A Hands-On Guide to Deploying a Two-Tier Architecture on AWS - Comprehensive Project Demo"


Creating a Virtual Private Cloud (VPC) is like setting up a secure and isolated space for your applications and resources in the Amazon Web Services (AWS) cloud. Here's a step-by-step guide in simpler terms:
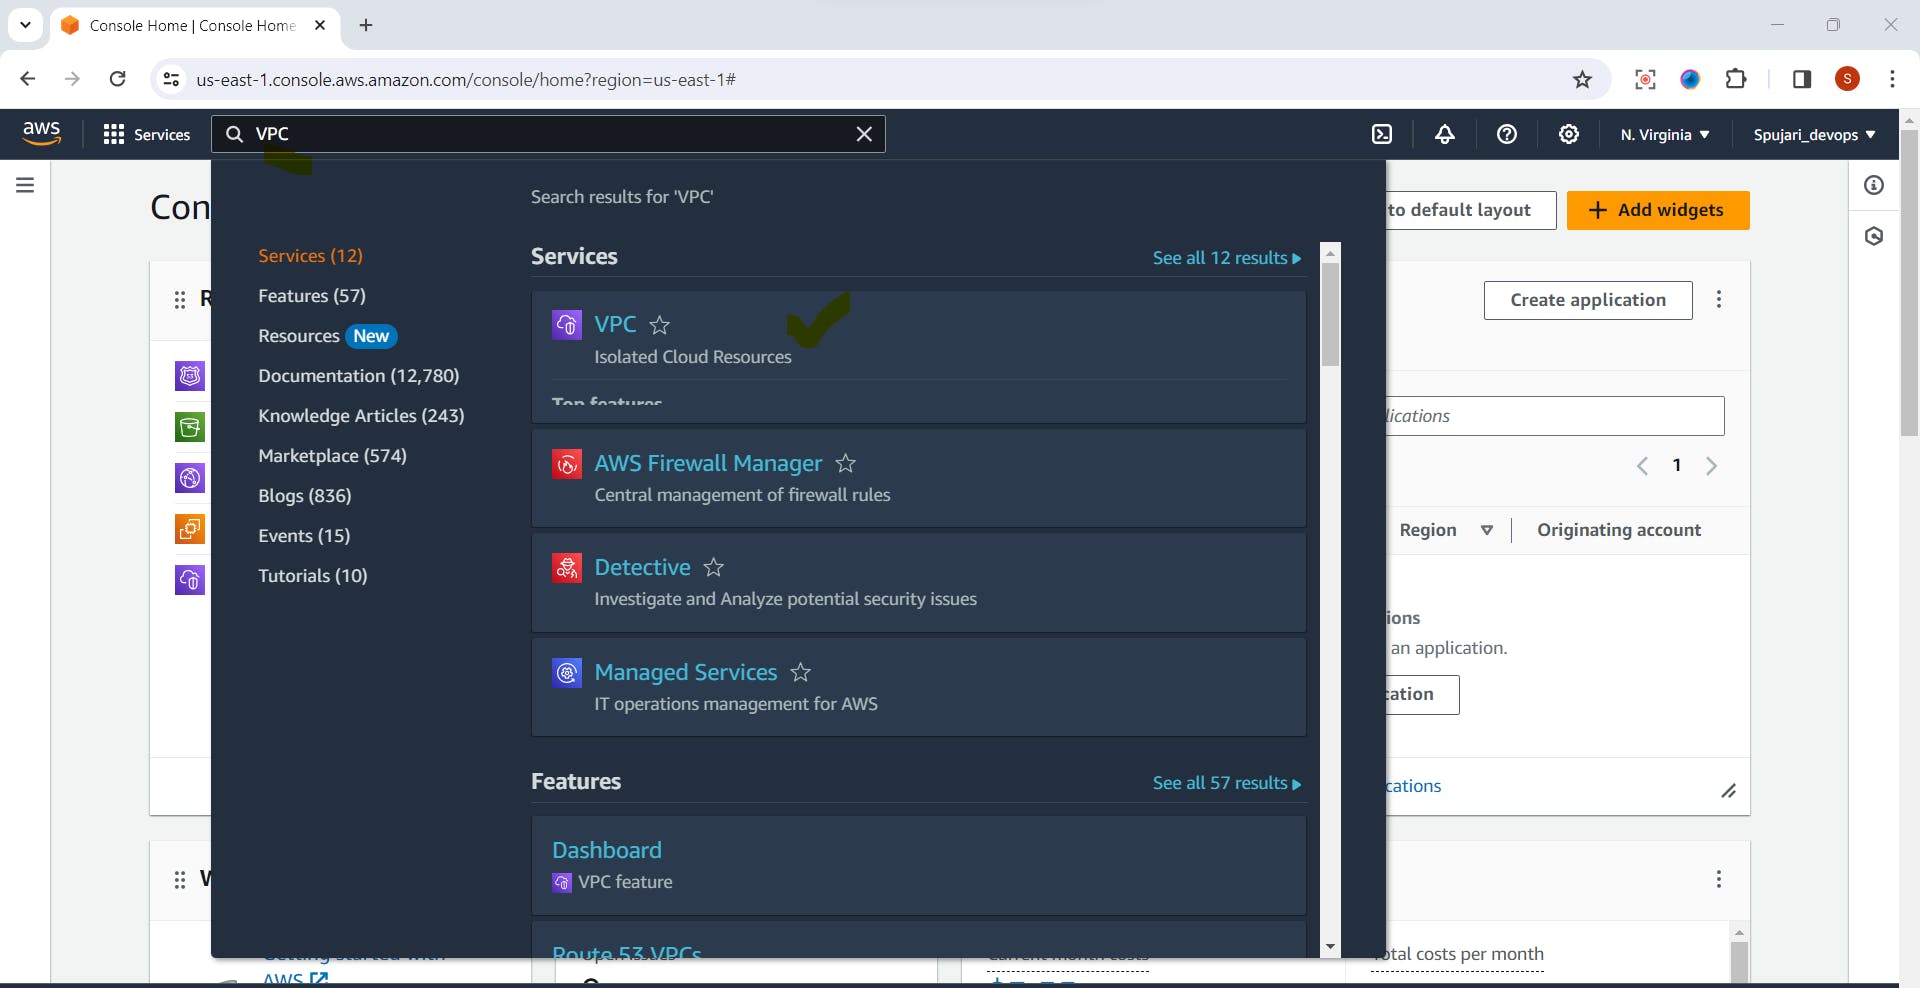
🌐 Access AWS Console: Search VPC on service search bar
🚀 Start VPC Creation:
- On the dashboard, click on "Create VPC."

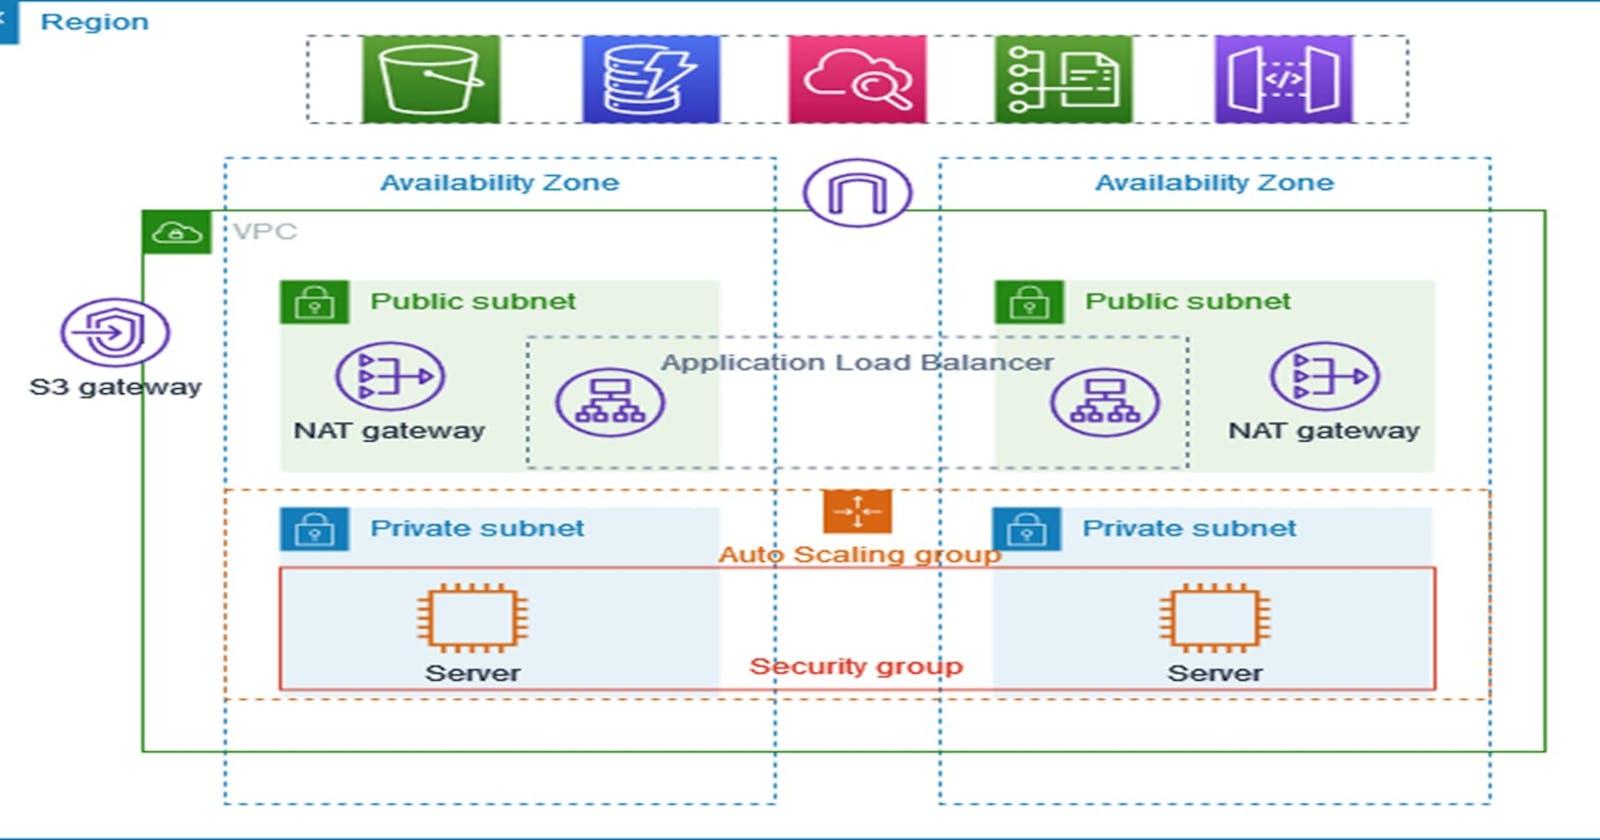
✨Understand this below diagram
⚙️ Configure VPC:
Resource to create -Select VPC and more
Give VPC a name.-
You can stick with the default settings for IPv4 CIDR block
Stick with the default settings for No IPv6 CIDR block

🔧 Configure Subnets:
Choose to have VPC in two different Availability Zones for better reliability.
Decide on two public and two private subnets for applications

🌍 Fine-tune Subnet Details:
- Use the default settings for public subnets or customize the CIDR block if you have specific requirements.
🔒 NAT Gateways:
- Set up one NAT gateway for each Availability Zone to ensure a more robust system.
🔄 IPv6 Communication:
- If your applications use IPv6, enable the Egress-only Internet Gateway.
🌐 VPC Endpoints:
- If instances need to access an S3 bucket, choose the S3 Gateway option. This helps instances in your private subnet reach Amazon S3. It's cost-free, so you might as well keep this option enabled even if you're not currently using S3.
🔧 DNS options:
- Enable DNS hostnames
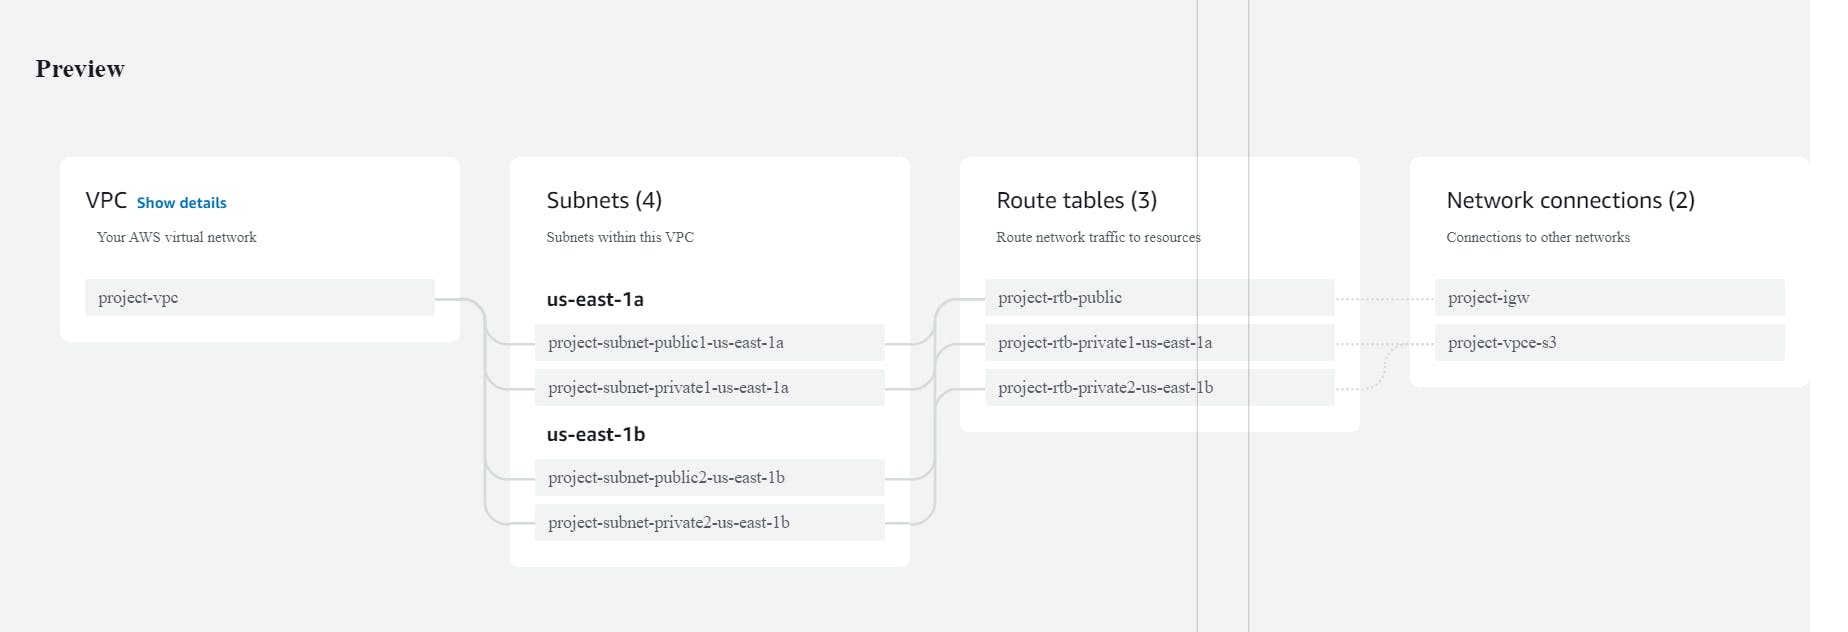
✨ Create VPC:
- Click on "Create VPC" to finish the setup.

⌛Create VPC Workflow In-progress

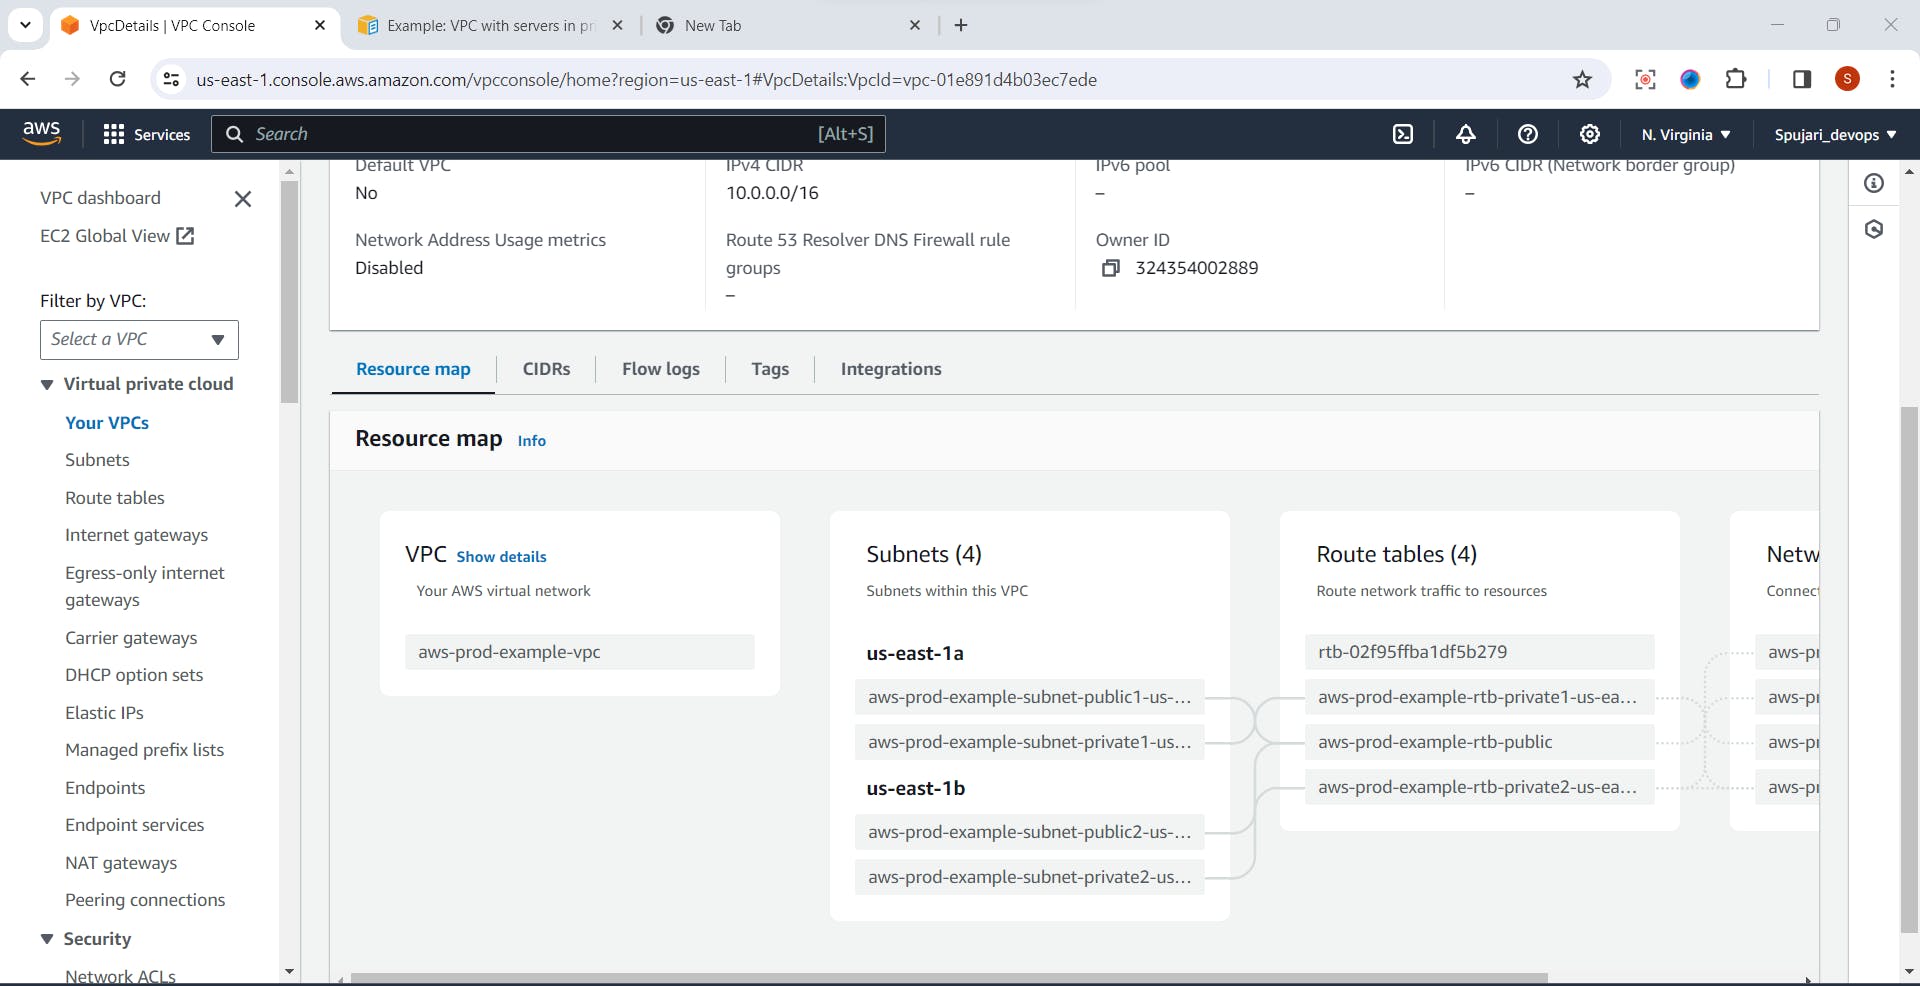
✅VPC is created successfully

✅👀View your created VPC your created VPC Map
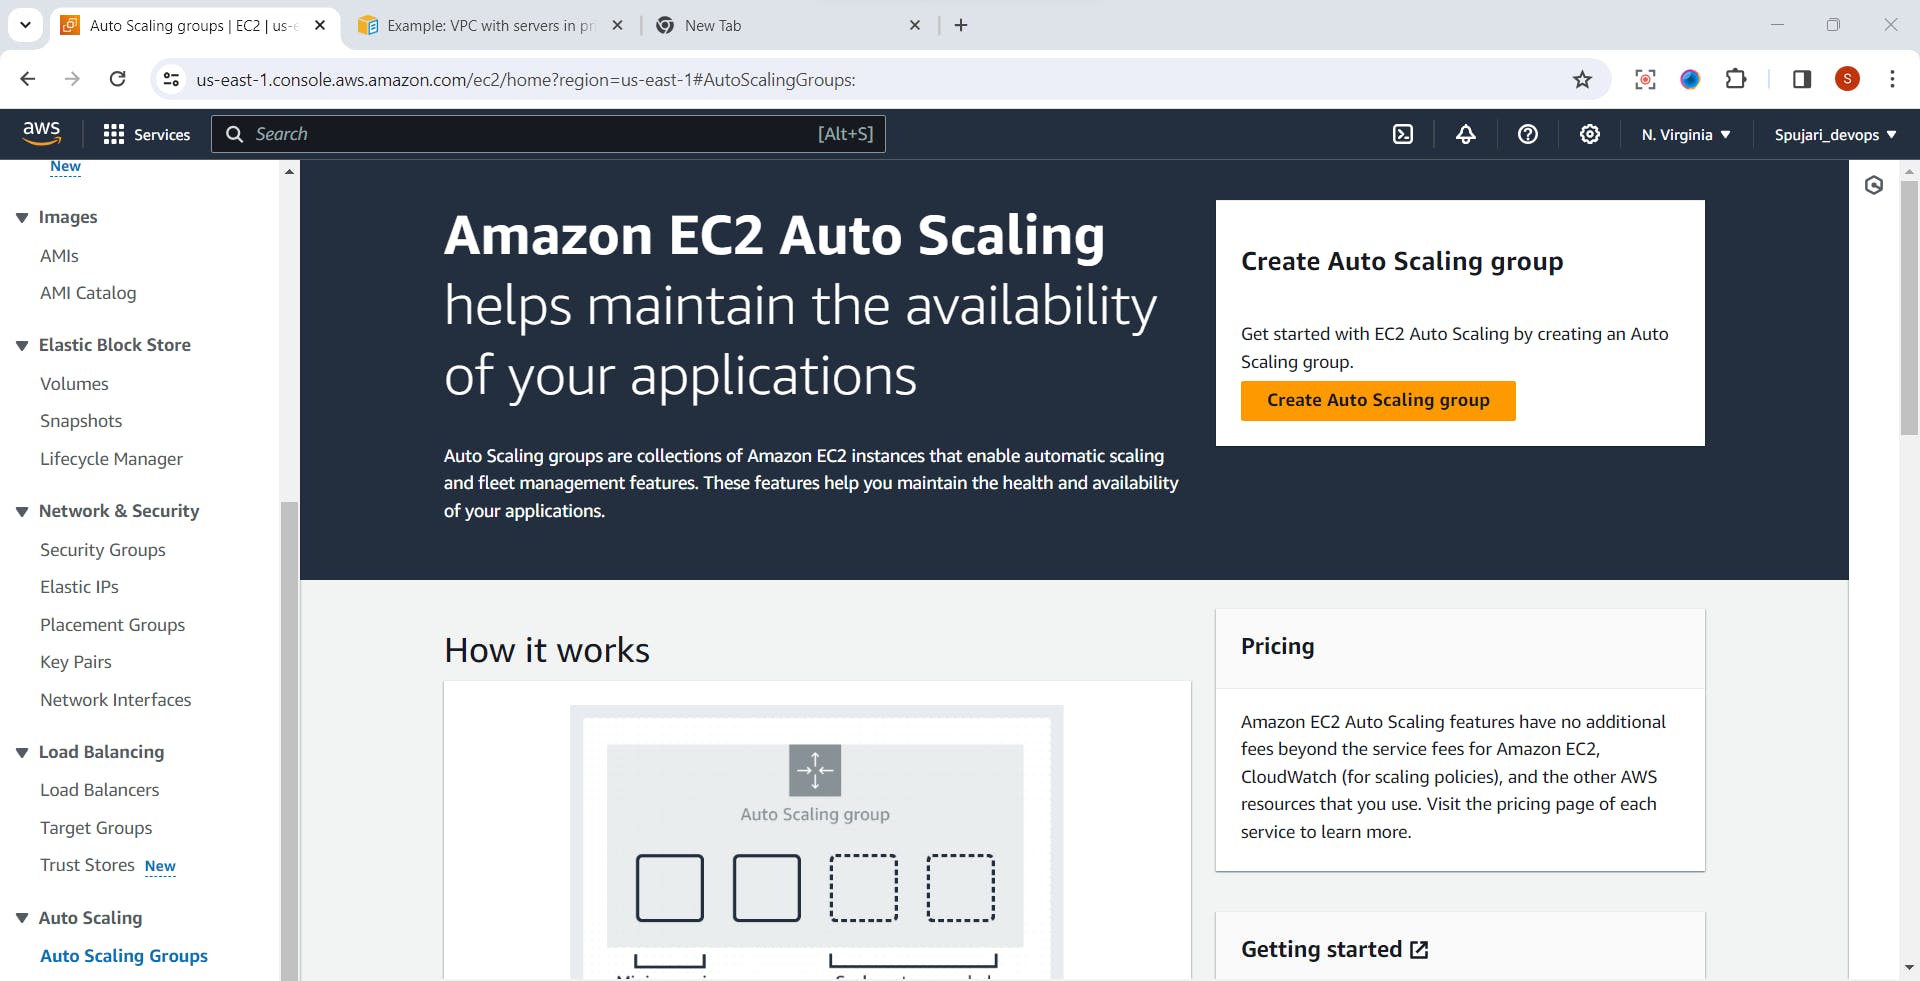
🚀Creating Auto Scaling Groups🚀
Step 1: Navigate to Auto Scaling in the Console 🚀
- Go to EC2 instance >Auto Scaling

- Click on Auto scaling Group

- Click on Create Auto Scaling Group
Step 2: Create a launch template ⚙️
- Click on Create launch instance template
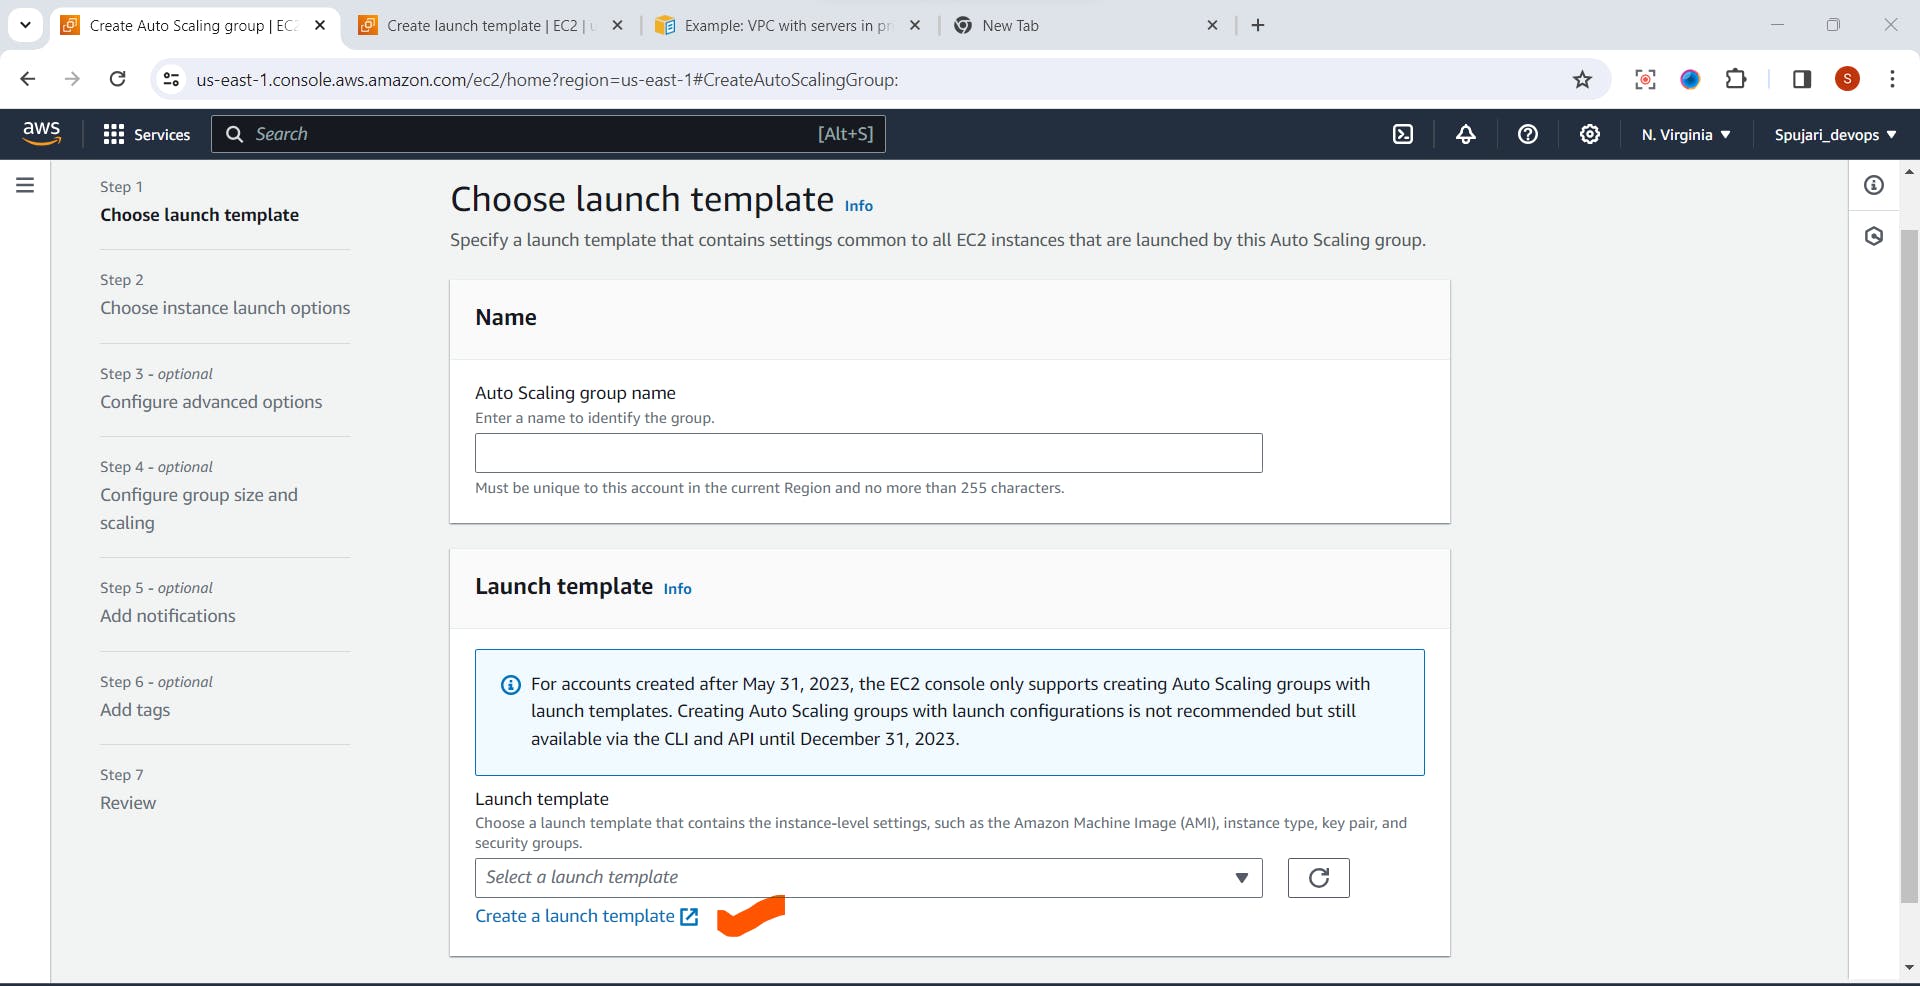
- In the create launch template fill below details
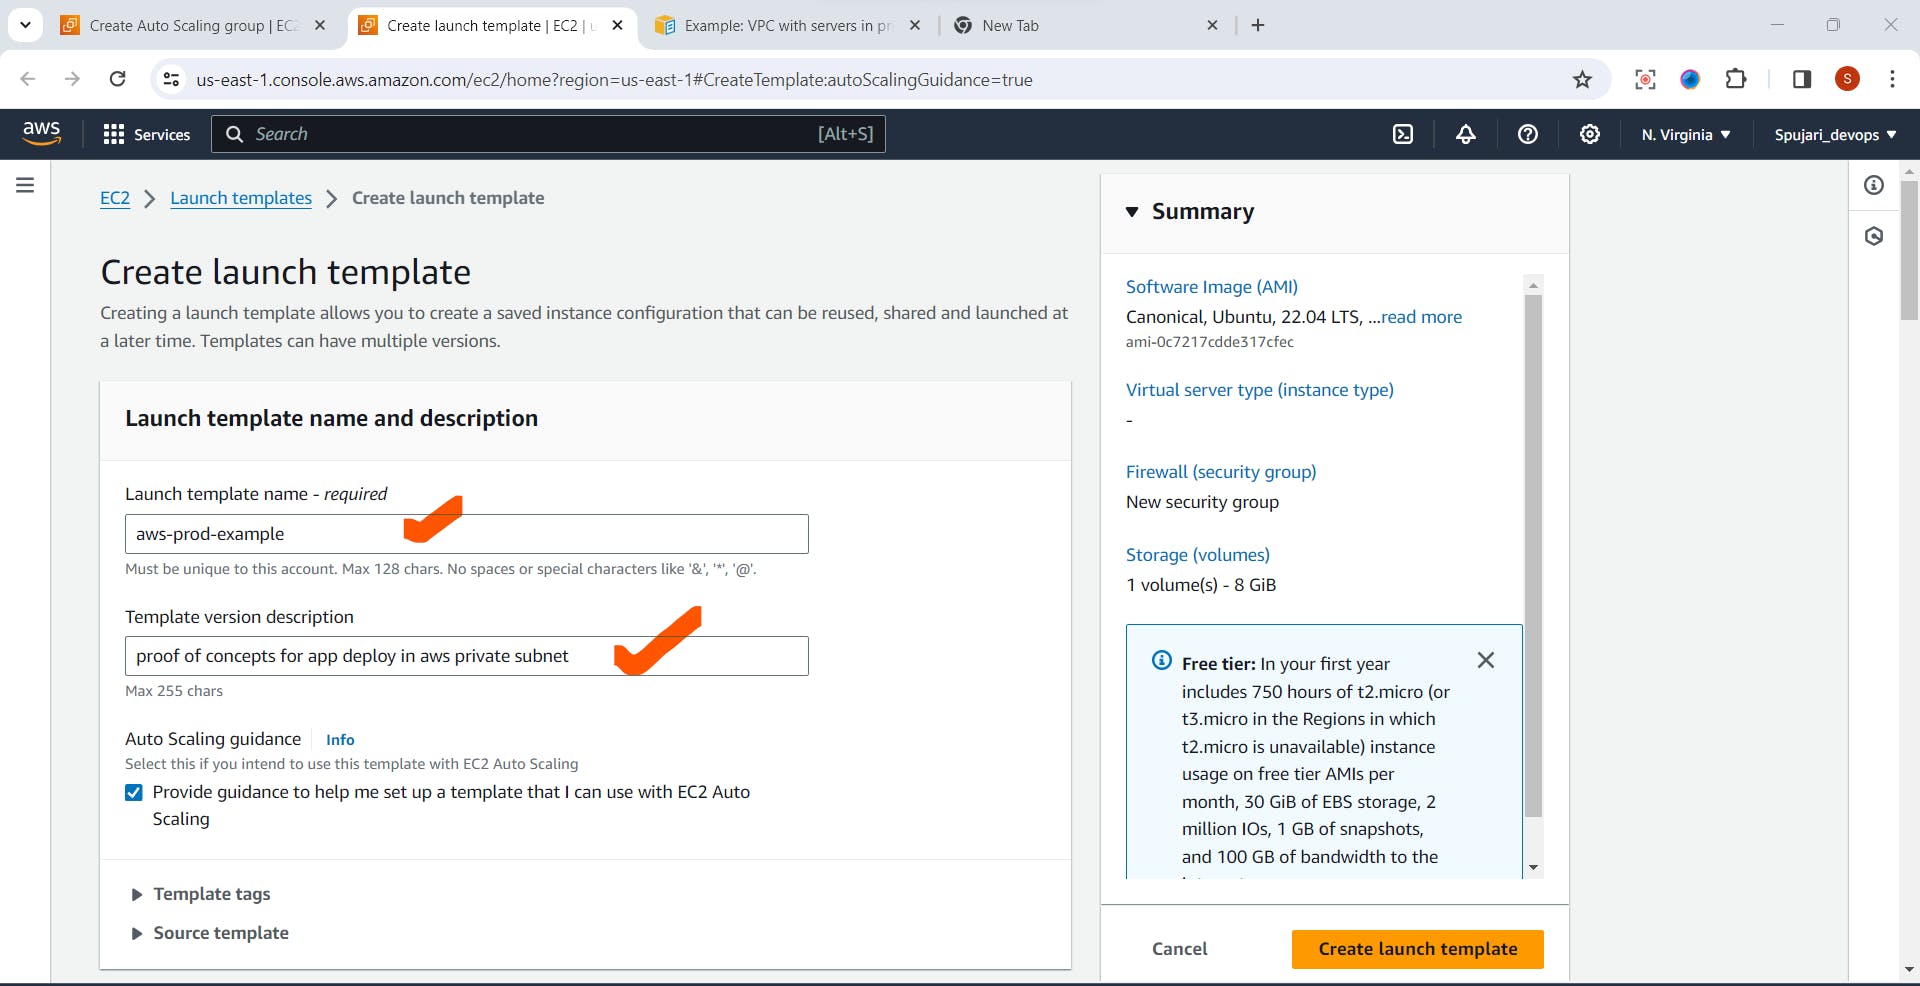
- Choose Application Image
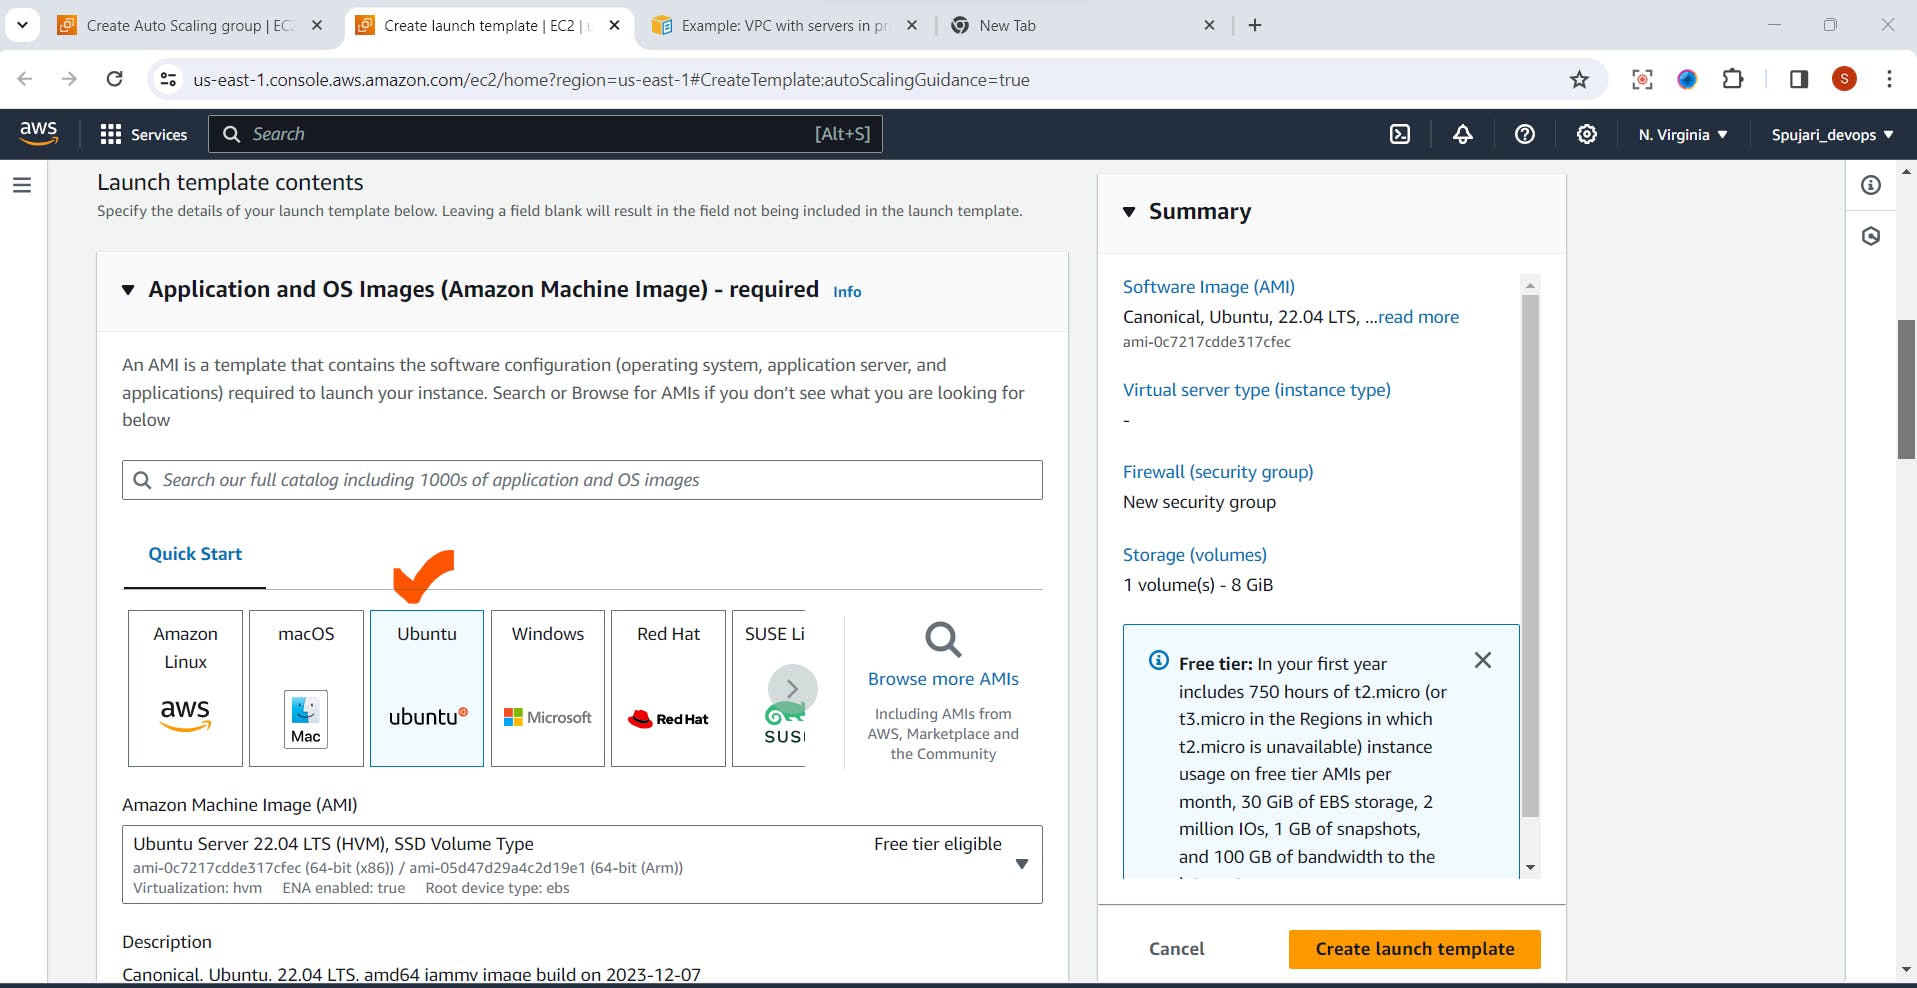
- Select Instance Type
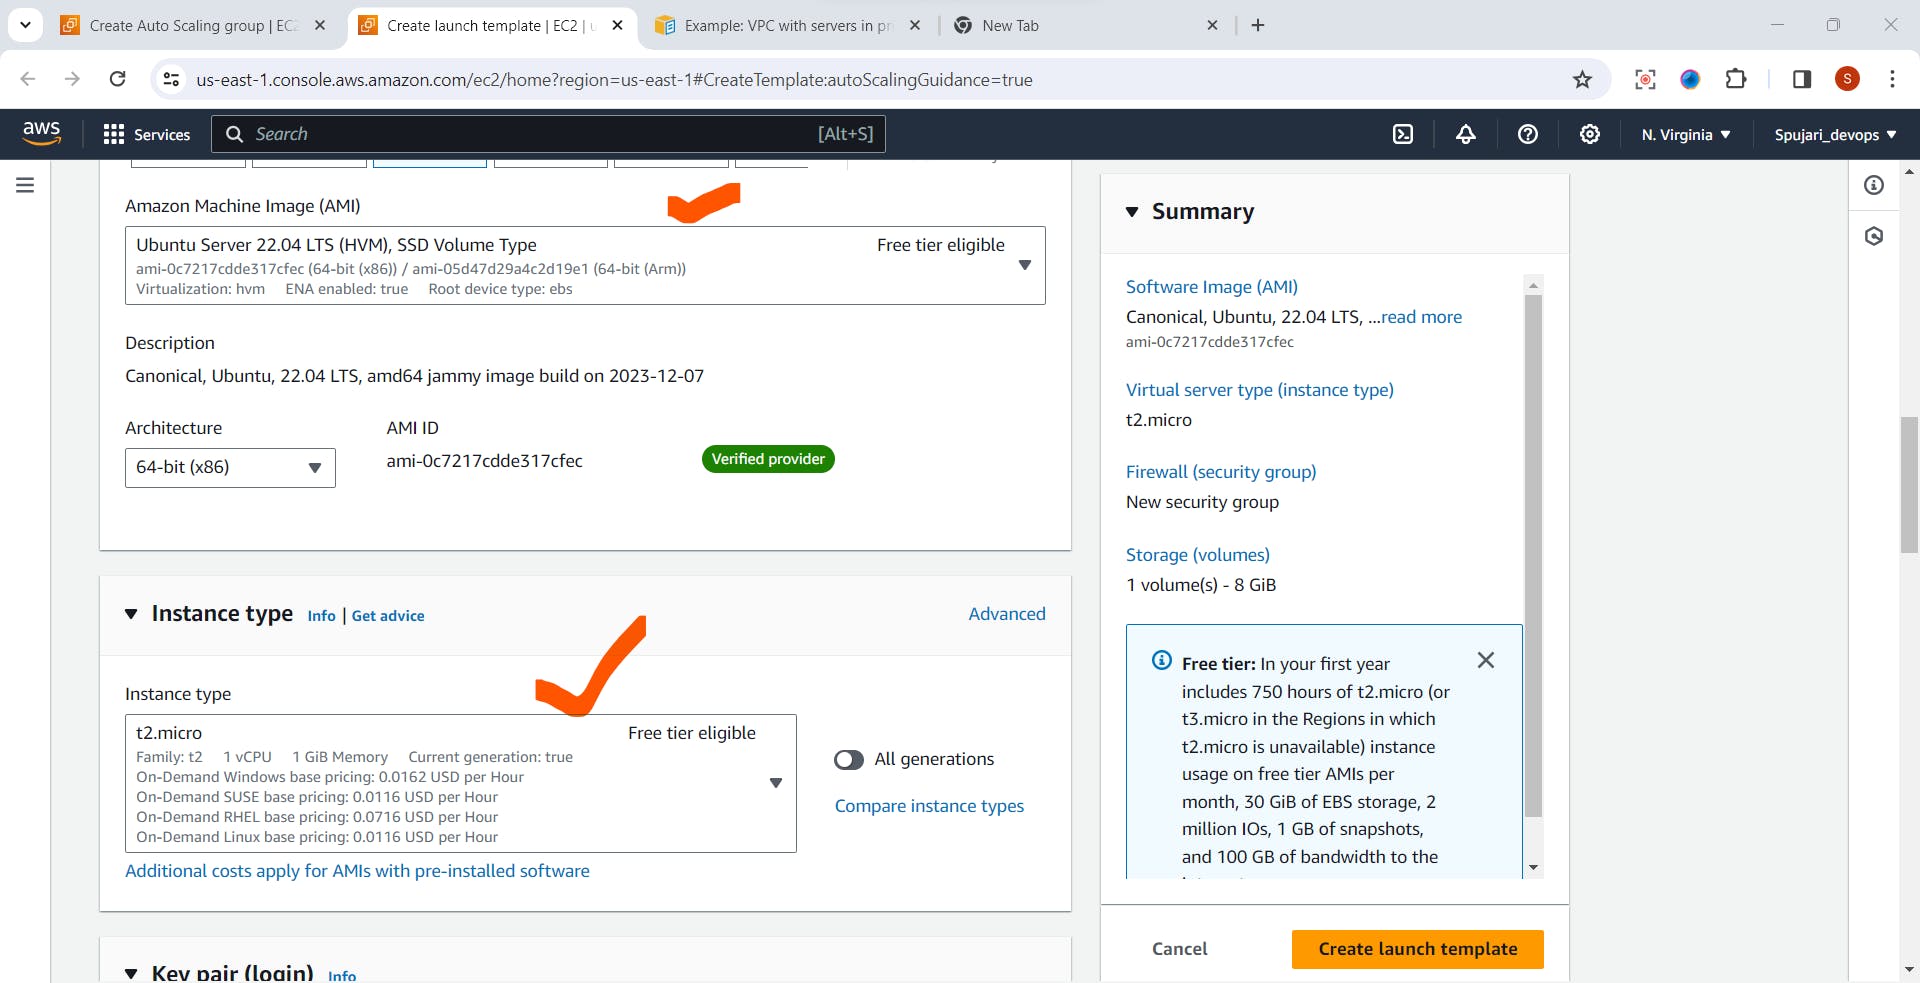
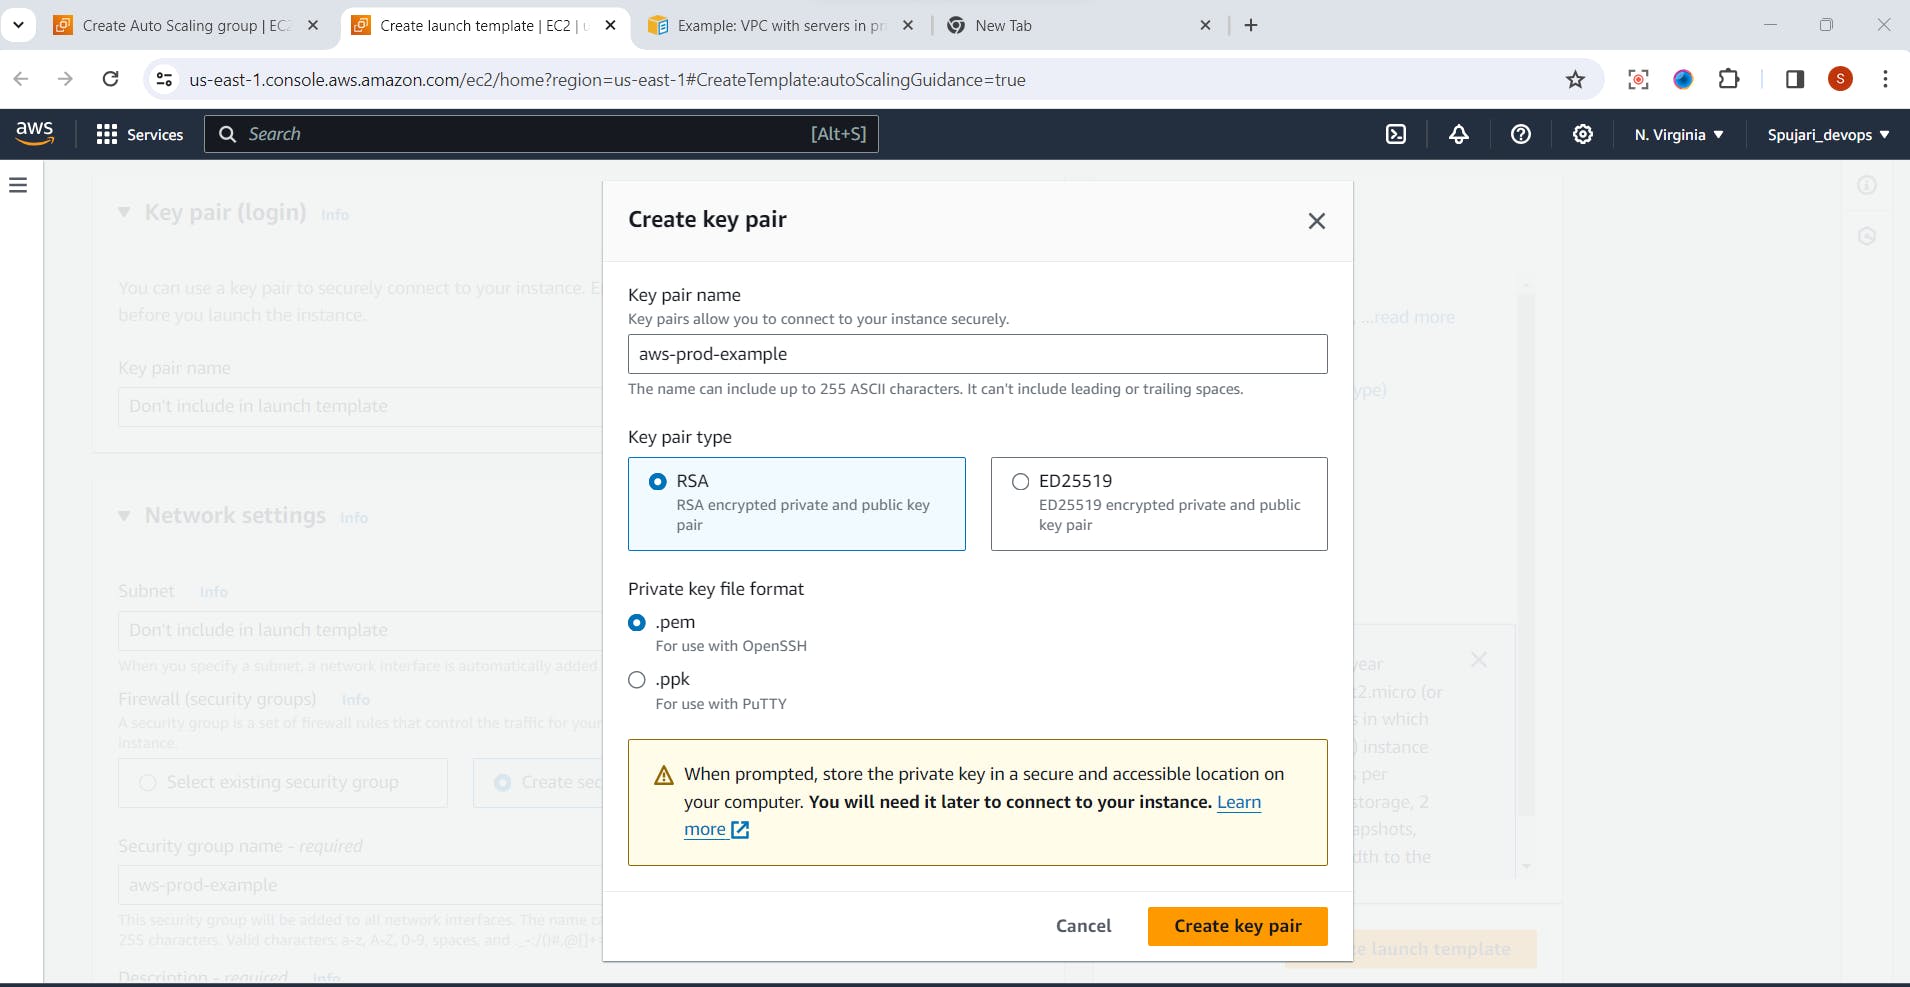
- Create new Key pair
In Network Settings > Fill below details
Note- select your created VPC here

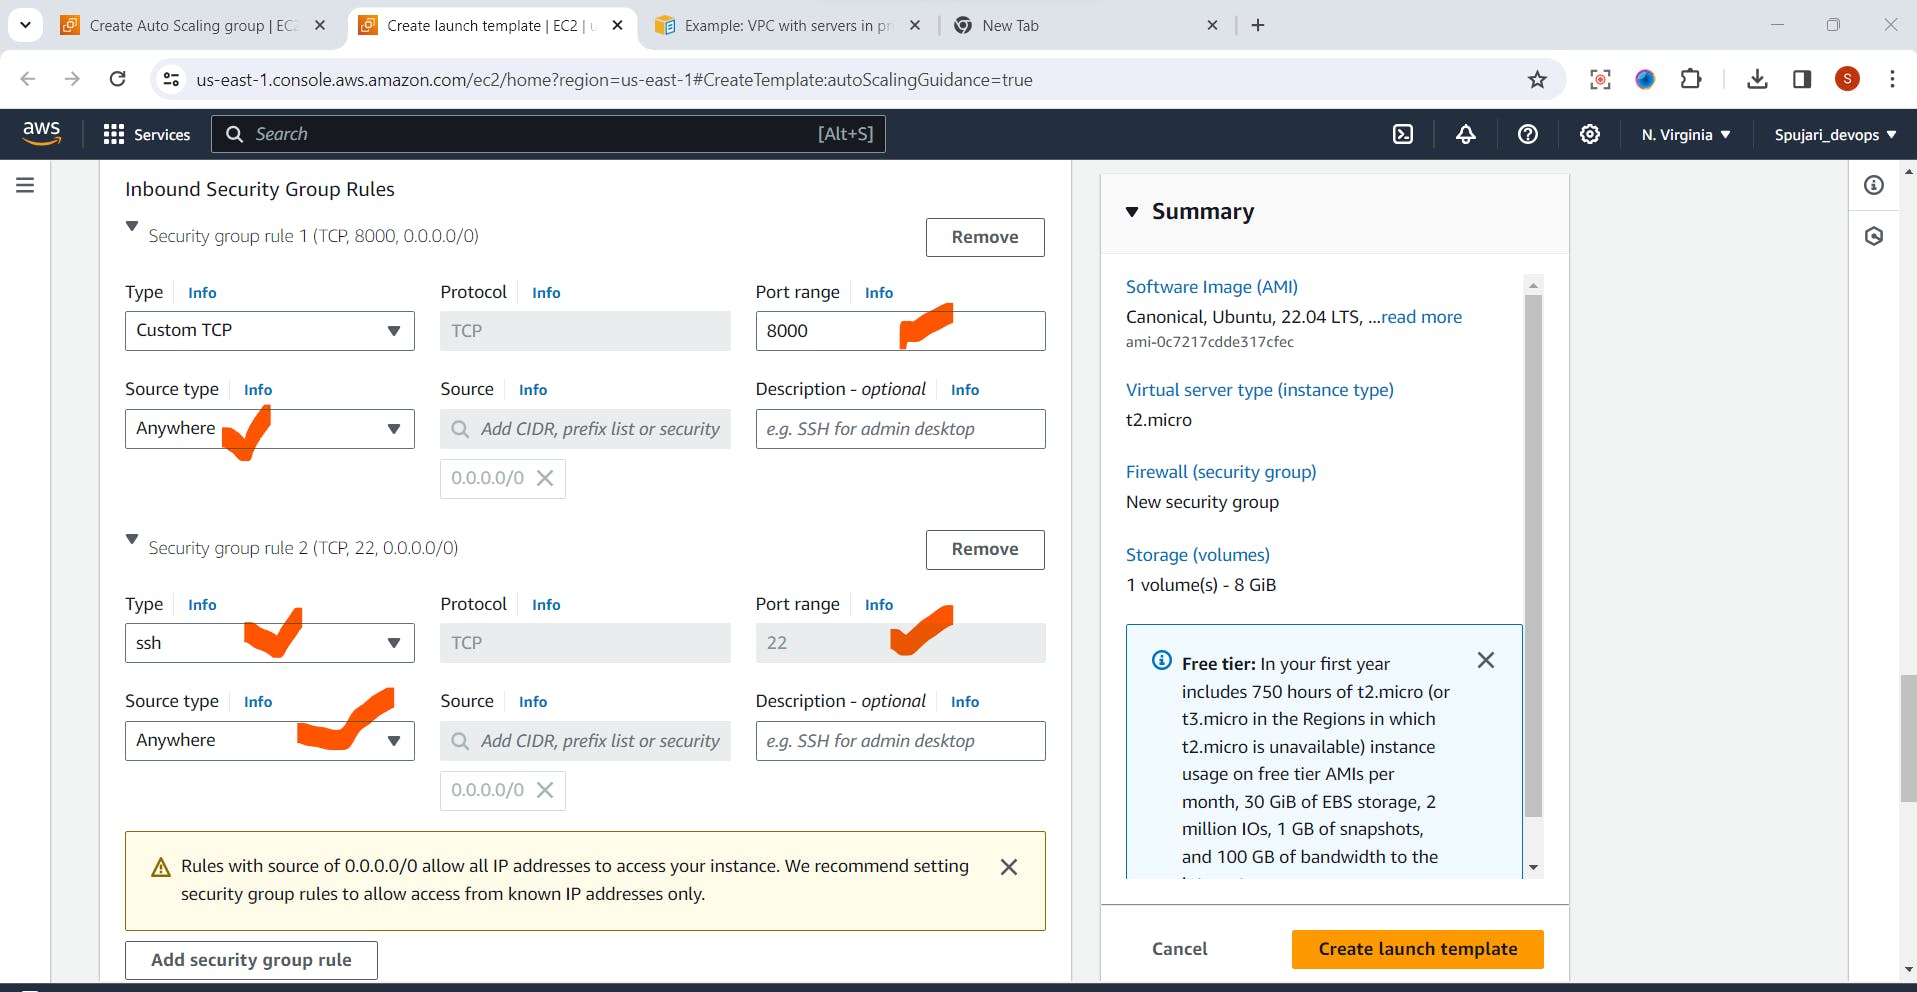
- Setup Inbound Security Group Rules
- Click on Create launch template

- Successfully created Create Launch template

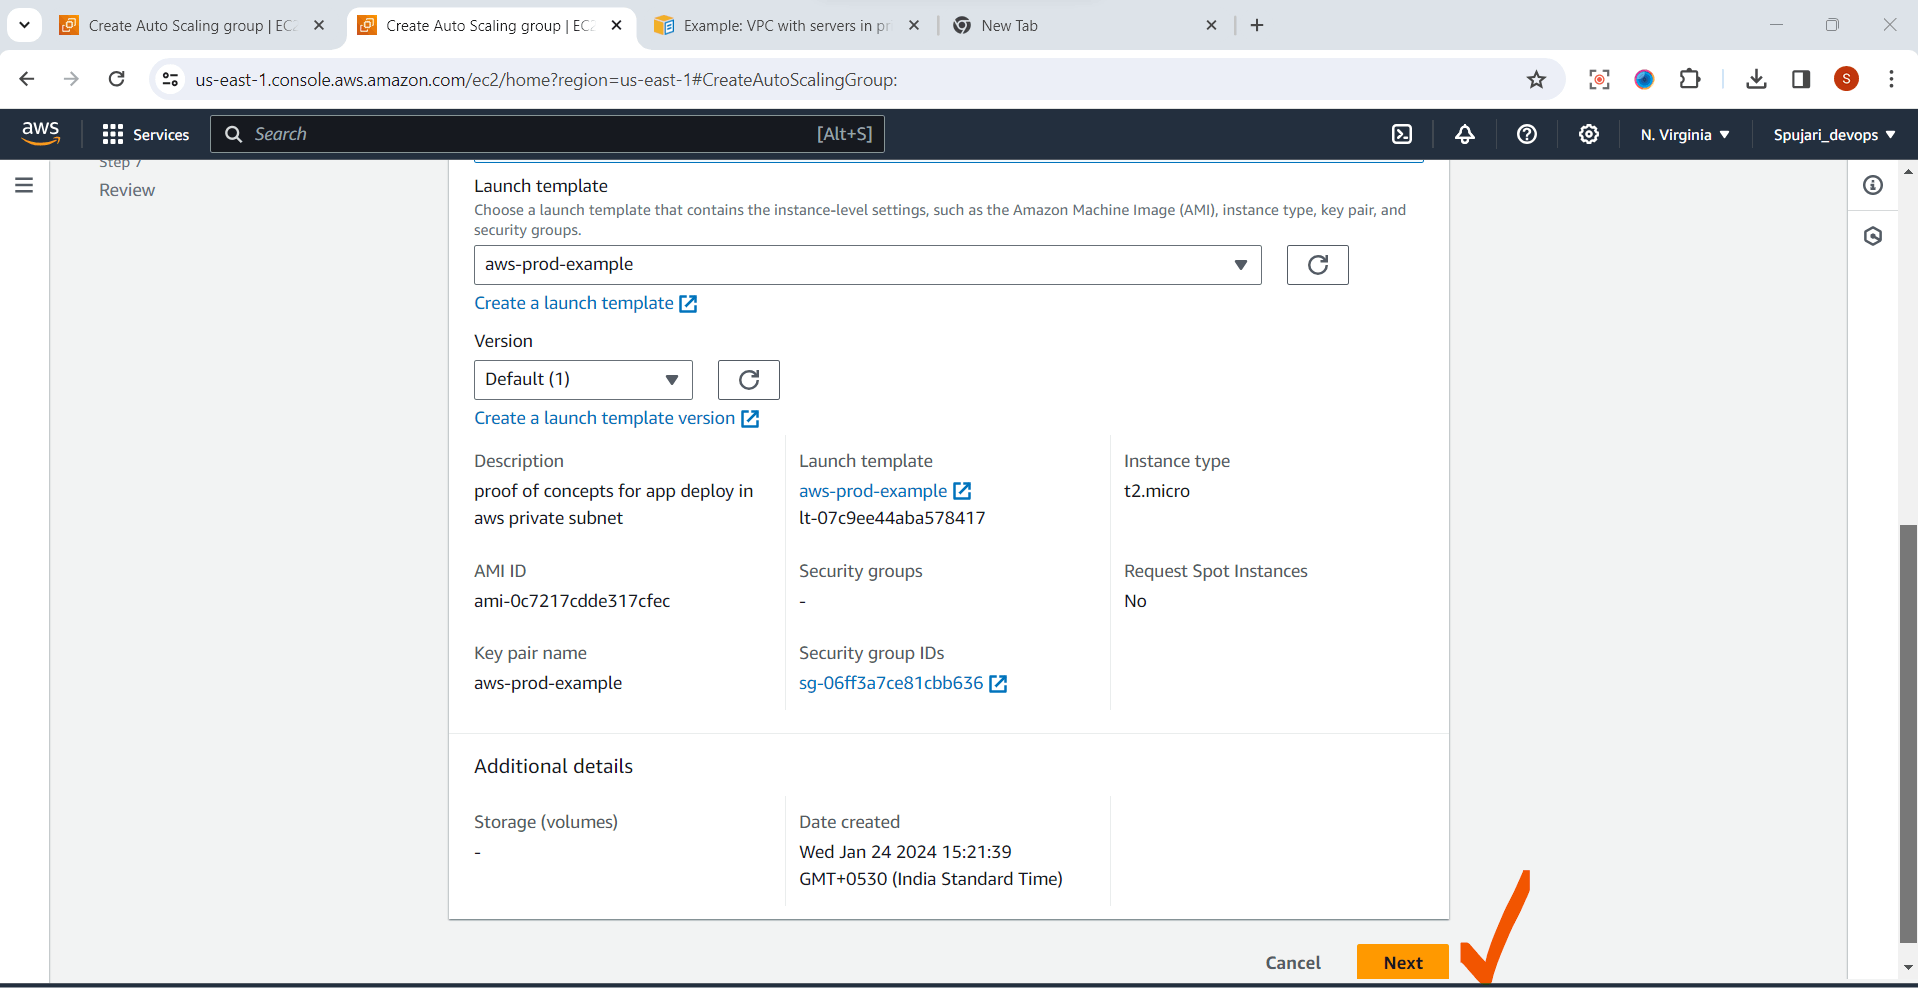
Step 3: Go Auto Scaling Group & Select Created launch Template⚙️
Enter Auto scaling Group Name
Now go to your Auto scaling Groups where you will get create new launch template

- Click on Next button
Set Version as Default
- Instance type requirements -No changes are required here
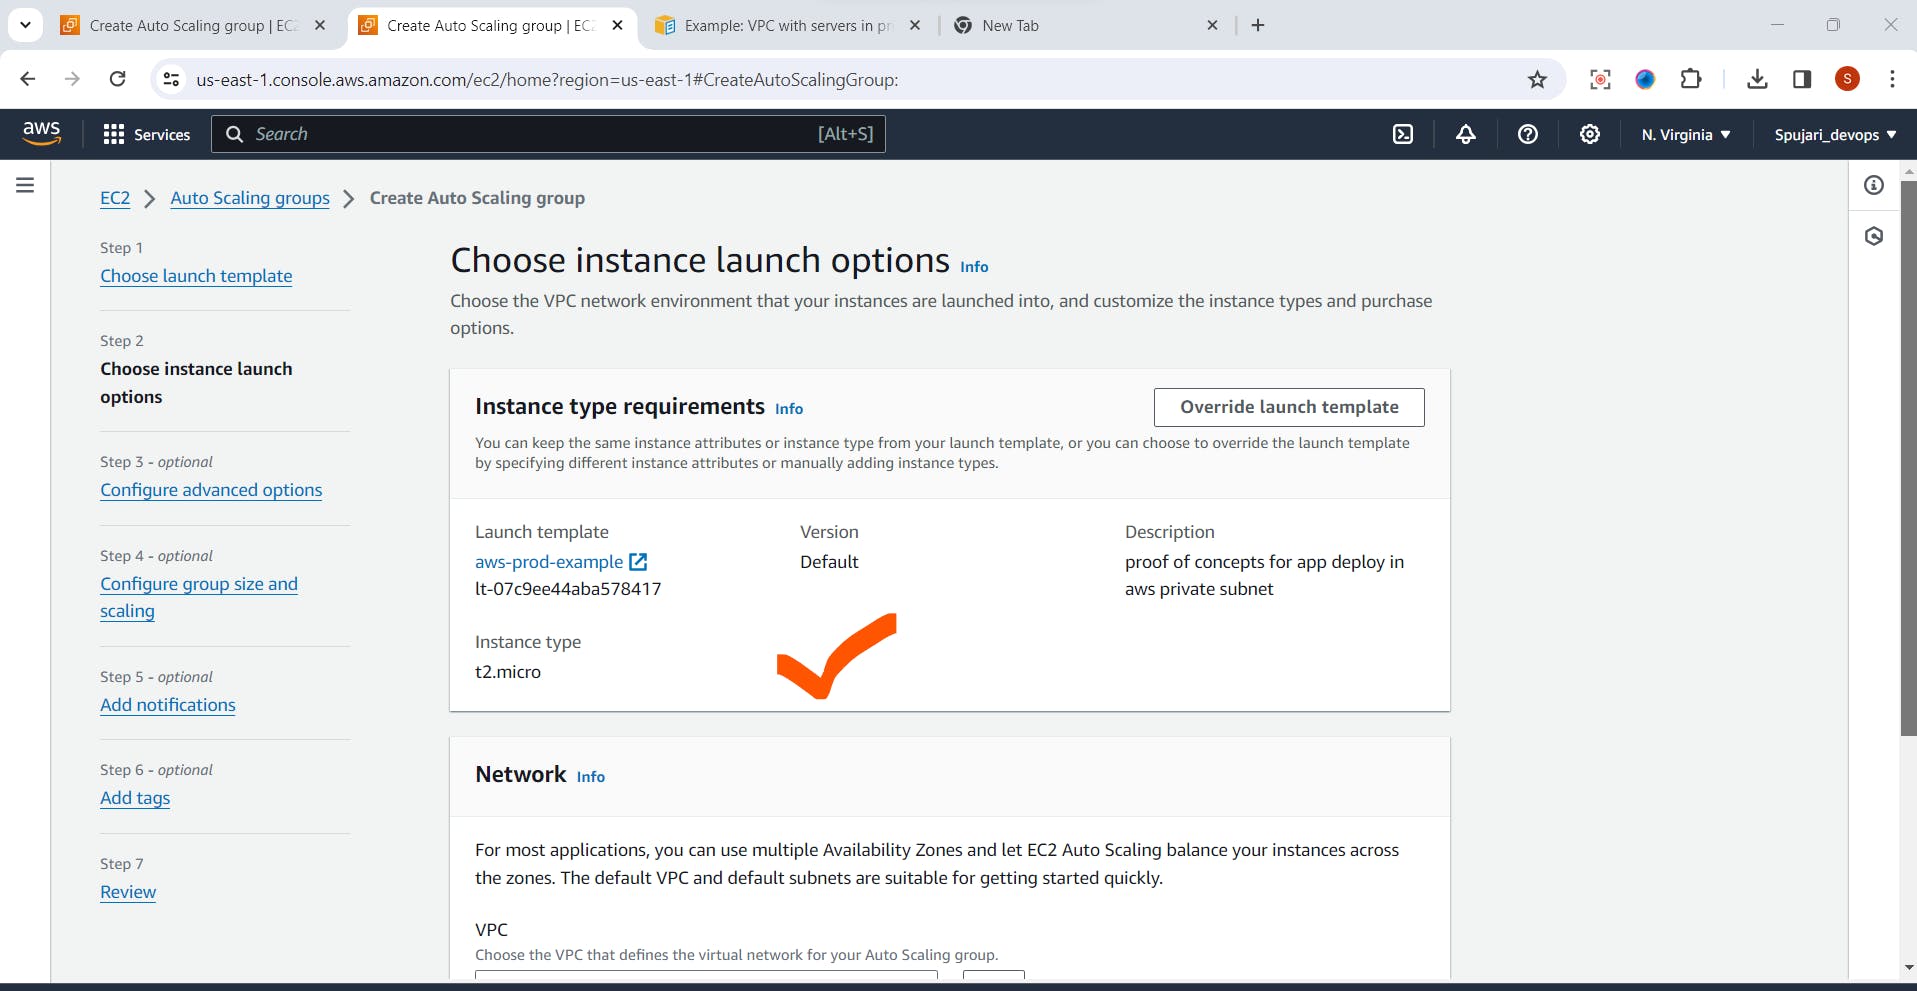
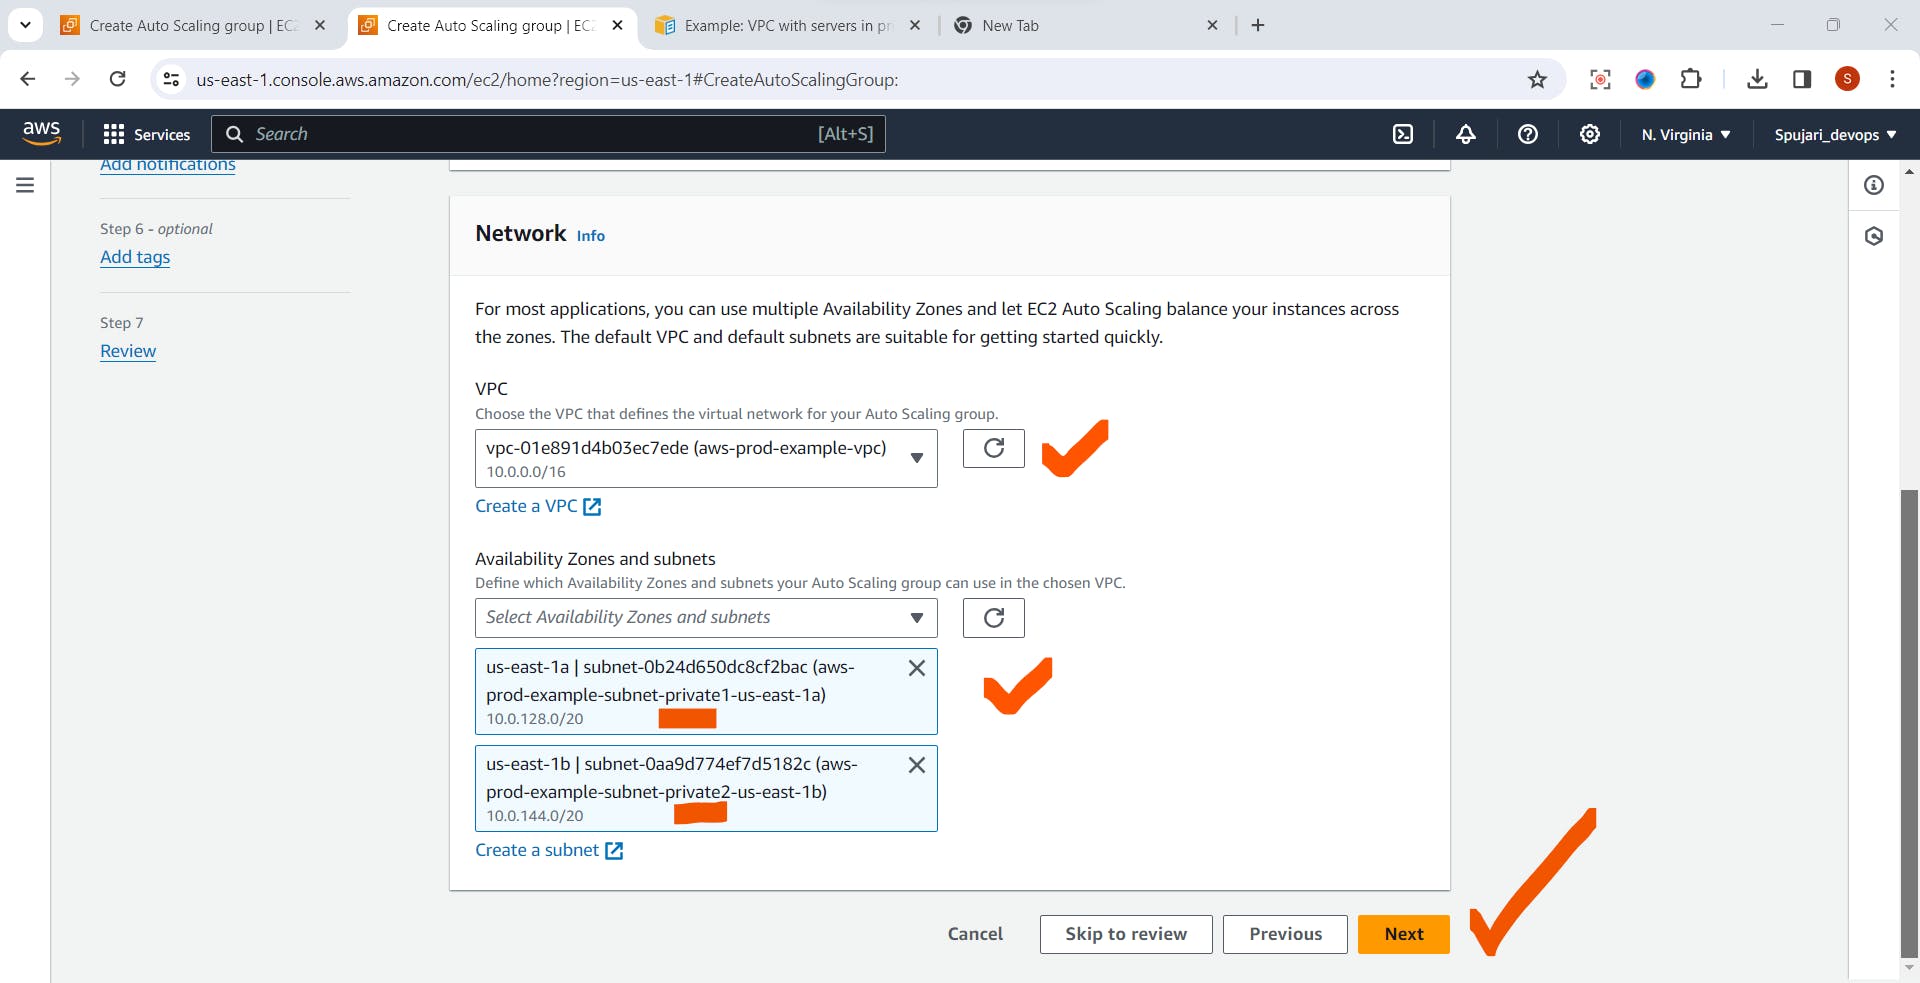
In the Network ->Select your created VPC
Select private subnet
Click on Next
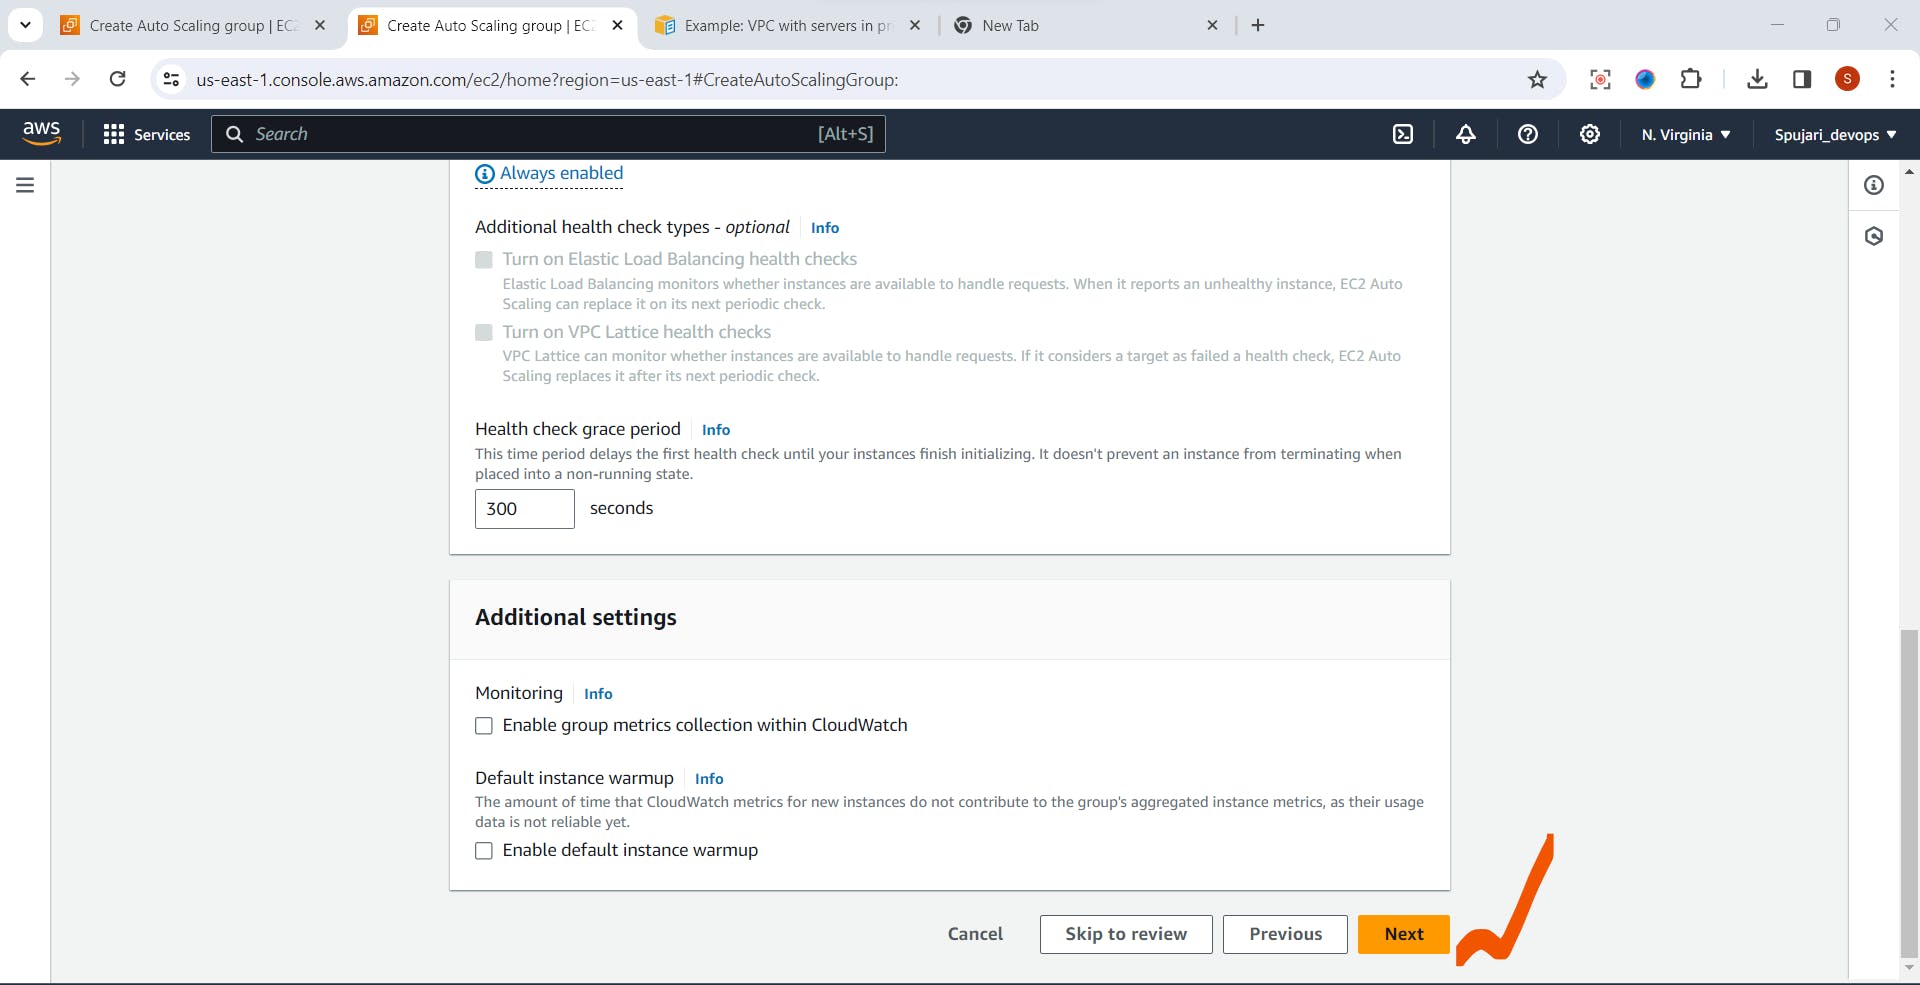
- In the Configured Advanced options page -No need to change anything ,Just click on next

- Scroll Down->Click on Next button
Set Configure group size and scaling
1.Desired Capacity -Set 2

2.Scaling limits
Min desired capacity- Set 1
Max desired capacity - Set 4
Automatic scaling - select No scaling policies

- No Need to change anything here -set as default ,and click on Next

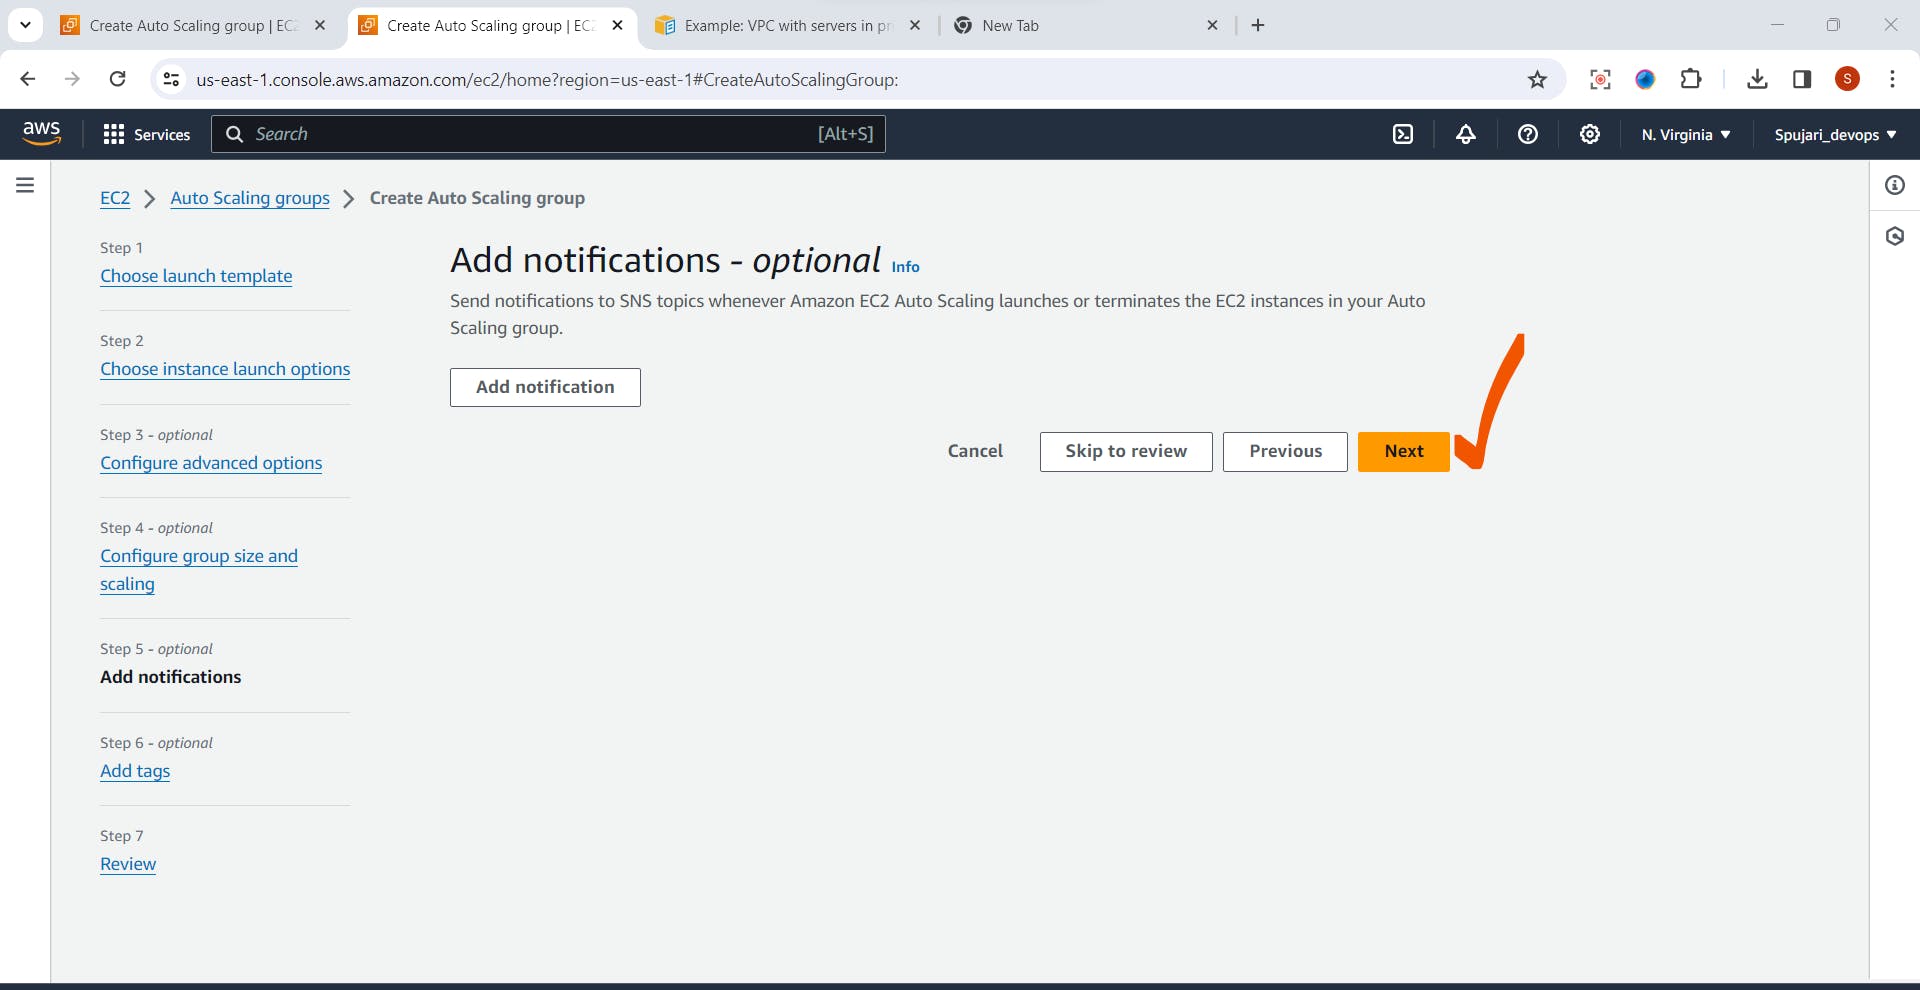
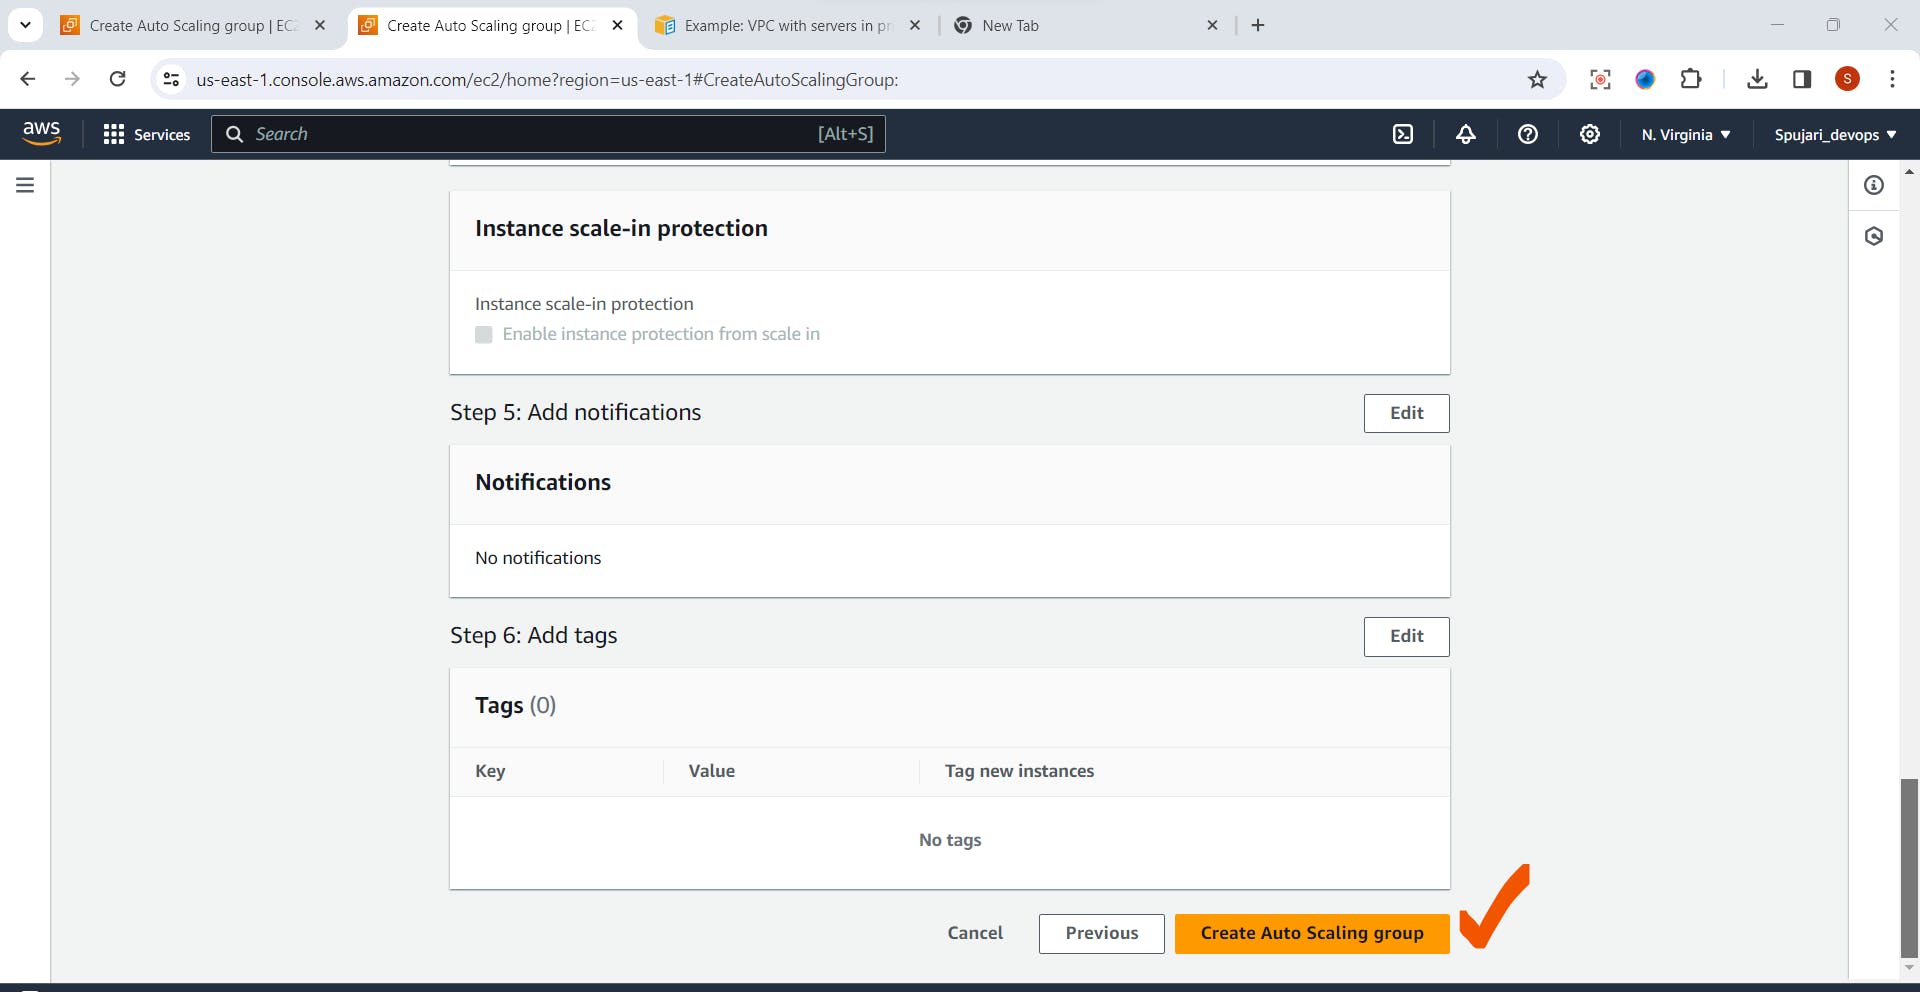
- Add notifications -set as default
Click on Next
Add tags-Set as default
Click on Next button

- Review and Create Auto scaling Group

- Click on Create Auto Scaling Group
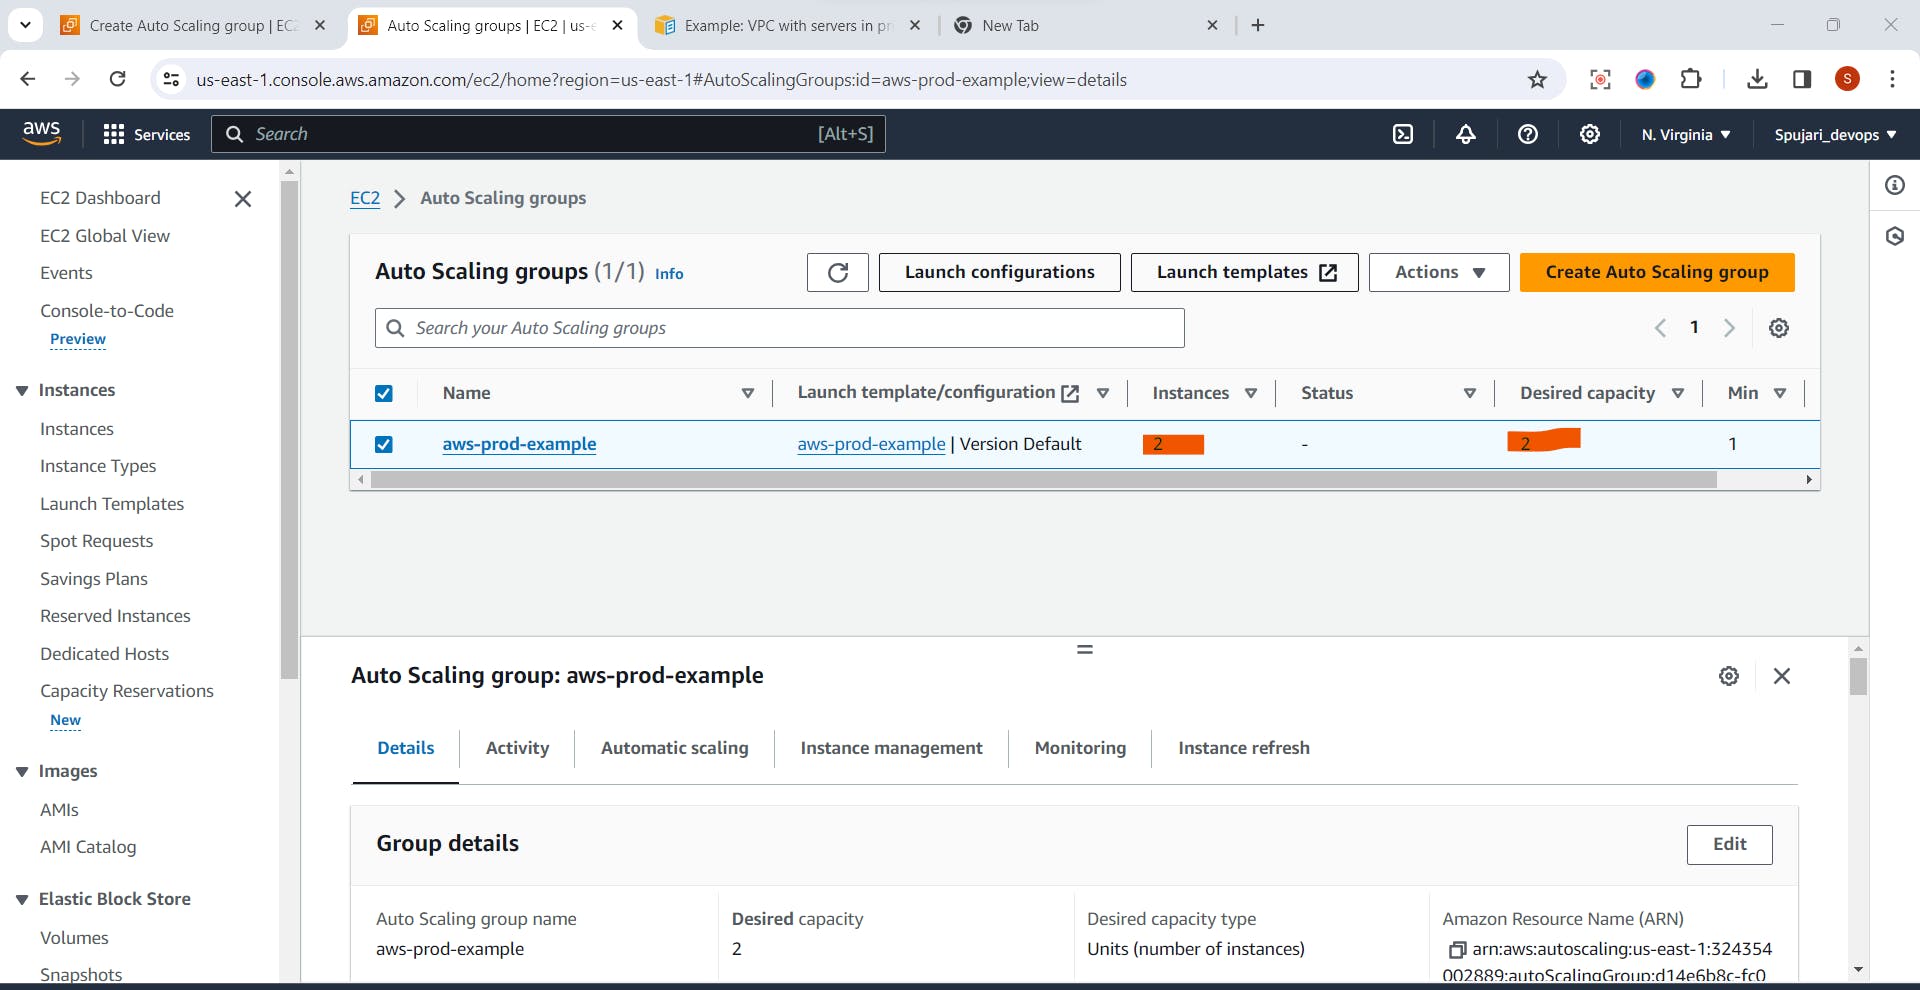
- Auto scaling Group is create successfully

- Observe Instance count ,and Desired Capacity
- Now go to EC2 Dashboard ->Instances-Observe two instances are create in private subnet

- Click on Instance ID ,and observe private subnet

- Go to second private subnet instance -observe subnet ID

Install the application on Private subnet EC2 instance before that we need to create Bastion-host 🌐
As you observe there is no public IP address for two private instance ,for access those instances we need to create bastion -host Ec2 instance
Step 1: Create a Bastion Host 🔒
Go to the EC2 dashboard.
Go to instances ->Launch Instance

- Enter EC2 instance name here

- Choose an Ubuntu Image (AMI) for your Bastion host.
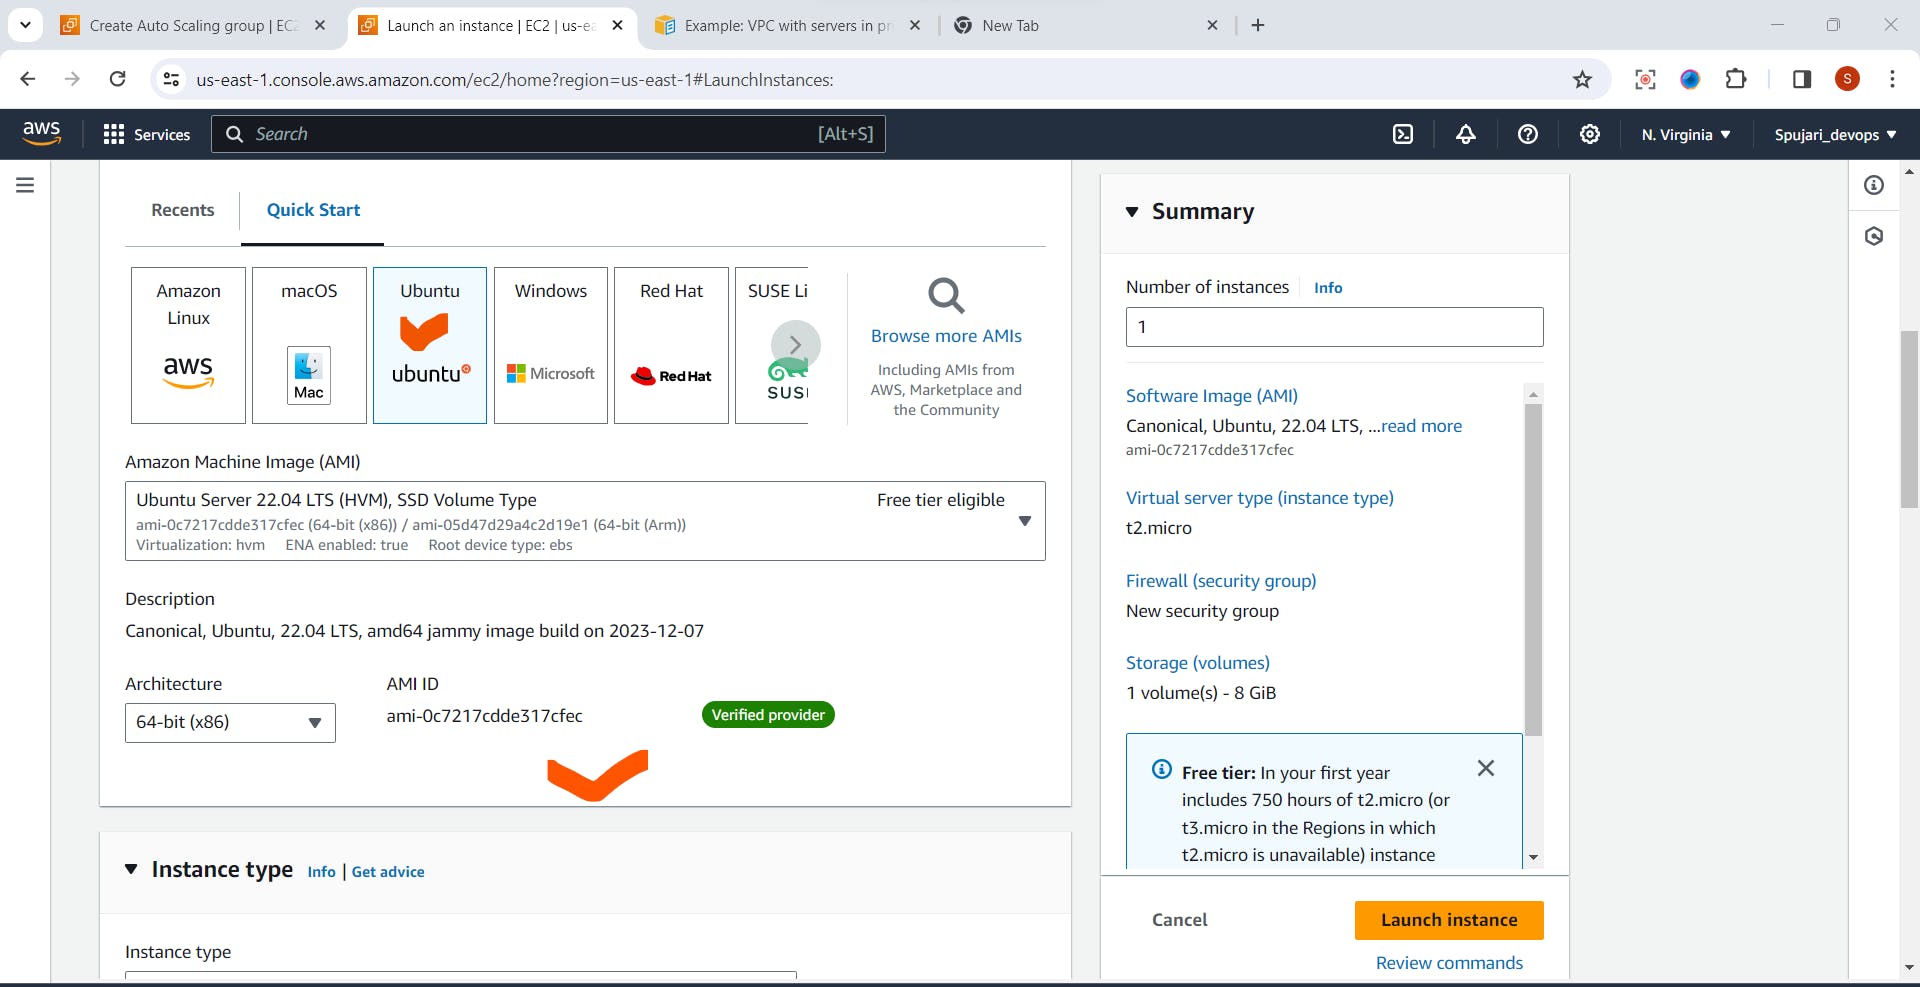
Instance Type and Key pair
Instance Type -Set as default
Create new key pair

Network settings->
->select your created VPC
->subnet -set as default
->Auto-assign public IP-Enable
->Create security group

- Click on Launch Instance
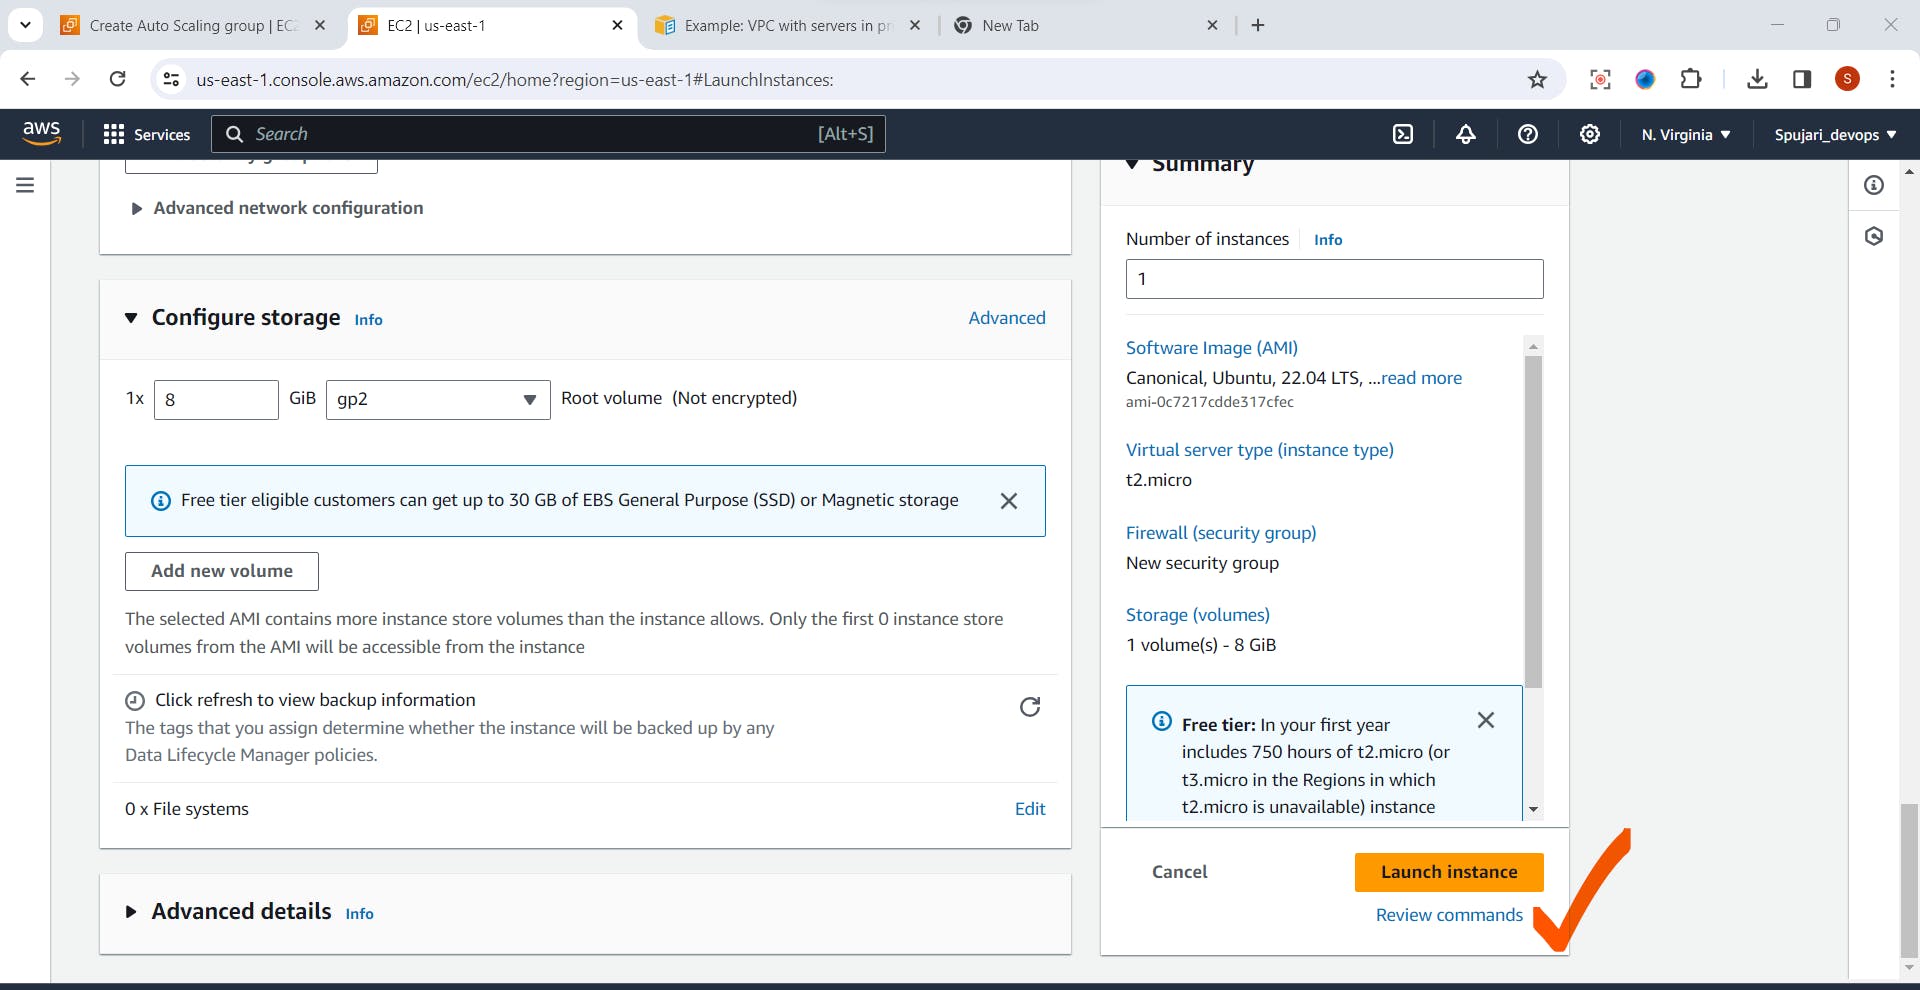
- Instance is created successfully

Secure access of a private subnet on AWS using a Bastion host.
This method ensures a robust and controlled environment for managing your resources. Let's break down the steps with clarity and simplicity:
Why a Bastion Host? 🛡️
A Bastion host acts as a secure gateway, providing a controlled point of entry to your private subnet. This ensures that access to your sensitive resources is both monitored and safeguarded.
Now we need to securely copied our private subnet PEM file into public instance (Bastion-host ) using below command
Go to terminal ,and run below command
scp -i bastion-host-aws.pem aws-prod-example.pem ubuntu@52.207.224.163:/home/ubuntu/
aws.pem--public instance
aws-prod-example.pem ---private instance

- Check the file is transferred successfully or not
ssh -i bostion-host.pem ubuntu@54.242.224.129
pem file securely copied successfully.

- Now lets connect ssh with private instance
1.Go to Private subnet instances
2.Copy private ip address

3.Run below command in terminal
ssh -i "aws-prod-example.pem" ubuntu@10.0.141.77
Now we have successfully connected private subnet using bastion-host

- Now lets create Simple HTML file

- Run index.html file on port 8000
python3 -m http.server 8000

Creating an Application Load Balancer on AWS
- Now go to EC2 Dashboard -> Click on Load Balancer
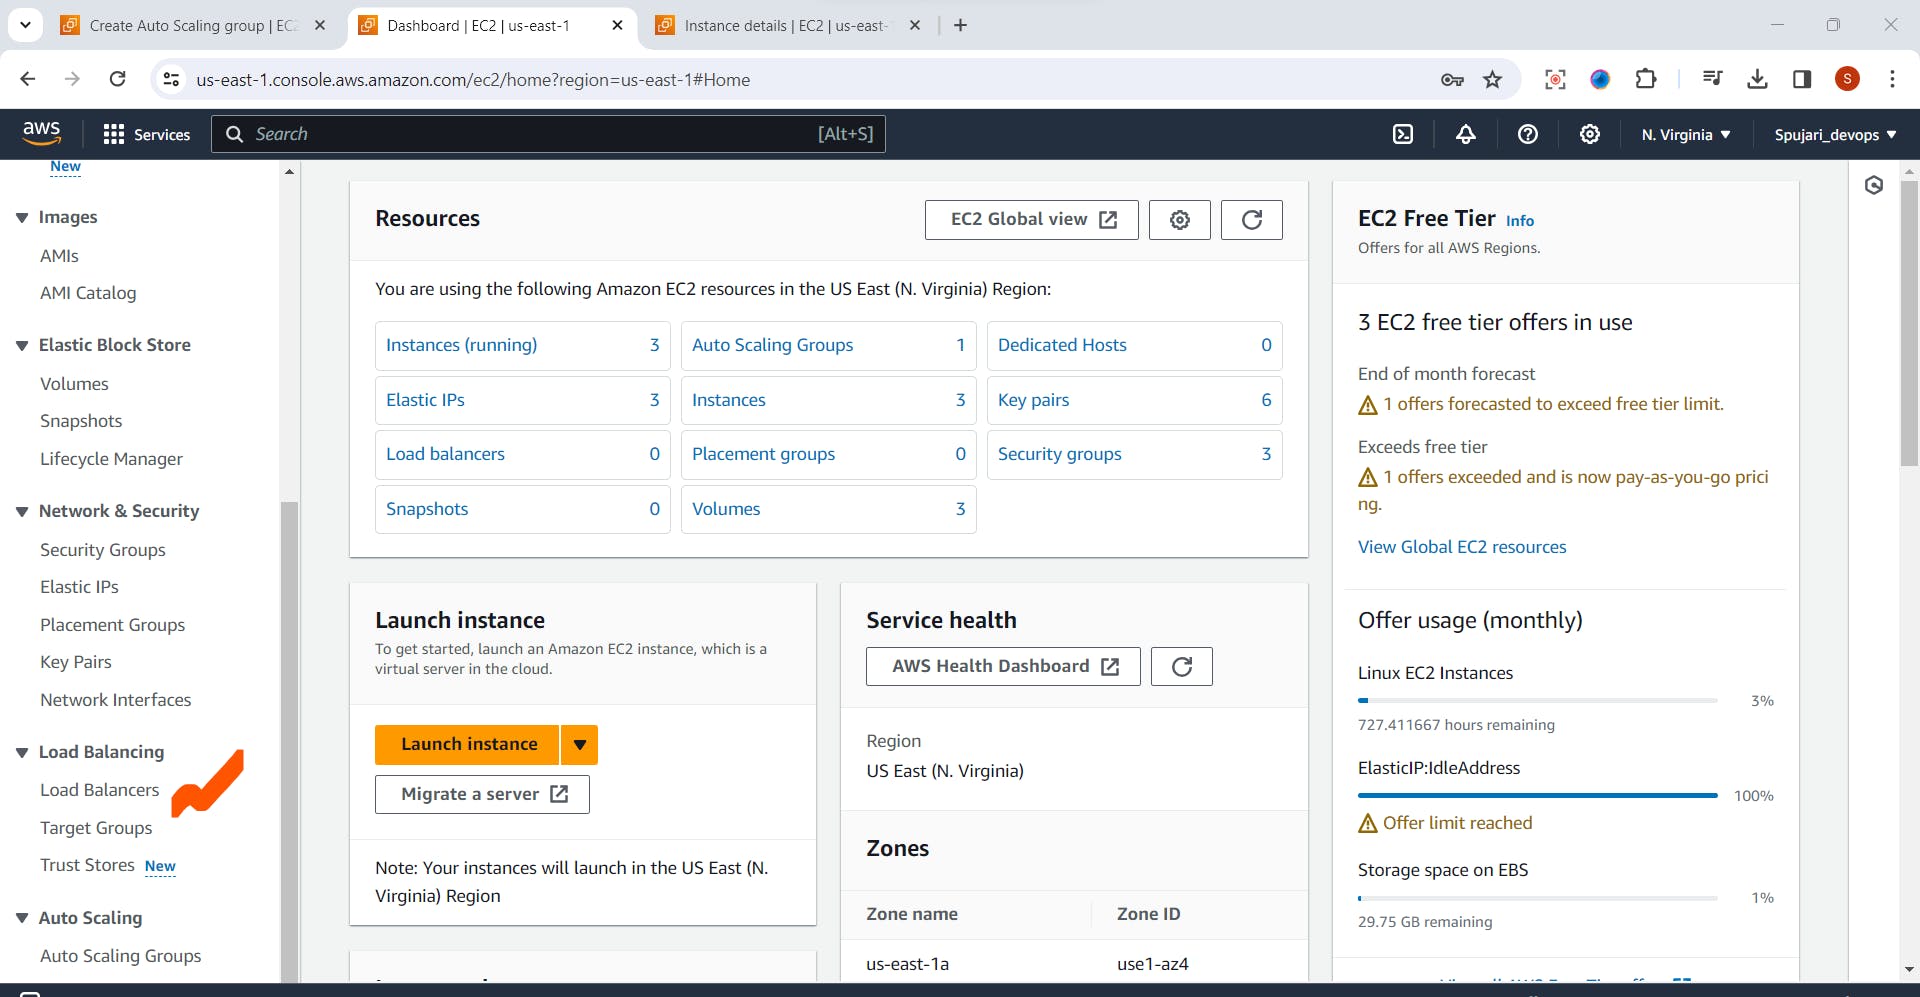
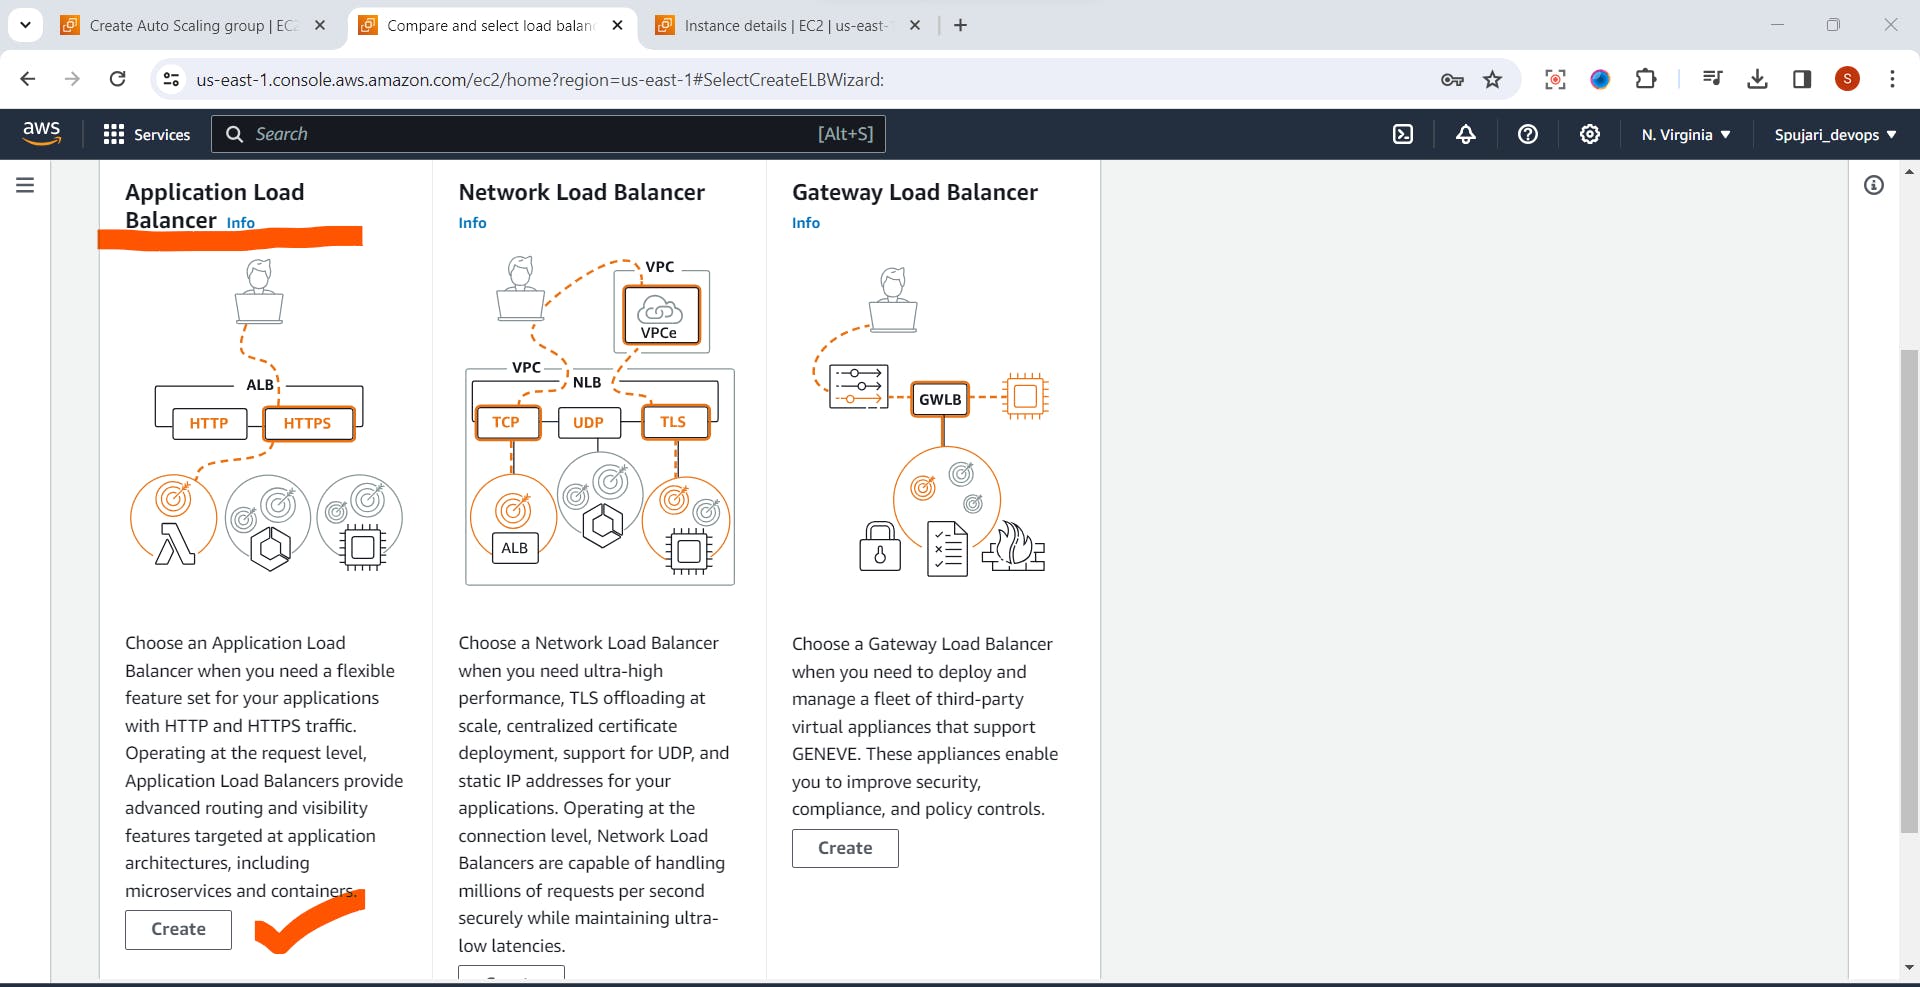
- Click on Create Load Balancer

- Select Application Load Balancer->Click on create
Now create Load Balancer
1.Enter Load Balancer Name
2.Scheme-Set as default
3.IP address type -set as default

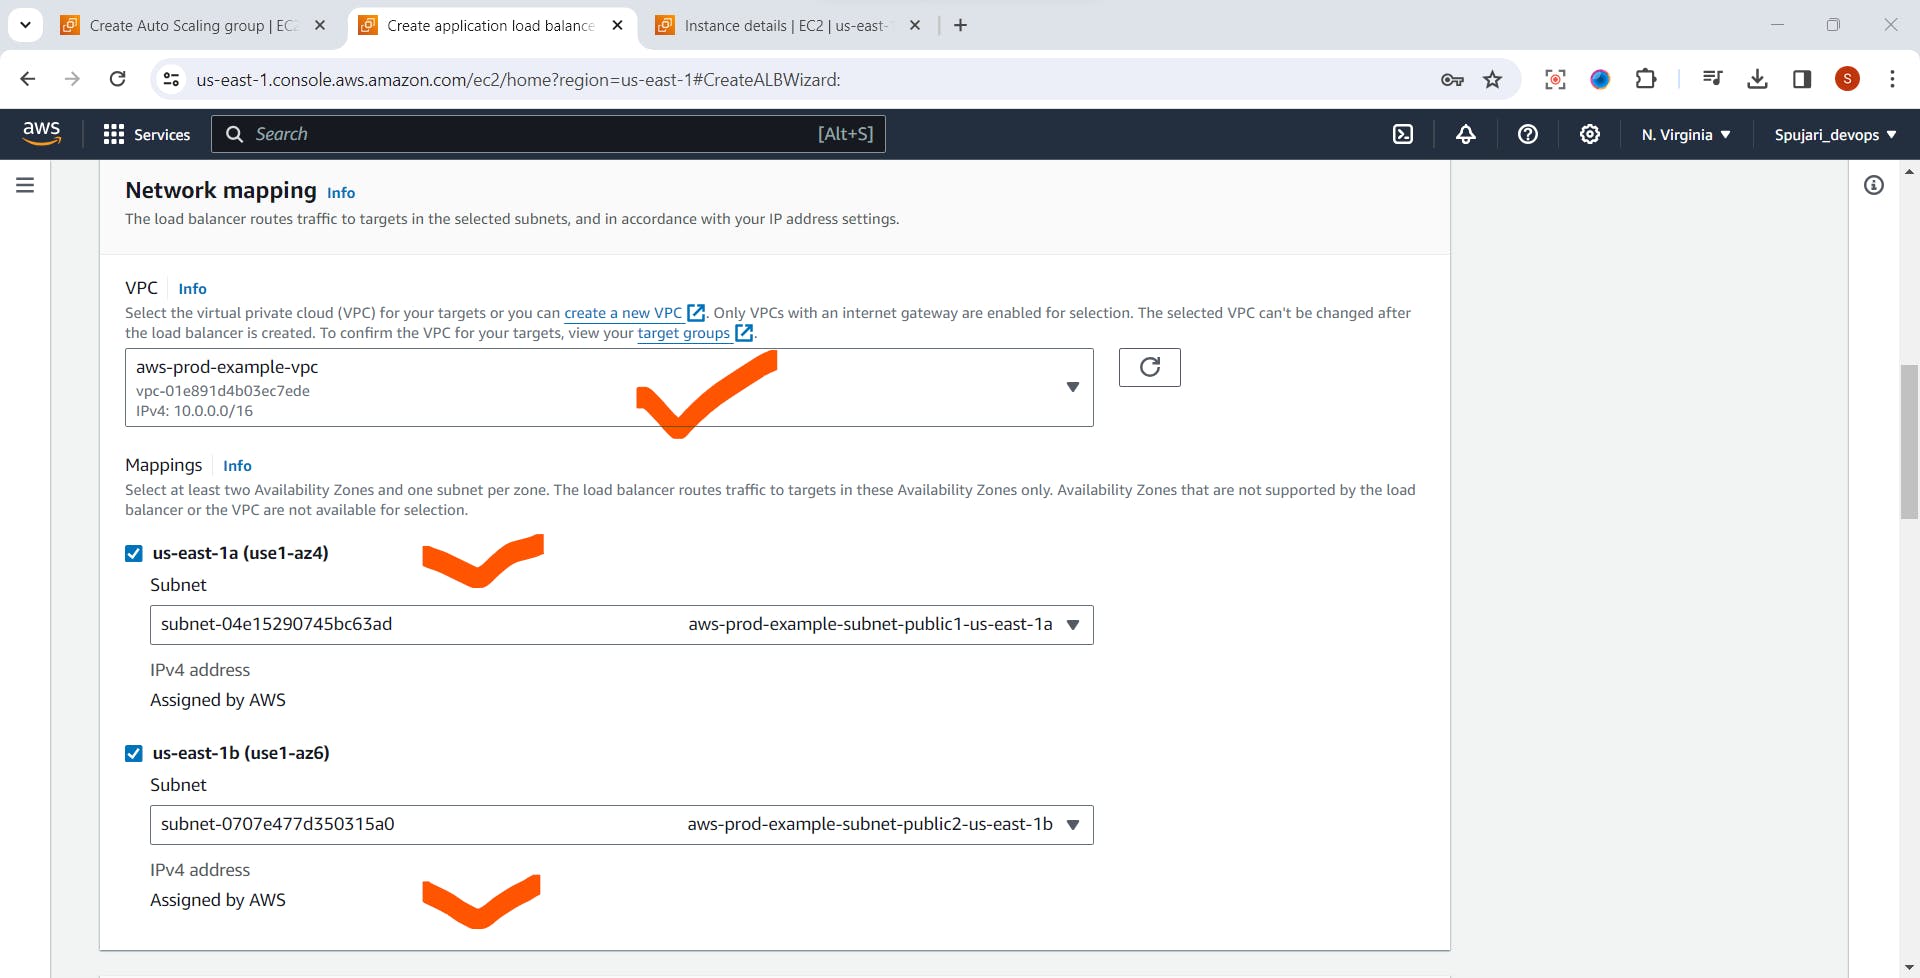
- Network Mapping
1.Select Created VPC here
2.Mapping -Select public subnet -both
- Security Groups-Select all three option
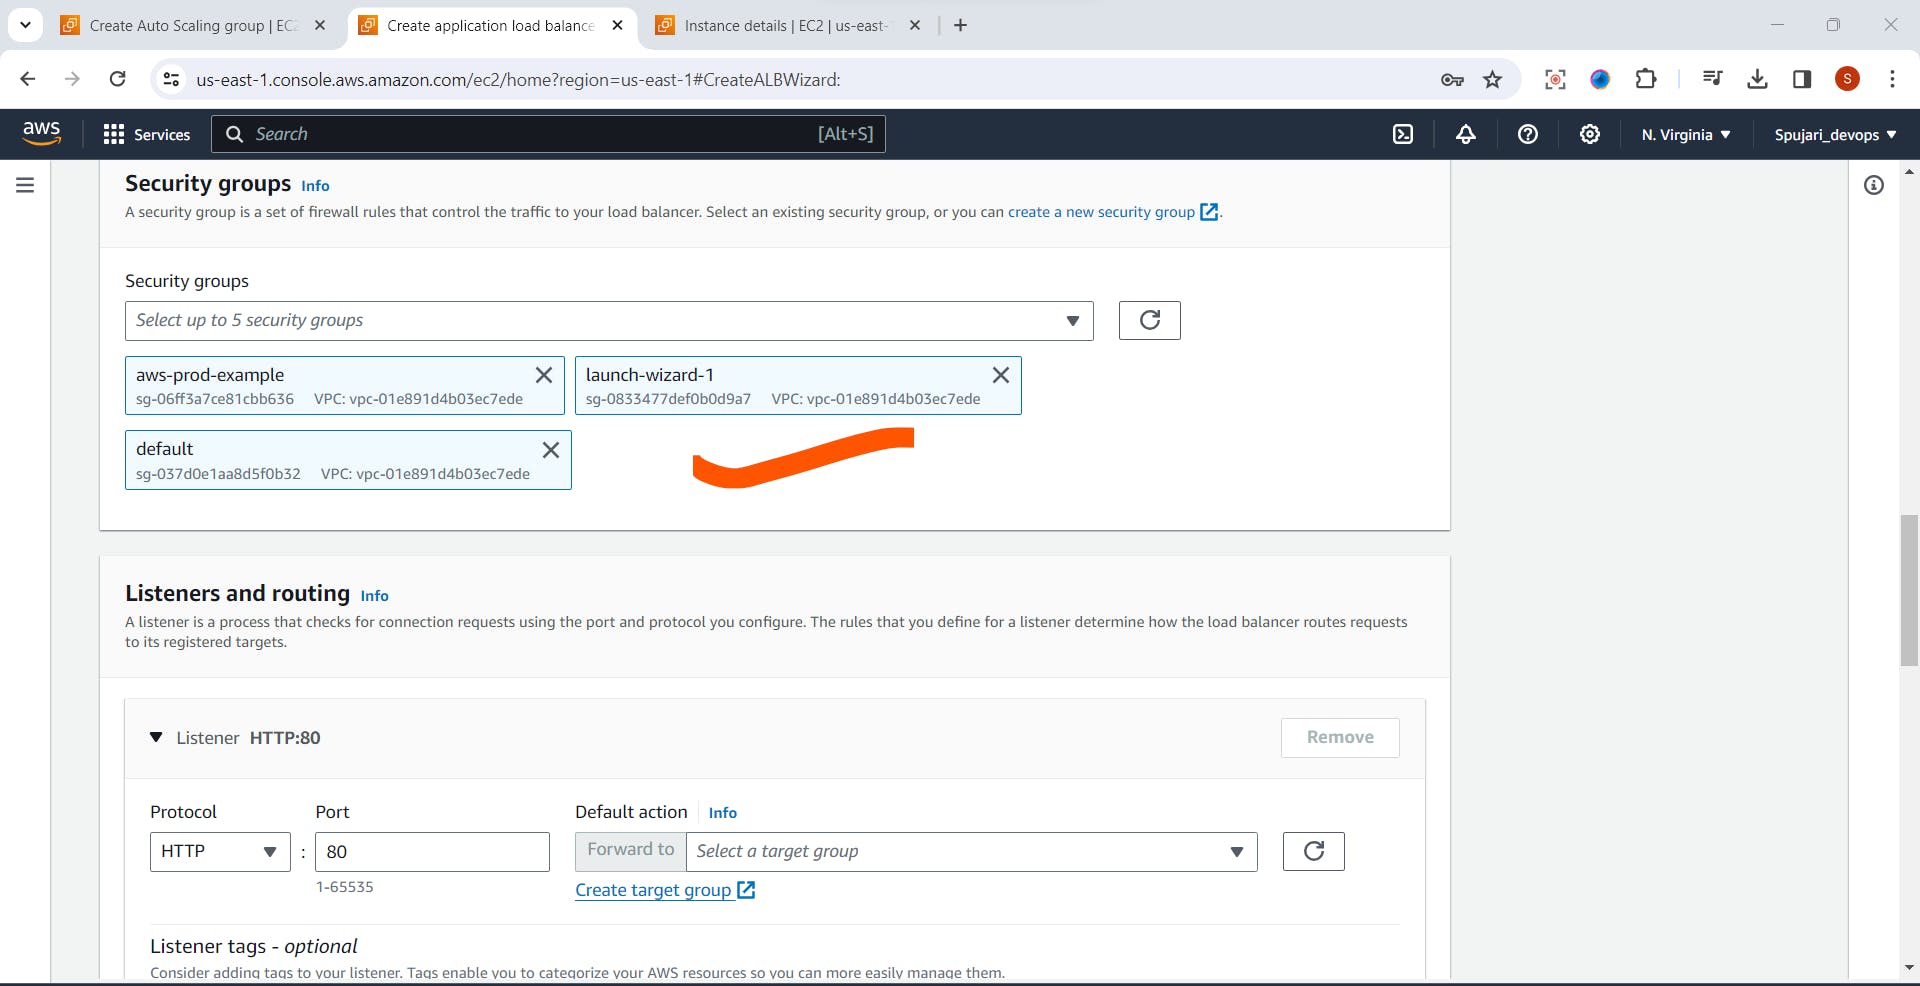
Listeners and routing
1.Click on Create target group

Specify group Details
1.Choose a target type-Instances

Enter target Group :aws-prod-example
Protocol :port - HTTP ,Enter port 80
IP address type -IPv4

- Health Check - Set Default
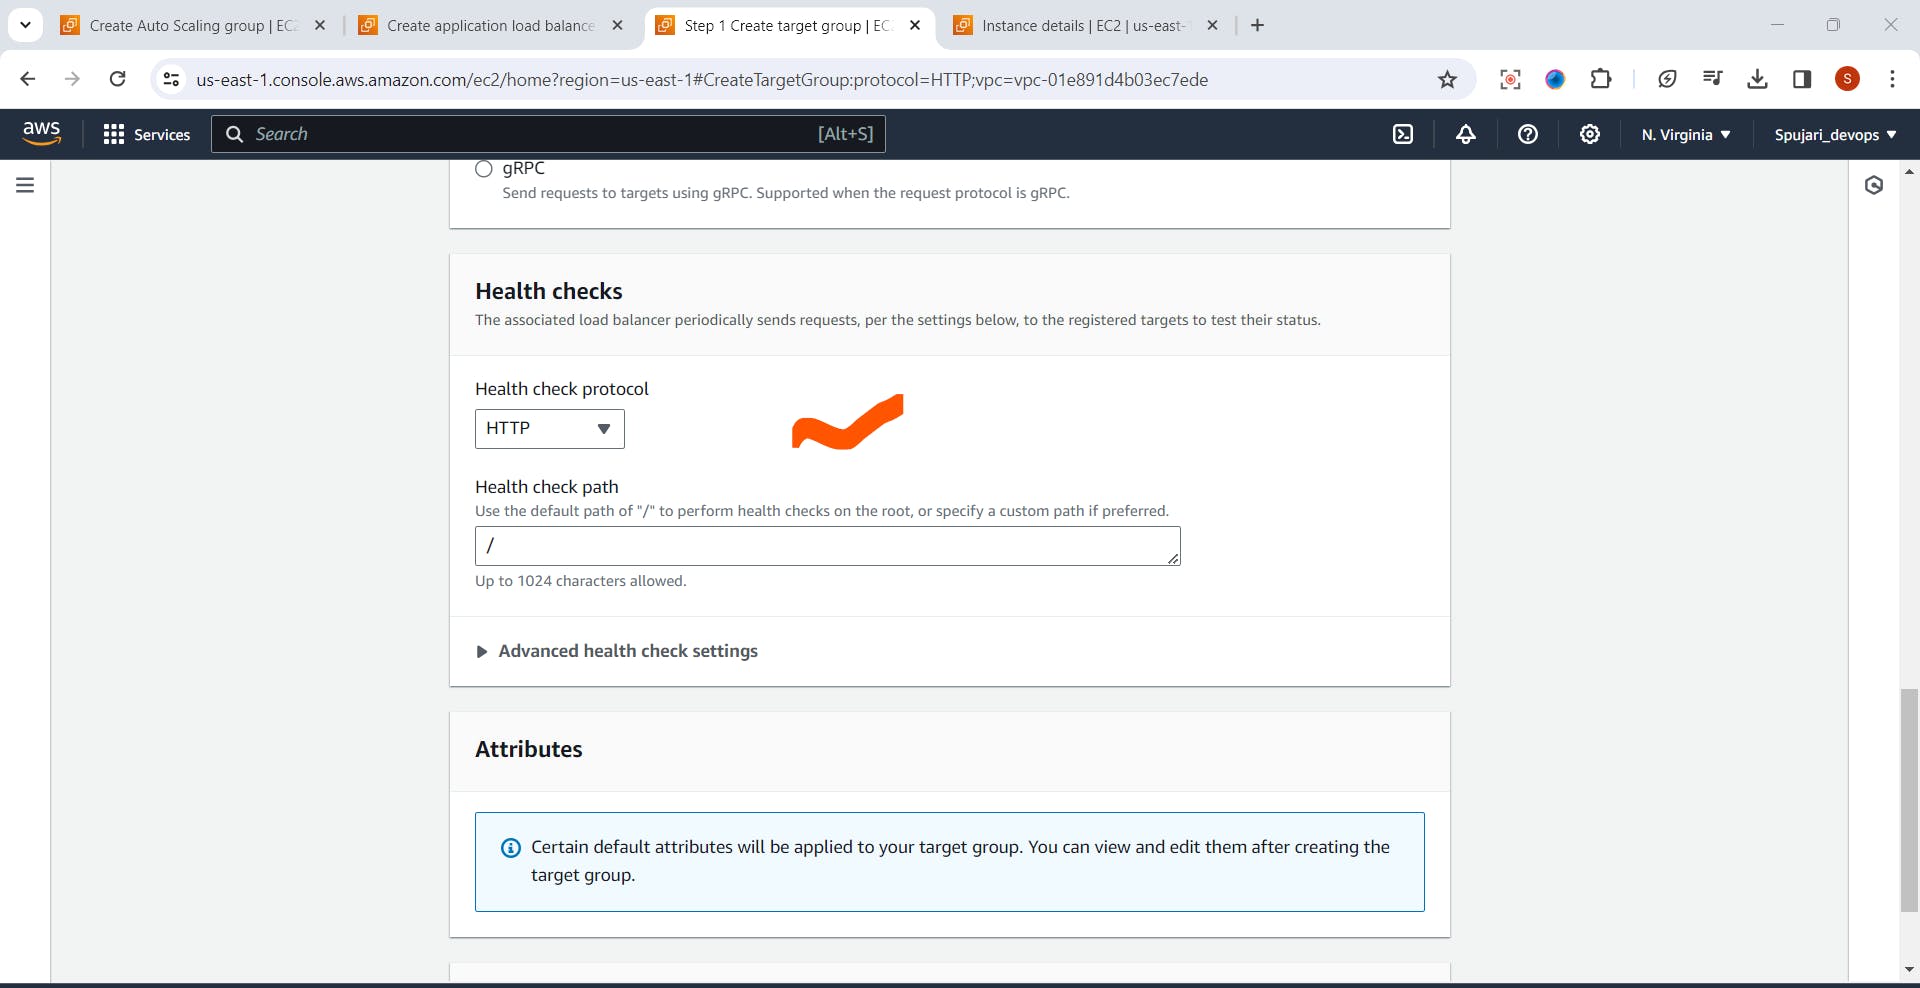
- Click on Next

- Select private subnet Instances
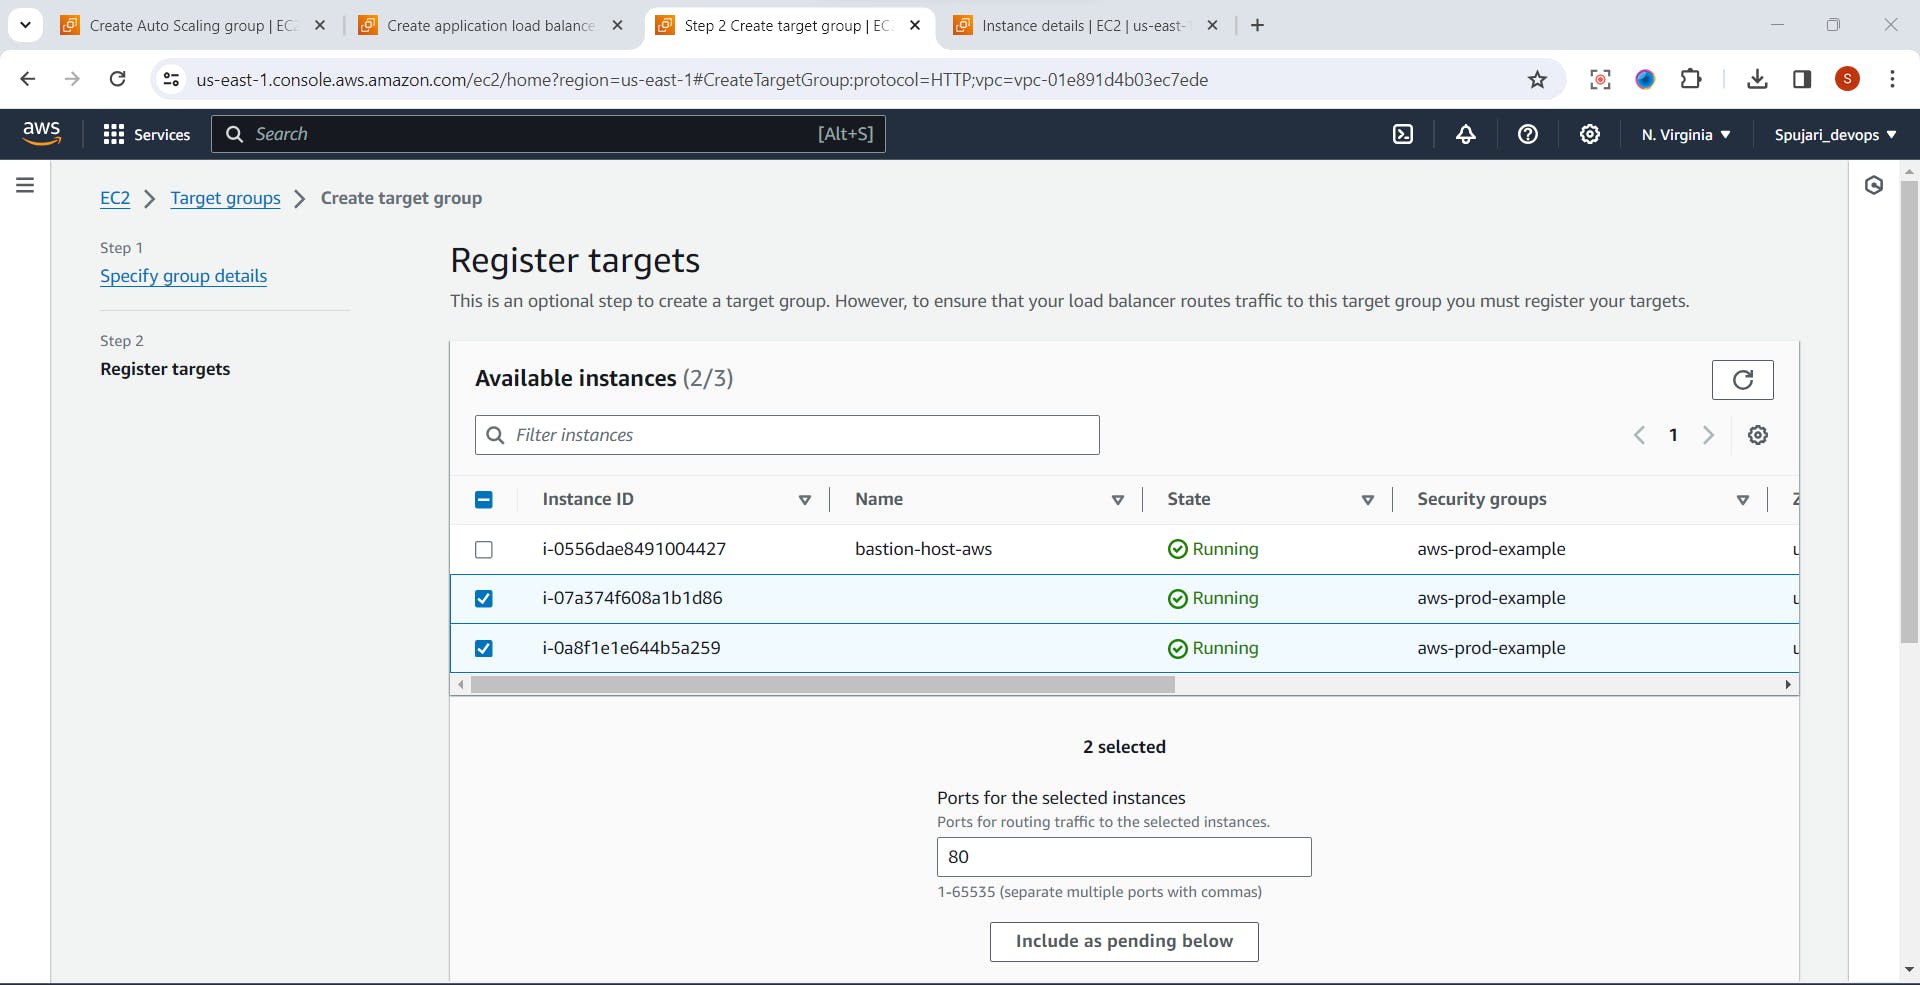
- Click on Include as Pending below
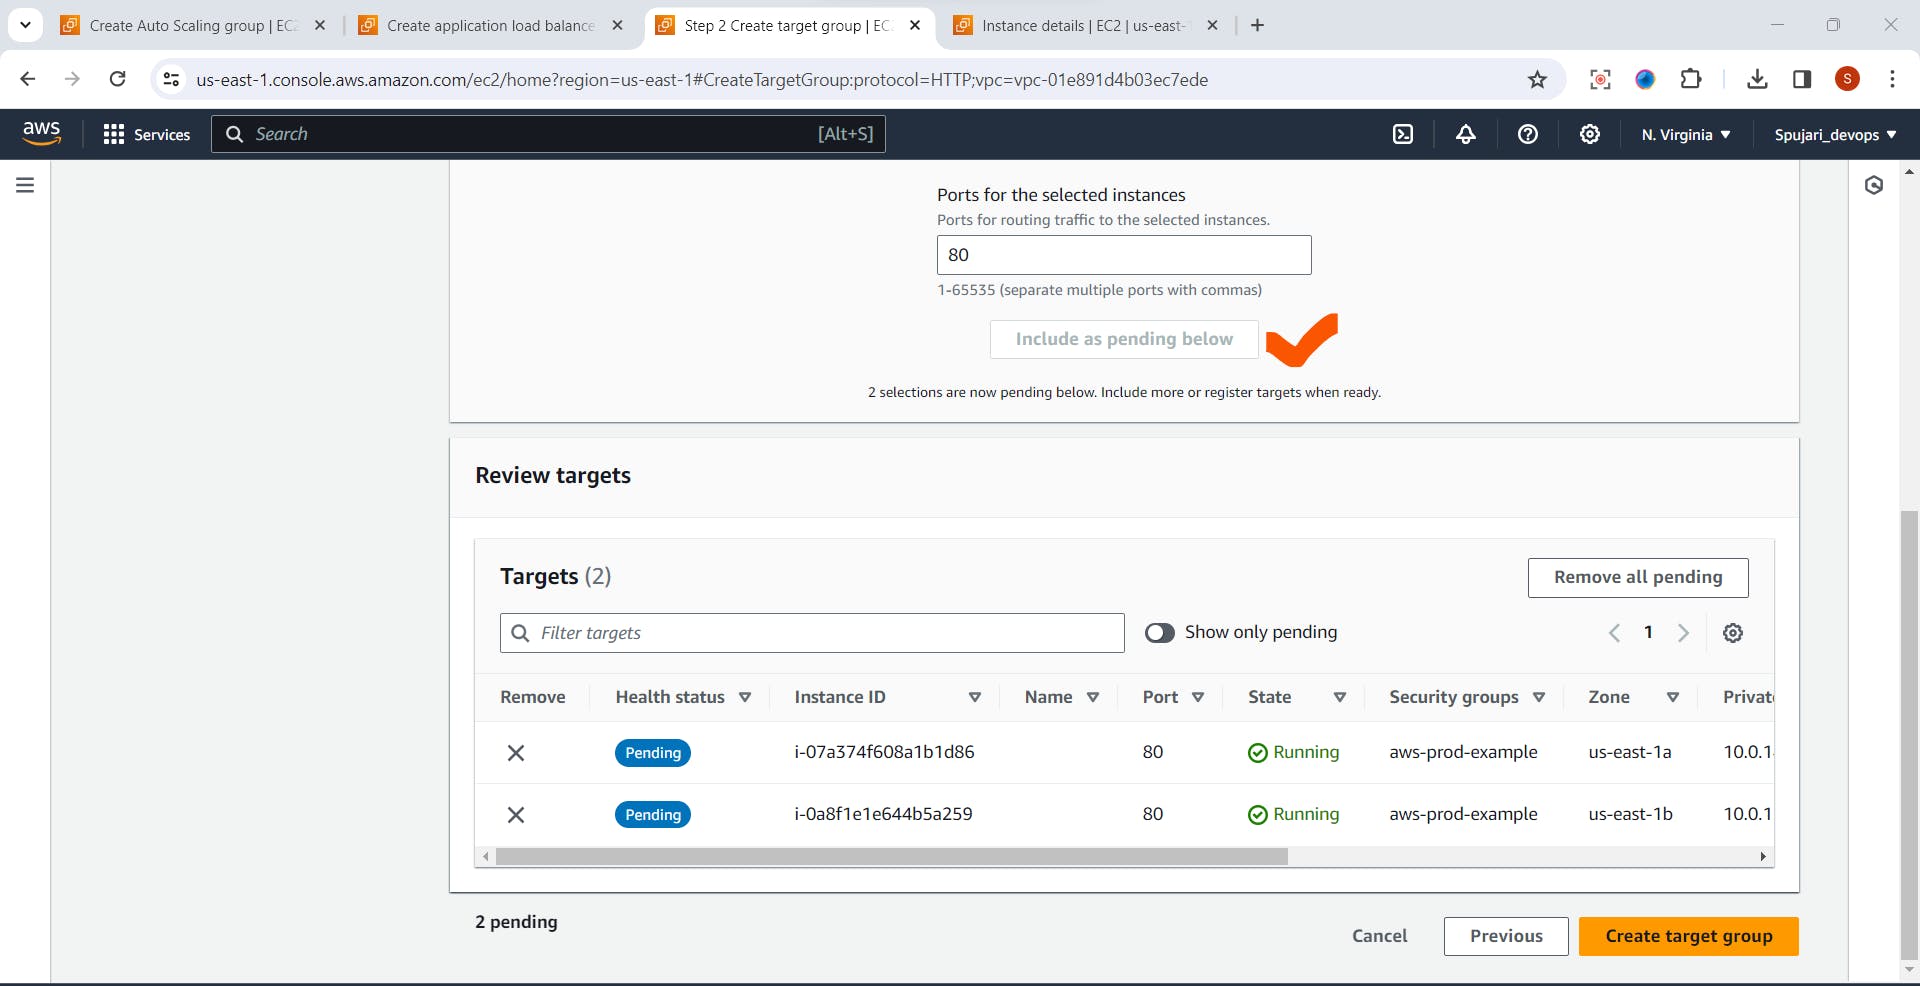
- Click on Create target Group

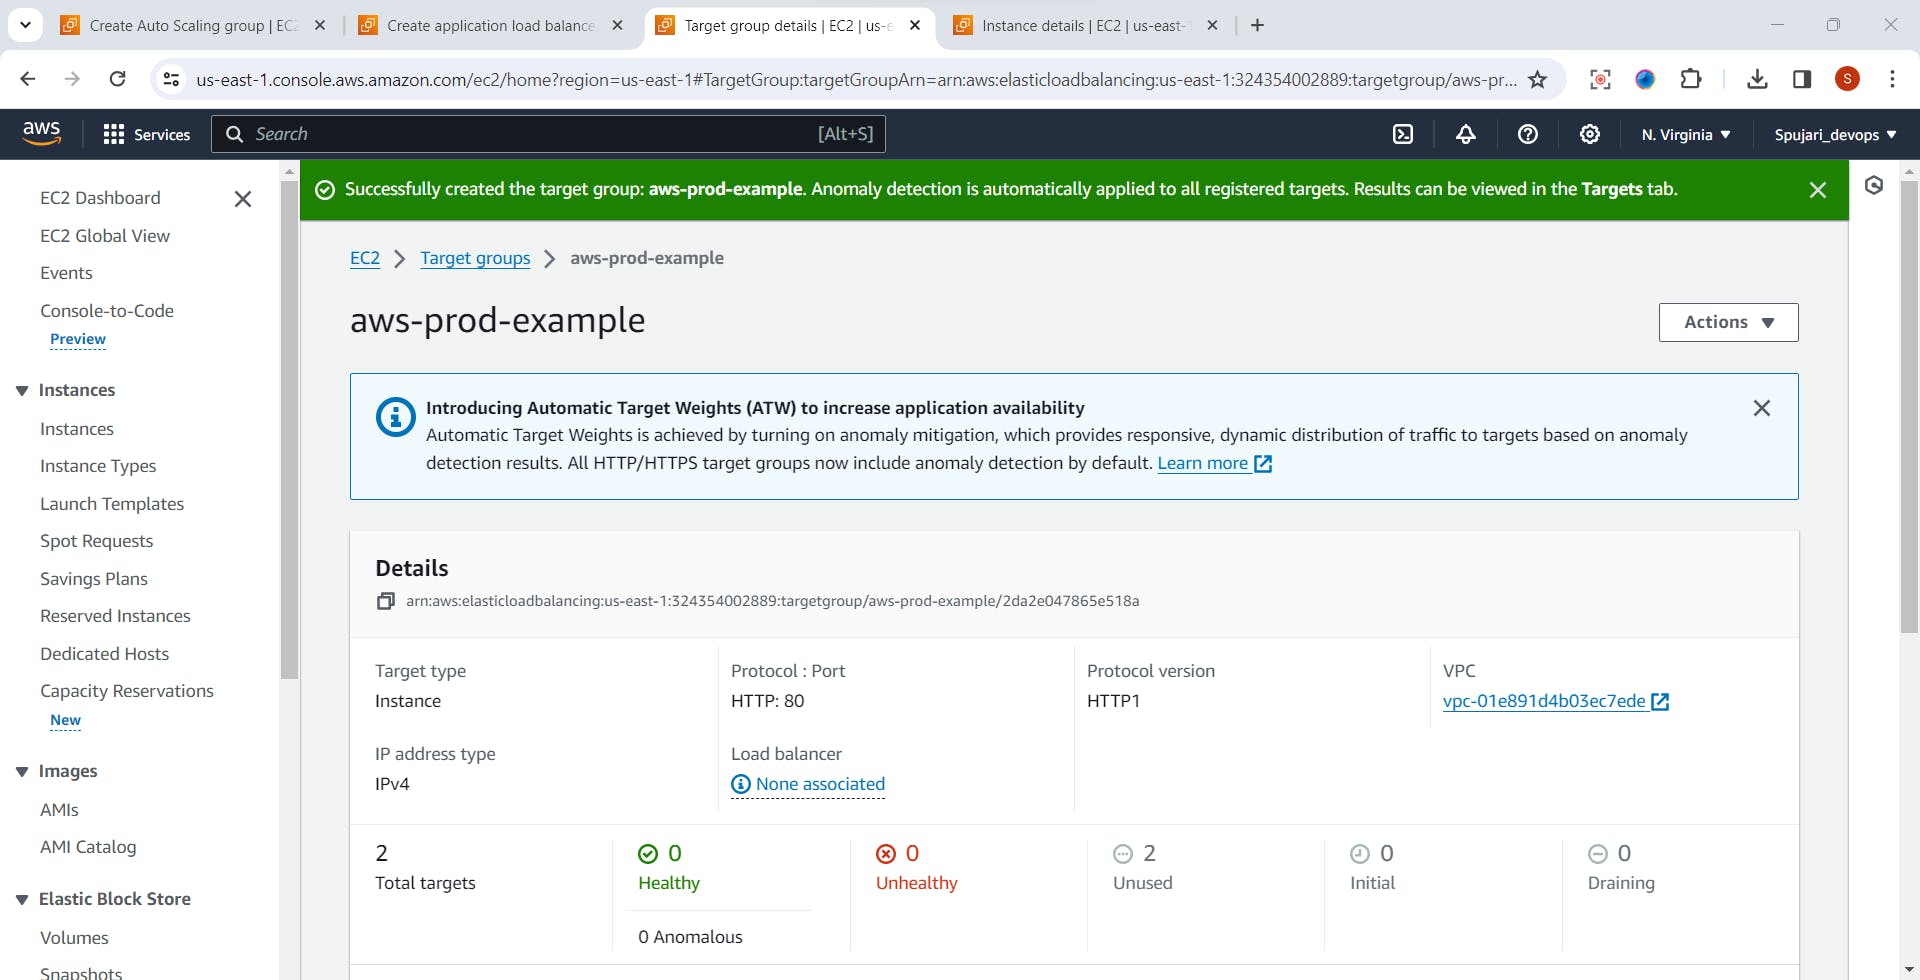
- Successfully created target group
- load balancer is created successfully

- Click on View Load Balancer
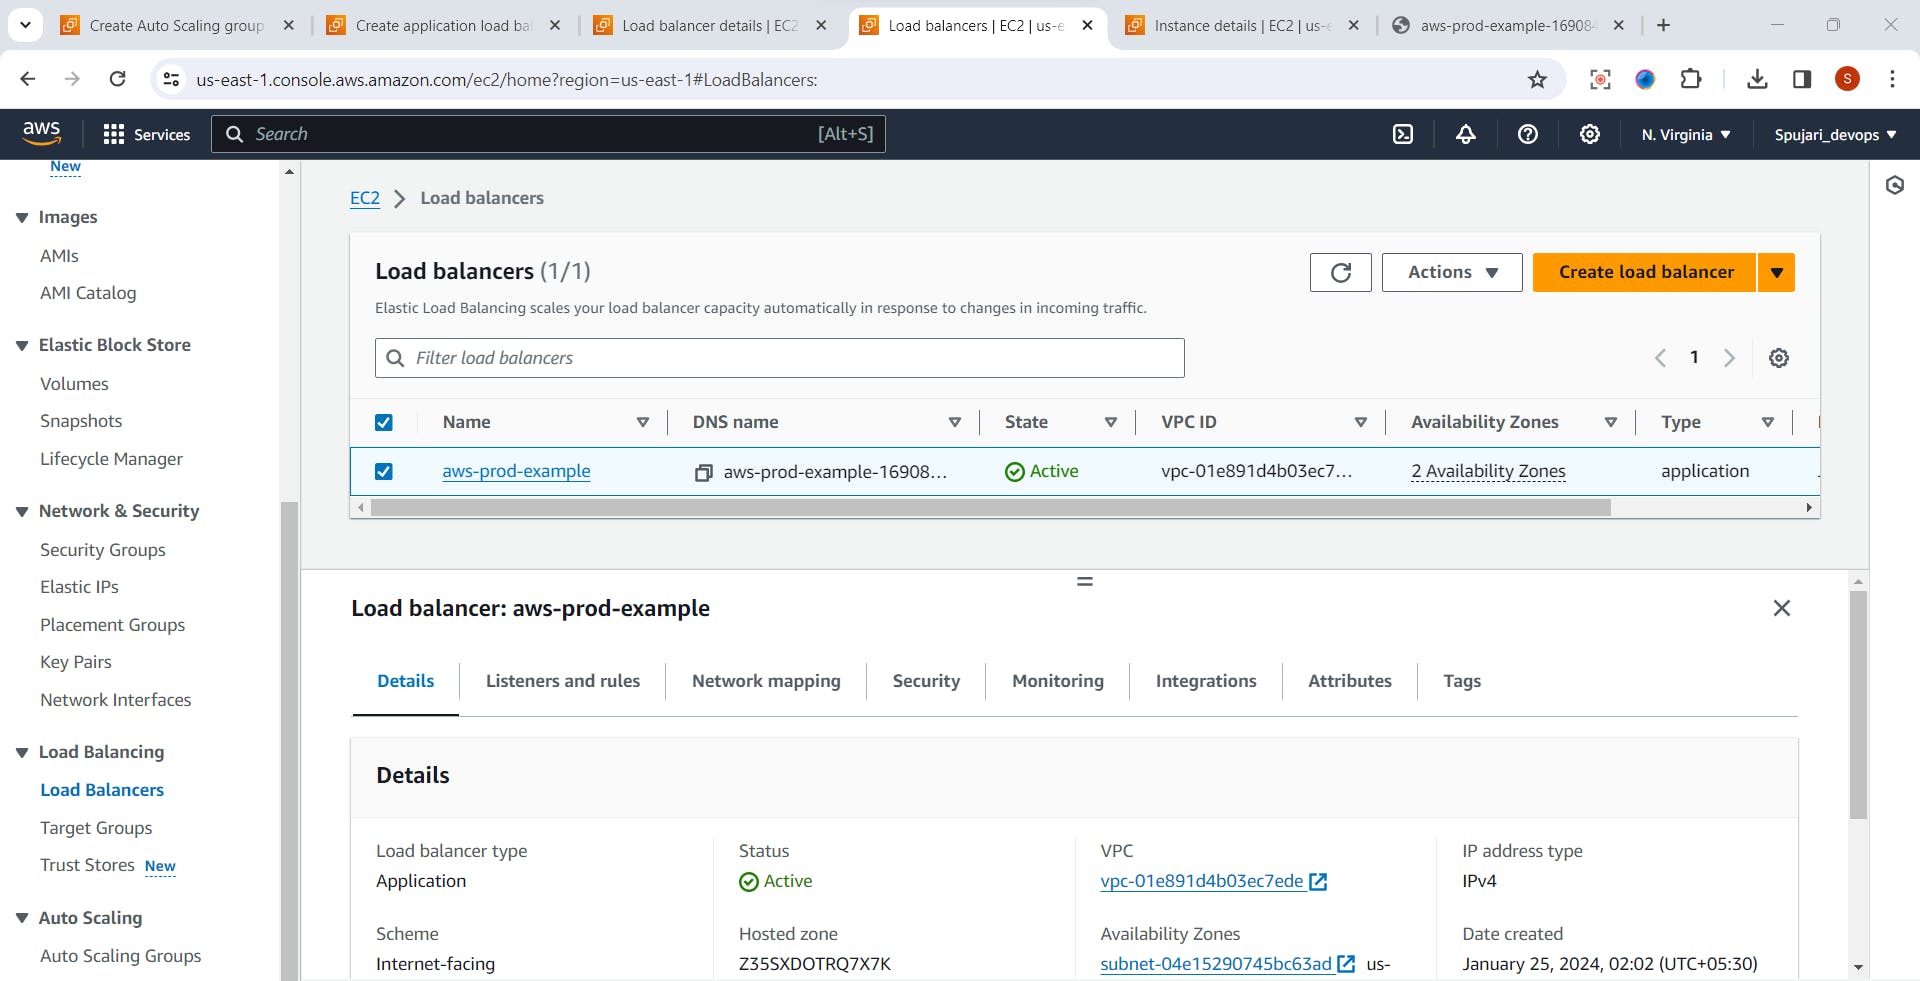
- Click on load balancer name

- Listeners and rules -Select HTTP

- Click on Security>select your created Security Group ID

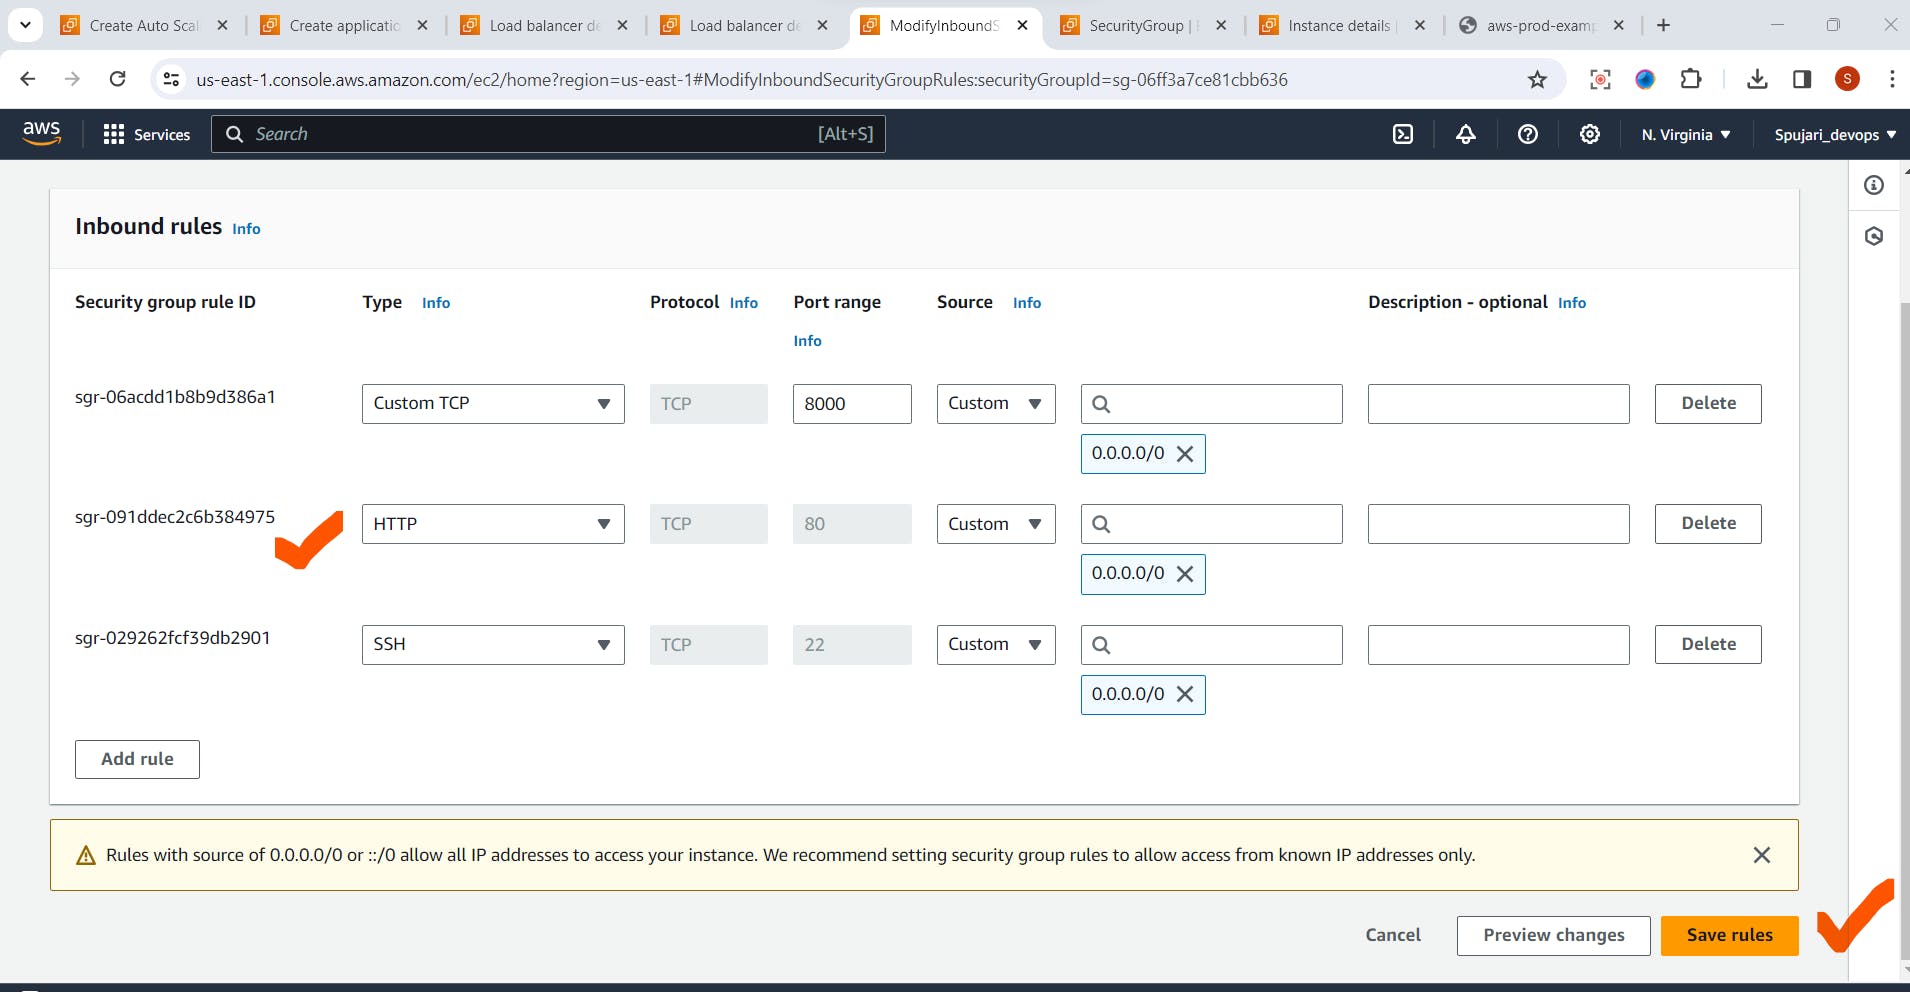
- Click on Edit Inbound Rule
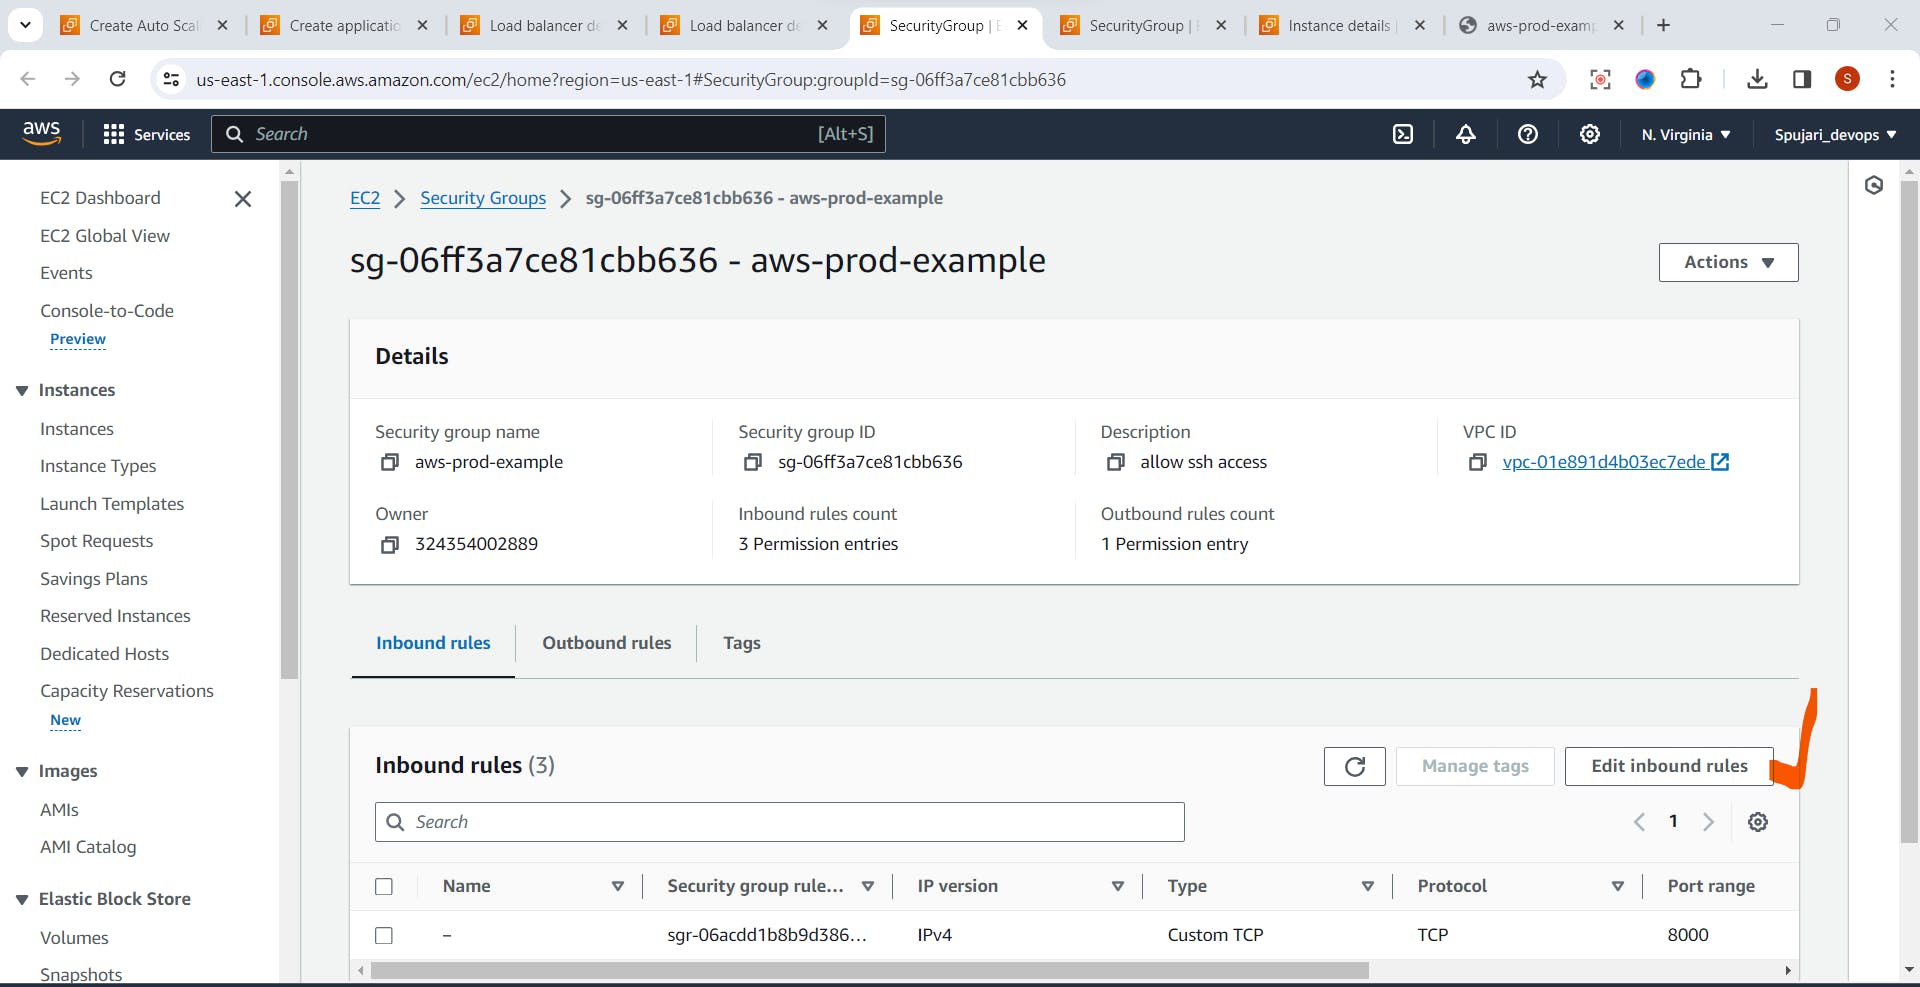
- Add Rule for Port 80-> click on Save
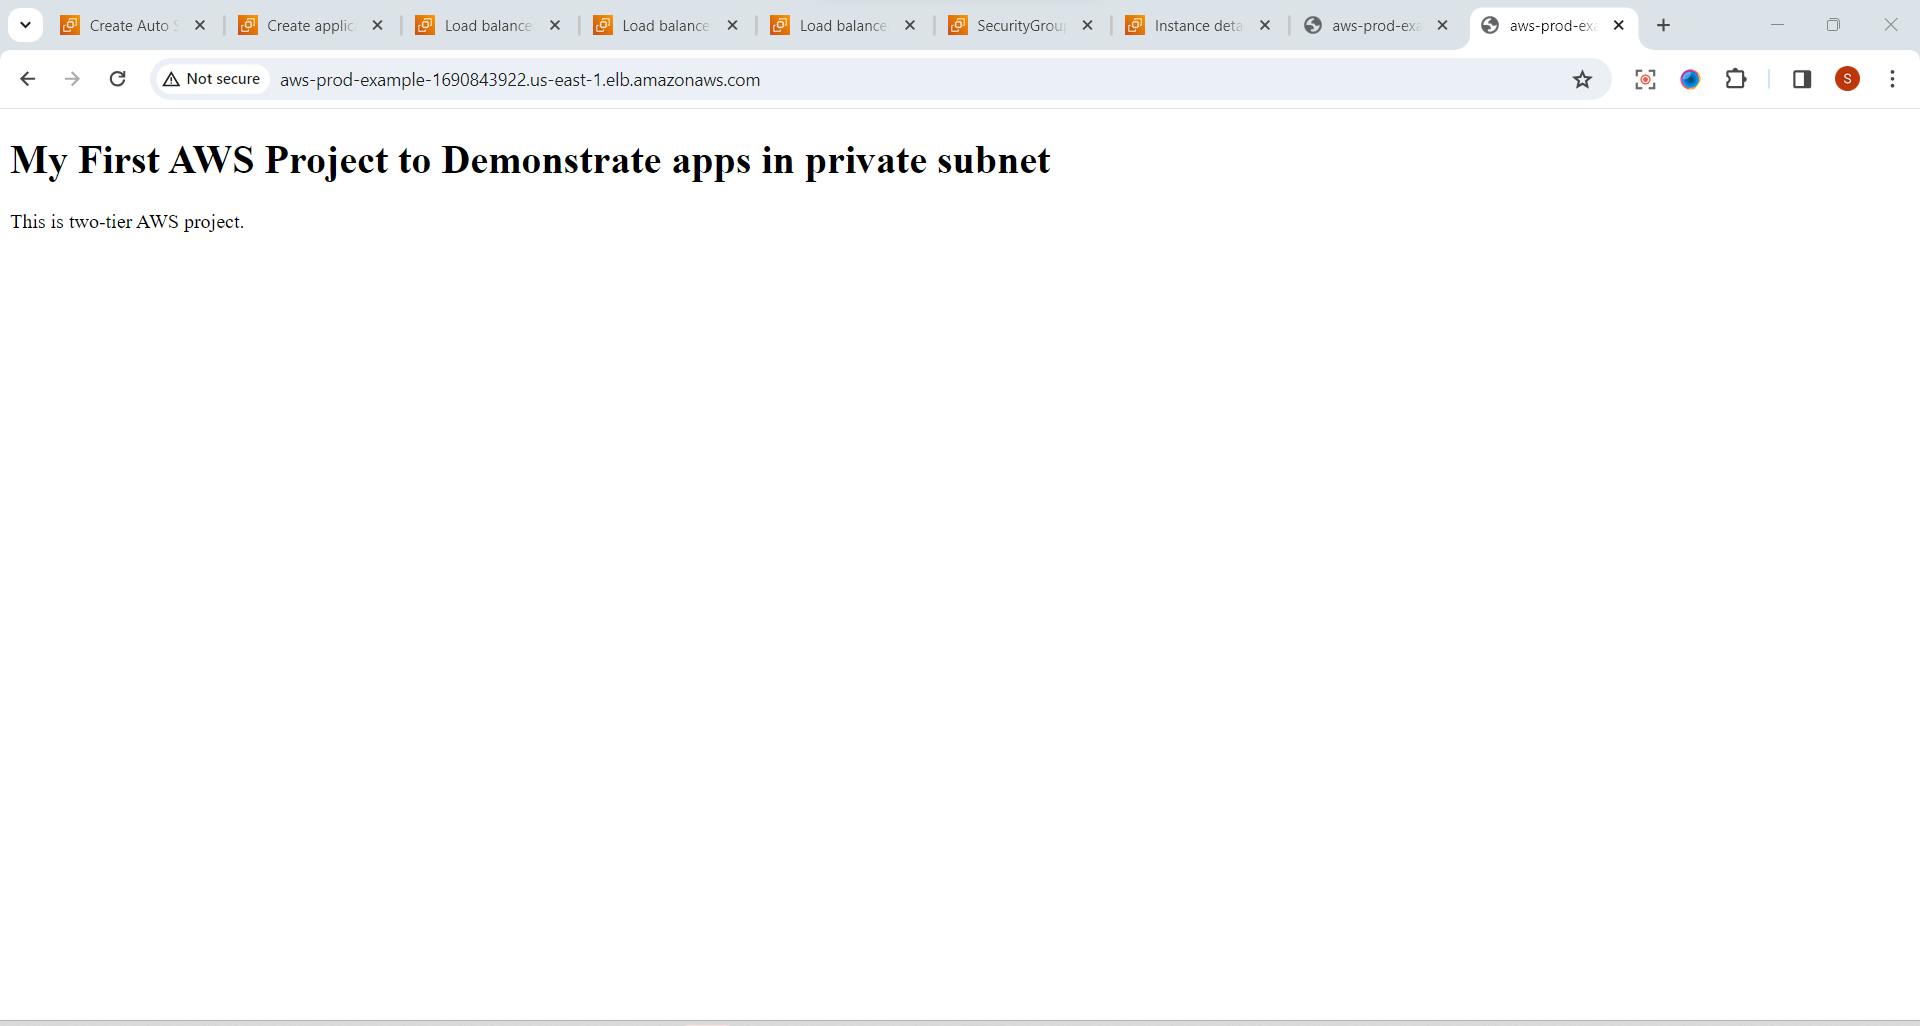
- Go to load Balancer -Copy DNS name ,and paste it in the browser

Test the Application 🧪
Paste it in browser
Finally Application is deployed on private subnet
Conclusion 🌐
Congratulations! we have successfully deployed application in a private subnet on AWS, securing it from direct internet exposure. Regularly monitor your application's performance, update security configurations, and scale resources as needed. This ensures a resilient and secure deployment in the AWS cloud environment. 💻🚀
If this post was helpful, please do follow and click the like button below to show your support .
- Thank you for reading💚
Best Regards,
Sprasad 🌐✨