"AWS S3 Unveiled: A Step-by-Step Guide to Creating and Using AWS S3 Buckets 🚀"🌐
Amazon Simple Storage Service (S3). In this comprehensive guide, I'll embark on a journey to uncover the key components and functionality that make AWS S3 an integral part of the cloud ecosystem.
Part 1: Understanding AWS S3 Components 🧩
1. Buckets 🪣
Definition:
- S3 Buckets are containers for storing objects (files) in AWS S3.
Functionality:
- Each object is contained within a bucket, and buckets act as a top-level namespace for objects.
2. Objects 📦
Definition:
- Objects are the fundamental entities stored in S3, consisting of data and metadata.
Functionality:
- Objects can range from a few bytes to several terabytes, and each object is assigned a unique key within a bucket.
3. Keys 🔑
Definition:
- Keys are unique identifiers for objects within a bucket.
Functionality:
- Keys enable easy retrieval of objects and form a hierarchical structure within a bucket.
4. Regions 🌍
Definition:
- AWS S3 is distributed across multiple geographic regions worldwide.
Functionality:
- Users can choose the region for their S3 bucket based on factors such as latency, compliance, and data residency requirements.
Part 2: Key Functionality of AWS S3 🚀
1. Scalability and Durability 📈🛡️
Scalability:
- S3 scales seamlessly to accommodate any amount of data.
Durability:
- Designed for 99.999999999% (11 9's) durability, ensuring data is highly available.
2. Security and Access Control 🛡️🔐
Encryption:
- S3 provides server-side encryption options for data at rest.
Access Control:
- Access can be controlled using bucket policies, IAM roles, and Access Control Lists (ACLs).
3. Versioning and Lifecycle Management ⏳
Versioning:
- Enables the storage of multiple versions of an object.
Lifecycle Management:
- Automate transitions between storage classes and set object expiration rules.
4. Event Notifications and Logging 🔔📊
Event Notifications:
- Trigger events based on specific actions in the bucket (e.g., object creation).
Logging:
- Log and monitor bucket activity using Amazon CloudWatch.
Part 3: "Creating Your AWS S3 Bucket 🪣🚀"
Step 1: Sign in to AWS Console
Go to the AWS Management Console.
Sign in to your AWS account.
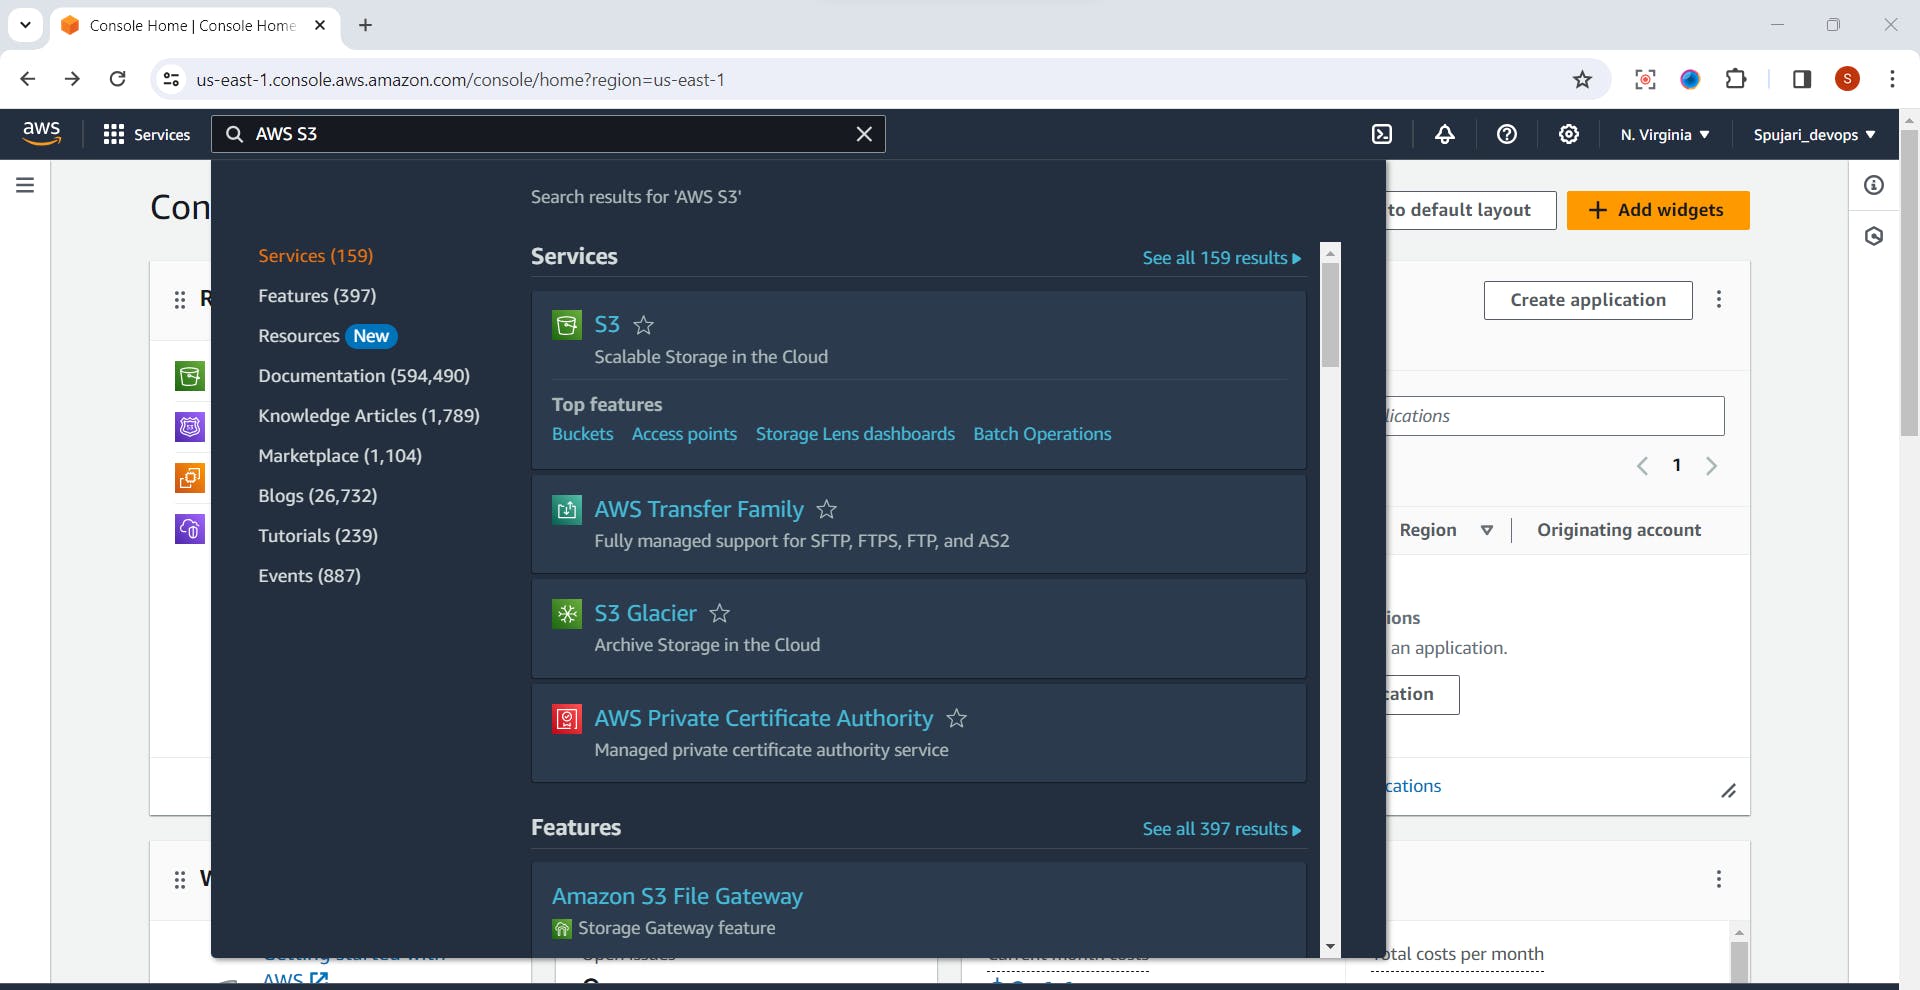
Step 2: Navigate to S3 Service
In the AWS Management Console, find and click on the "Services" dropdown.
Select "S3" under the "Storage" category.
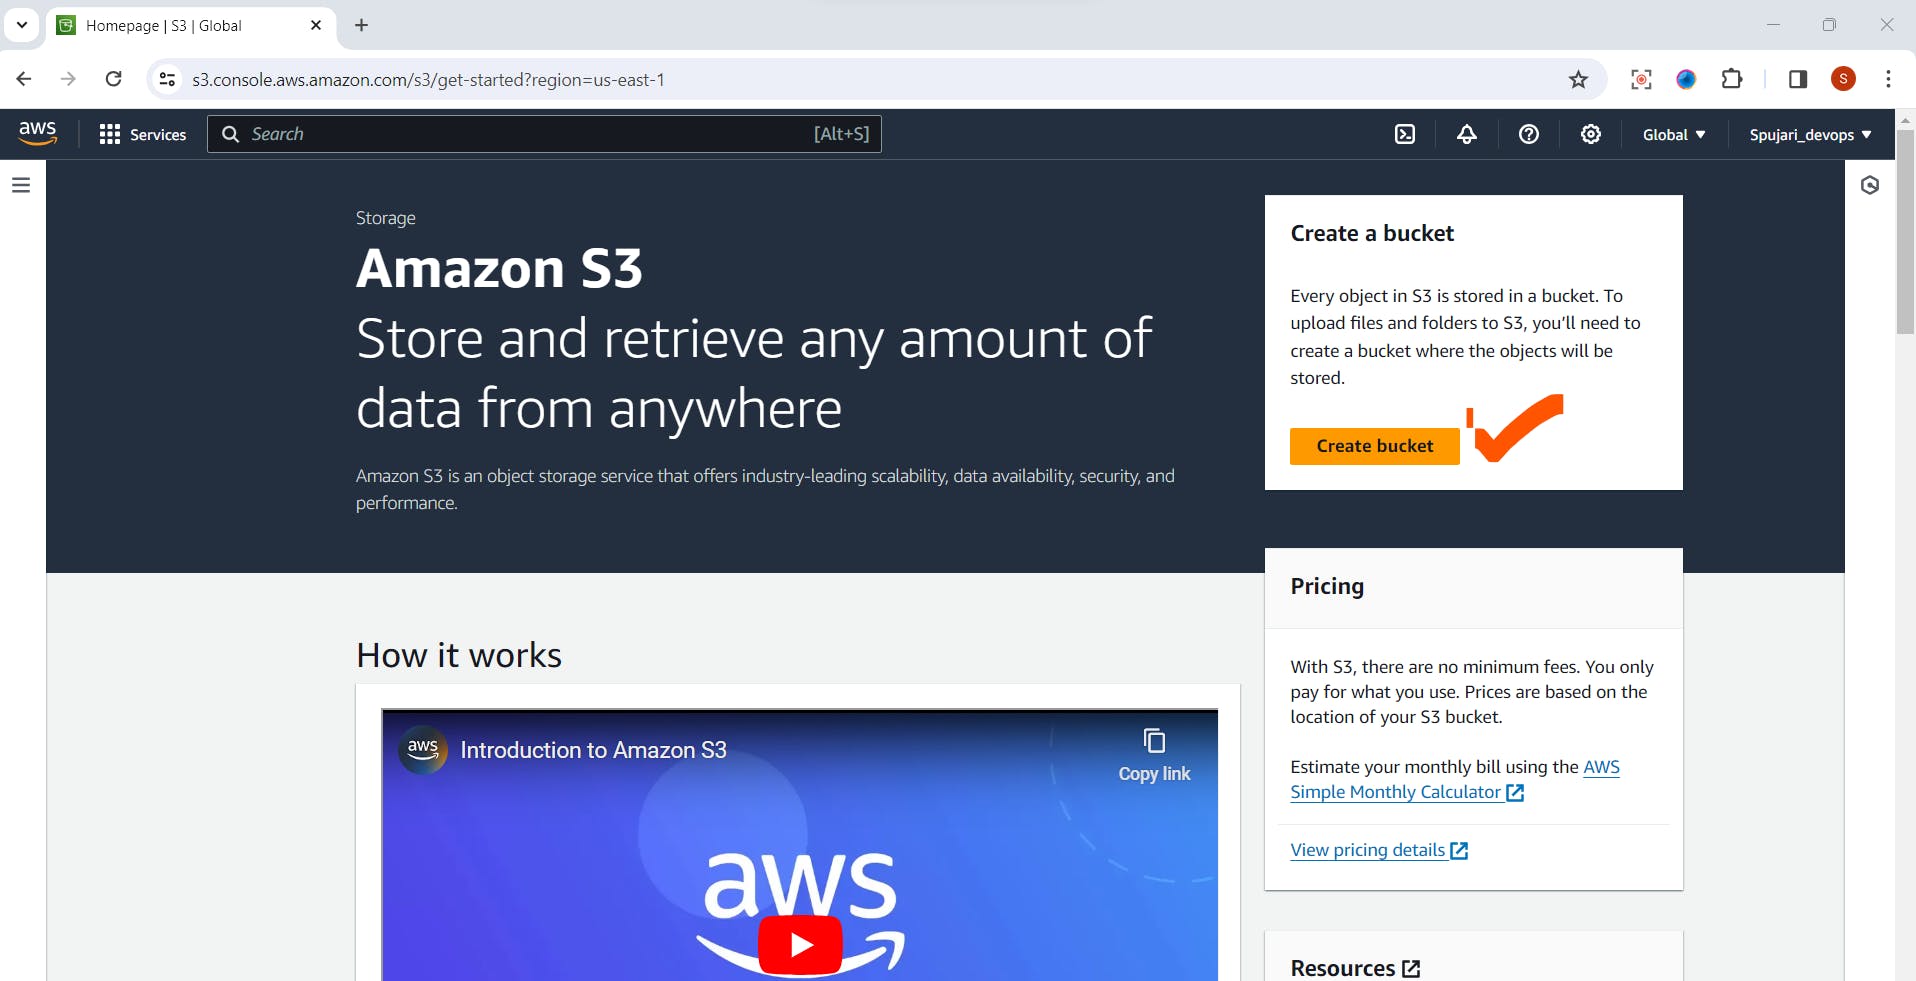
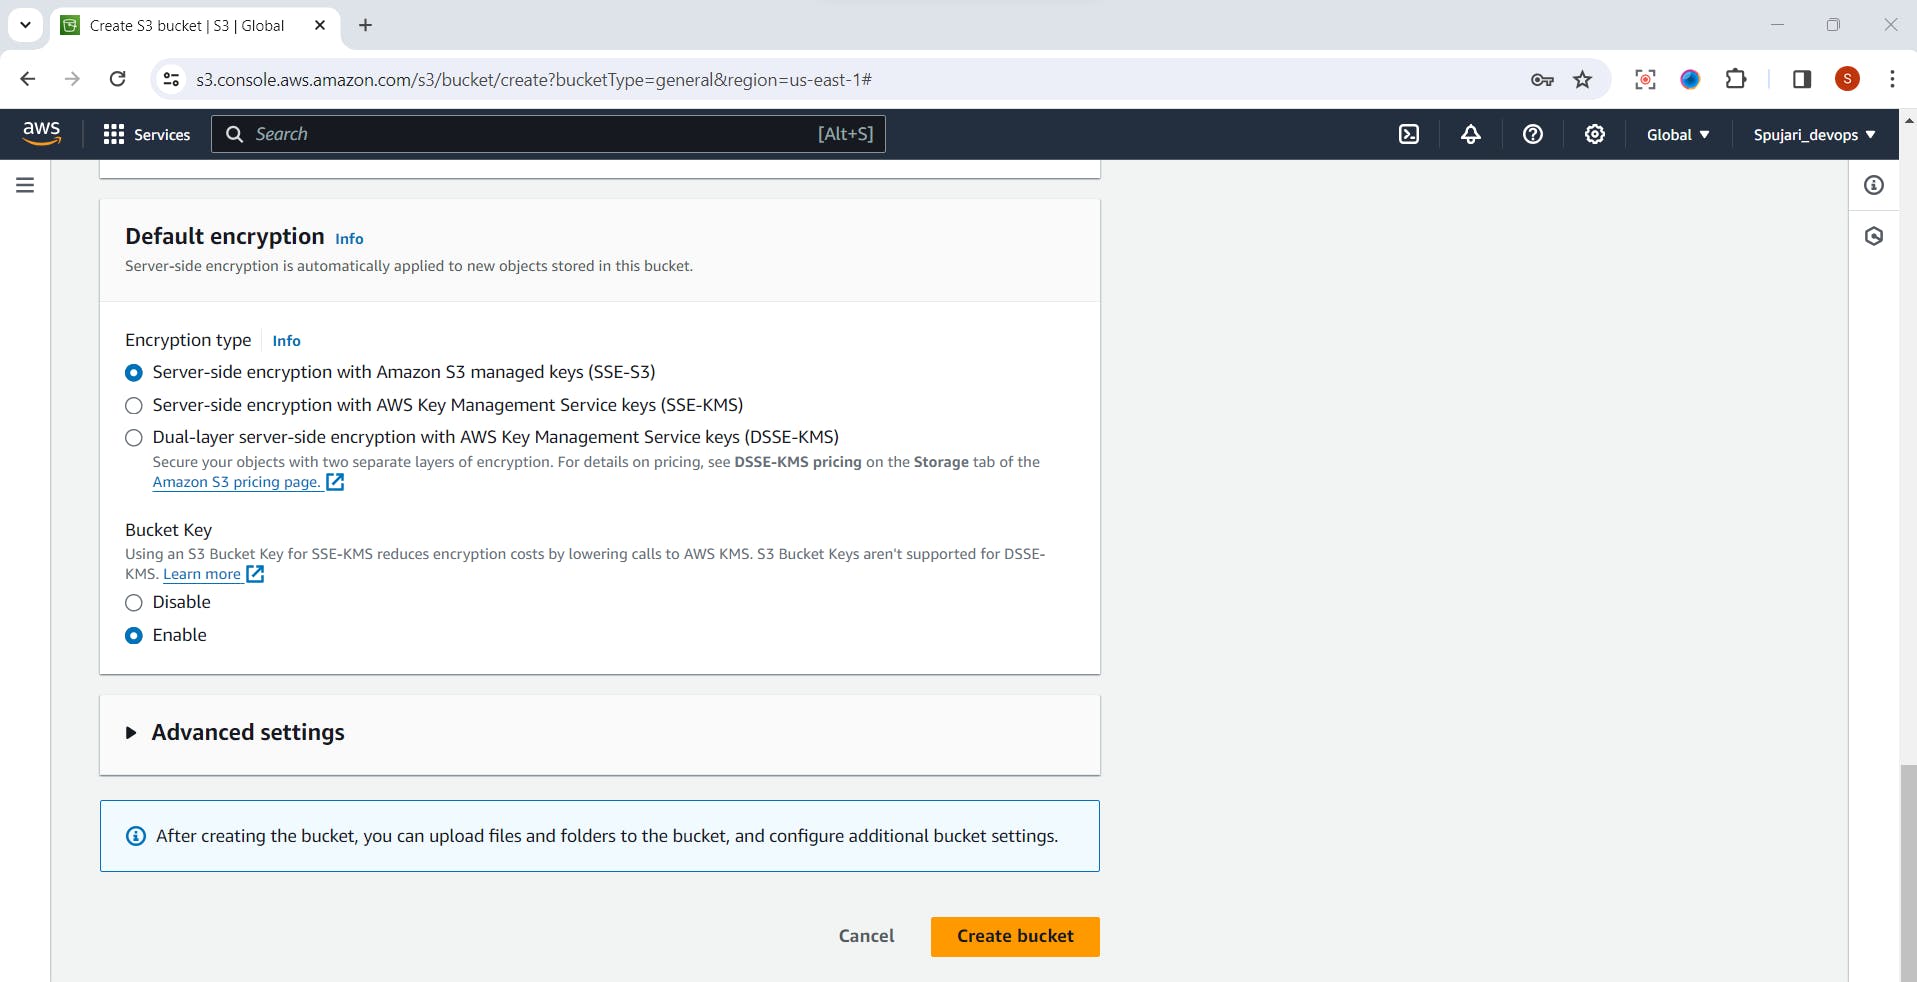
Step 3: Create a New S3 Bucket
Click the "Create bucket" button.
Enter a unique and meaningful name for your bucket.
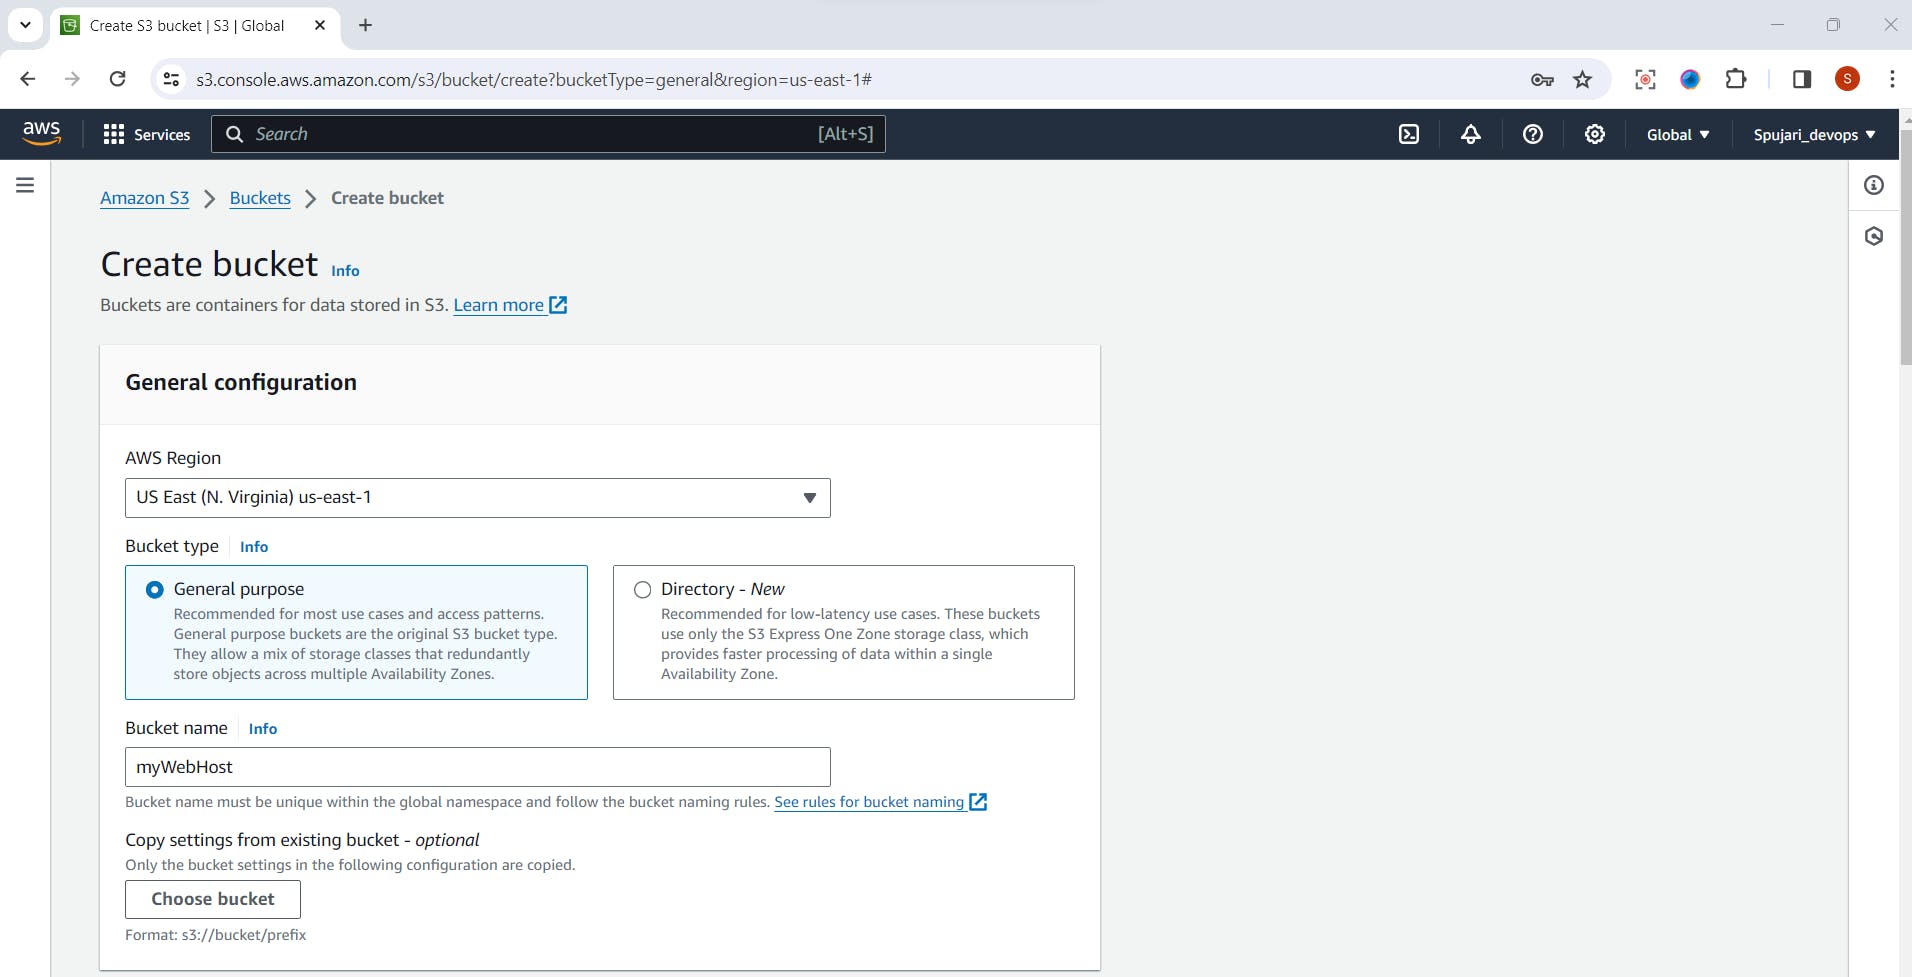
Choose the region for your bucket.
**Leave as Recommended:**Configure additional settings like versioning, logging, and tags.
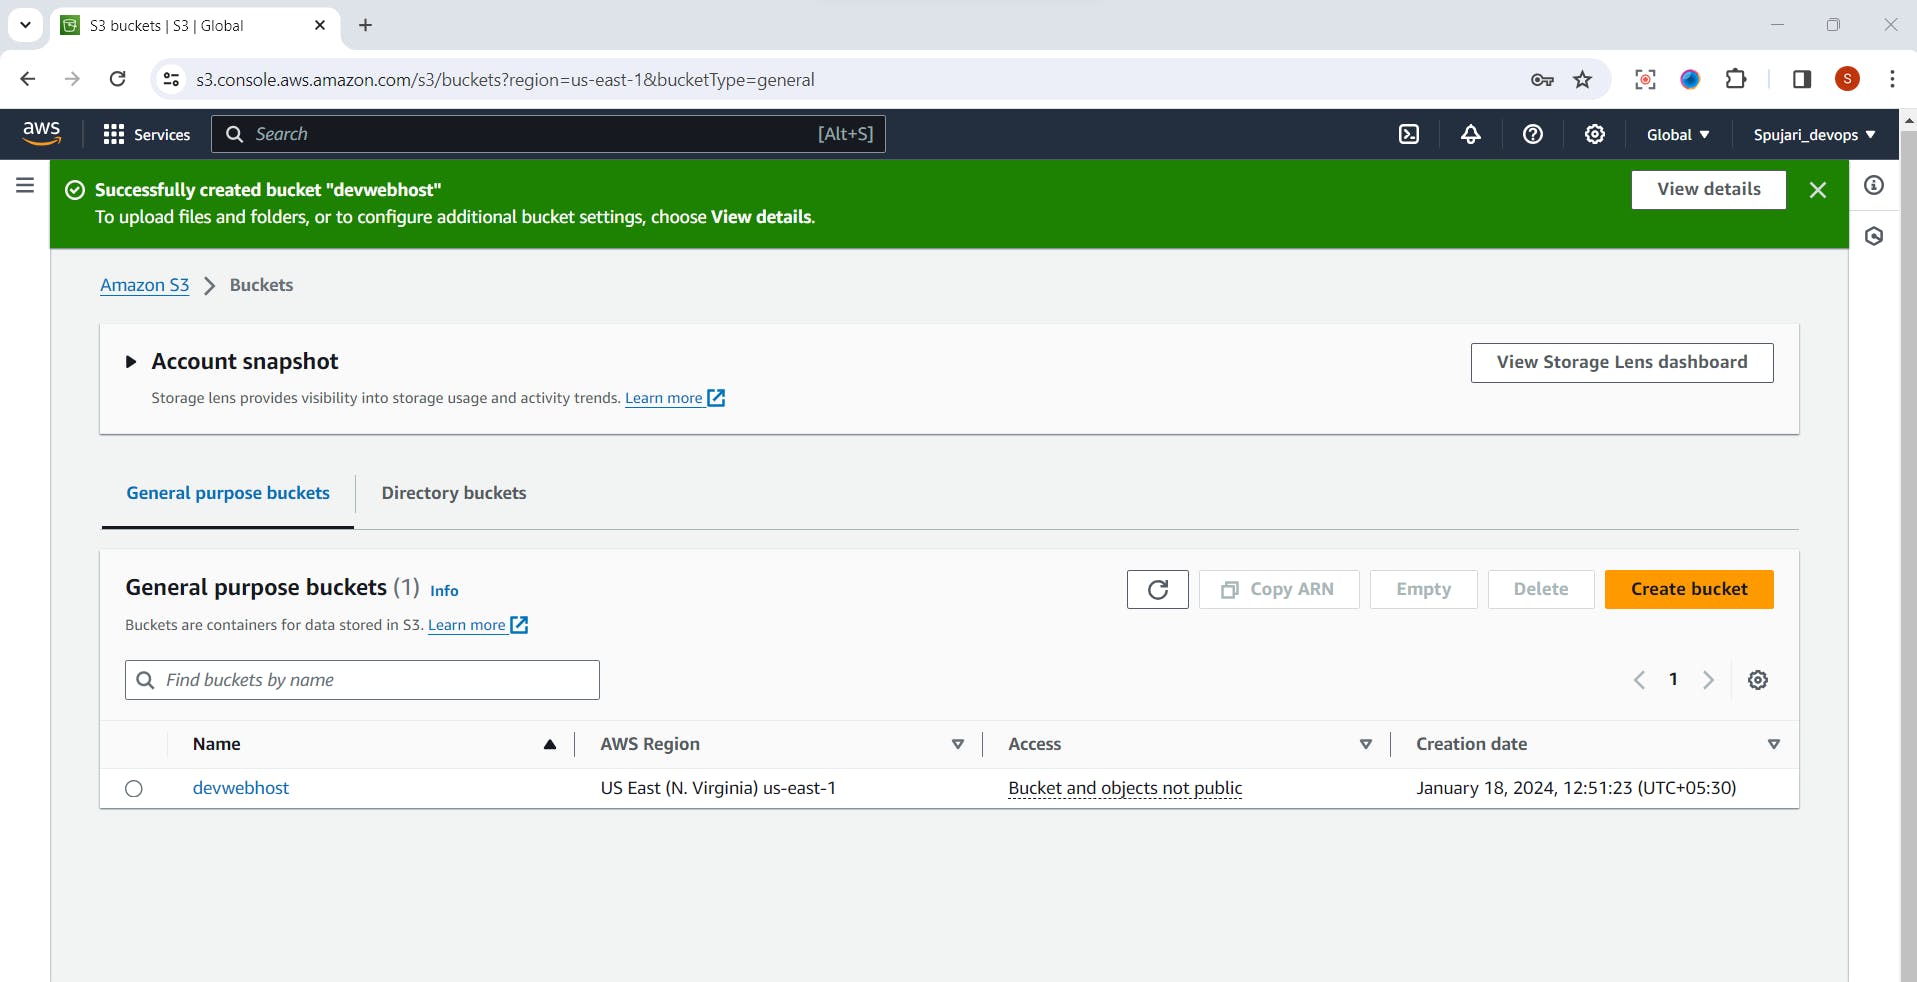
Click "Create" to create the bucket.
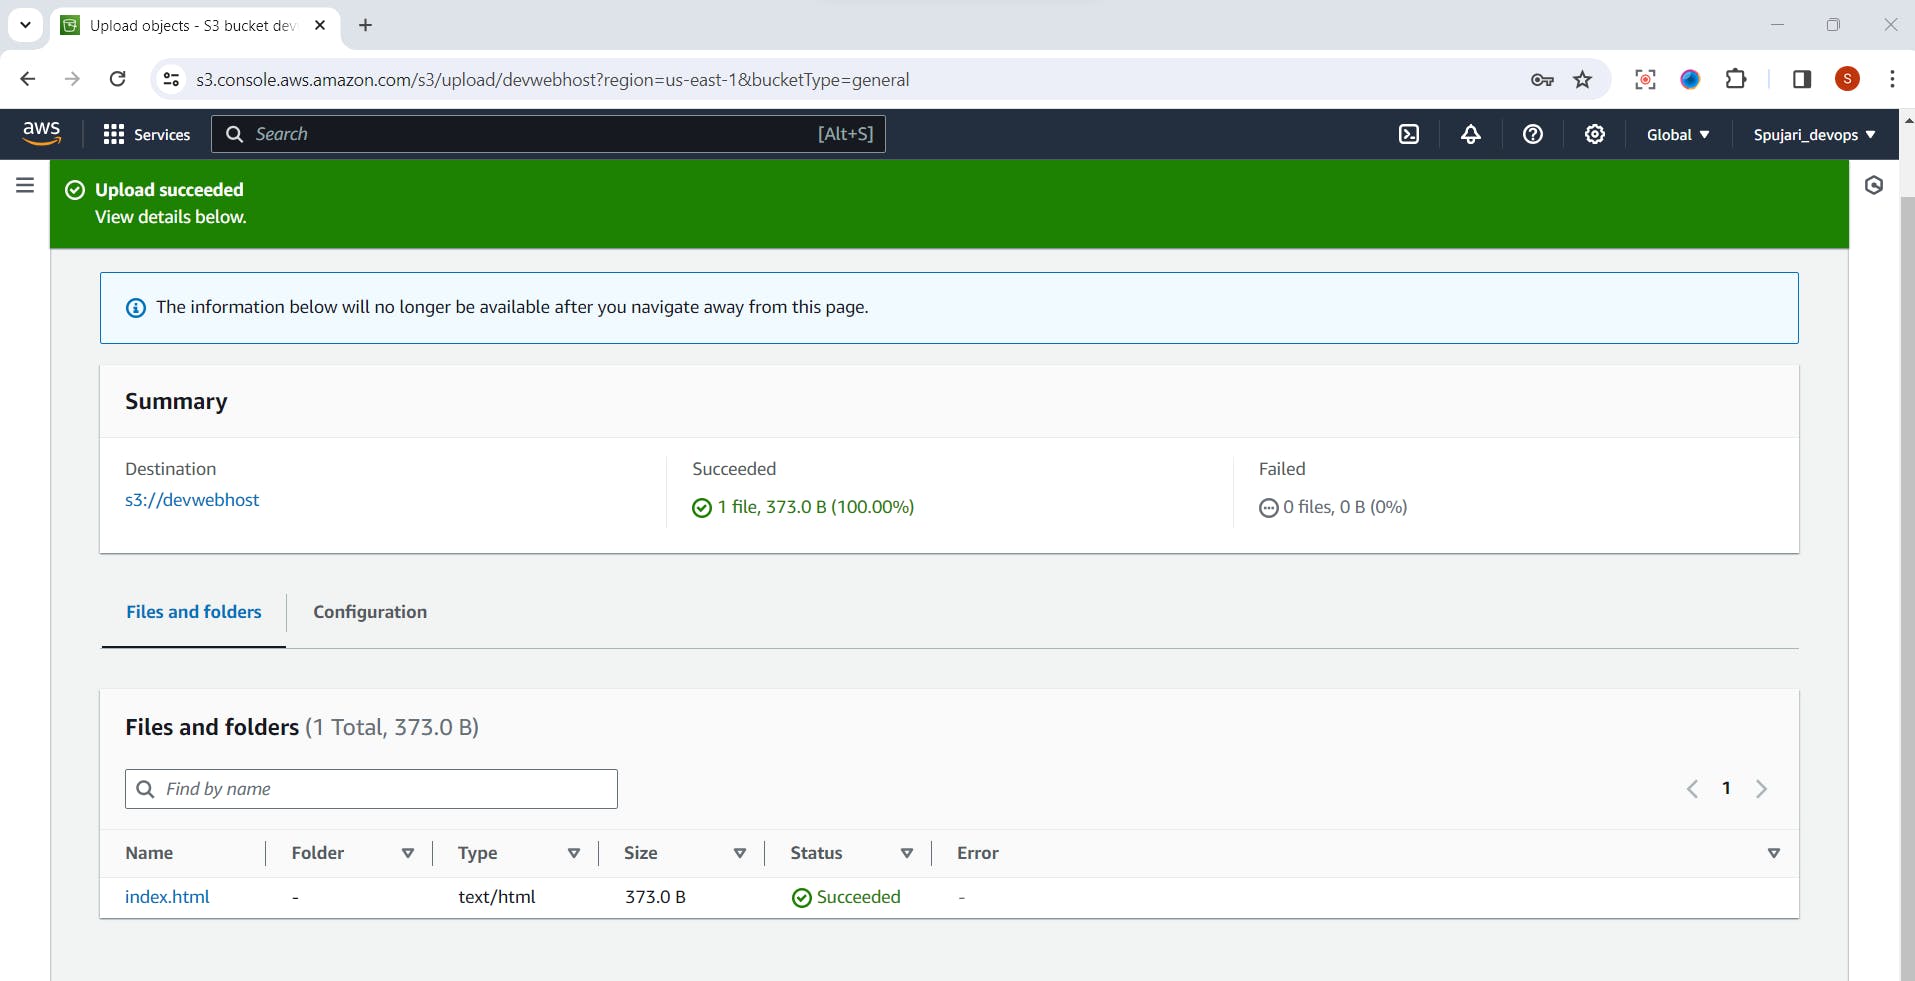
Step 4: Upload Files to the S3 Bucket
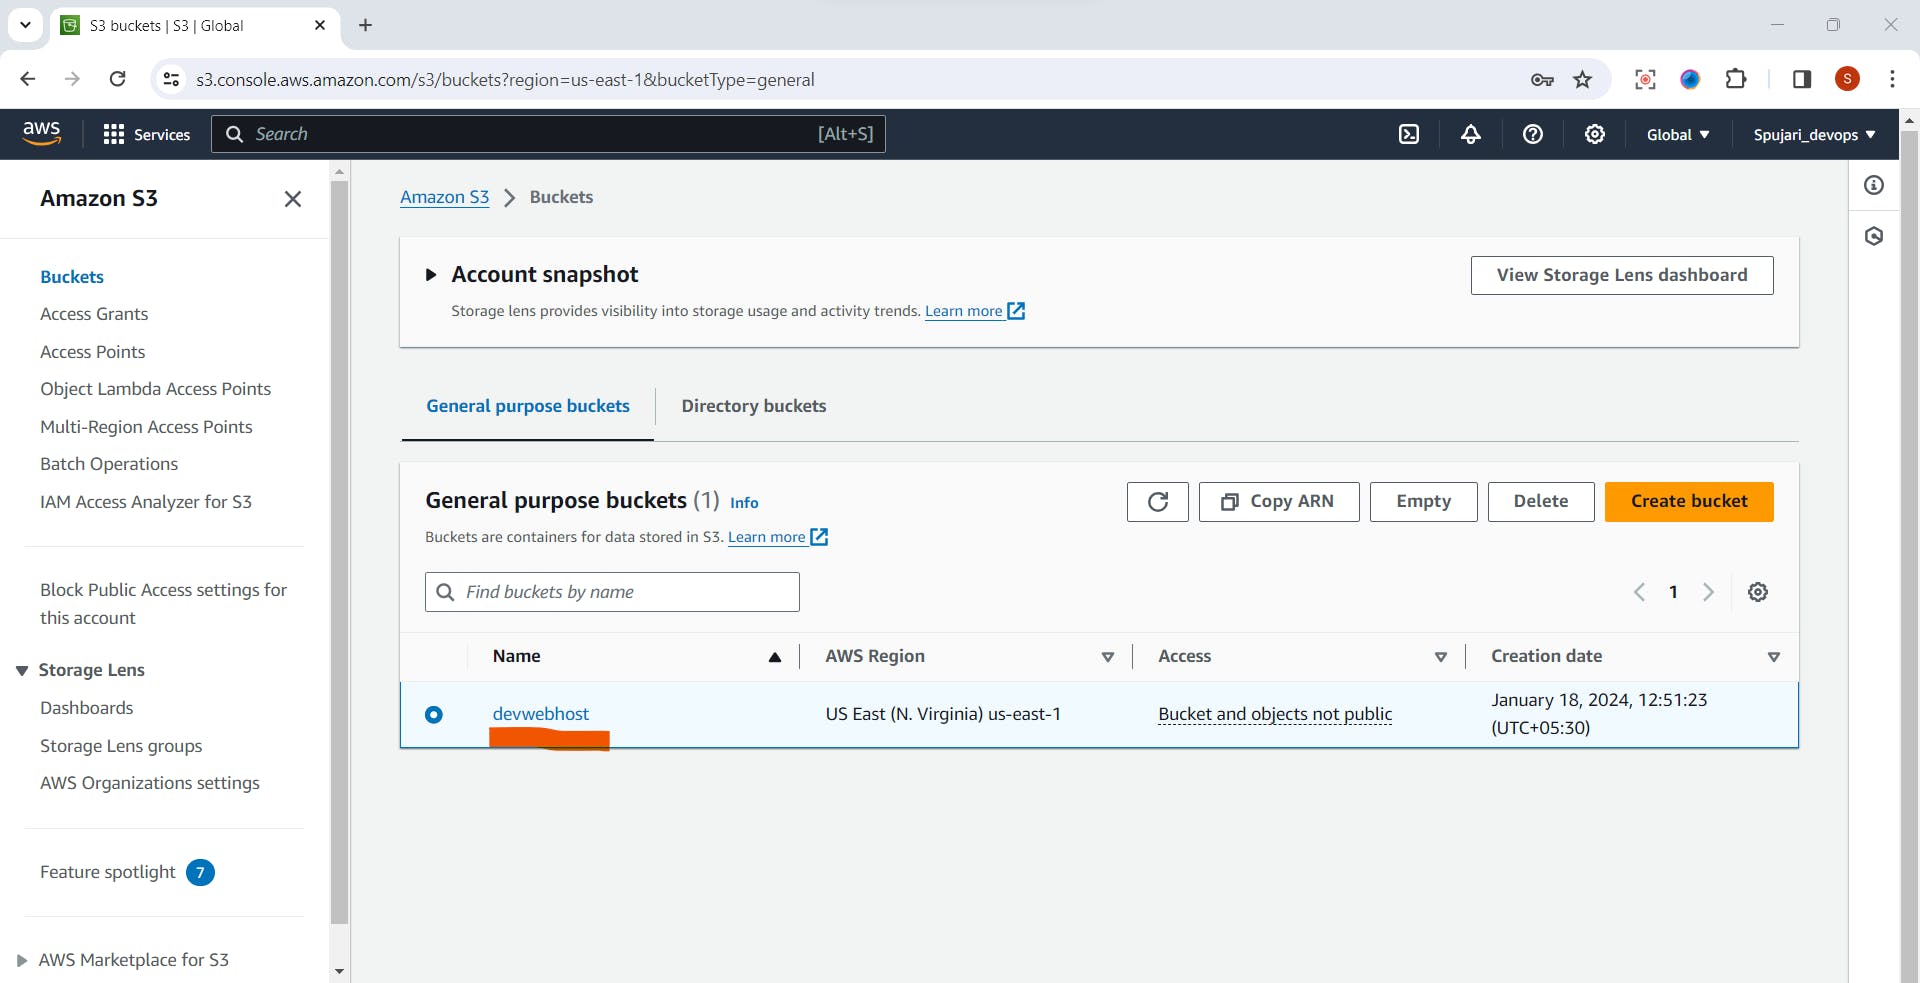
Open your newly created bucket in the S3 console.
Click on the "Upload" button.
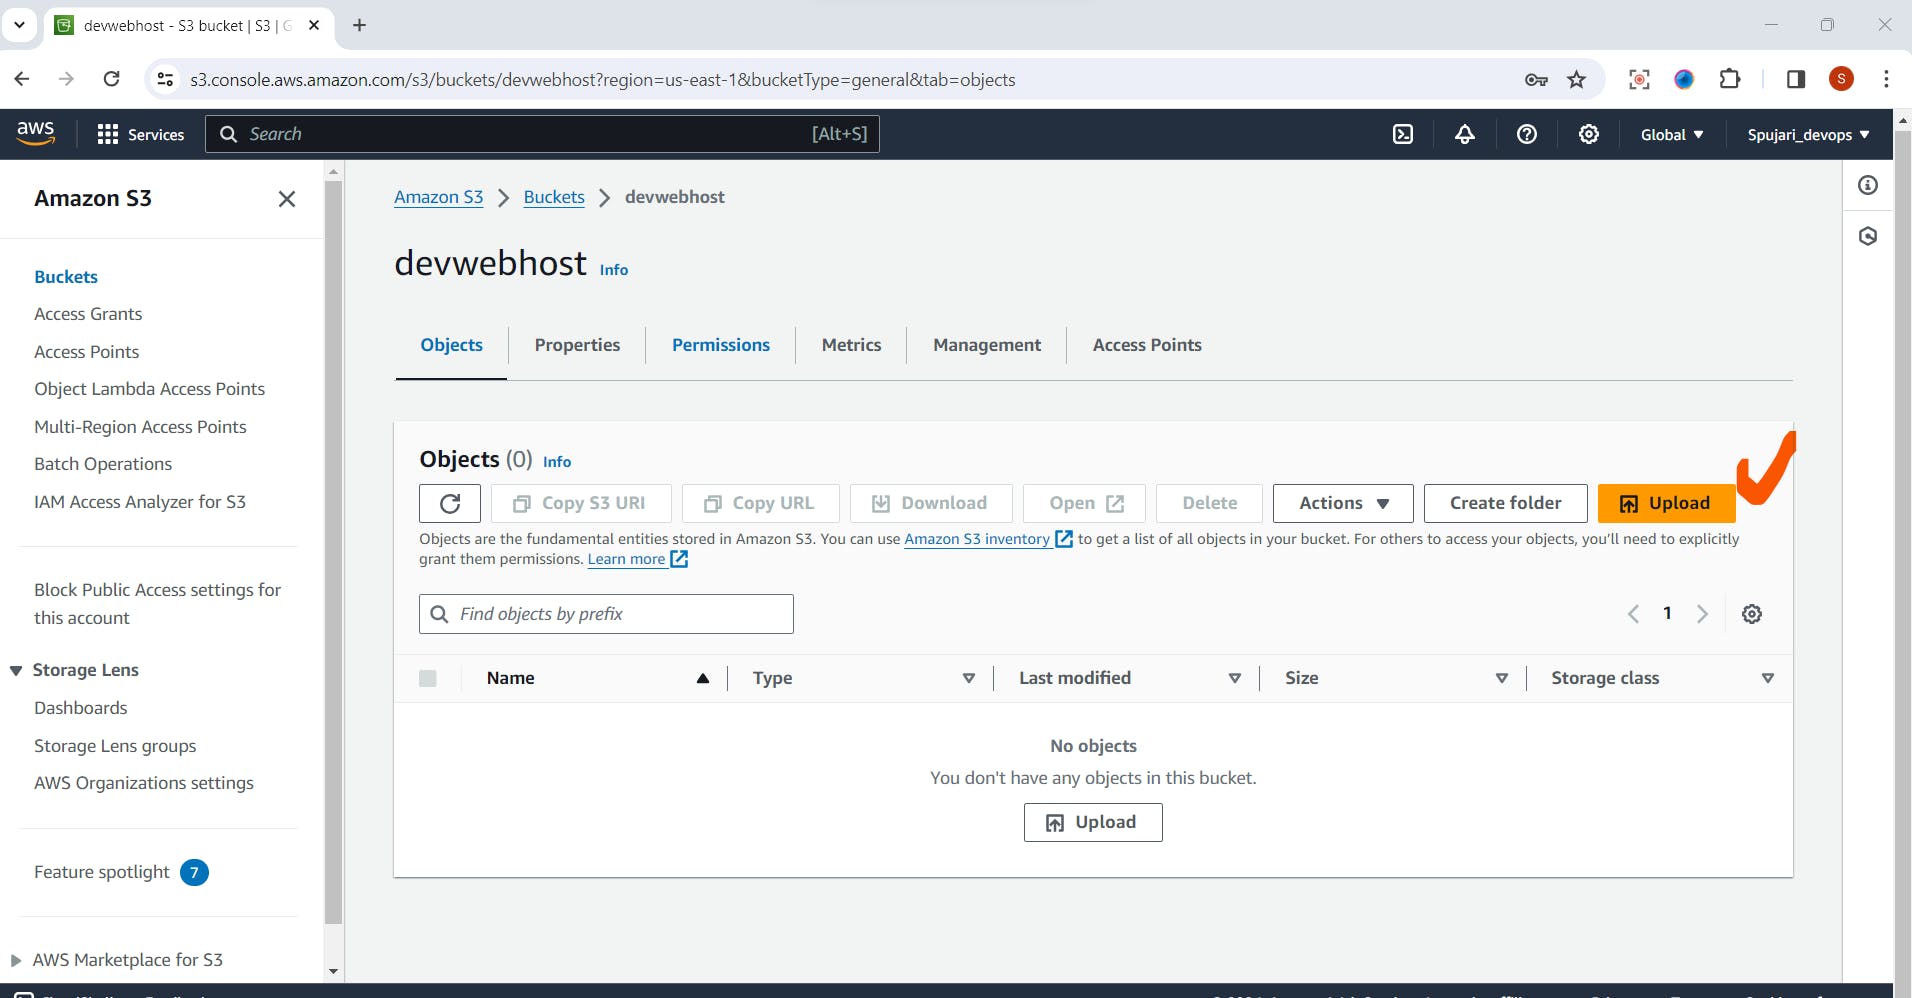
Click on the Add files or folders from your local machine.
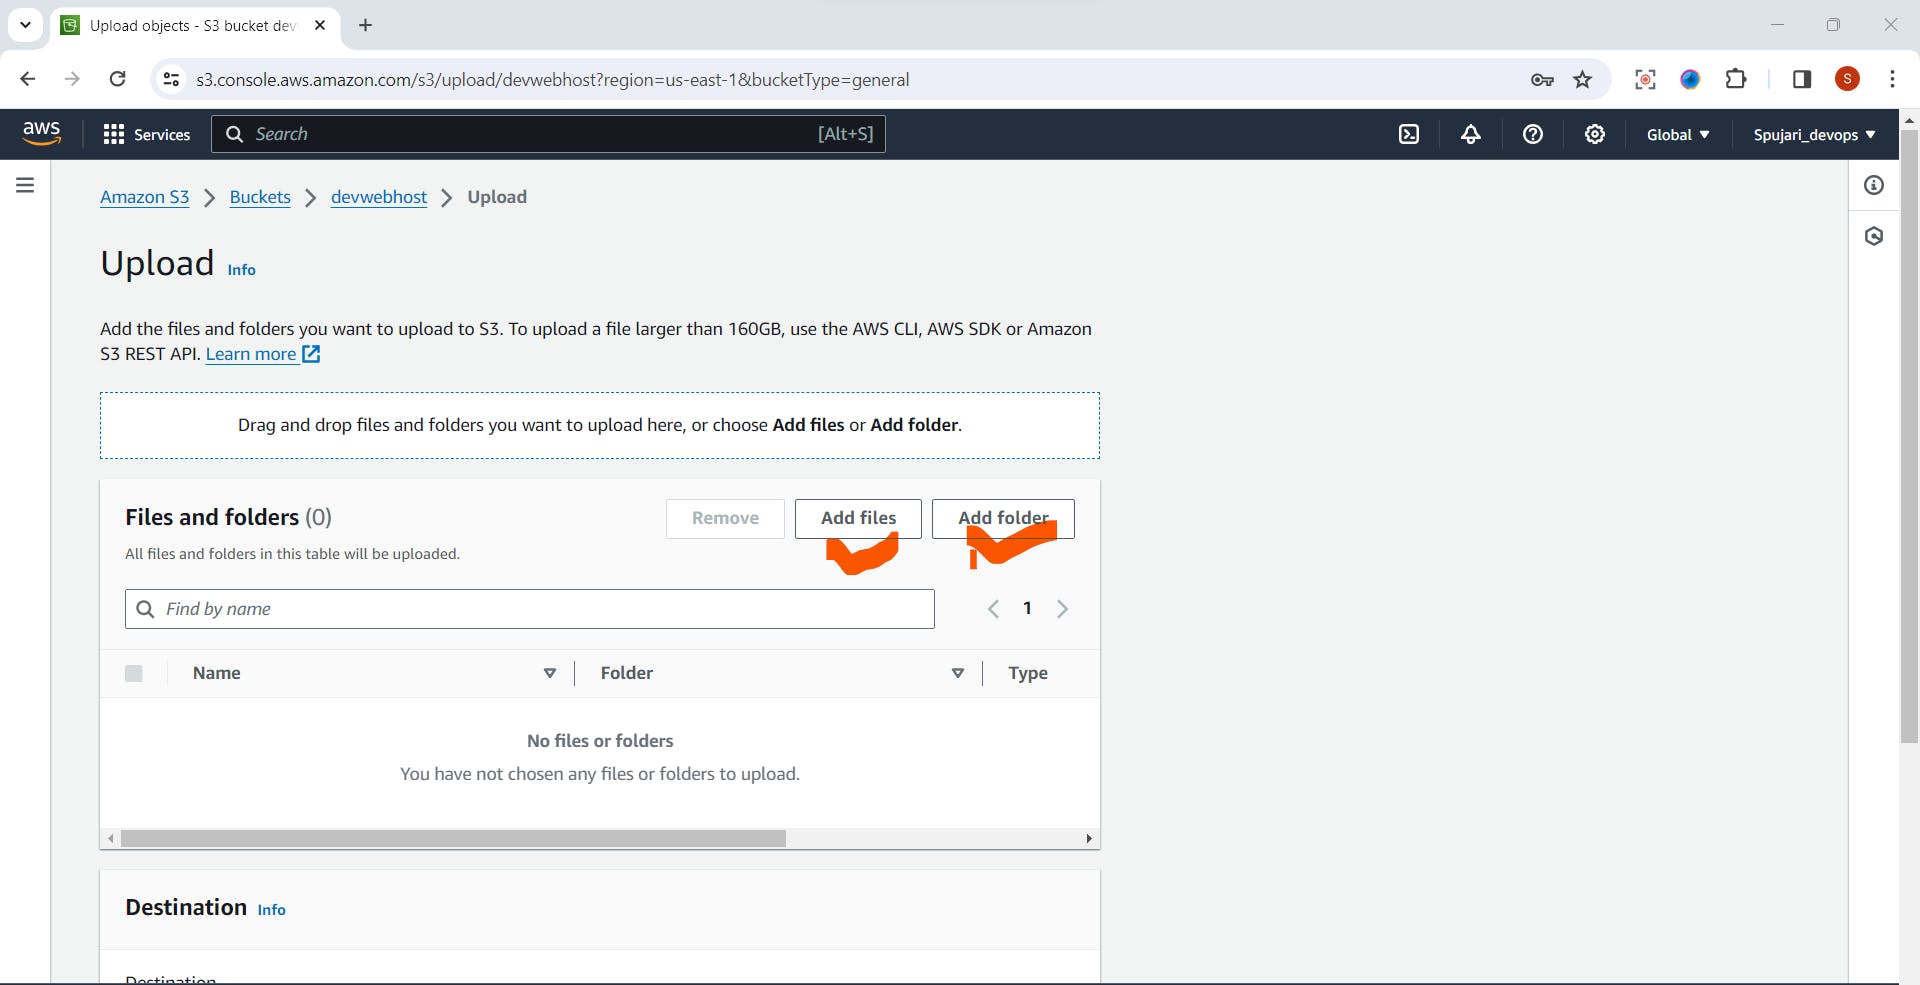
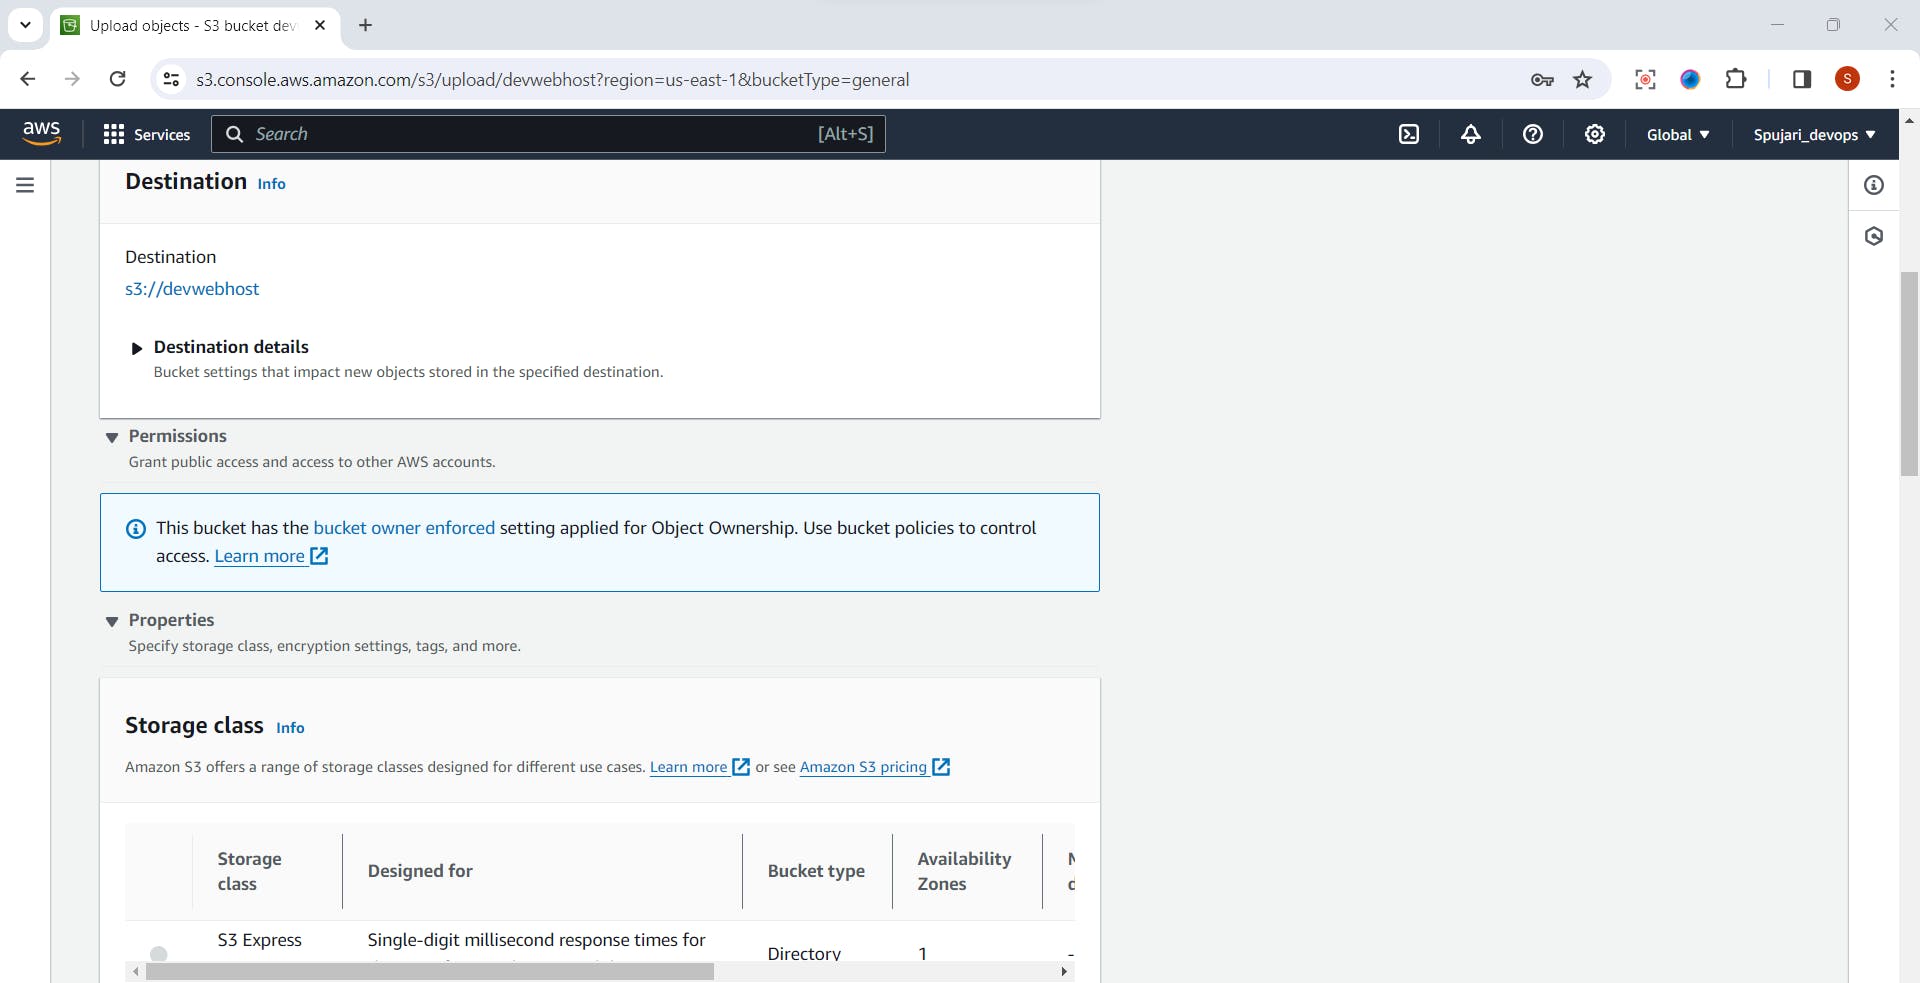
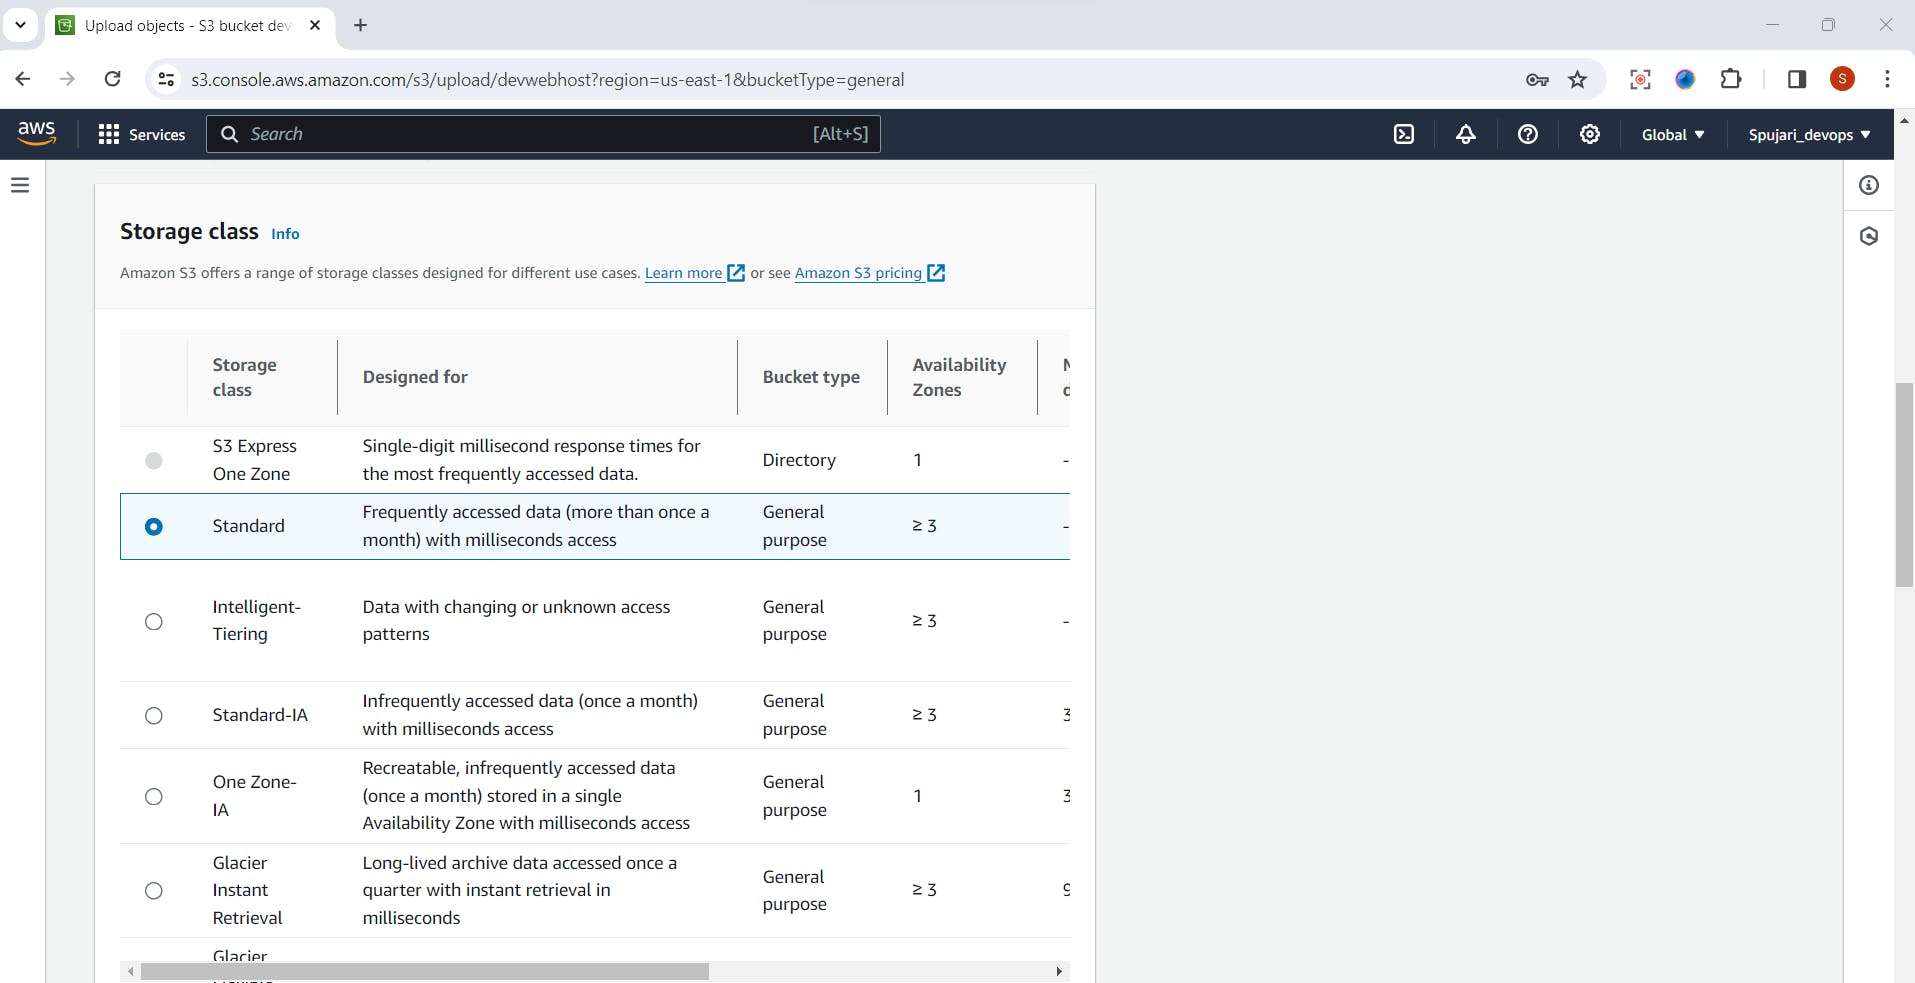
Configure settings like permissions and storage class if needed.
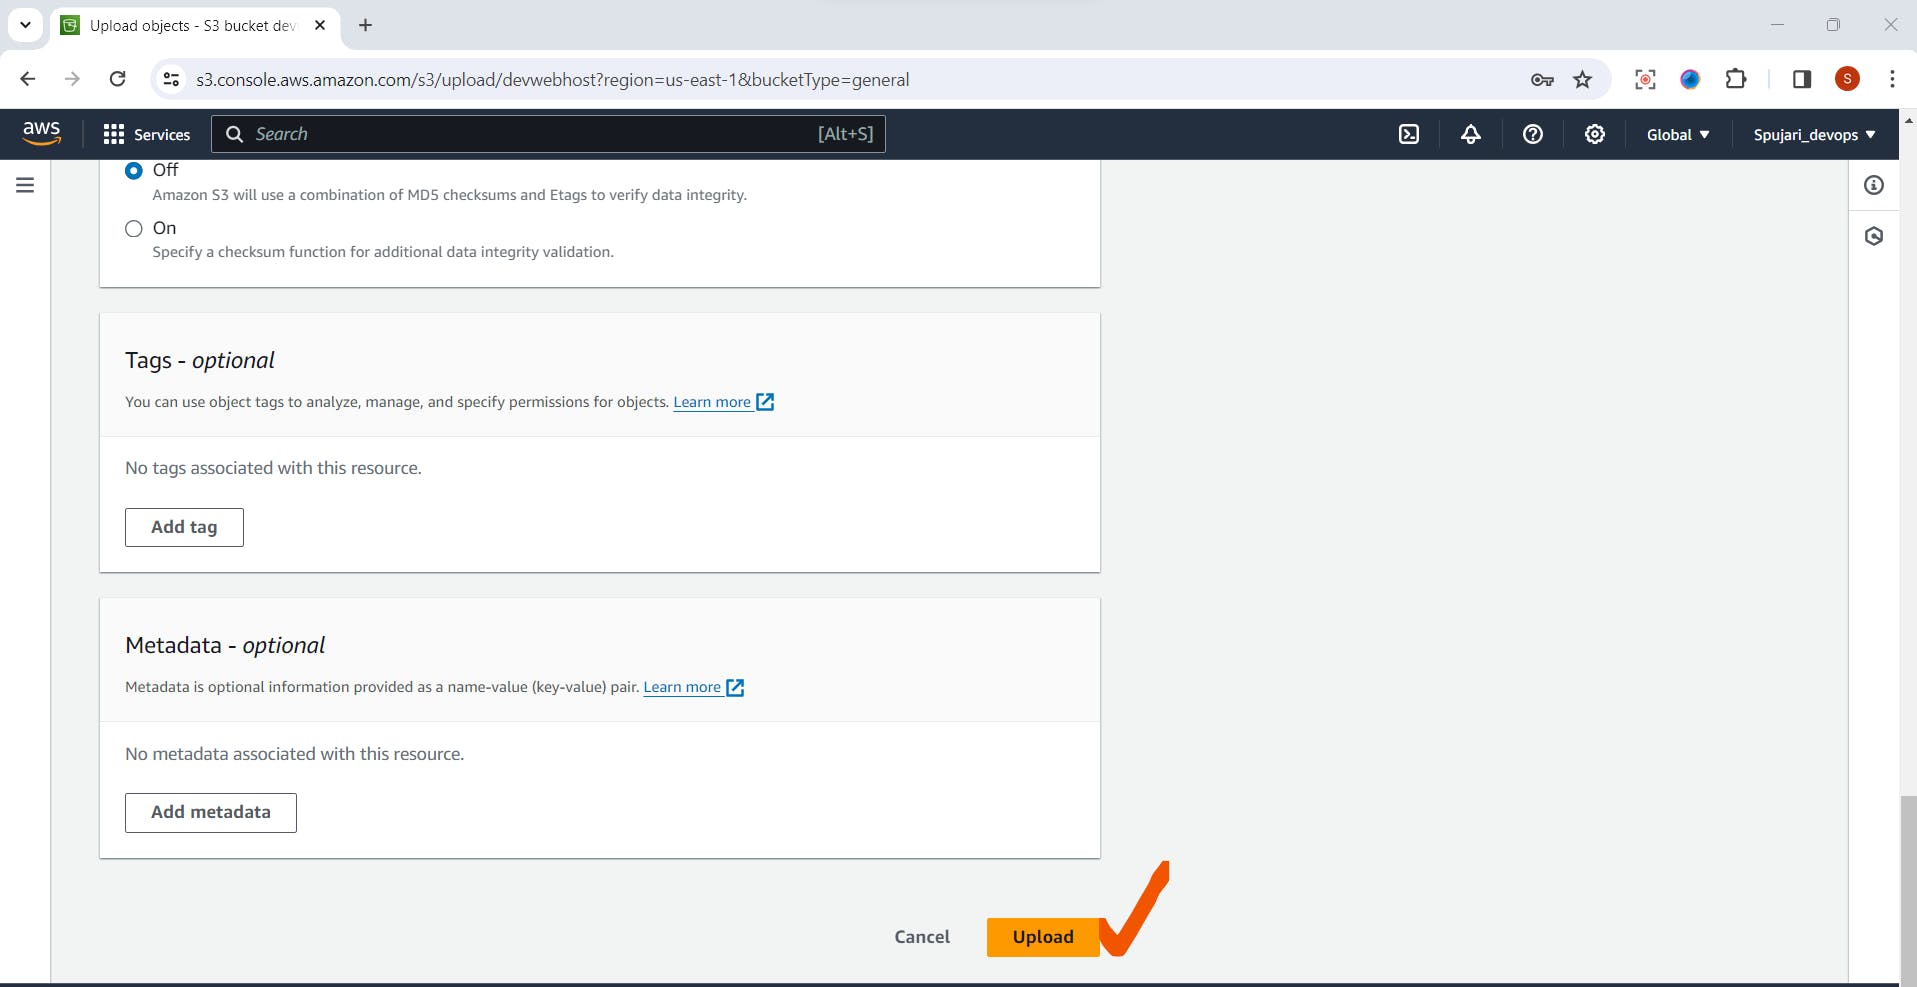
Click "Upload" to upload your files.
Step 5: Set Permissions (Optional)
Select the object (file or folder) for which you want to set permissions.
Click the "Permissions" tab.
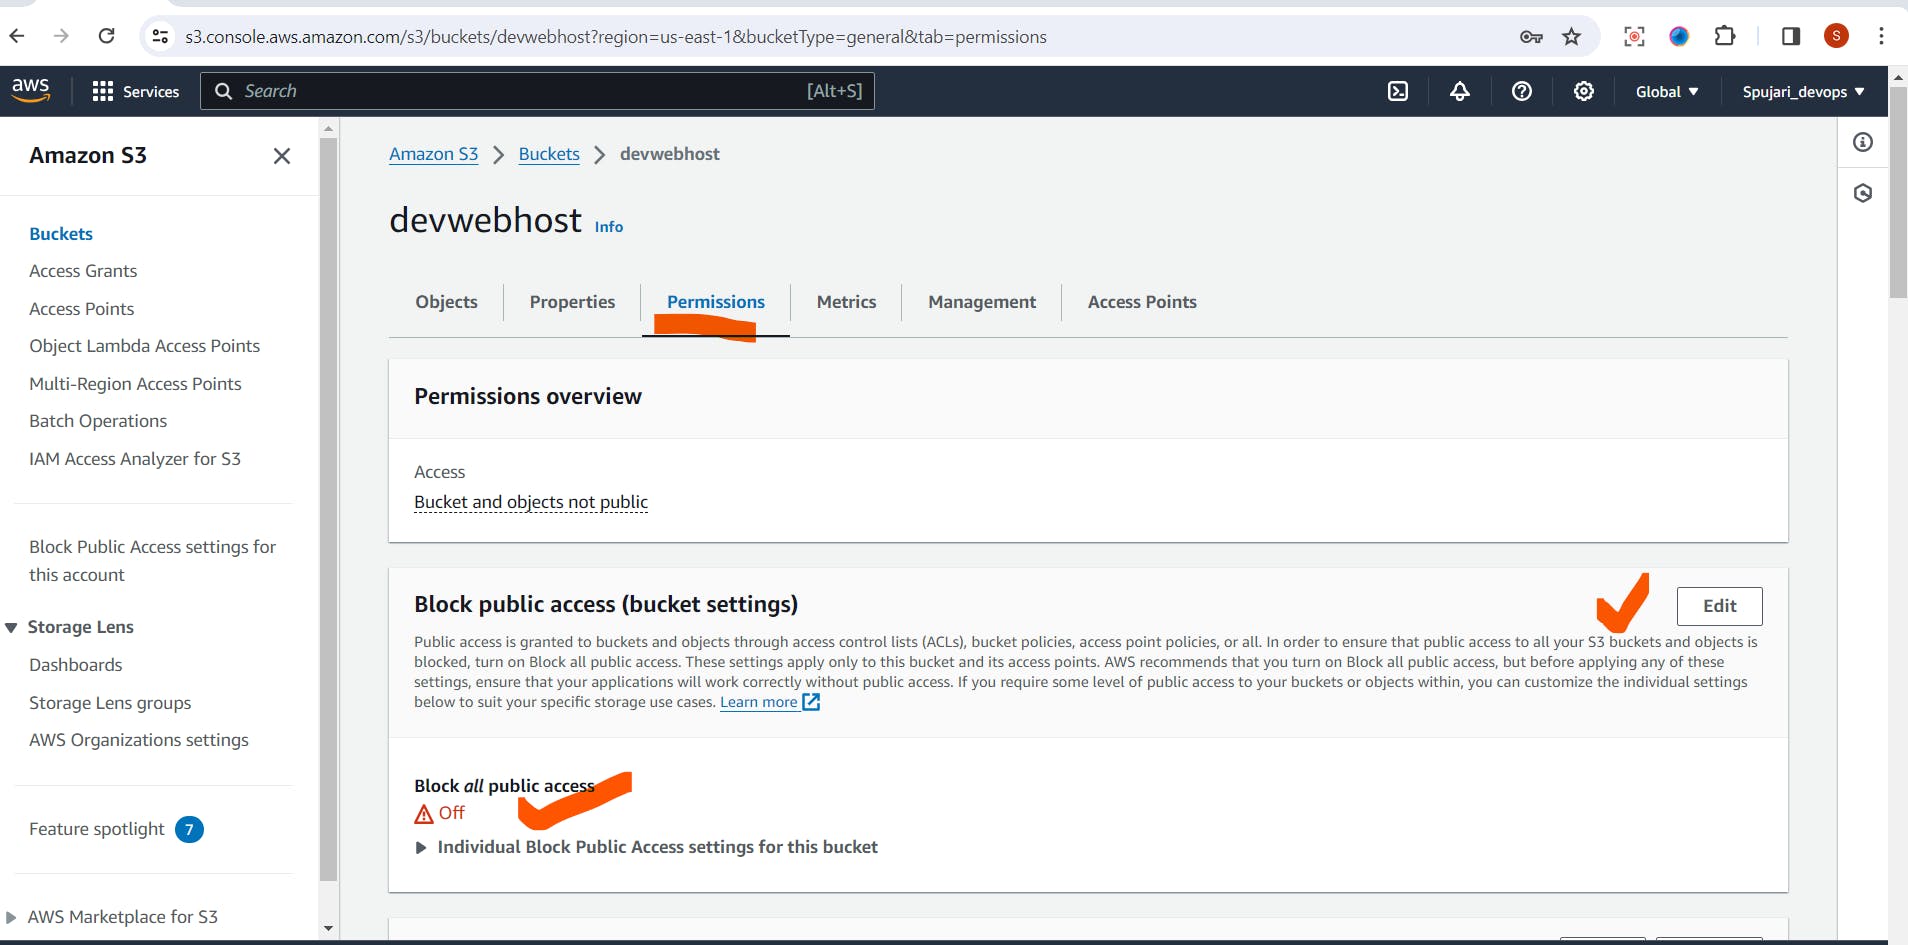
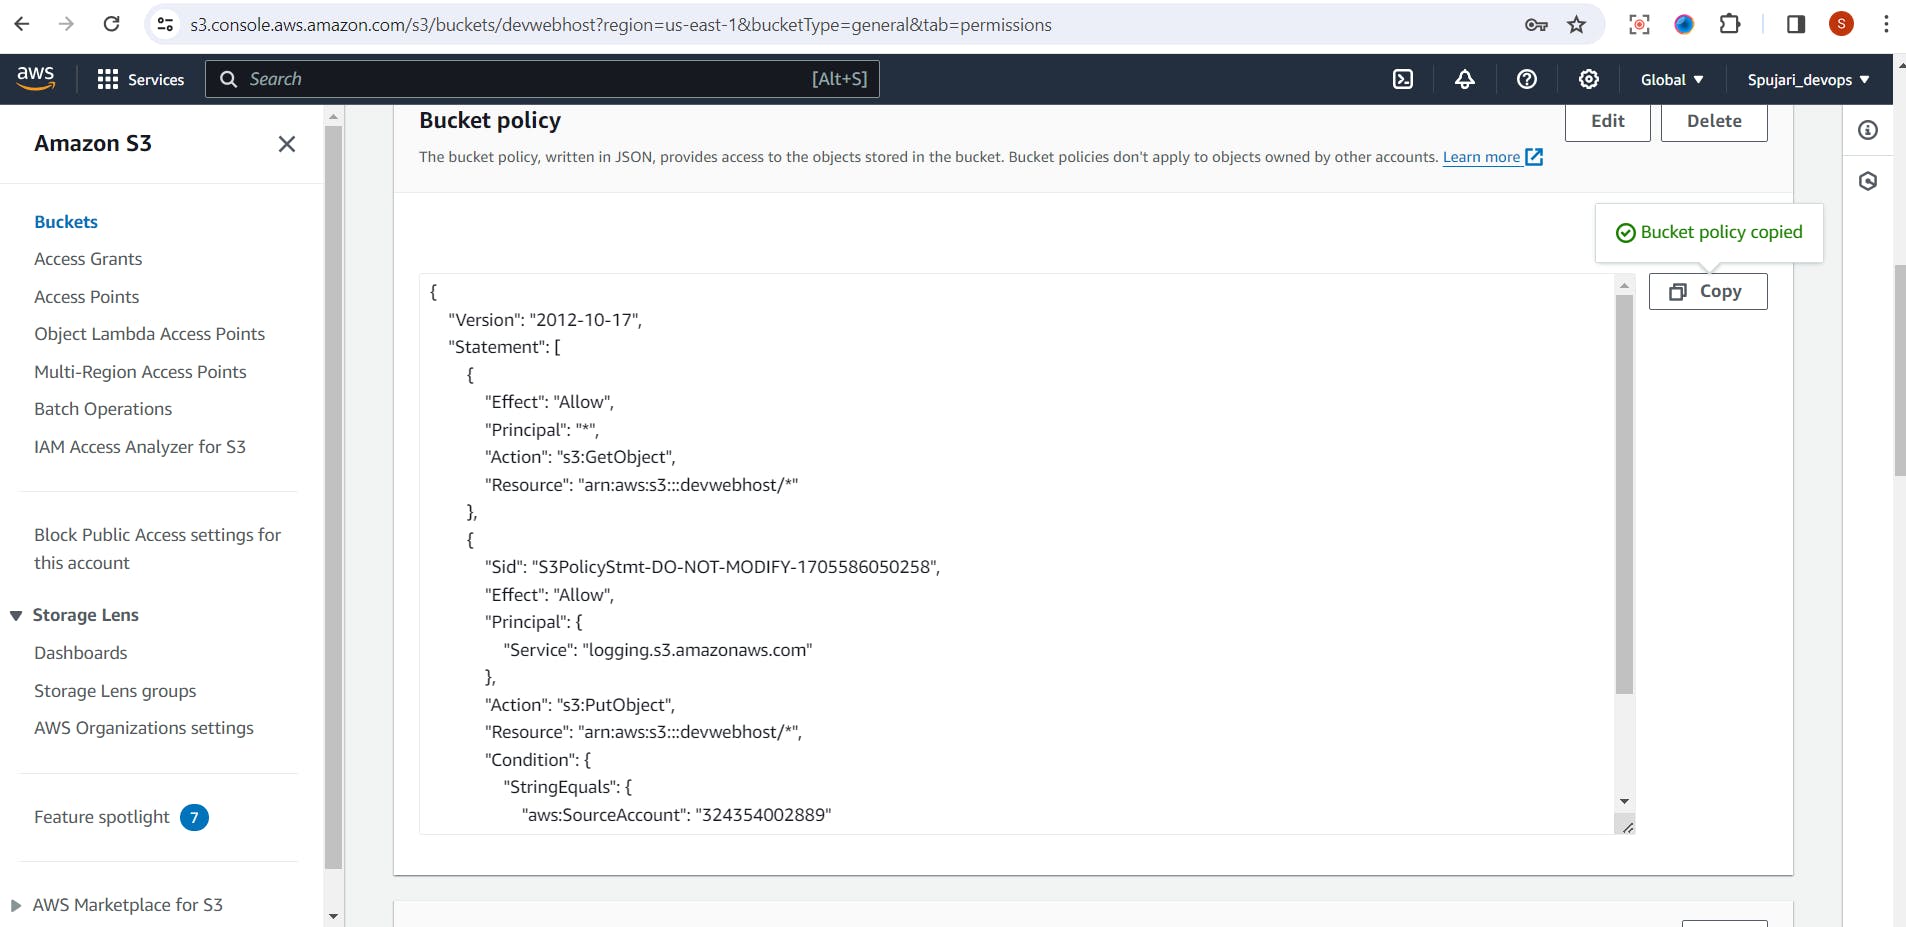
Adjust permissions by adding or modifying Access Control Lists (ACLs) or bucket policies.
Step 6: Enable Versioning (Optional)
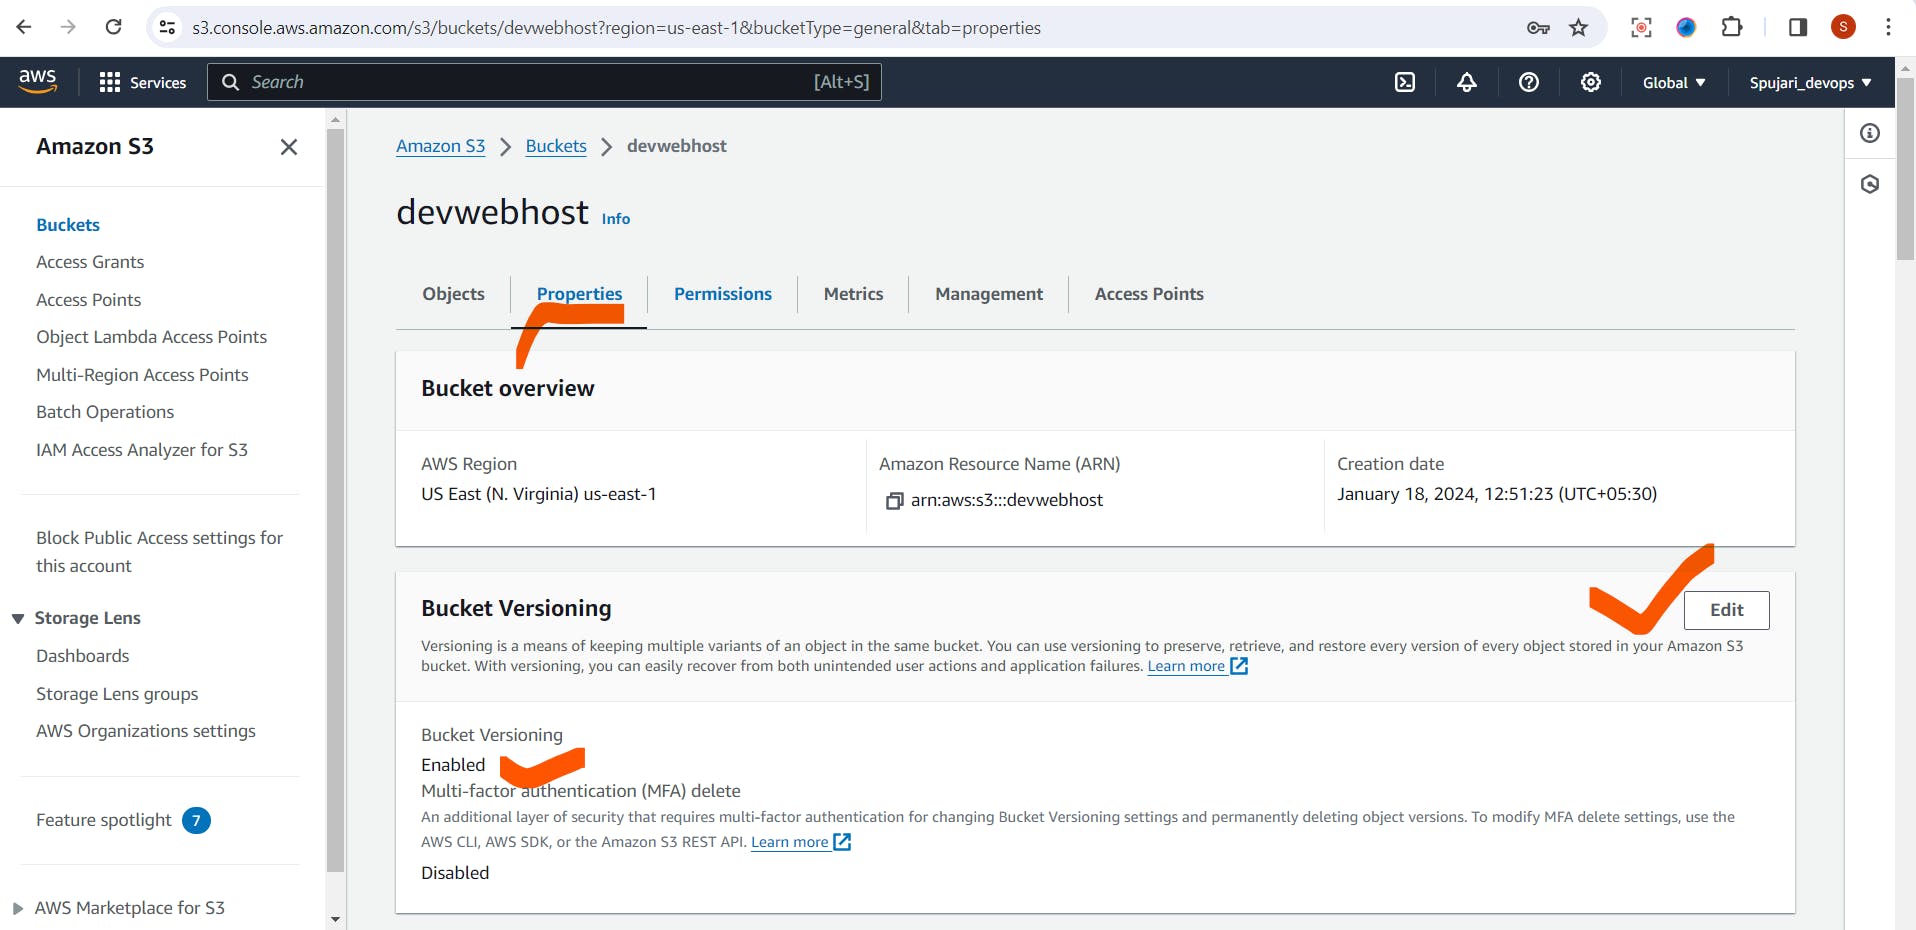
In the bucket properties, navigate to the "Versioning" tab.
Turn on versioning to keep multiple versions of an object.
This helps in tracking changes and recovering from accidental deletions.
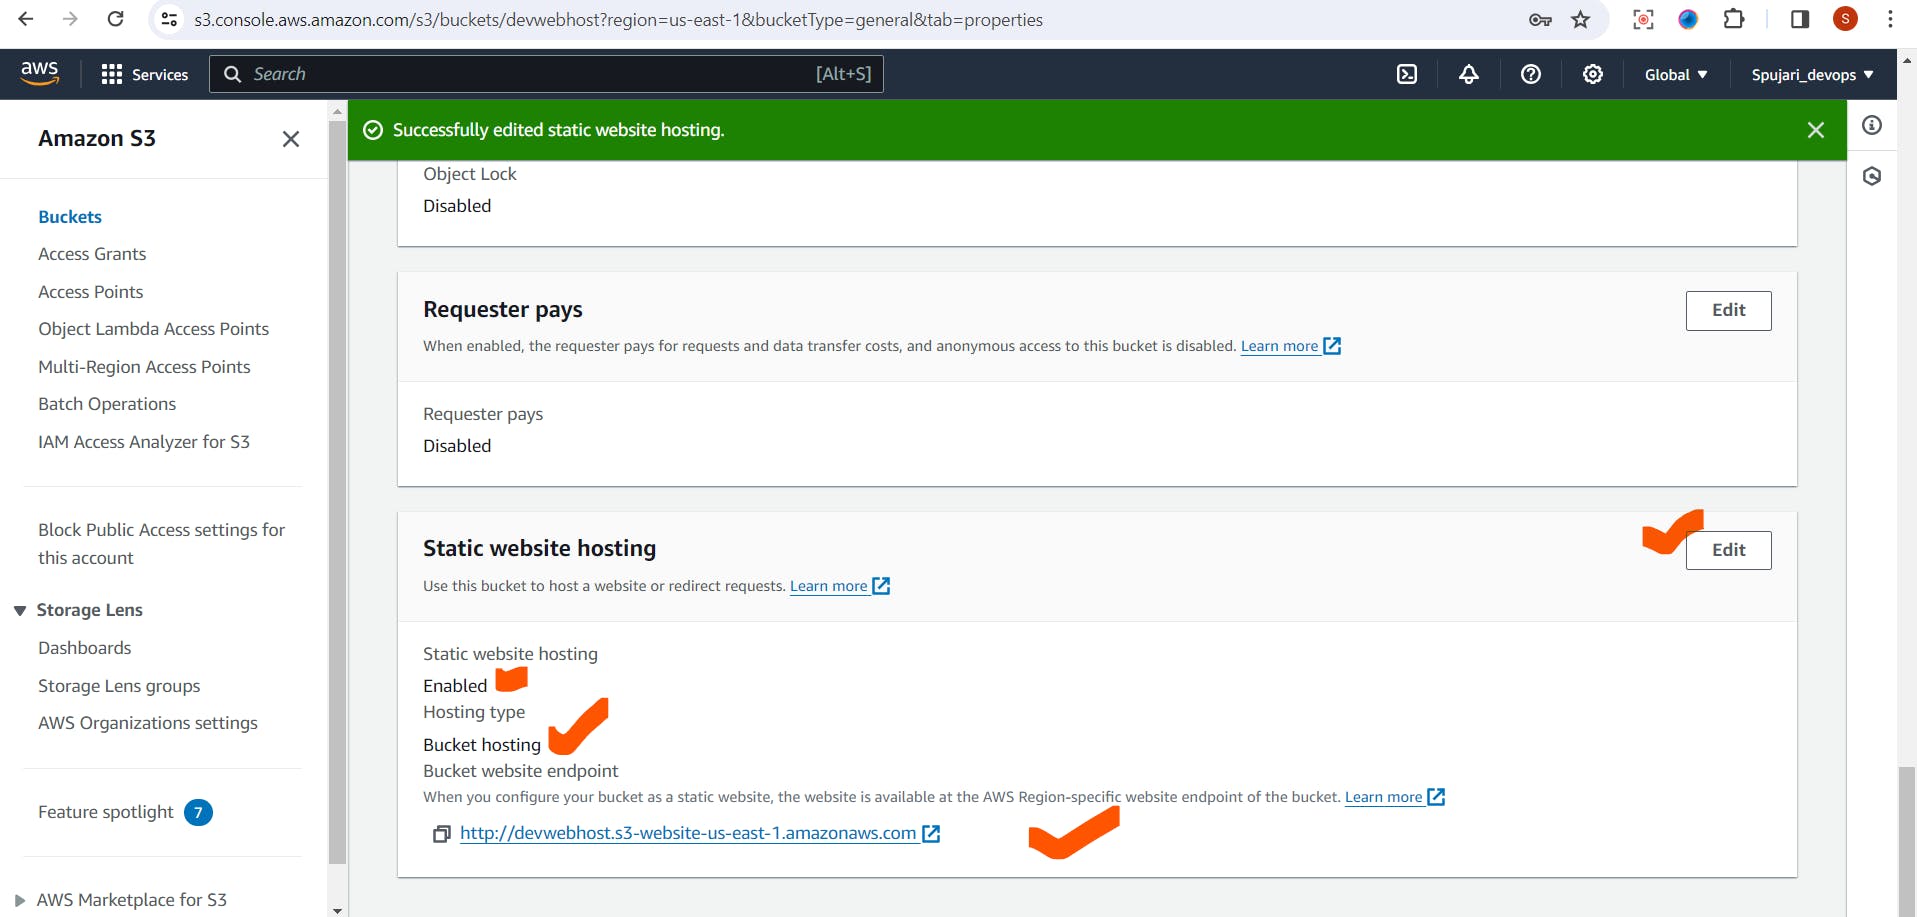
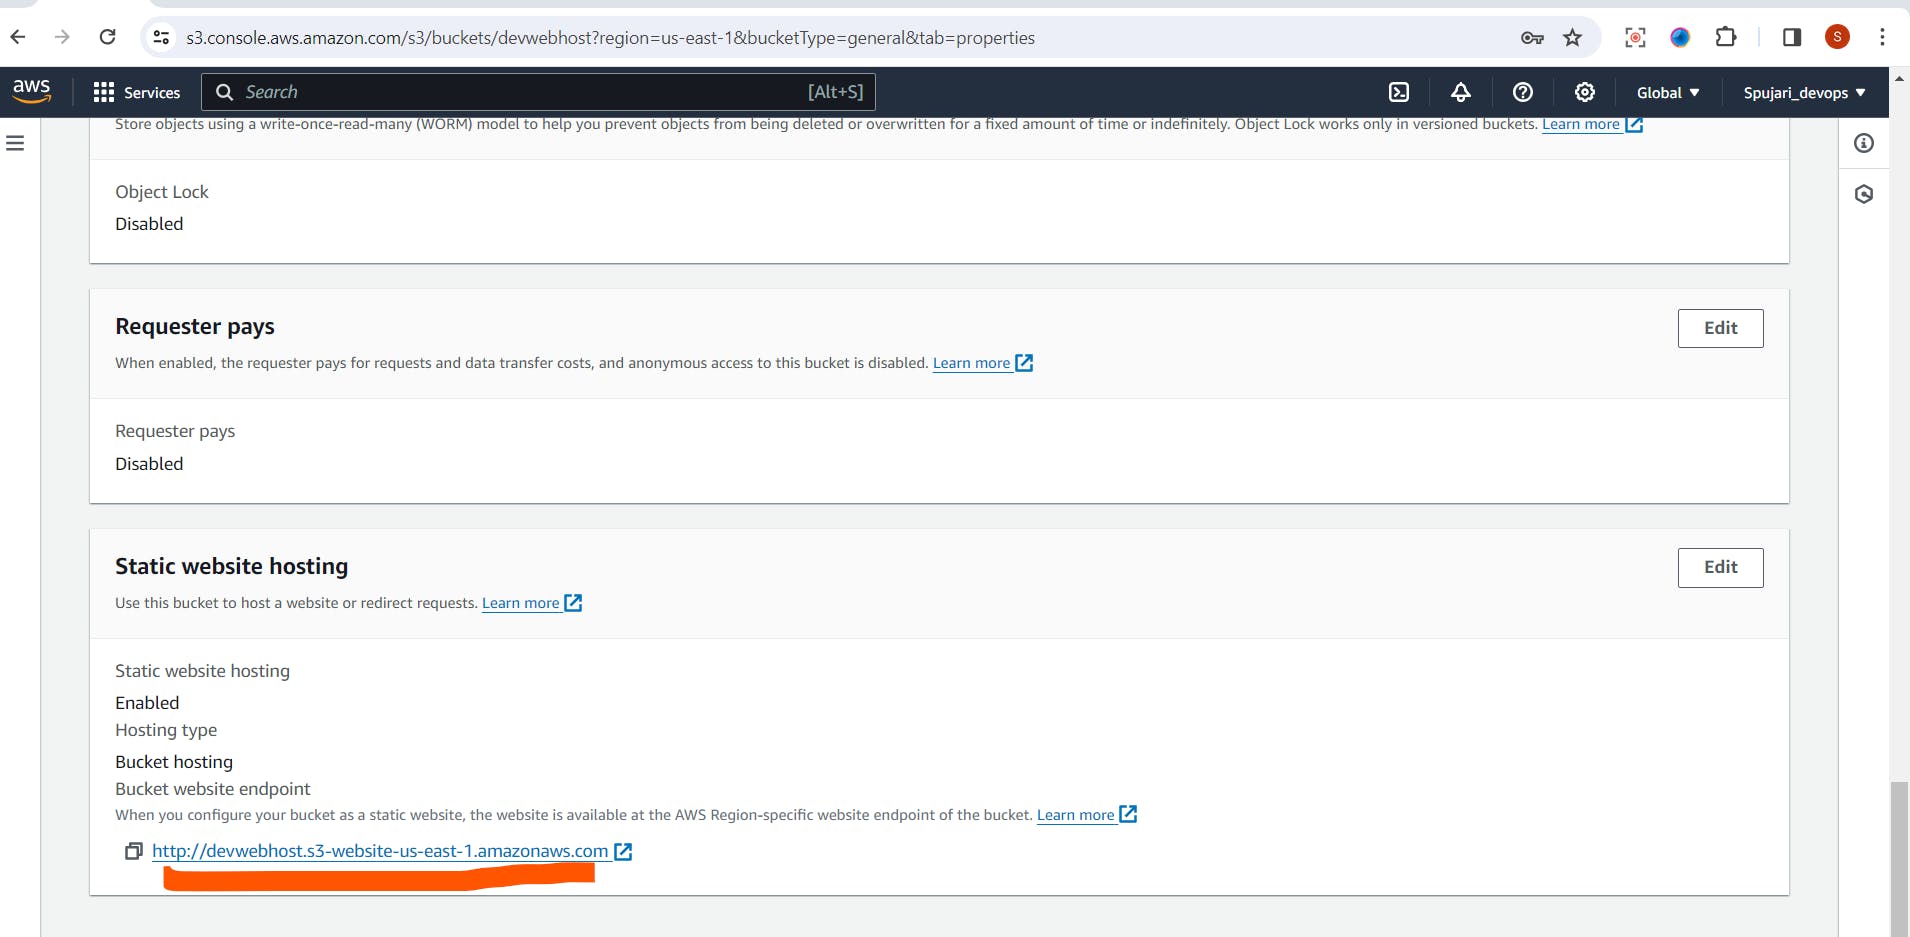
Step 7: Configure Static Website Hosting (Optional)
In the bucket properties, navigate to the "Static website hosting" tab.
Enable static website hosting by providing index and error documents.
This is useful for hosting a simple static website directly from your S3 bucket.
Step 8: Enable Logging (Optional)
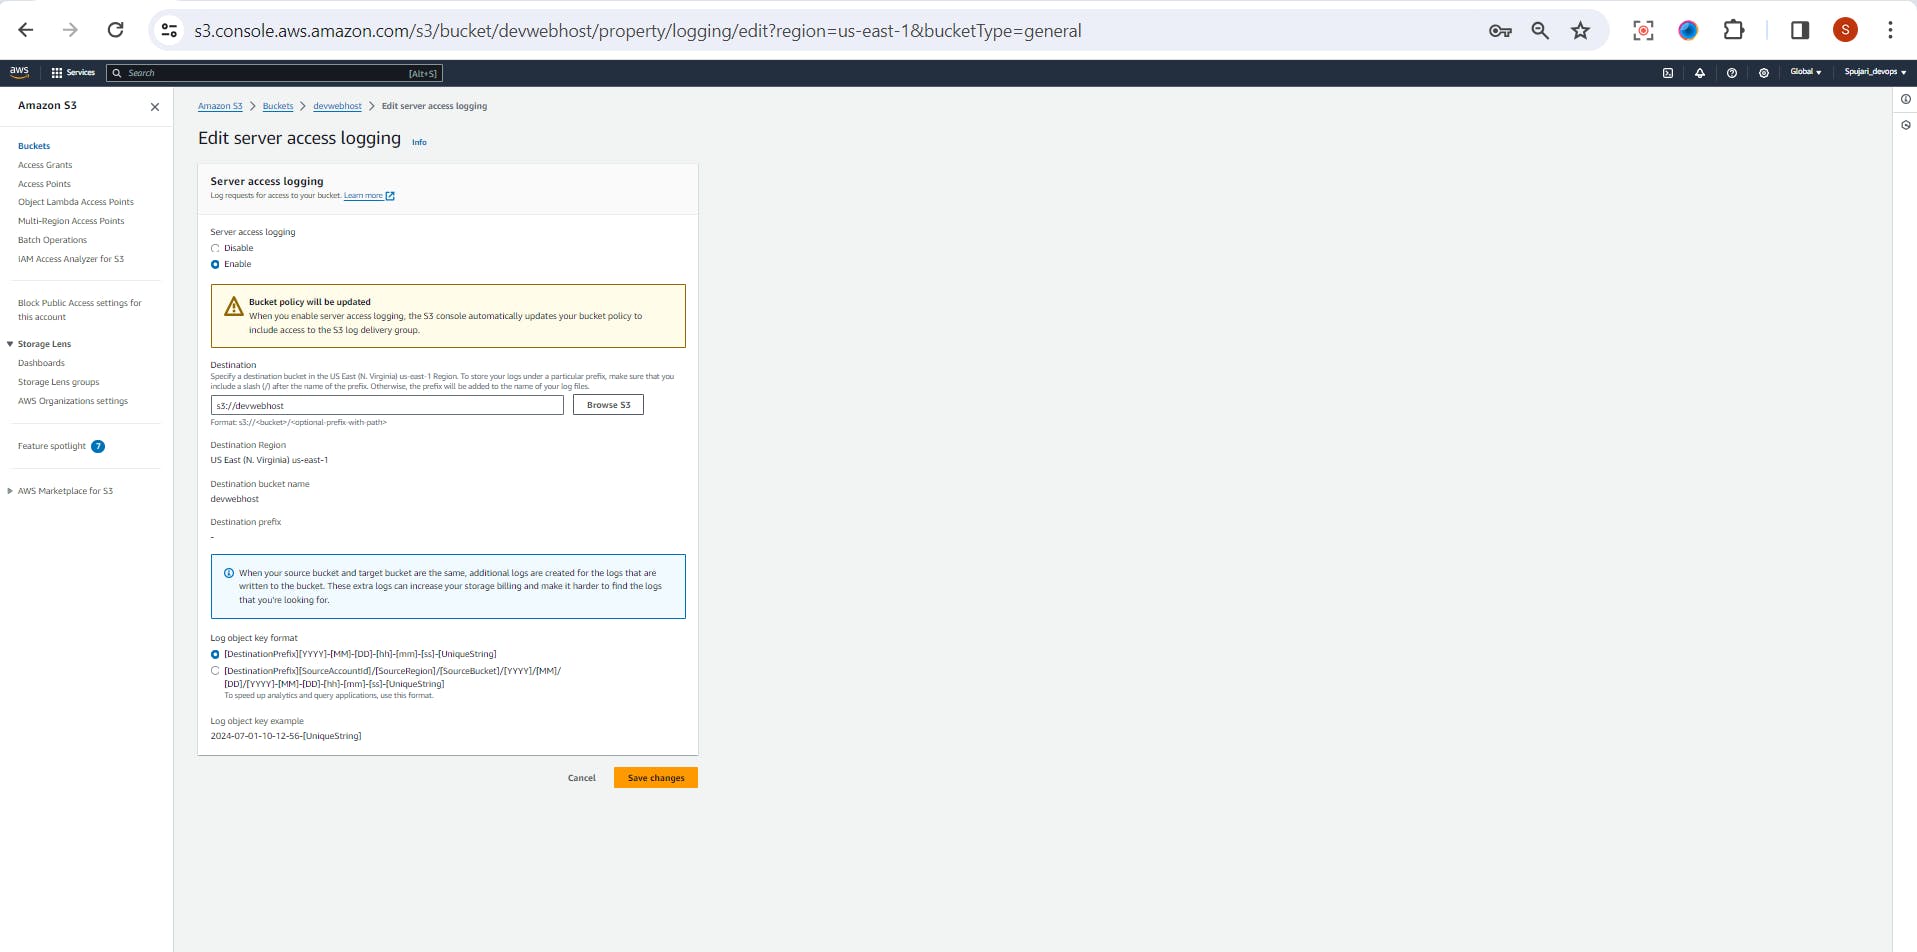
In the bucket properties, navigate to the "Server access logging" tab.
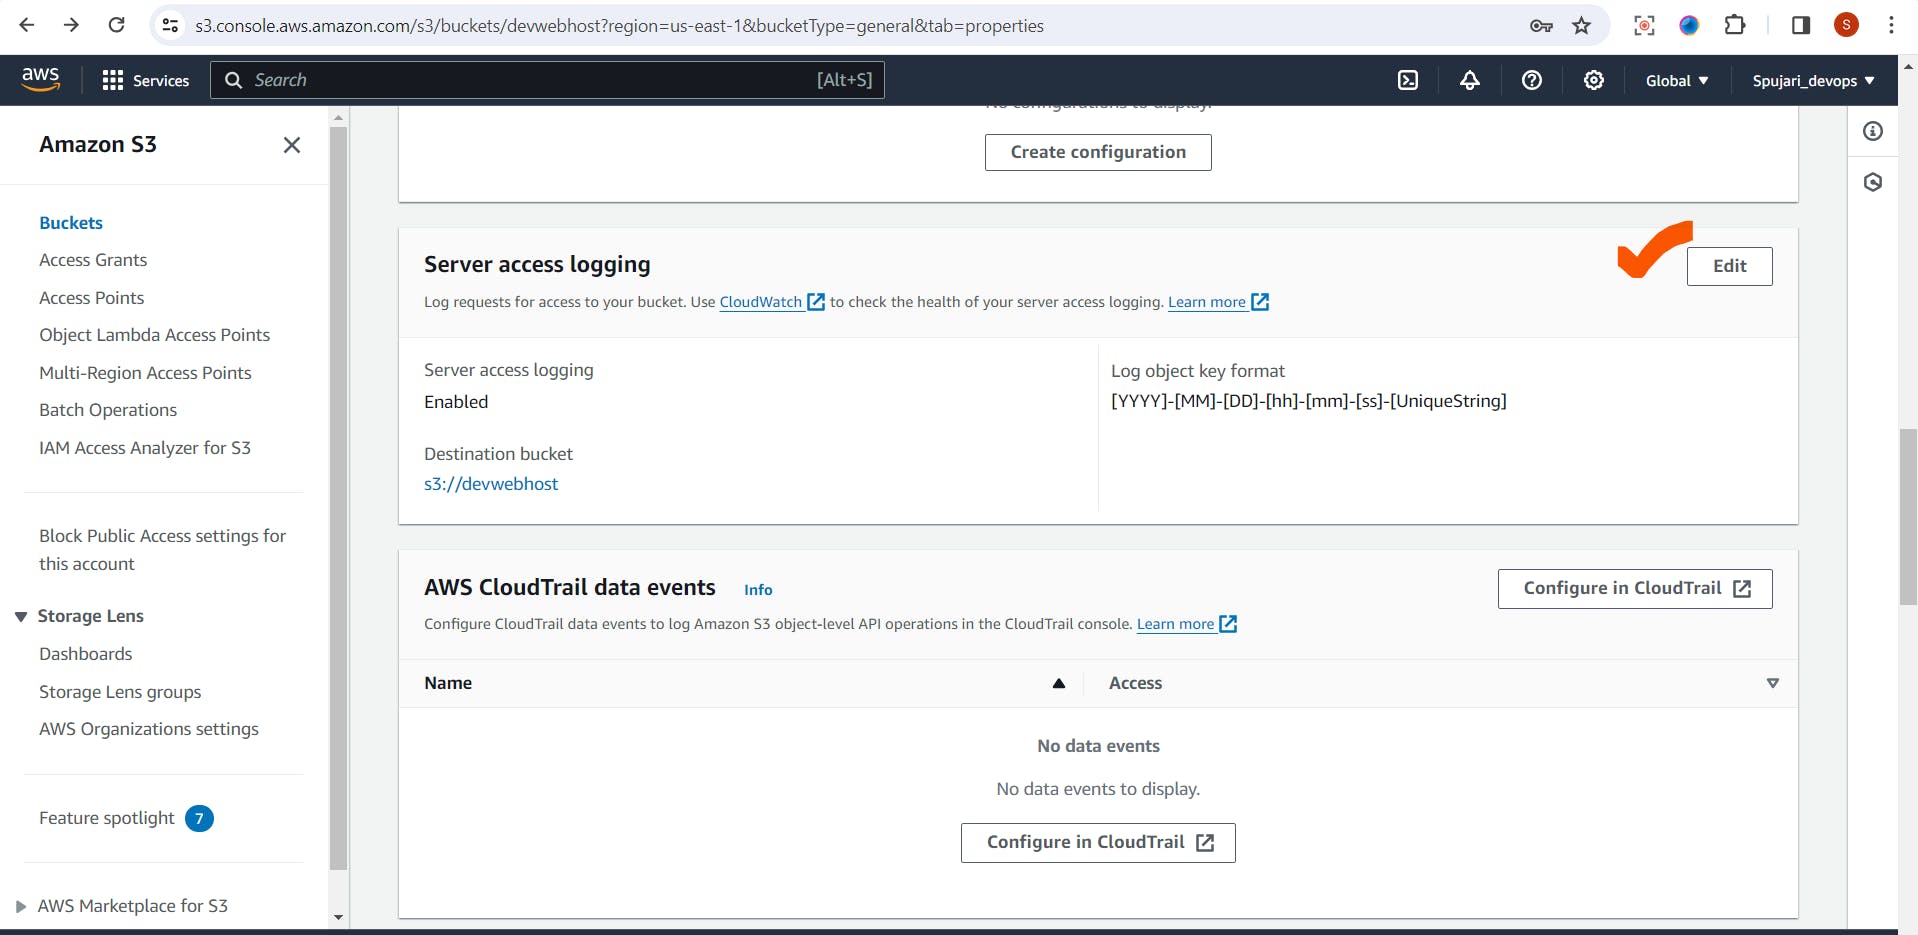
Enable logging and specify the target bucket to store access logs.
This helps in monitoring and analyzing access to your S3 bucket.
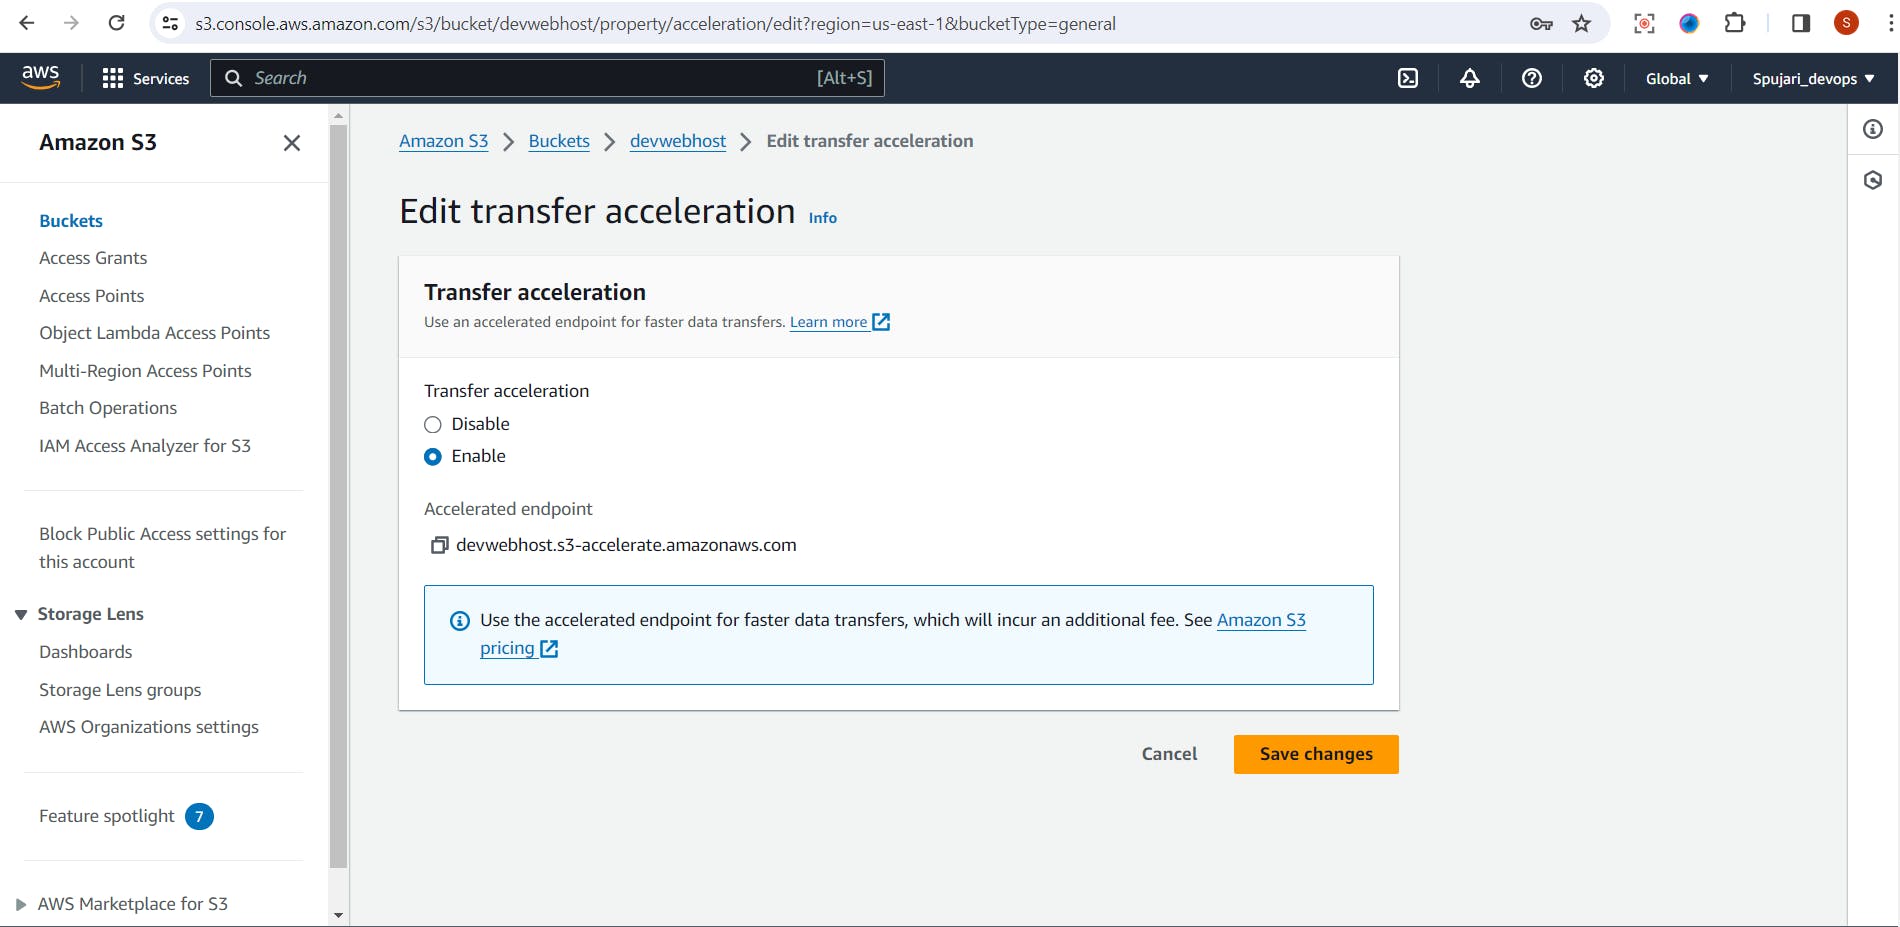
Step 9: Set Up Transfer Acceleration (Optional)
In the bucket properties, navigate to the "Transfer acceleration" tab.
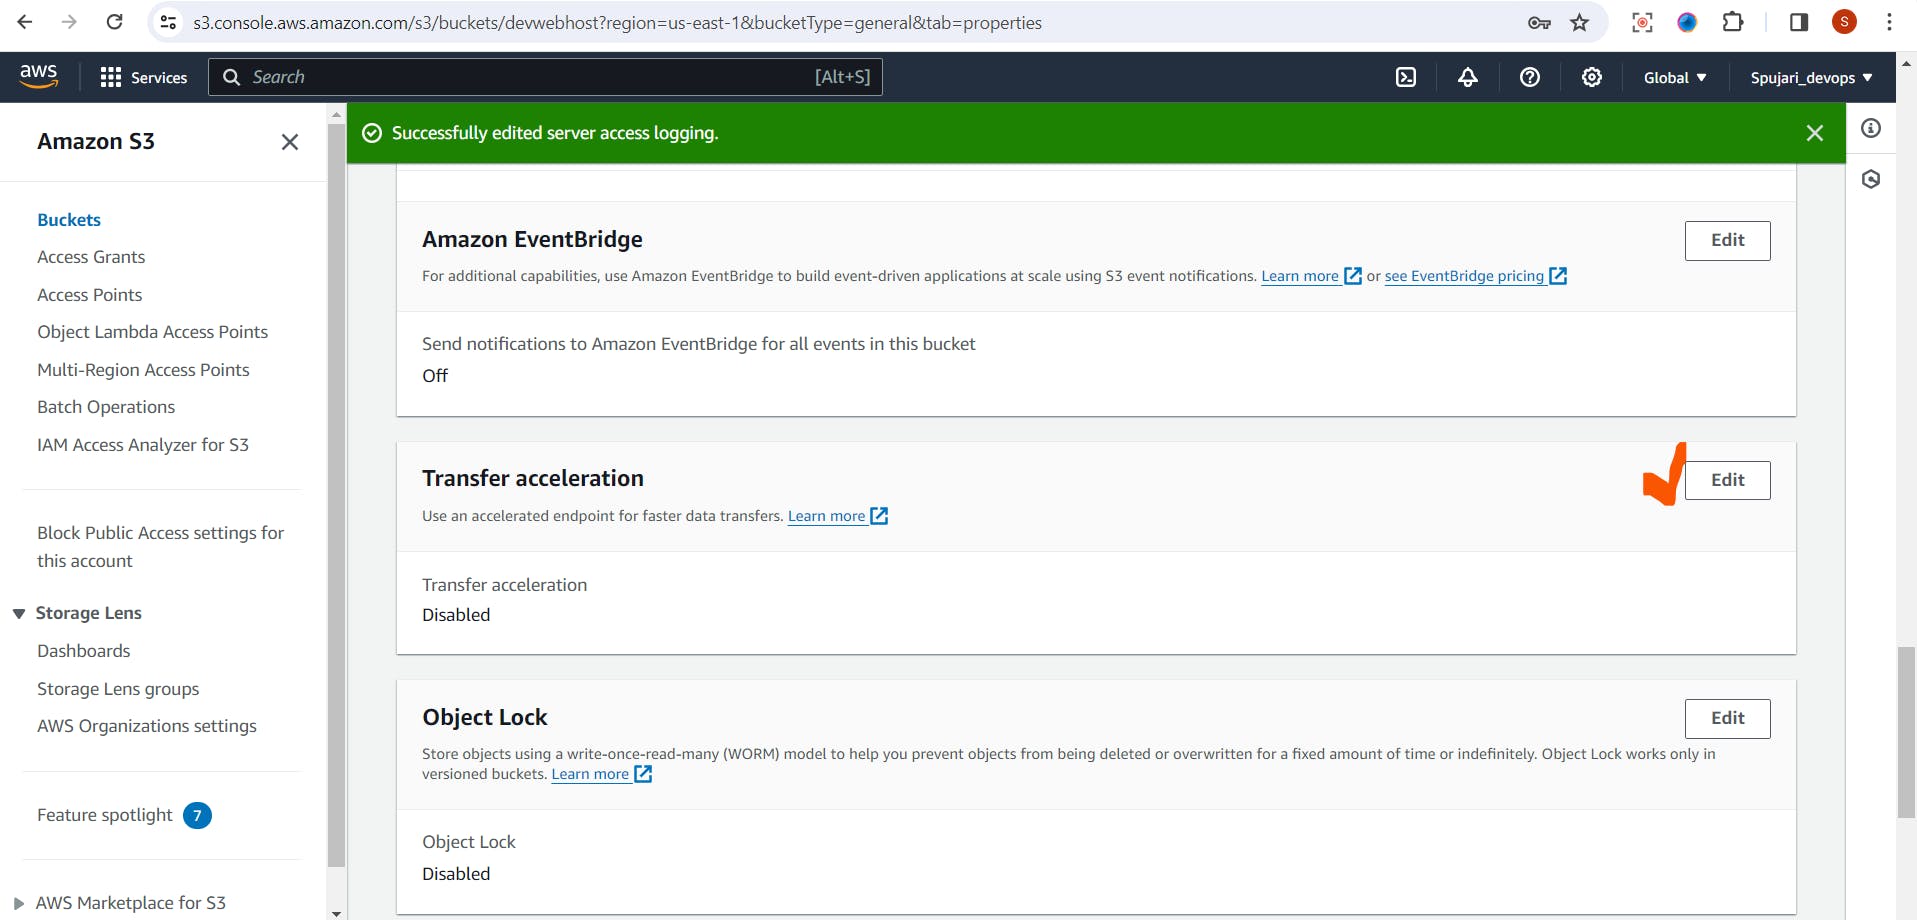
Enable transfer acceleration to accelerate uploading and downloading of objects using the CloudFront global network.
Step 10: Clean Up (When Necessary)
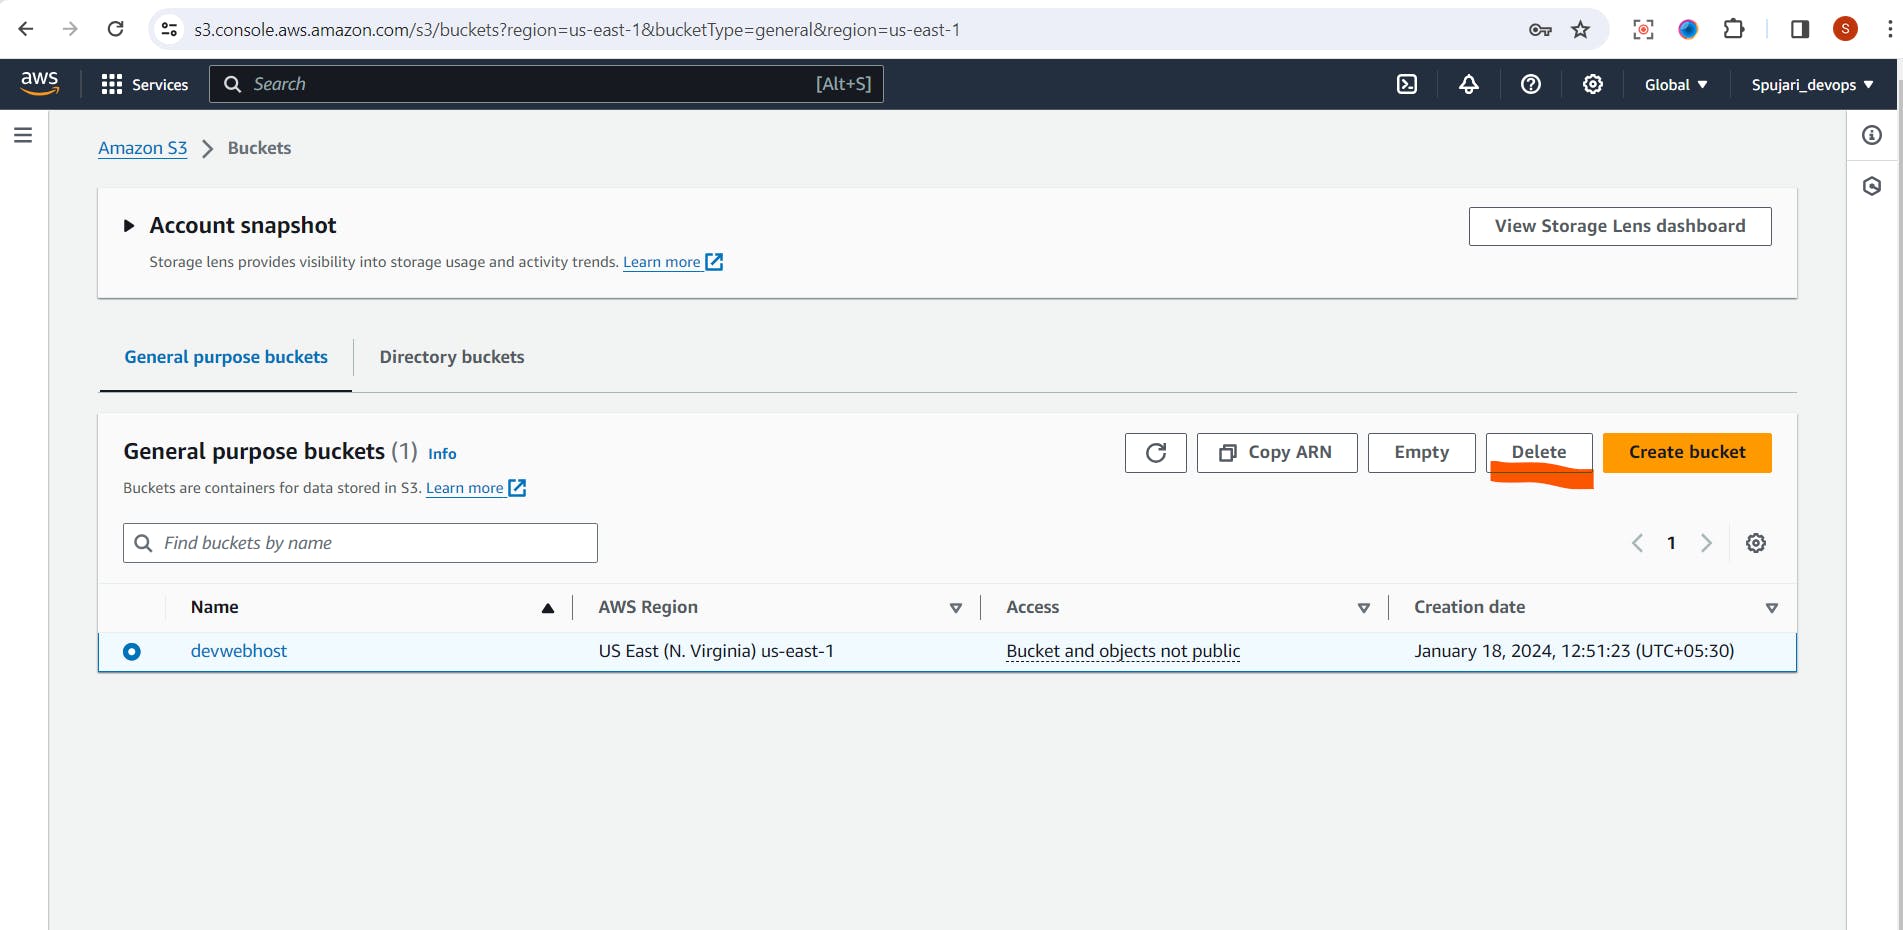
If you no longer need a bucket, select the bucket and click "Delete."
Be cautious, as this action is irreversible and deletes all objects in the bucket.
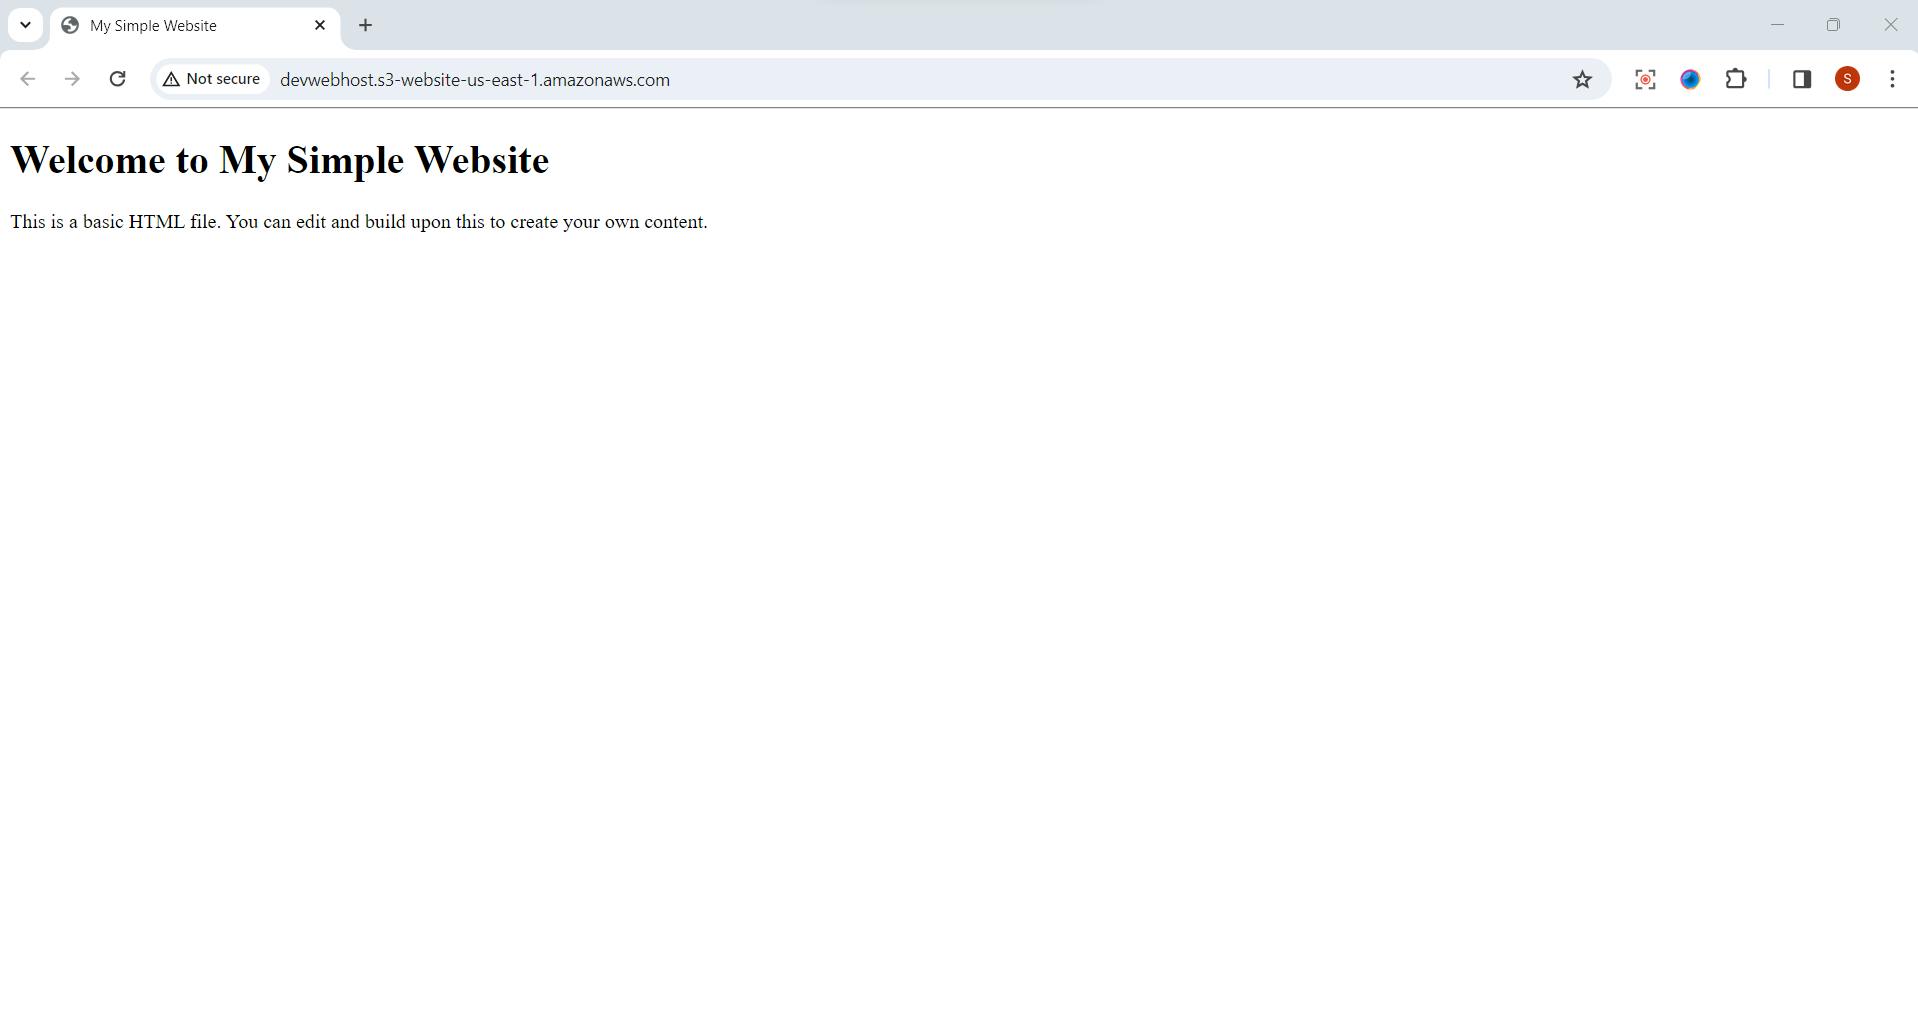
Step 11: Test HTML Page Hosted on AWS S3
This is a simple HTML page hosted on AWS S3 for testing purposes.
Go to Static website hosting -> Copy the URL
Paste it on new browser
Part 4:How to use AWS S3 Bucket in Real Life 🌍
Scenario 1: Storing and Sharing Photos 📸
Upload Photos:
Open your bucket.
Click "Upload" and select your photos.
Share the bucket URL to allow others to view your photos.
Scenario 2: Hosting a Simple Website 🌐🏡
Enable Static Website Hosting:
In the bucket properties, go to the "Static website hosting" tab.
Enable static website hosting and provide the index document (e.g., index.html).
Upload HTML Project:
Upload your simple HTML project to the bucket.
Access your website using the provided S3 bucket URL.
Scenario 3: Secure File Backup 💾🔐
Configure Versioning:
Enable versioning in your bucket properties.
Easily recover previous versions of files if needed.
Set Up Access Controls:
Define bucket policies to control who can access and modify your files.
Ensure data security with encryption options.
Part 5: Bringing It All Together 🤝
Share Your Content:
- Share your photos, website, or files with friends or colleagues by providing them with the S3 bucket URL.
Monitor and Manage:
- Use the AWS Management Console to monitor bucket activity, set up alerts, and manage access controls.
Cost Optimization:
- Explore cost-saving measures like lifecycle policies to transition data to cheaper storage classes when appropriate.
If this post was helpful, please do follow and click the like button below to show your support .
- Thank you for reading💚
Best Regards,
Sprasad 🌐✨
