Creating a Two-Tier Architecture in AWS Using Terraform modules

Greetings! I'm Sprasad P, a DevOps Engineer with a passion for optimizing development pipelines, automating processes, and enabling teams to deliver software faster and more reliably.
Have you ever wondered how websites and online services stay up and running smoothly? 🌐 In this project write-up, we'll explore the process of deploying a highly-available two-tier architecture using Terraform. But don't worry if you're not tech-savvy – we'll keep it simple and easy to understand!
What is a Two-Tier Architecture?
A two-tier architecture consists of two layers: a client layer and a database layer. This setup is commonly used in web applications, where the client layer handles user interaction and the database layer manages data storage and retrieval.
Why Terraform?
Terraform is an open-source infrastructure as code tool that allows you to define and provision cloud resources using simple declarative configuration files. With Terraform, you can easily manage and scale your infrastructure in a repeatable and automated way.
Introducing Terraform Modules
Now, imagine Terraform as a master builder who helps construct this building. But instead of building everything from scratch, Terraform uses something called "modules."
What Are Modules?
Containers for Resources: A module is like a toolbox that contains all the necessary tools and materials needed to build a specific part of the building.
Abstractions for Infrastructure: Modules allow us to describe our infrastructure in terms of its architecture, rather than getting bogged down in technical details.
Local vs. Remote Modules
Local Modules: These are modules that are defined within our project directory. It's like having a toolbox right on-site!
Remote Modules: Alternatively, we can use modules stored in online repositories like GitHub or the Terraform registry. It's like ordering a pre-made toolkit to be delivered to our construction site.
Let's Dive In!
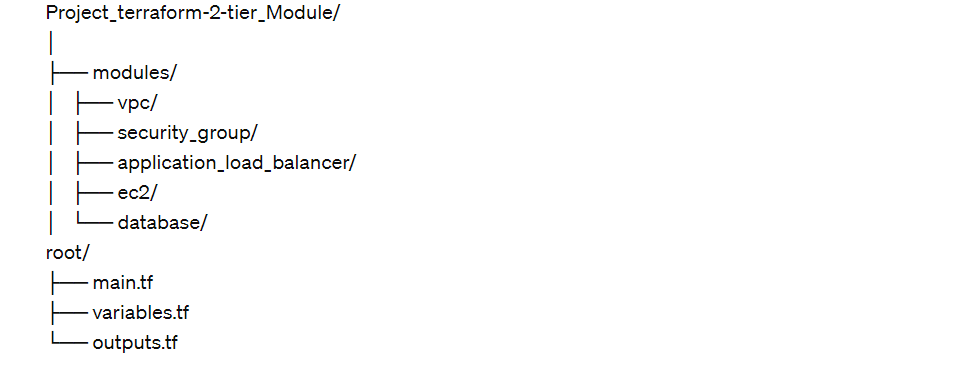
This is our project structure
Our two-tier architecture will contain the following components:
Deploy a VPC with CIDR 10.0.0.0/16
Within the VPC we will have 2 public subnets with CIDR 10.0.1.0/24 and 10.0.2.0/24. Each public subnet will be in a different Availability Zone for high availability
Create 2 private subnets with CIDR ‘10.0.3.0/24’ and ‘10.0.4.0/24’ and each will be in a different Availability Zone
RDS MySQL instance (micro)
A load balancer that will direct traffic to the public subnets
Deploy 1 EC2 t2.micro instance in each public subnet.
🚀 Let's get started with creating our infrastructure:
Click "GitHub" for the completed files.
Open your IDE (I am using github_Codespace).
Create a directory for your infrastructure:
$mkdir Project_terraform-2-tier_Module/Within that directory, we will add two folder like modules ,and root
  $mkdir modules
  $mkdir root
Stage 1: Write
Creating the directory structure for project's modules is a crucial step in organizing Terraform code. Let's break down the process of creating each folder within the Modules directory:
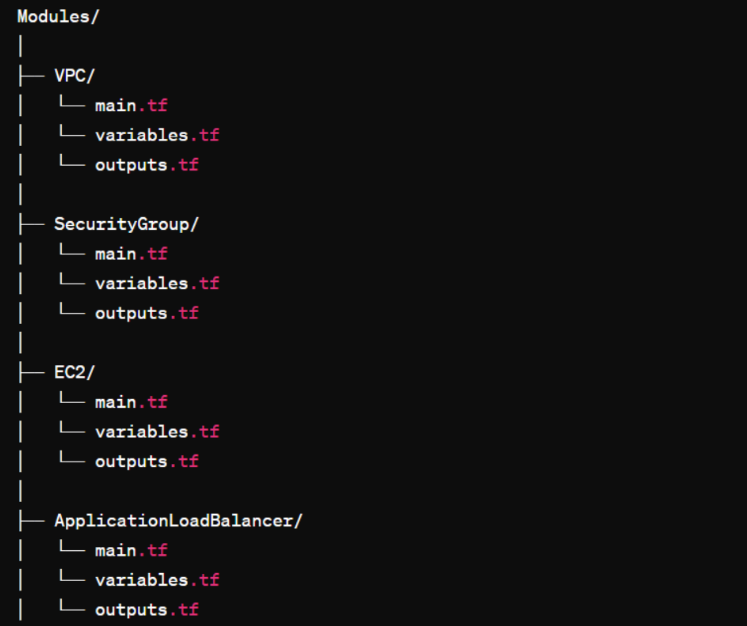
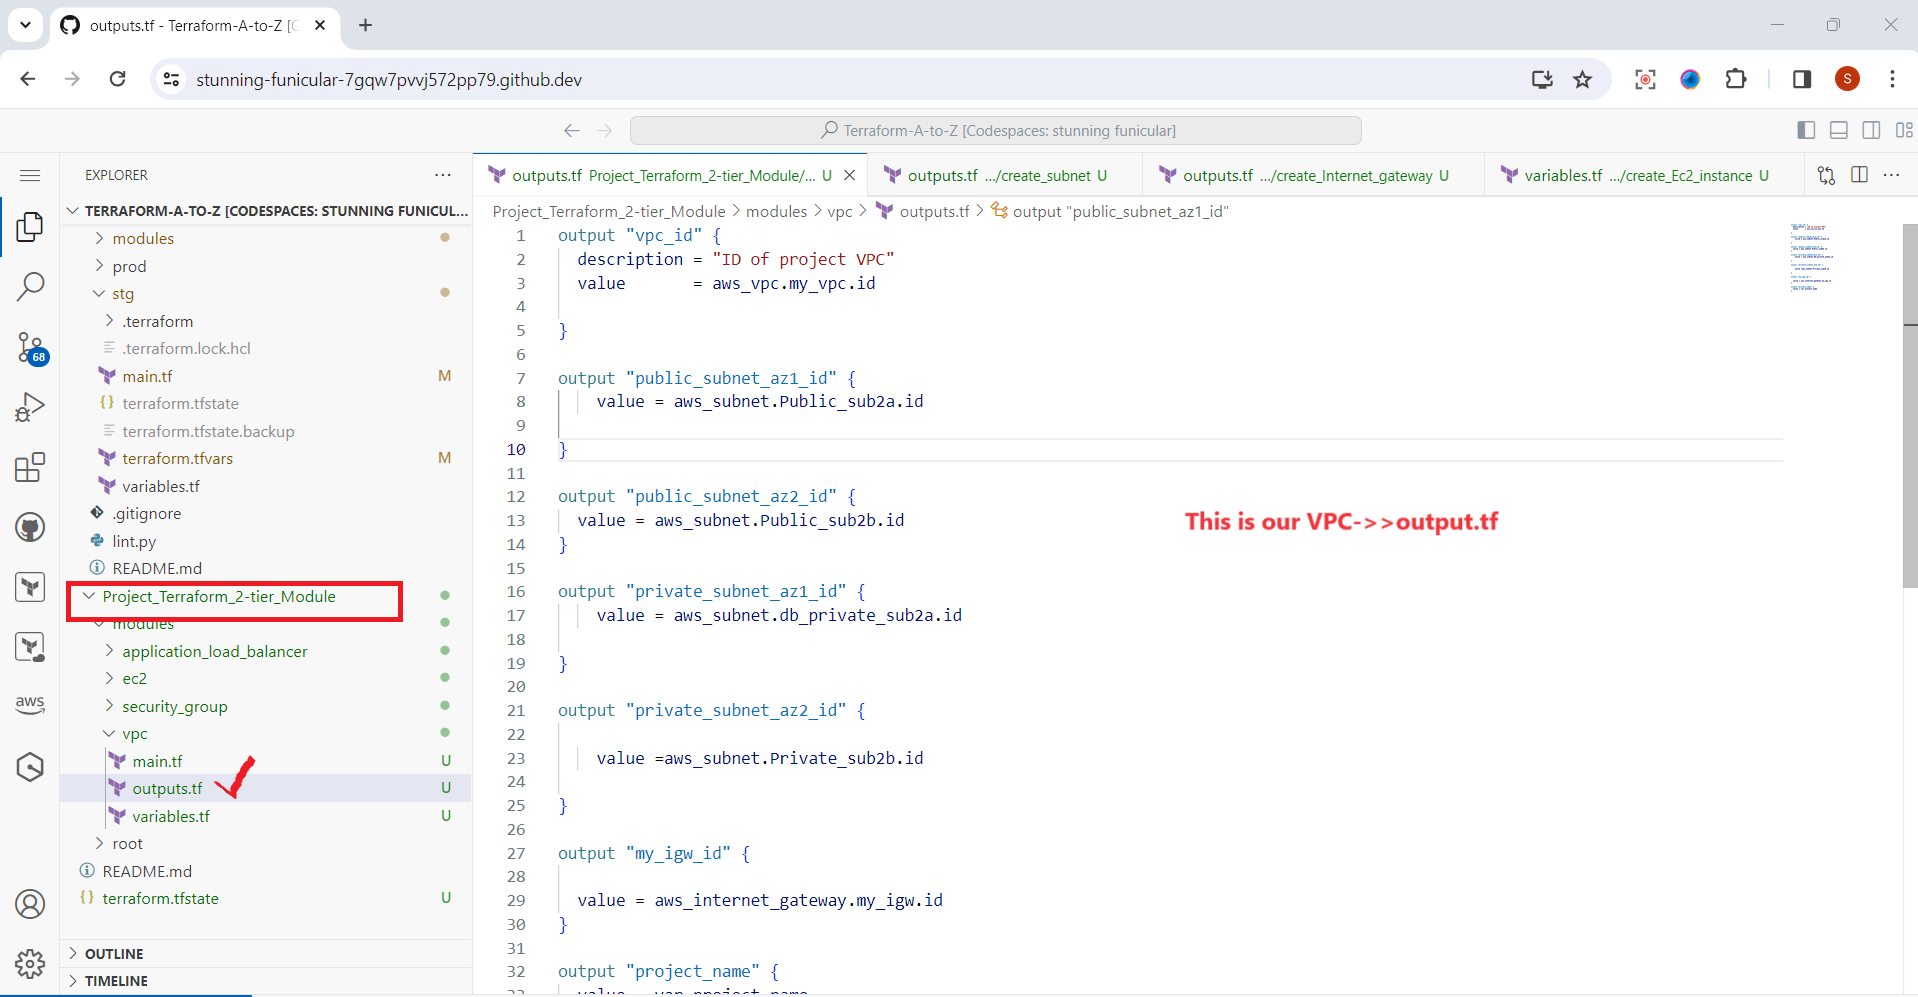
VPC Module
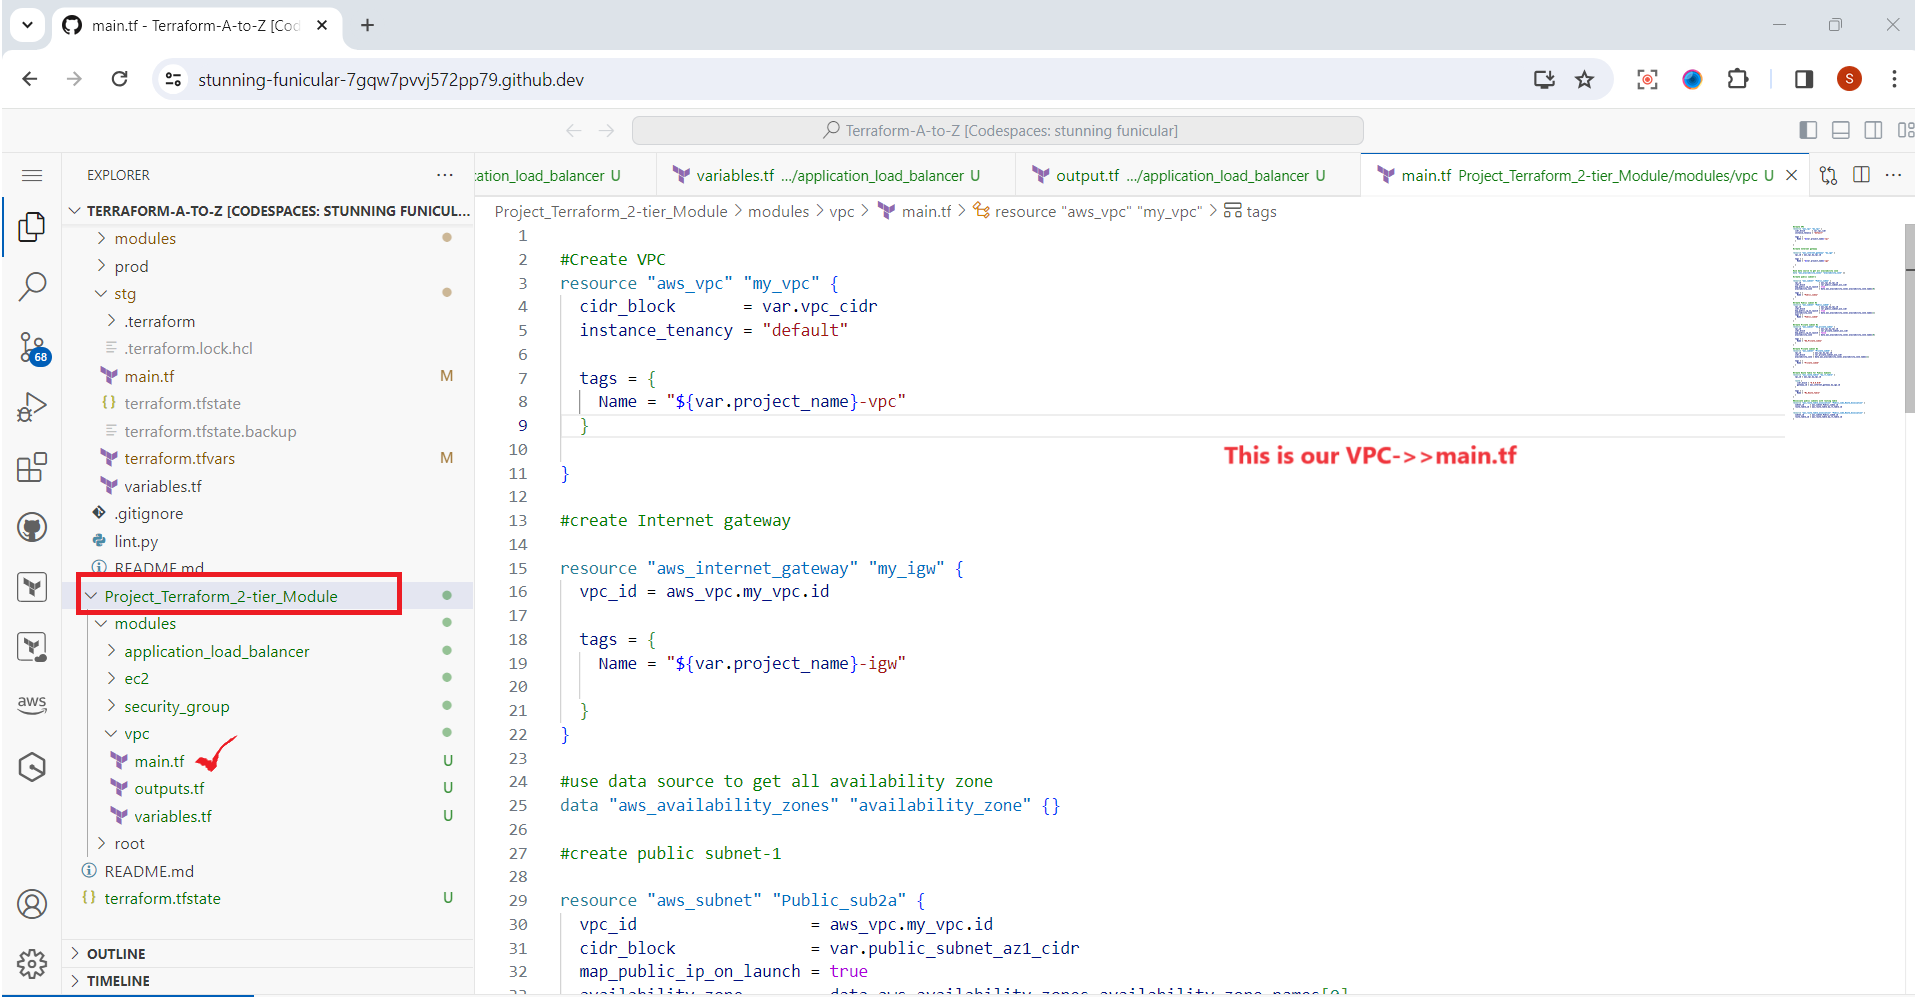
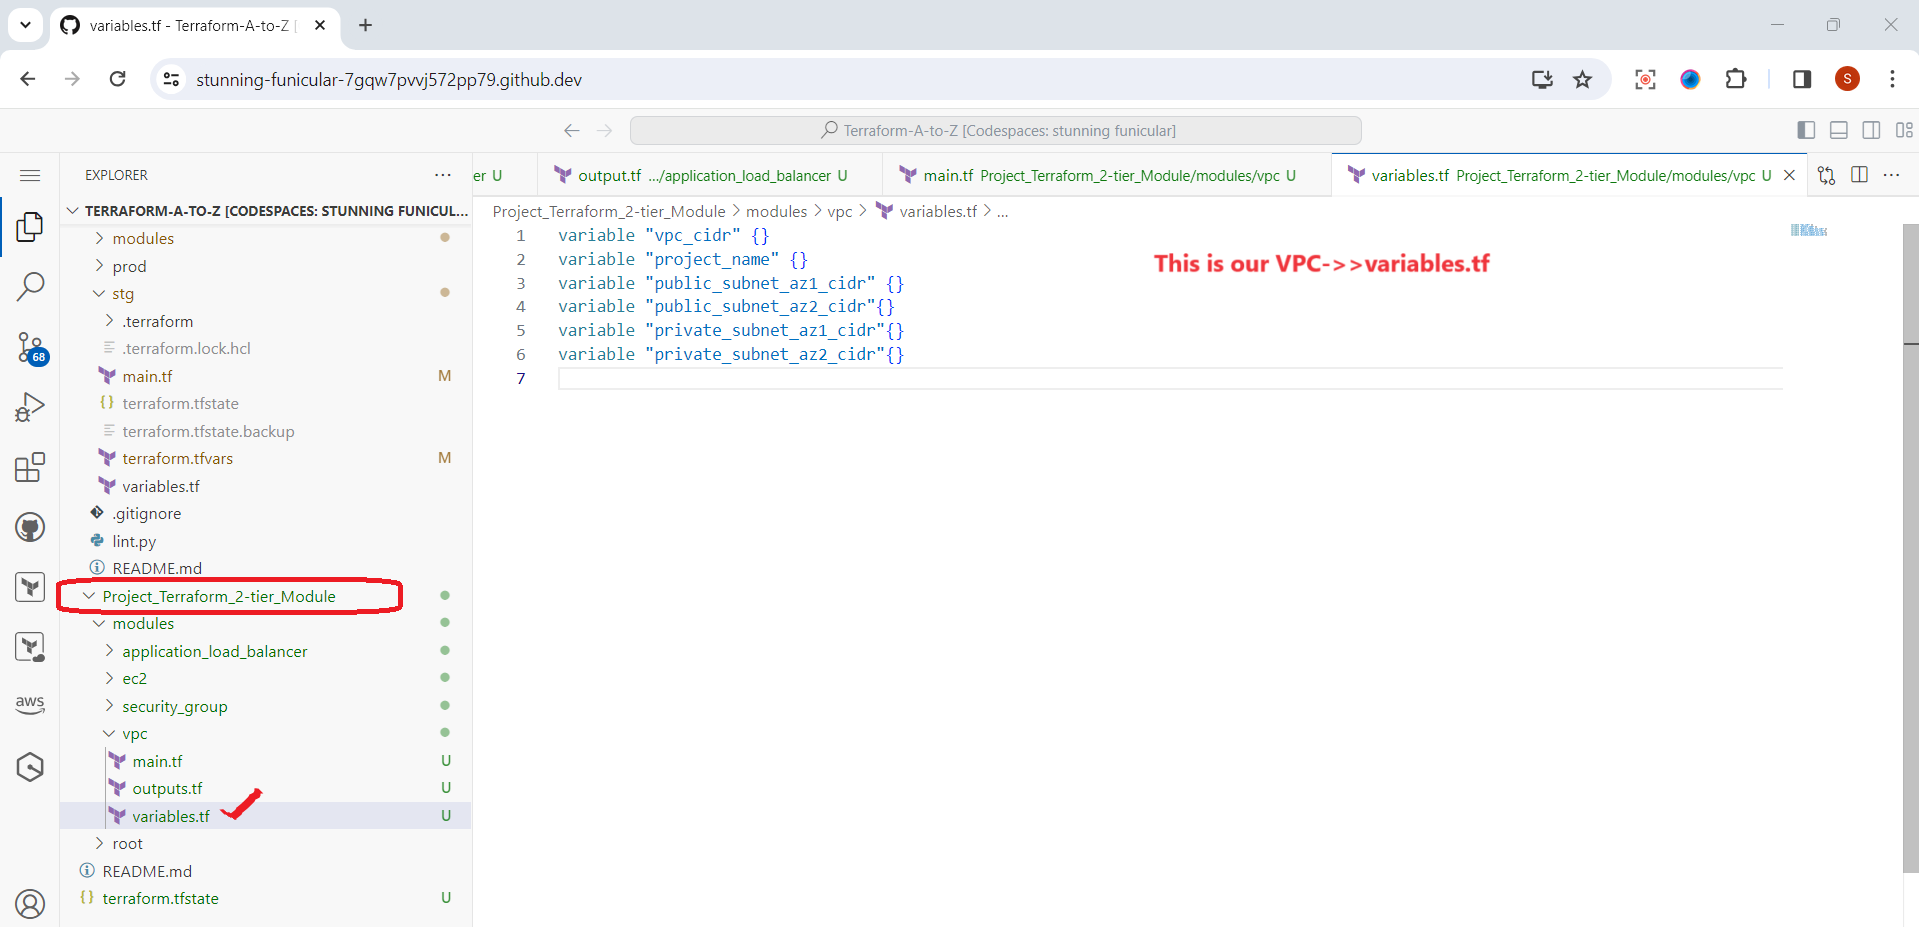
The VPC module sets up the Virtual Private Cloud (VPC) for infrastructure. It includes configurations for networking, subnets, and routing.
main.tf: Defines the VPC resources such as subnets, route tables, and internet gateways, availability zone, Associate public subnets with routing table etc.
variables.tf: Contains input variables used to customize the VPC configuration.
outputs.tf: Specifies the outputs of the VPC module, such as VPC ID and subnet IDs,internet_gateway,project_name.
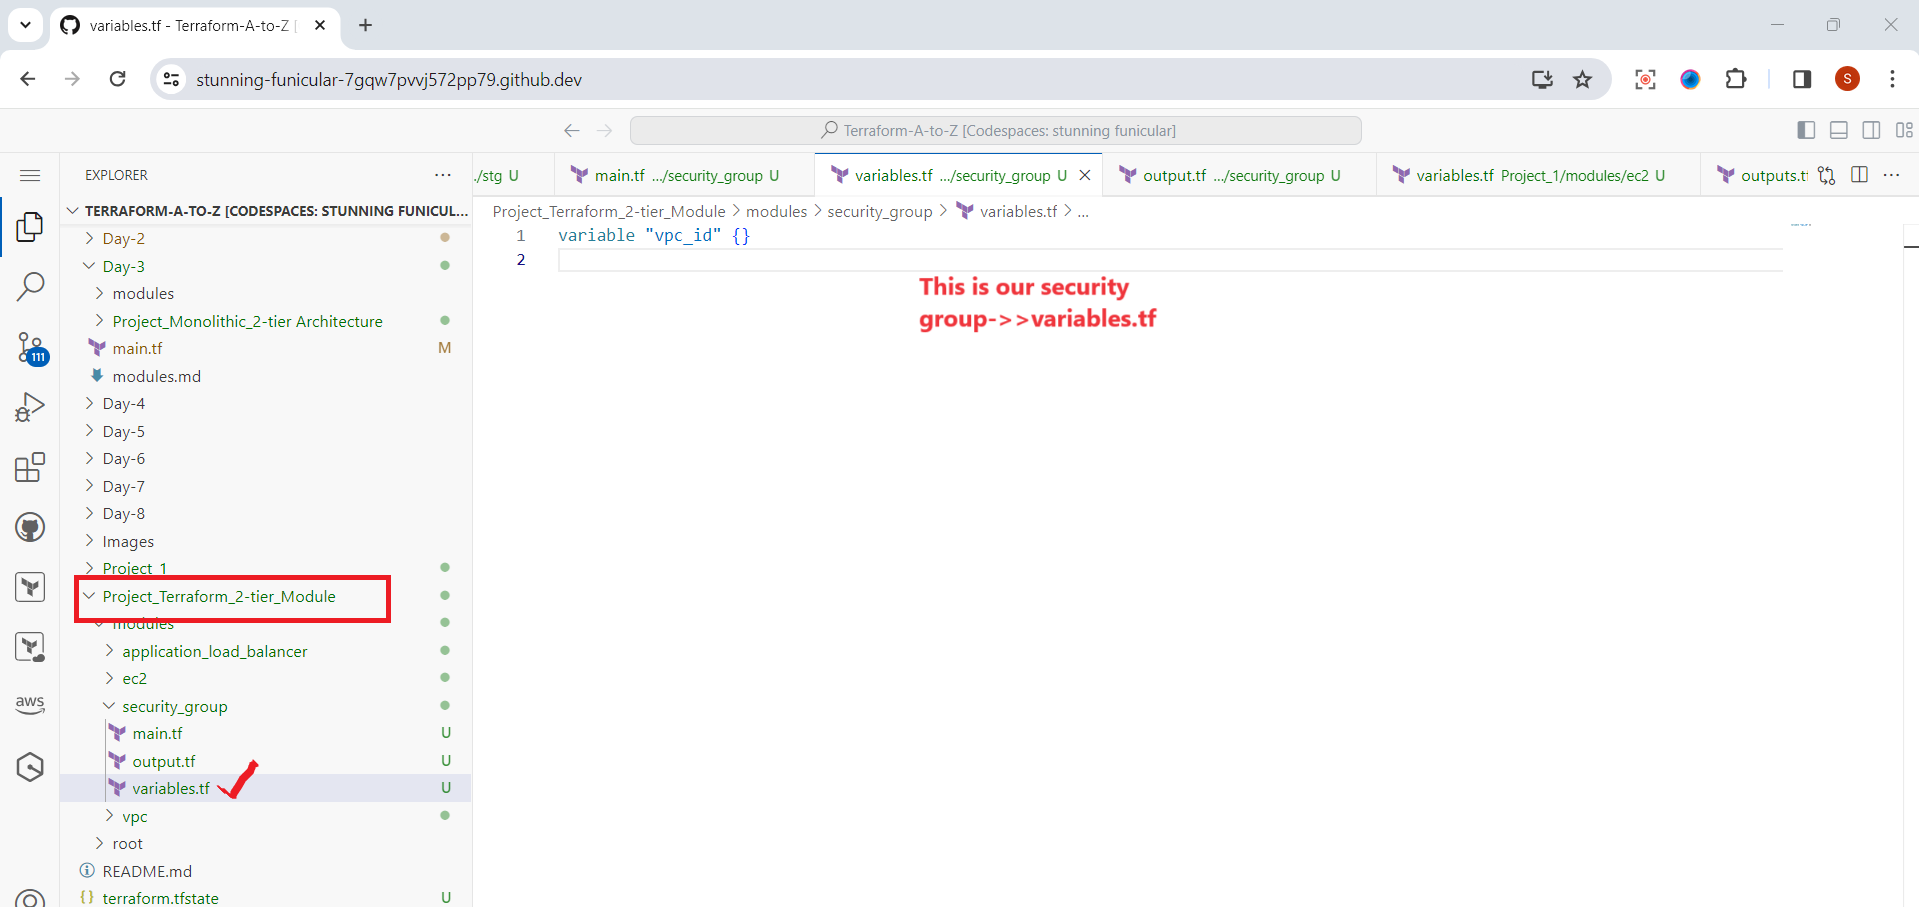
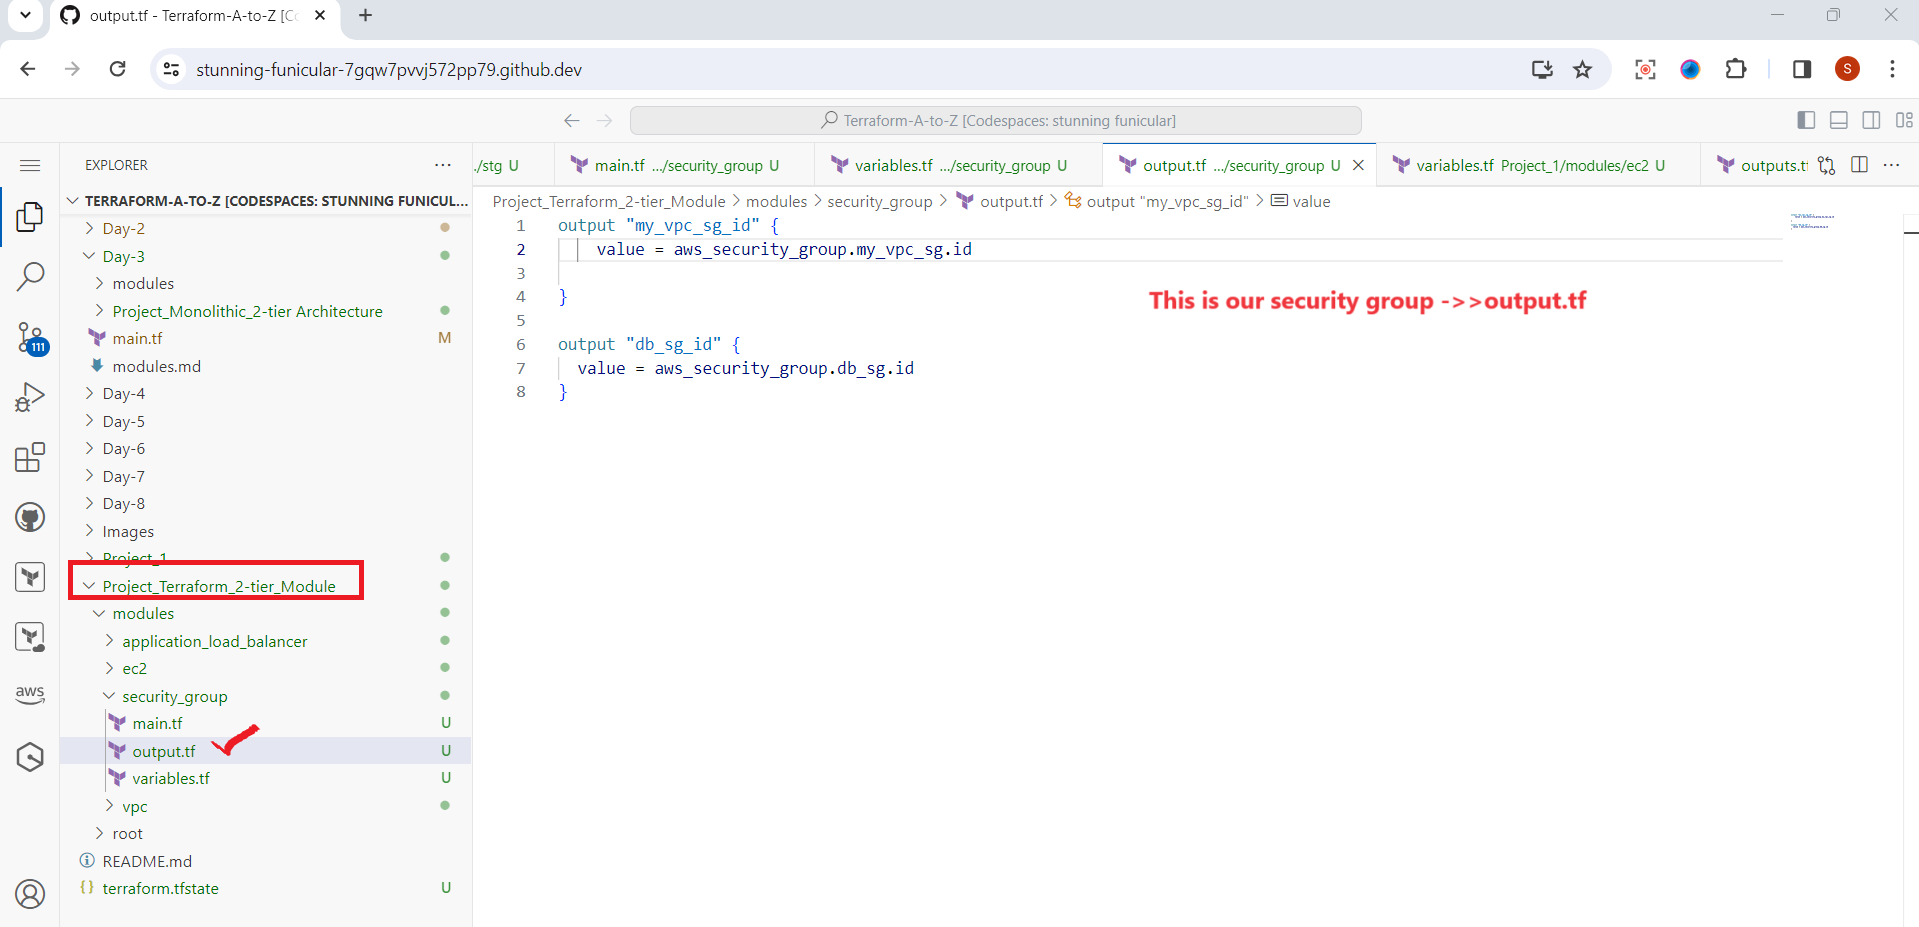
Security Group Module
The Security Group module manages the security rules for your resources, controlling inbound and outbound traffic.
main.tf: Defines the security group rules for your EC2 instances, RDS database, or other resources.
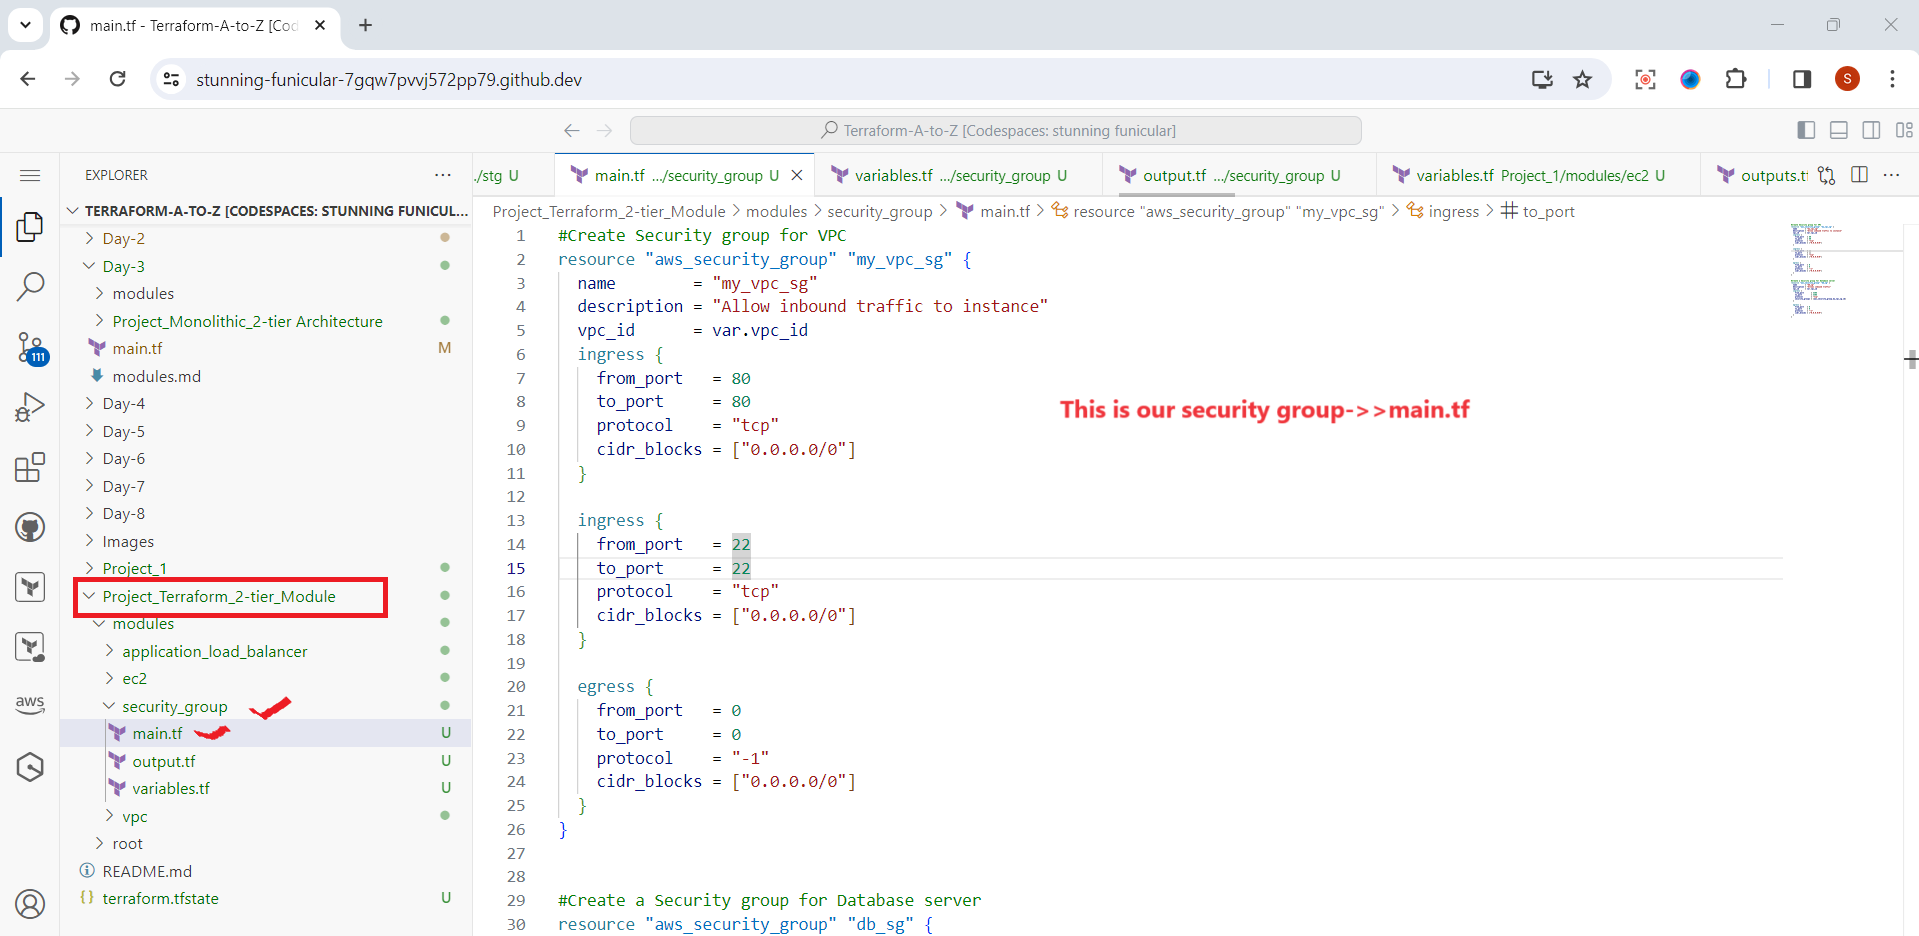
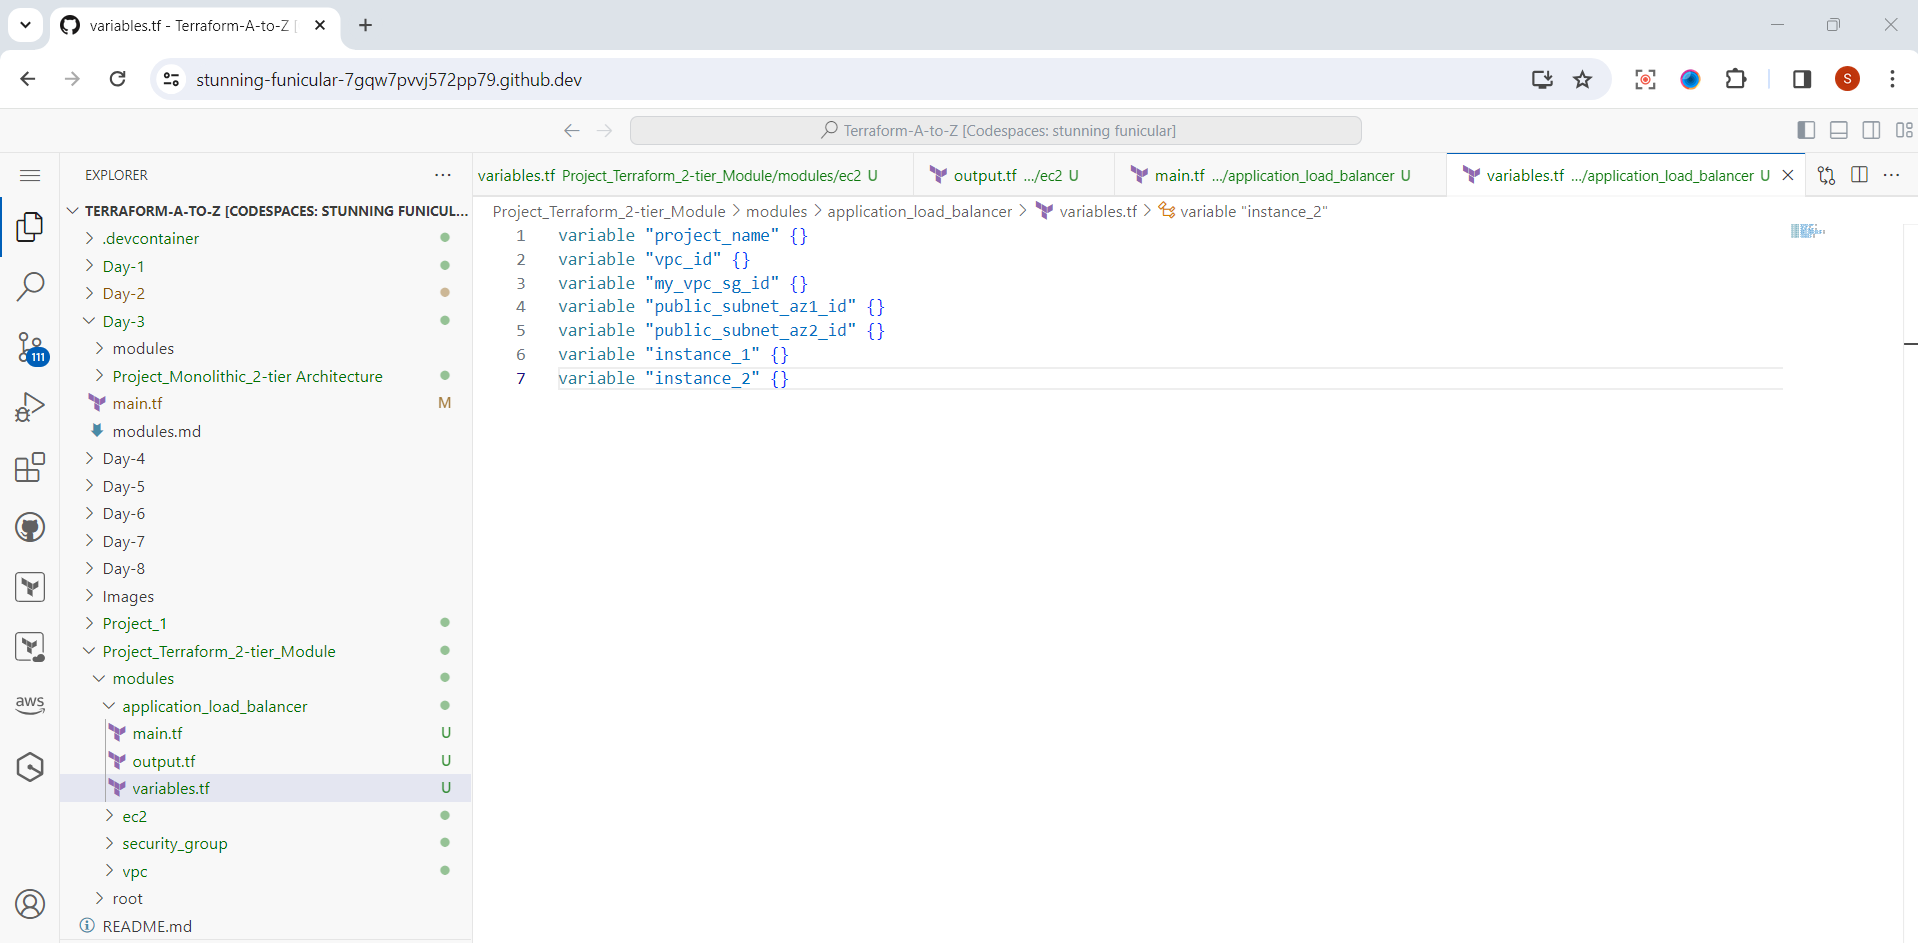
variables.tf: Holds input variables for defining security group rules.
outputs.tf: Specifies any relevant outputs from the security group module.
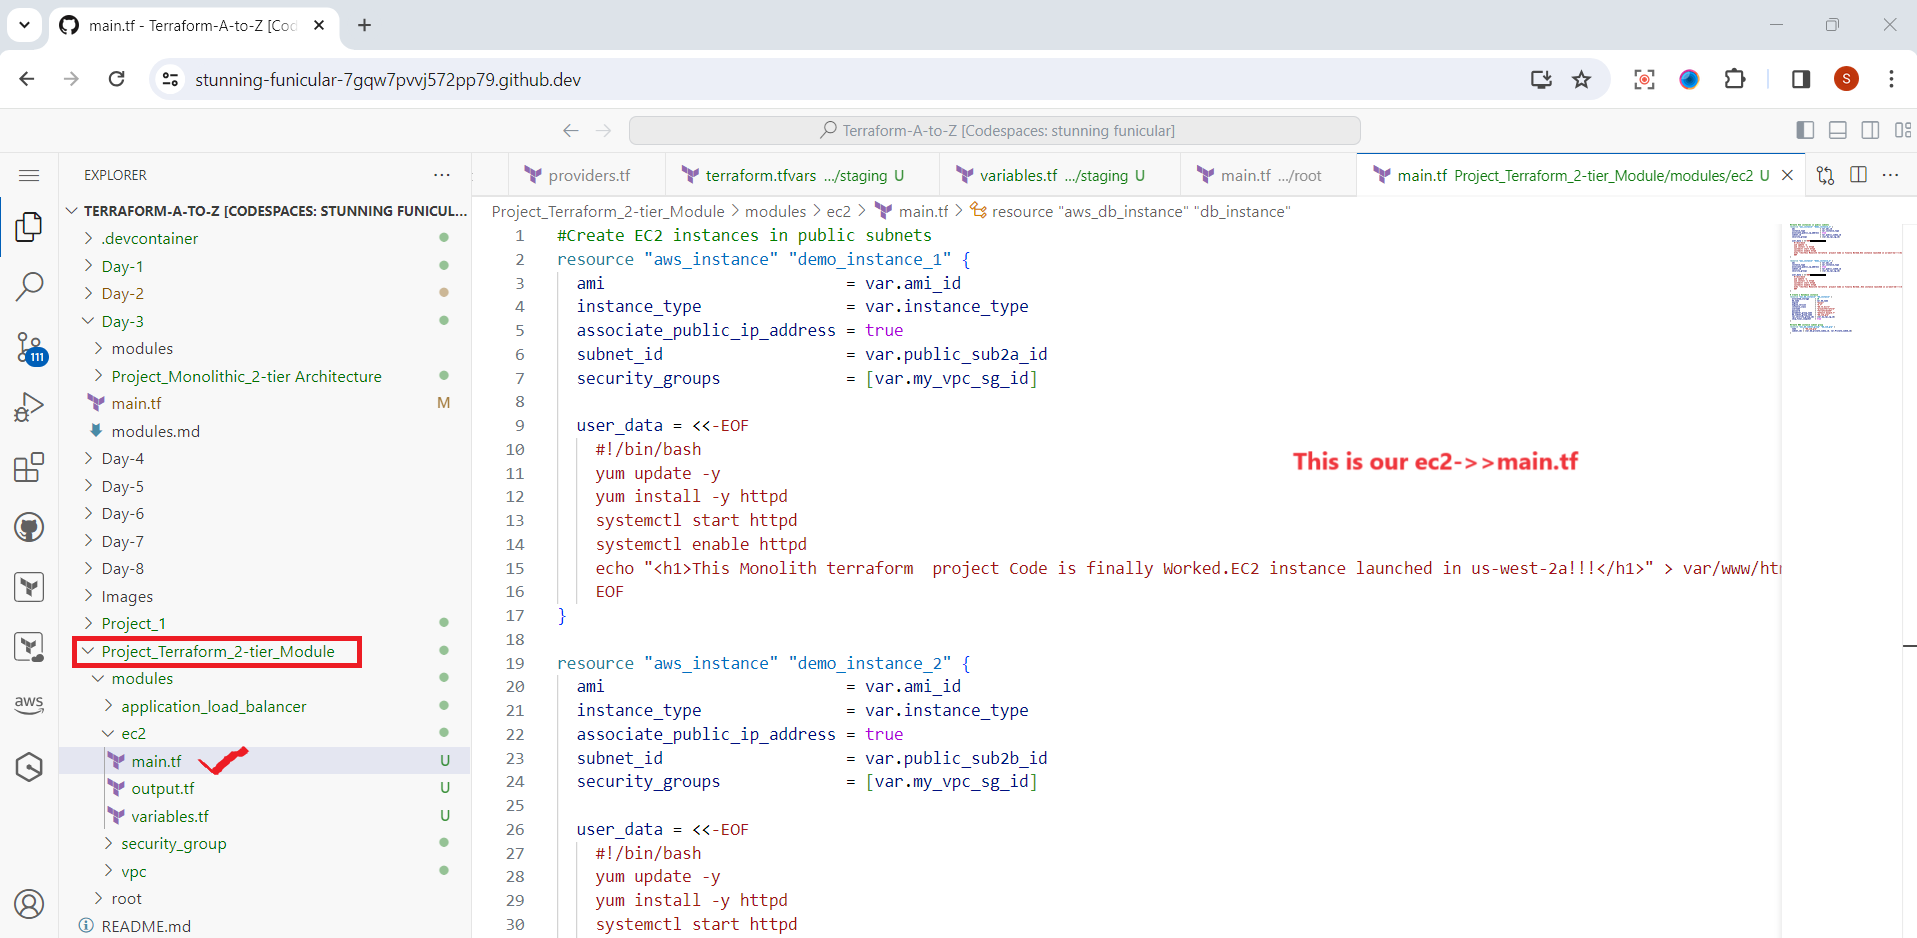
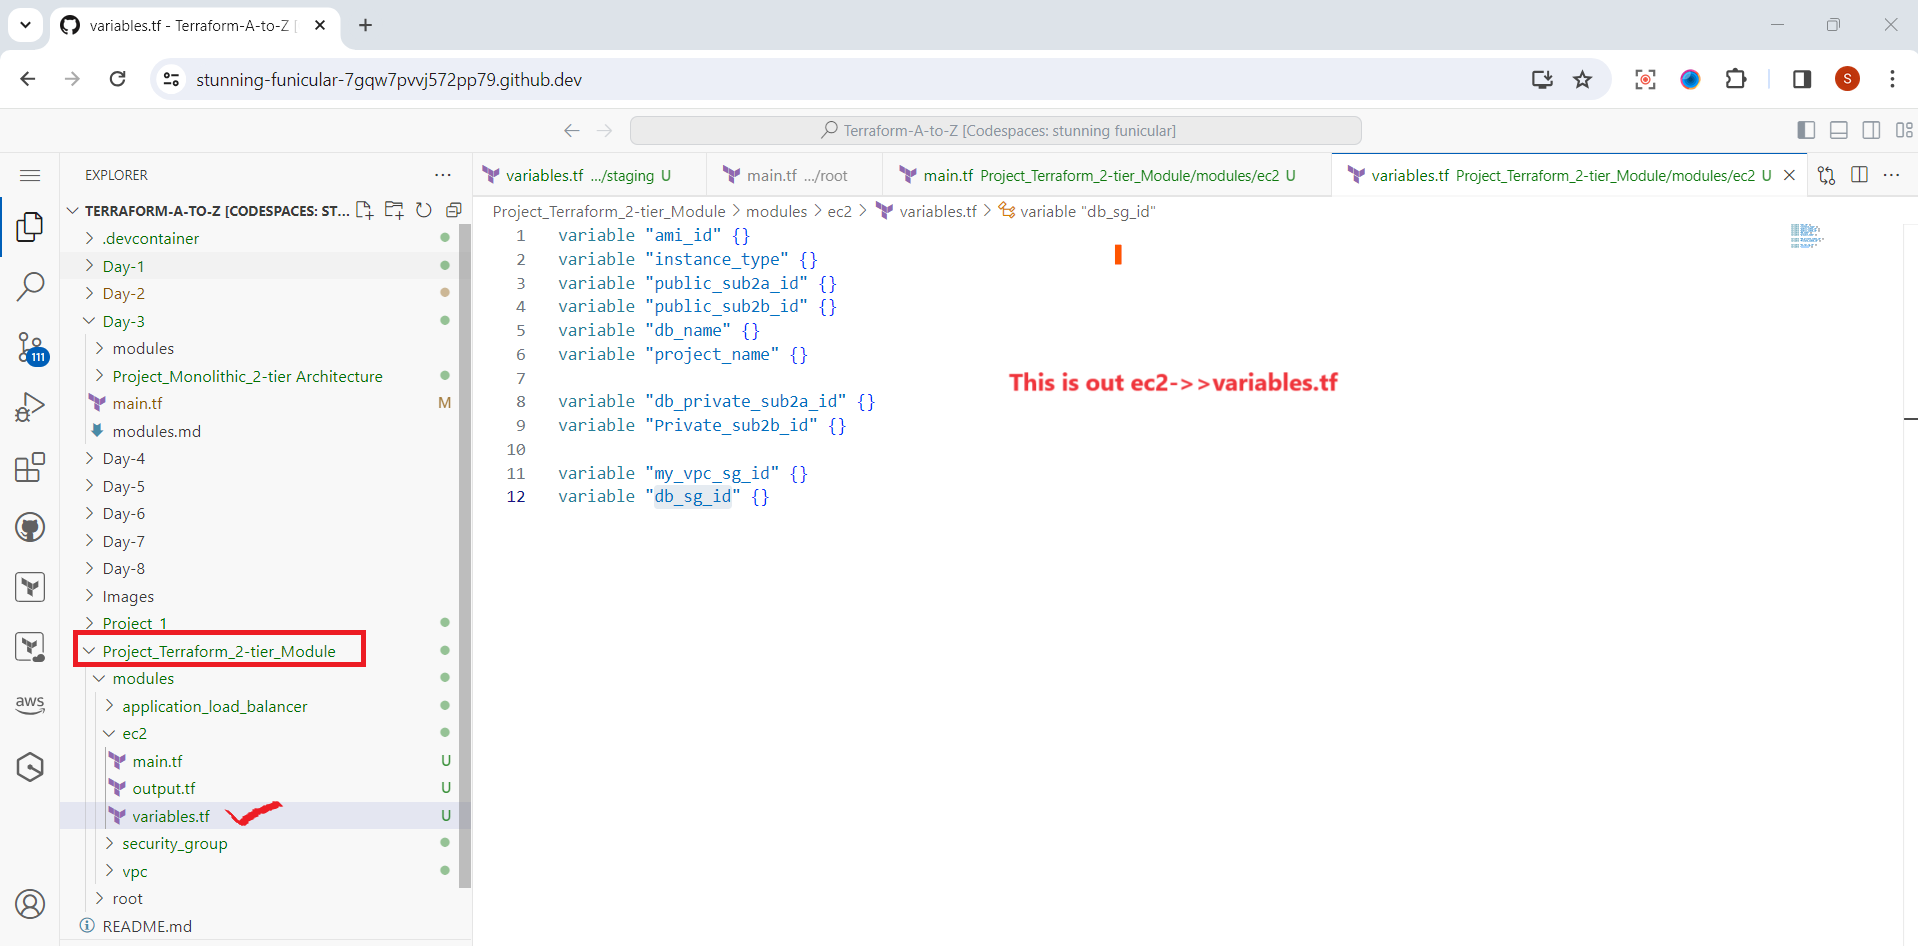
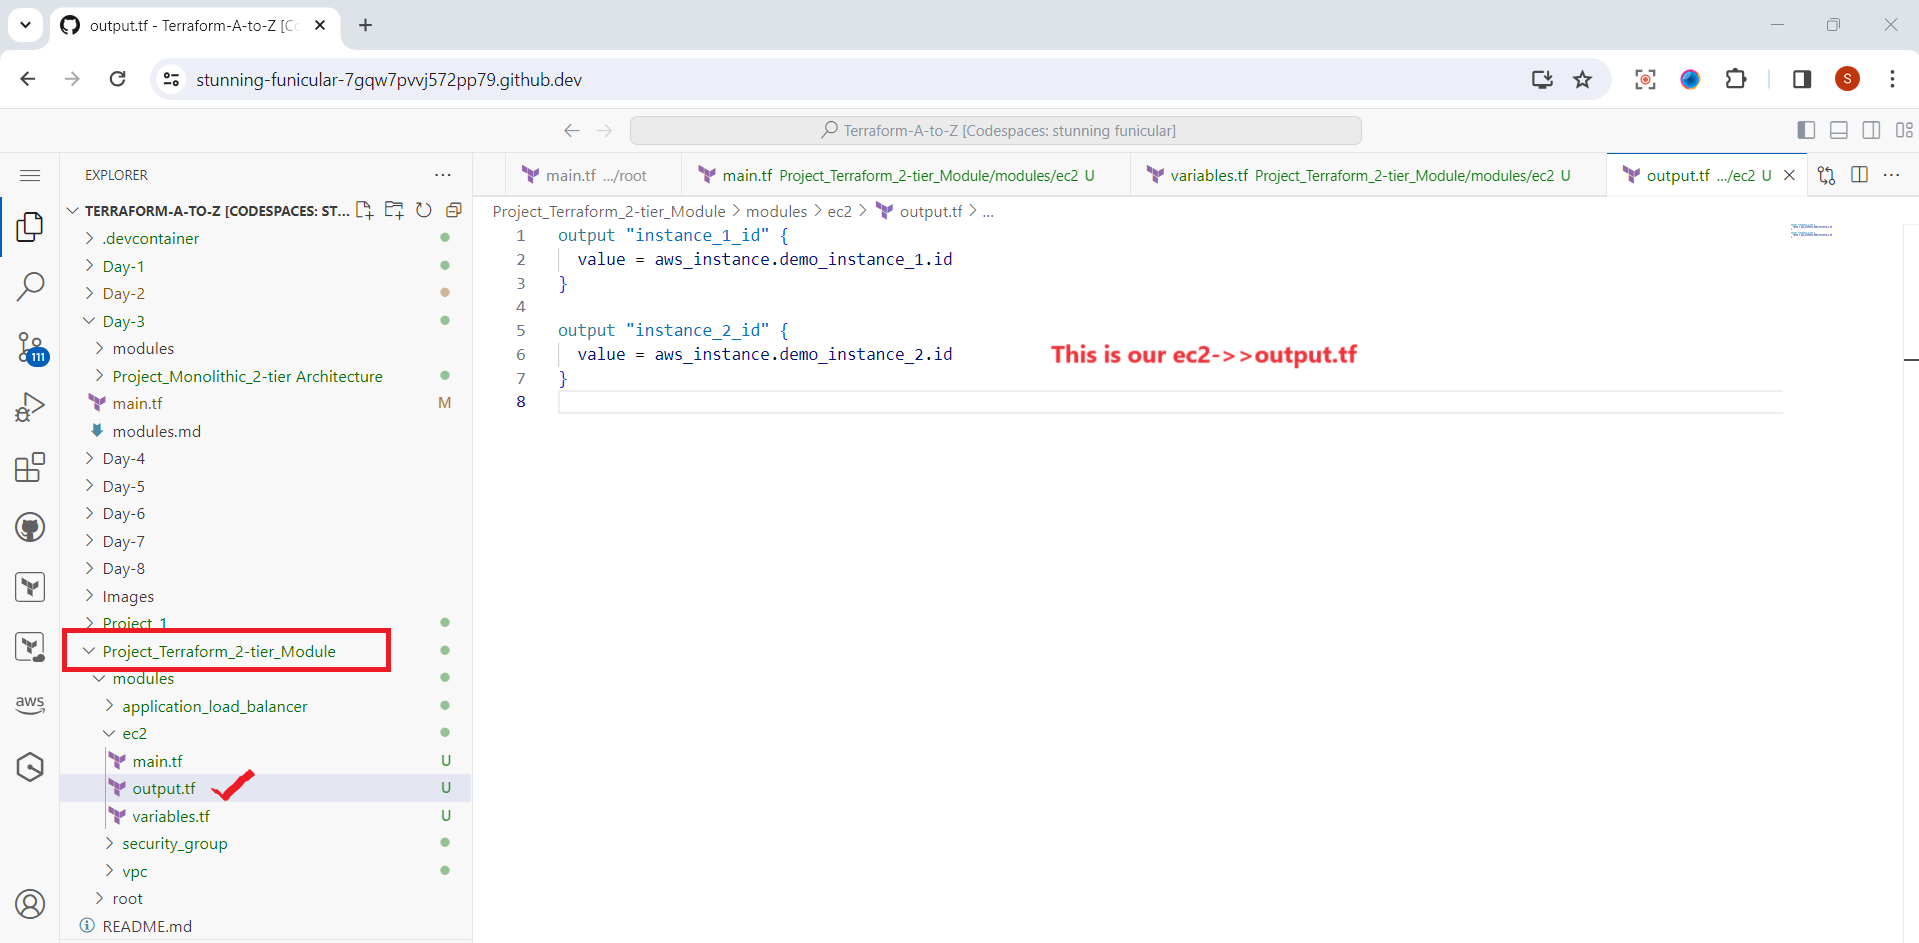
EC2 Module
The EC2 module handles the provisioning of your virtual servers (EC2 instances) within the VPC.
main.tf: Contains configurations for launching EC2 instances, including instance type, AMI, and networking settings.
variables.tf: Stores input variables used to customize EC2 instance configurations.
outputs.tf: Specifies outputs such as instance IDs or public IP addresses.
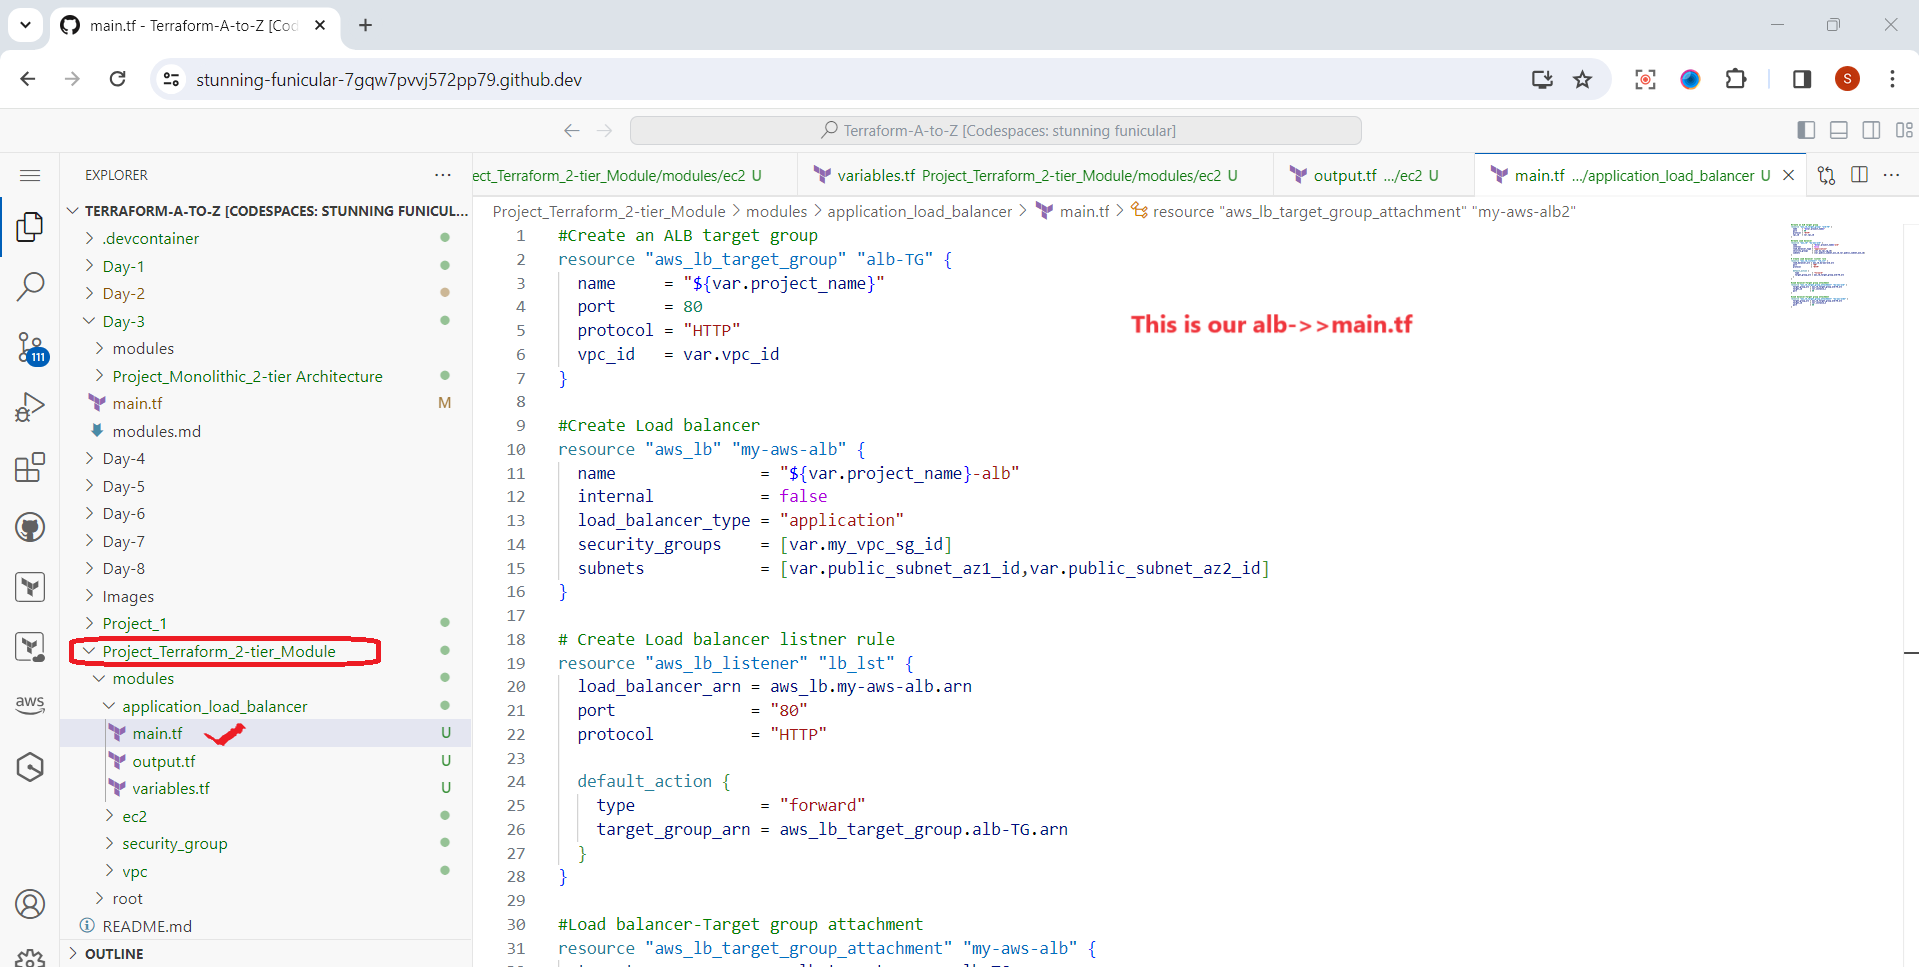
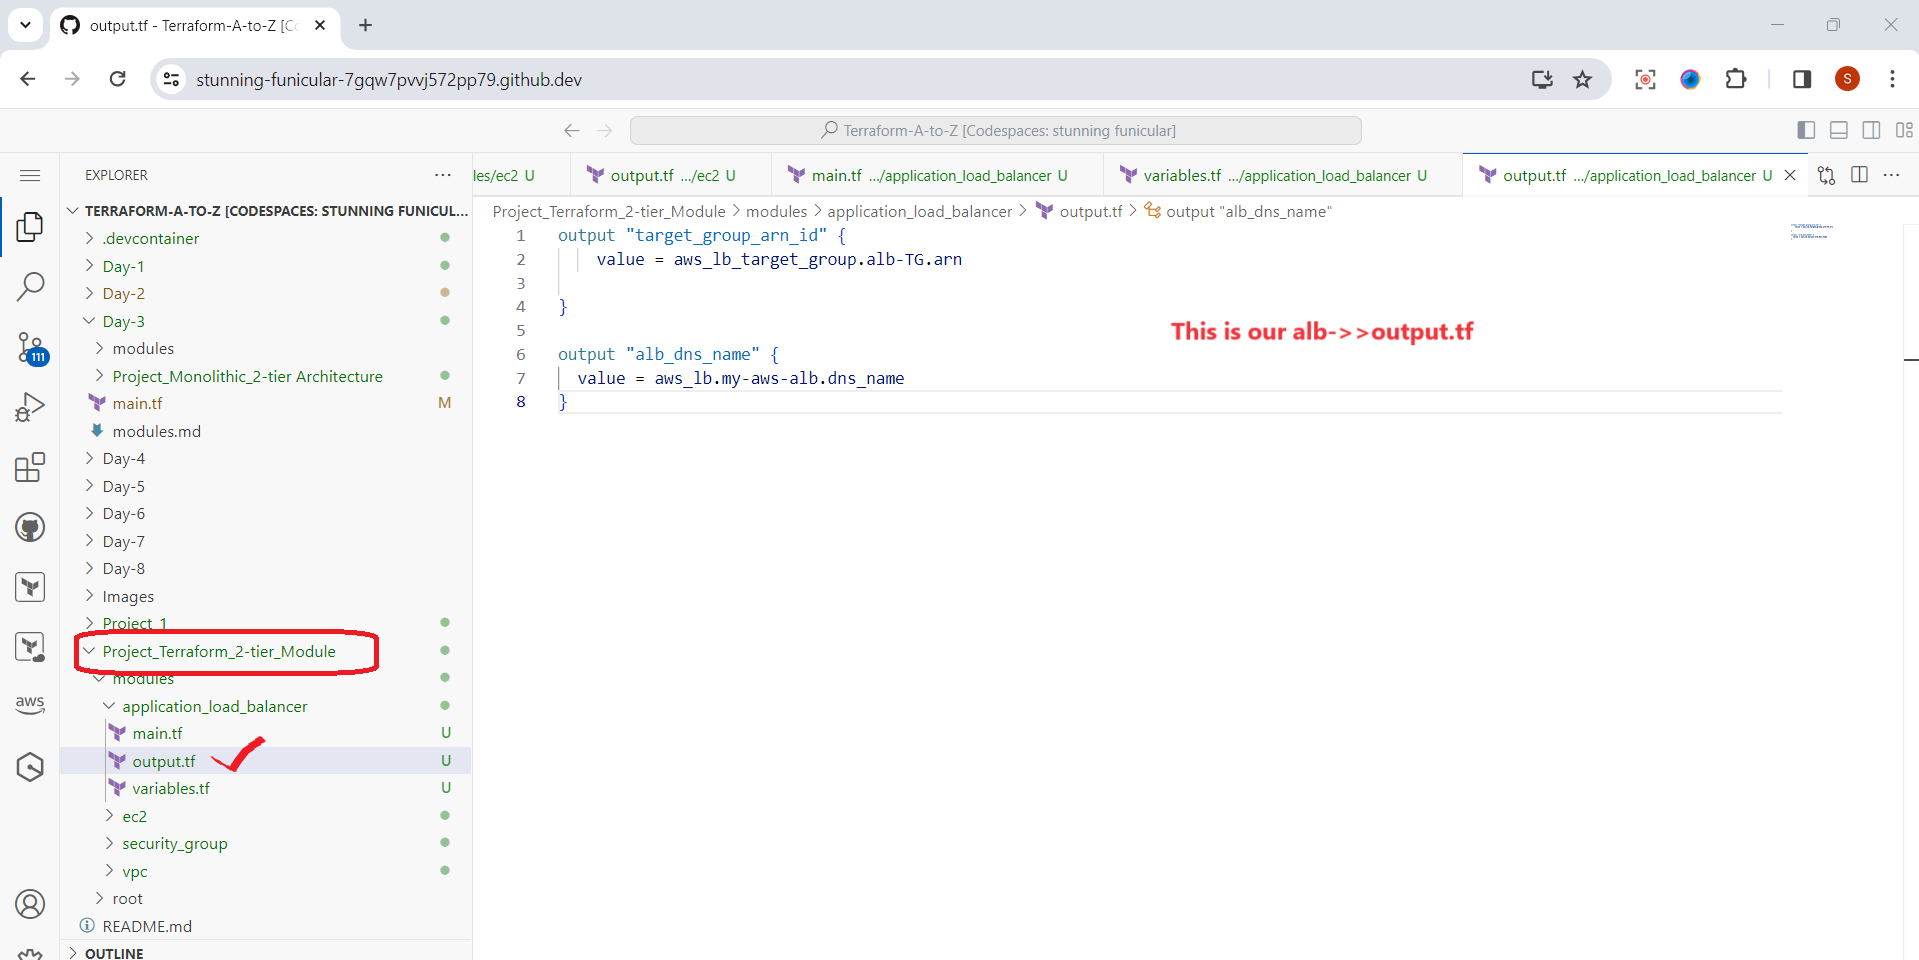
Application Load Balancer Module
The Application Load Balancer (ALB) module sets up a load balancer to distribute incoming traffic among your EC2 instances.
main.tf: Defines the ALB resources, such as listeners, target groups, and routing rules.
variables.tf: Holds input variables for configuring the ALB.
outputs.tf: Specifies outputs like the ALB DNS name or ARN.
Stage 2: Plan
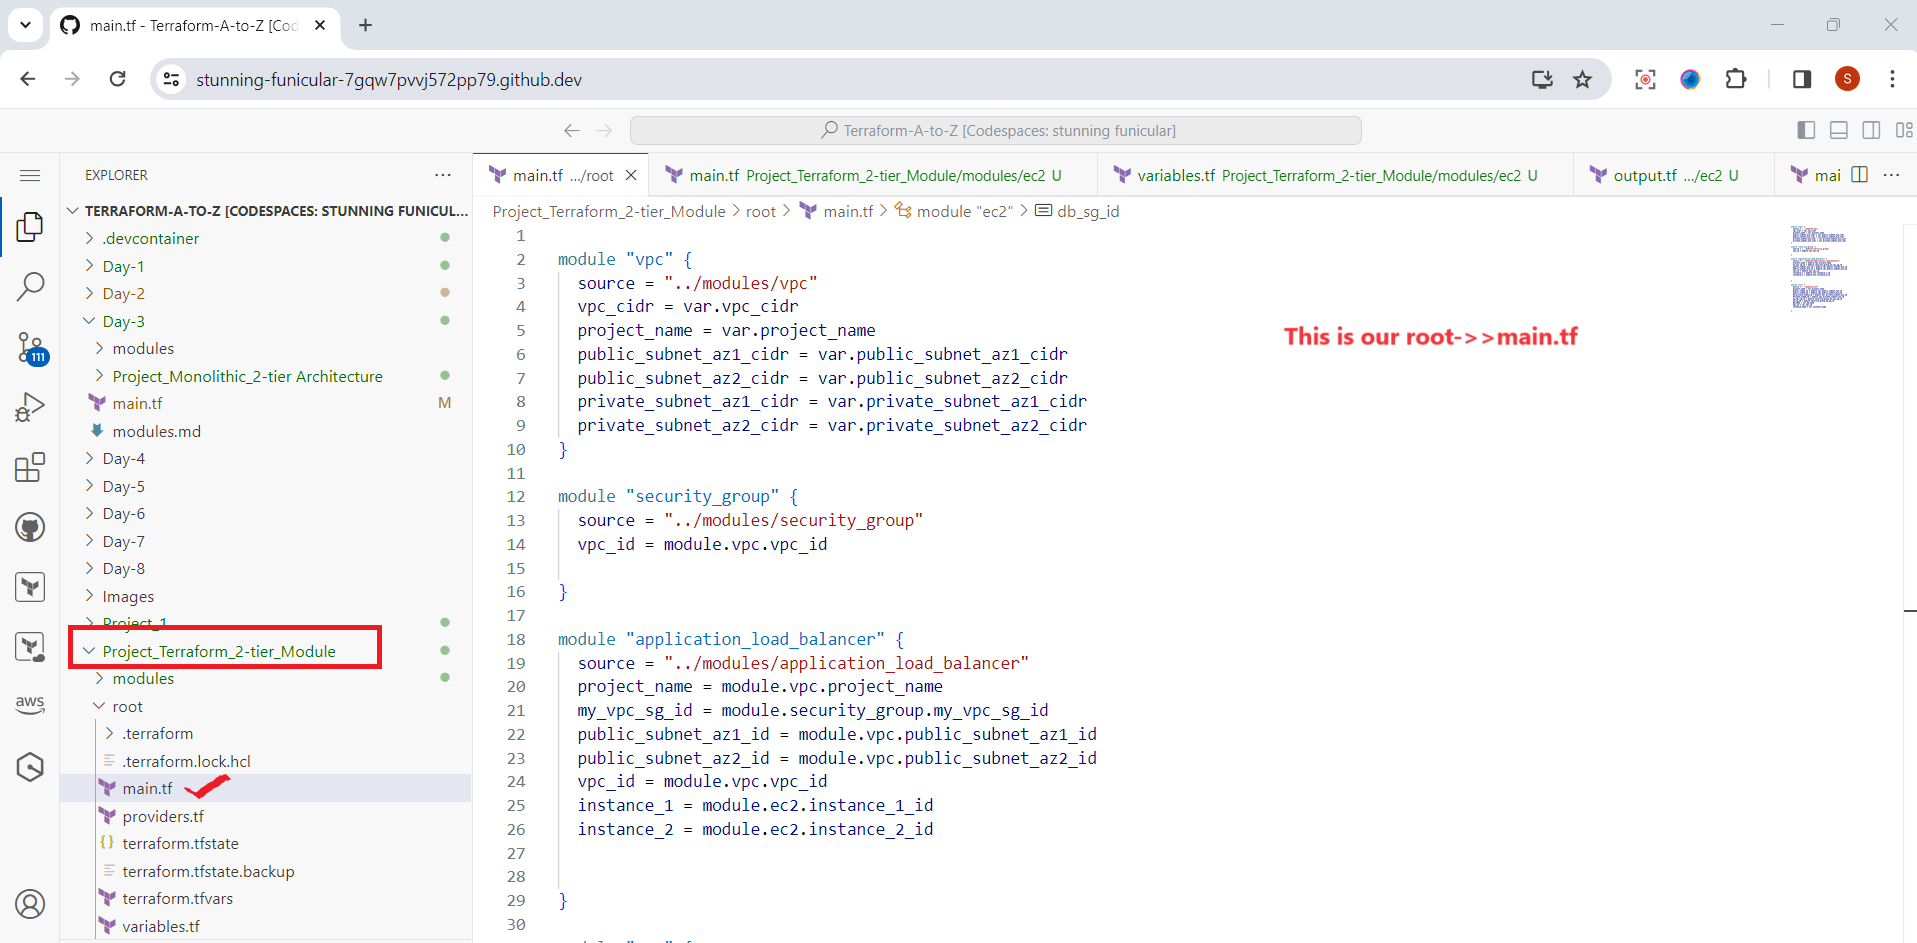
Root Directory
The root directory serves as the entry point for your Terraform project. It contains the main configuration files and serves as the orchestrator for calling modules.
main.tf: This file orchestrates the deployment by calling modules and defining the relationships between resources.
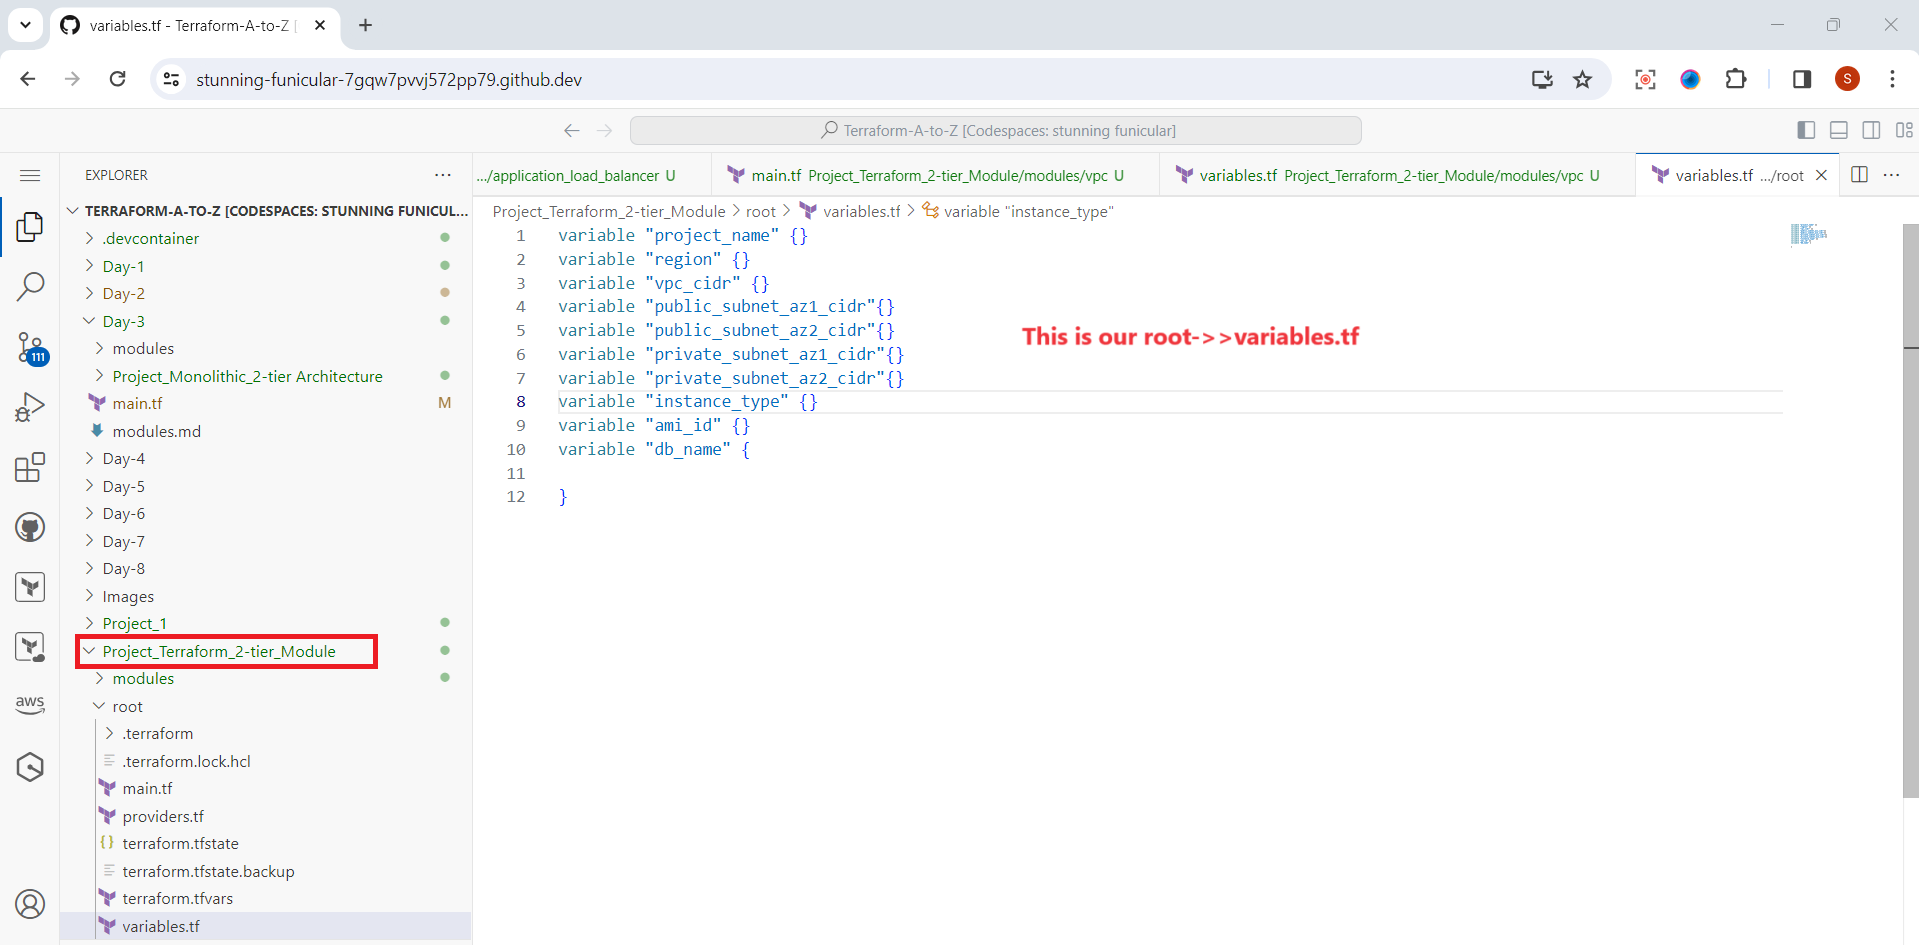
variables.tf: Contains input variables that can be used across the entire project, allowing for customization and flexibility.
terraform.tfvars: This file contains the actual values for the variables defined in
variables.tf.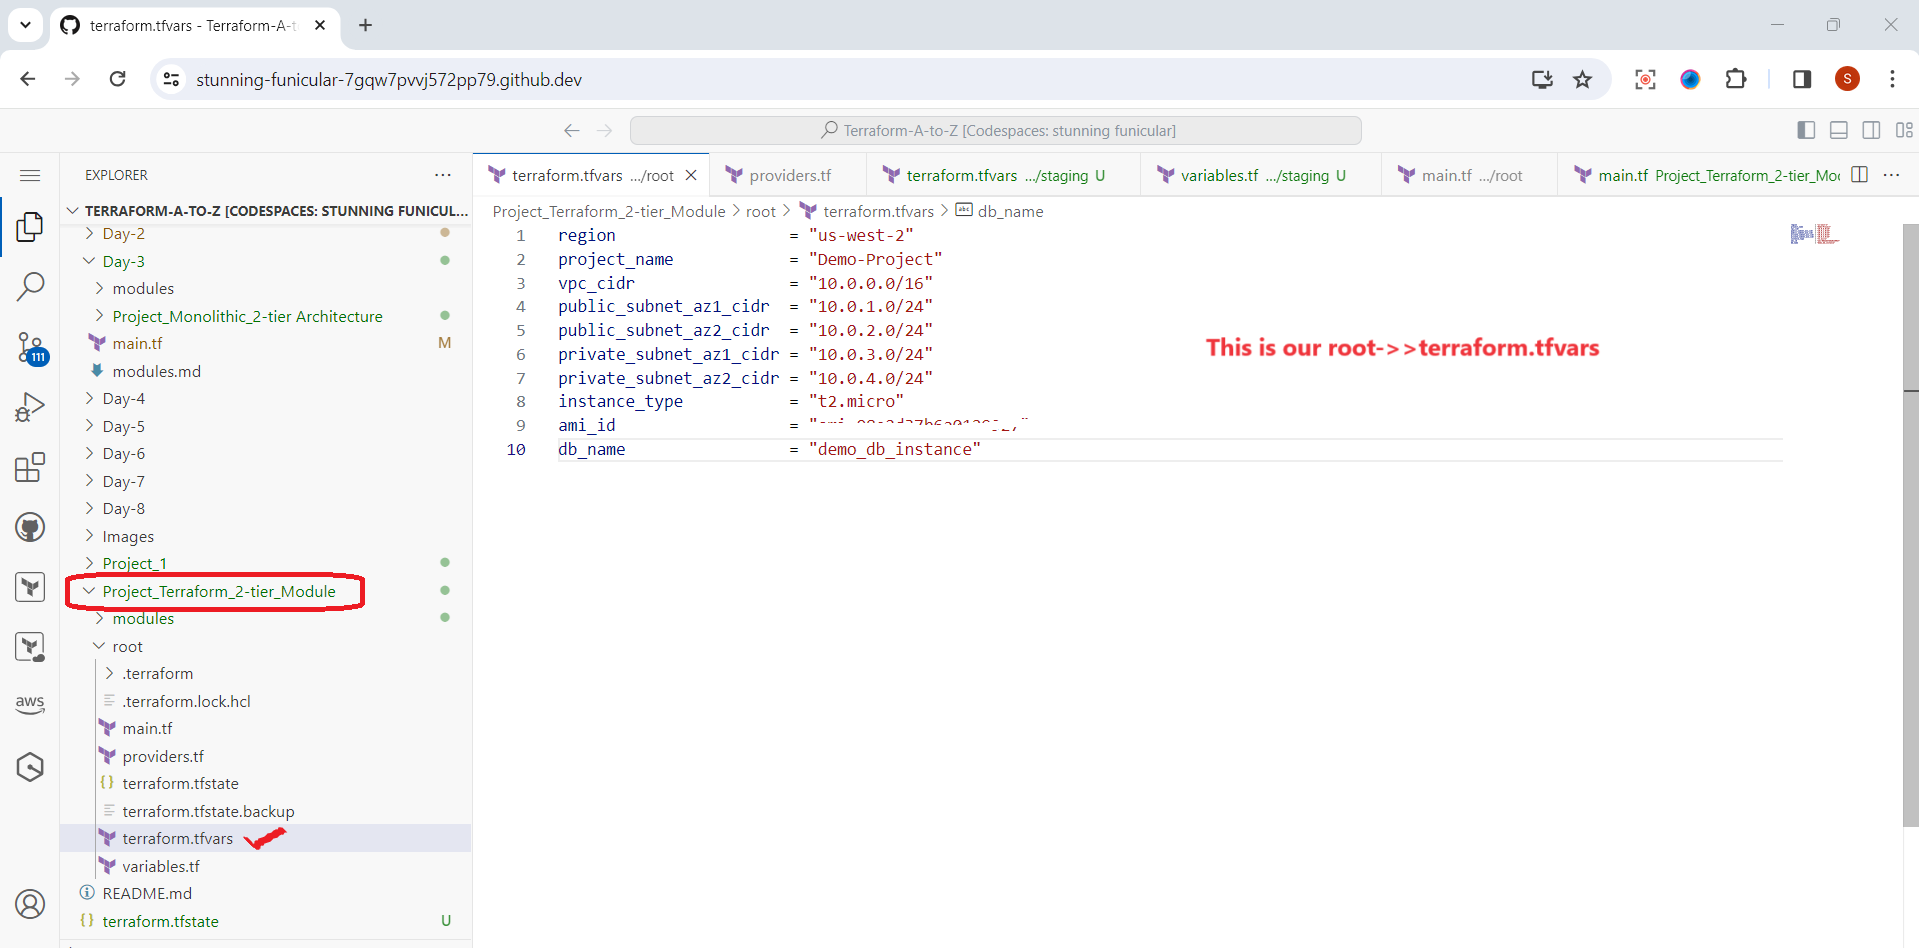
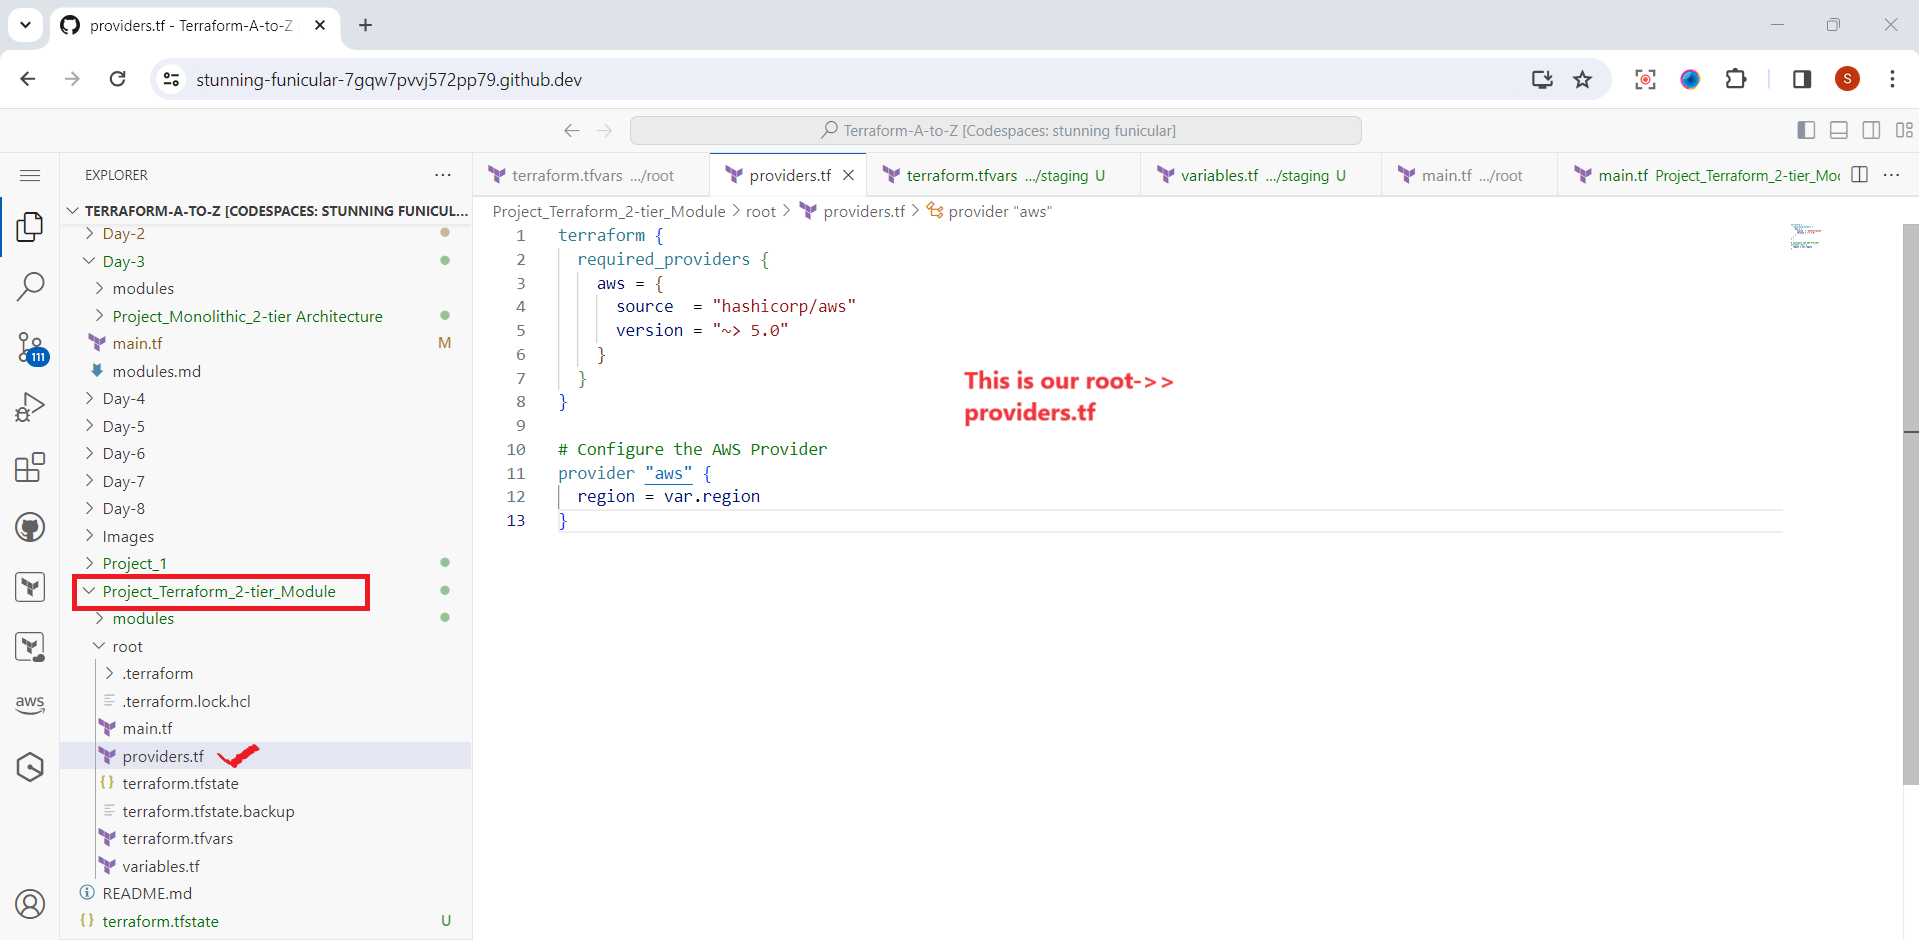
providers.tf: Specifies the provider configuration, such as AWS, Azure, or Google Cloud.
Stage 3: Apply
Initialize Terraform: Run
terraform initto initialize the Terraform backend.
Evaluate Configuration: Use
terraform planto review the execution plan and ensure there are no errors.
Execute the Plan: Finally, apply the Terraform configuration using
terraform apply. Don't forget to pass any sensitive variables using-var-file="secret.tfvars".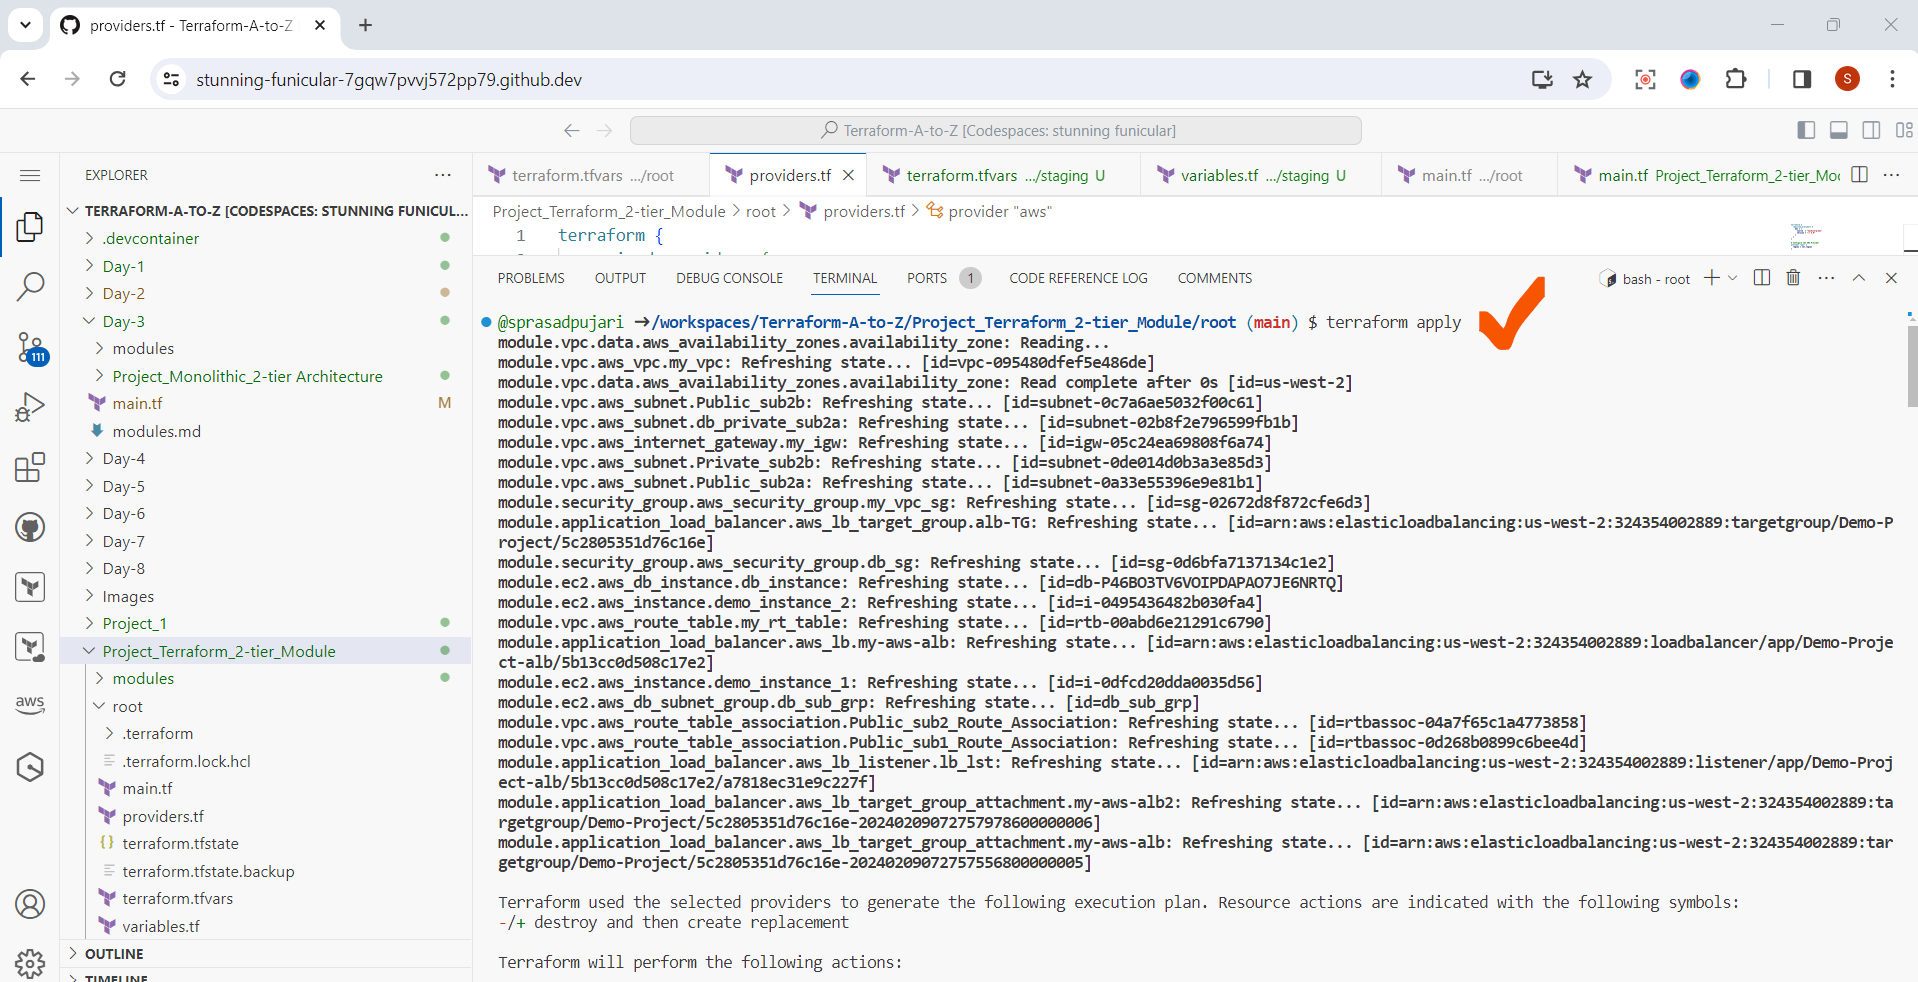

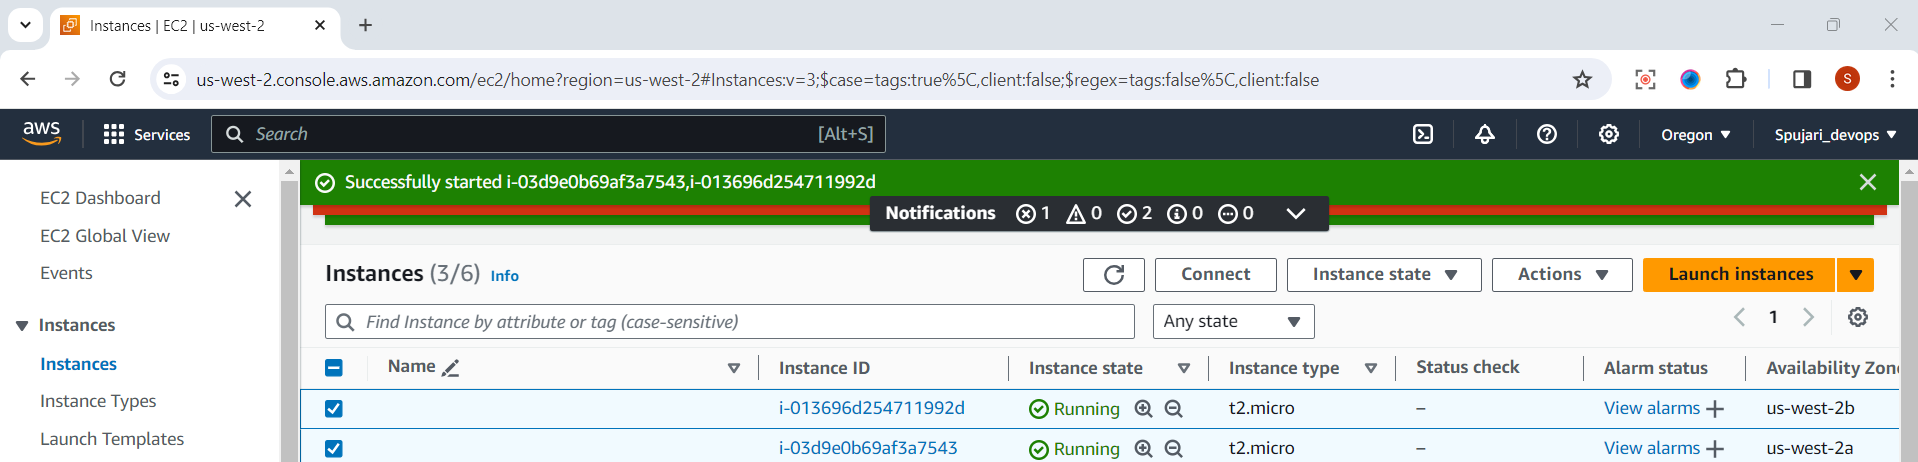
Let’s navigate to the AWS console to see what we spun up.
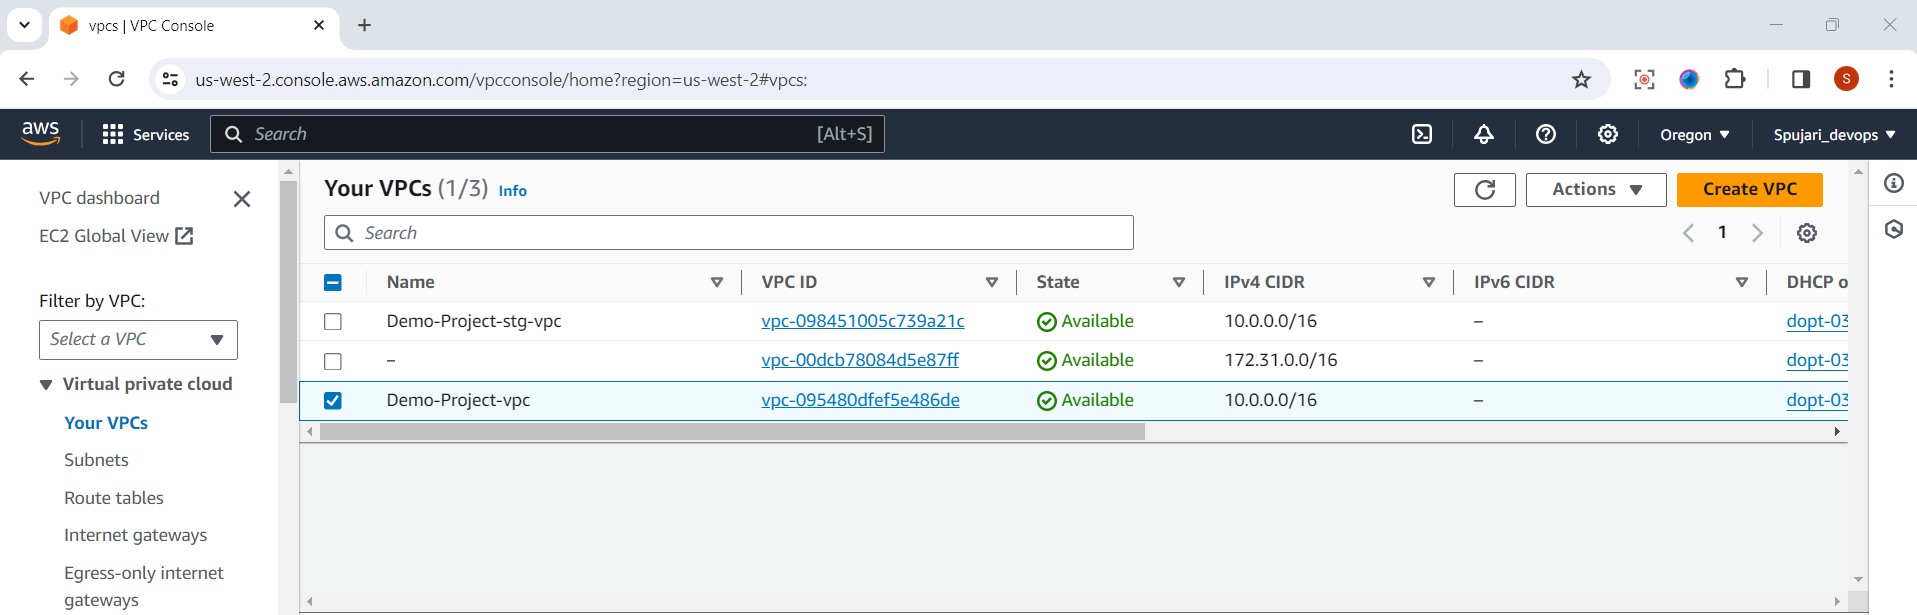
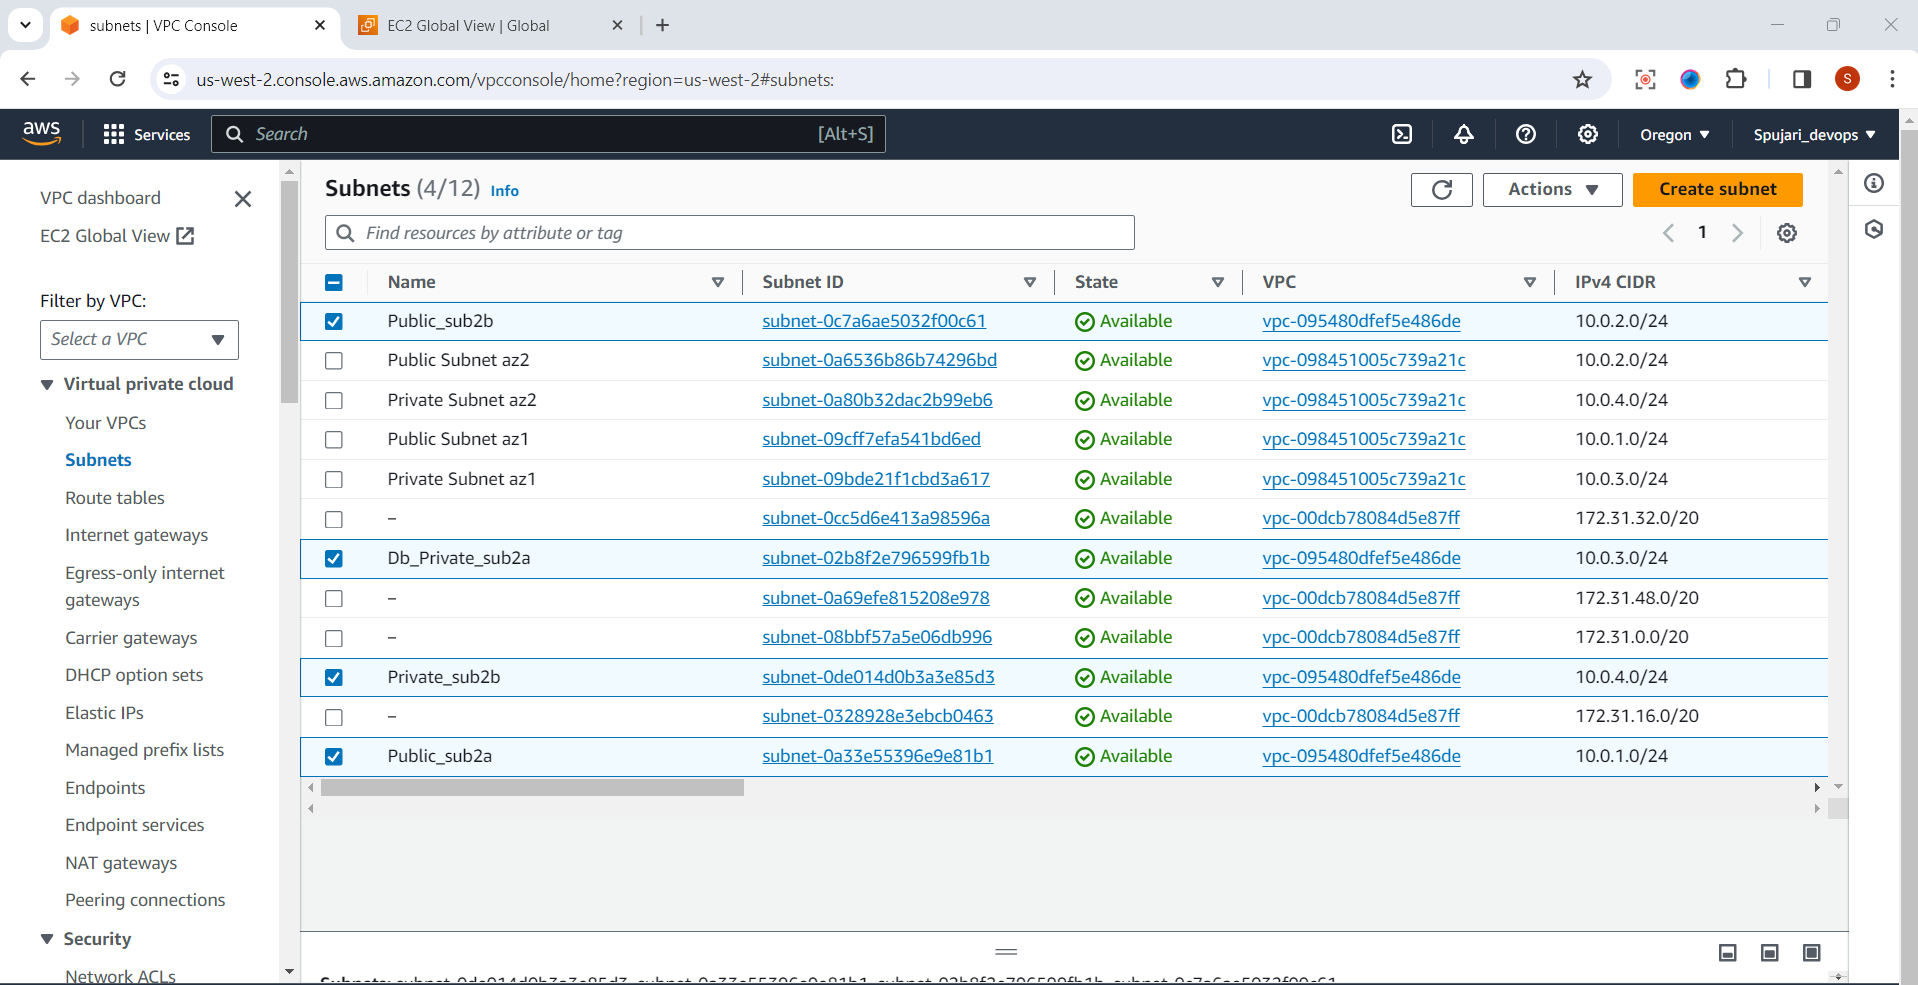
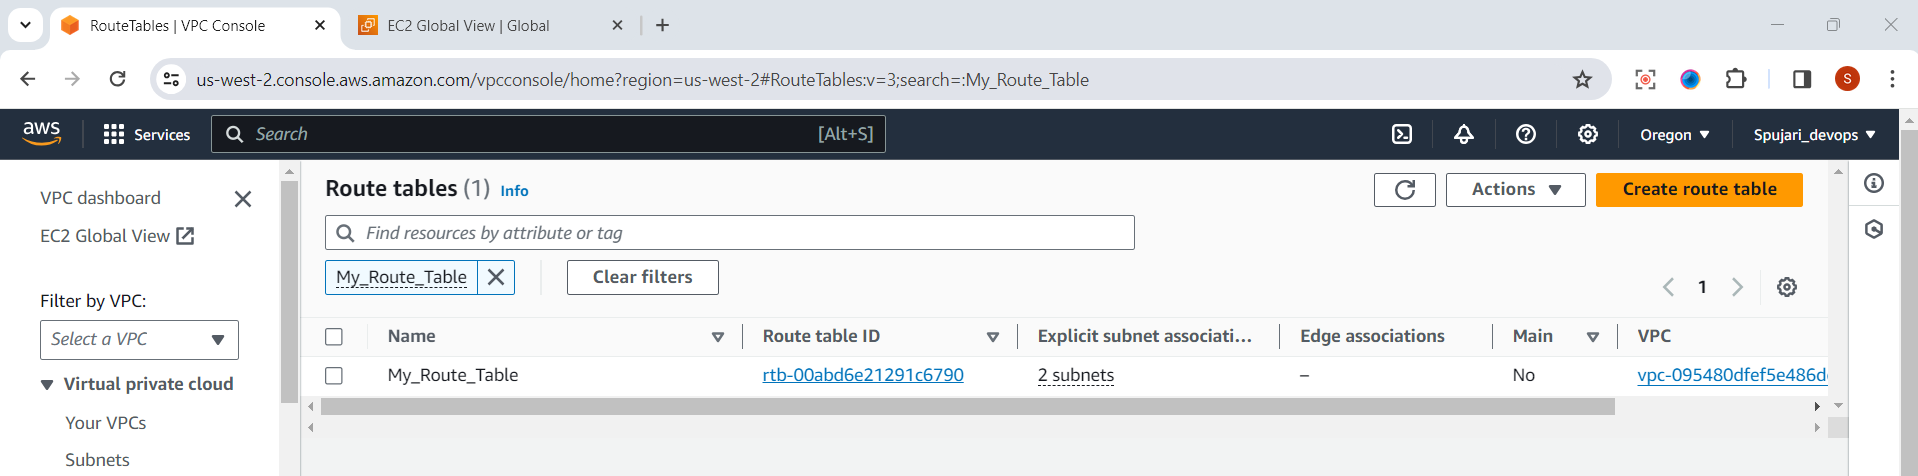
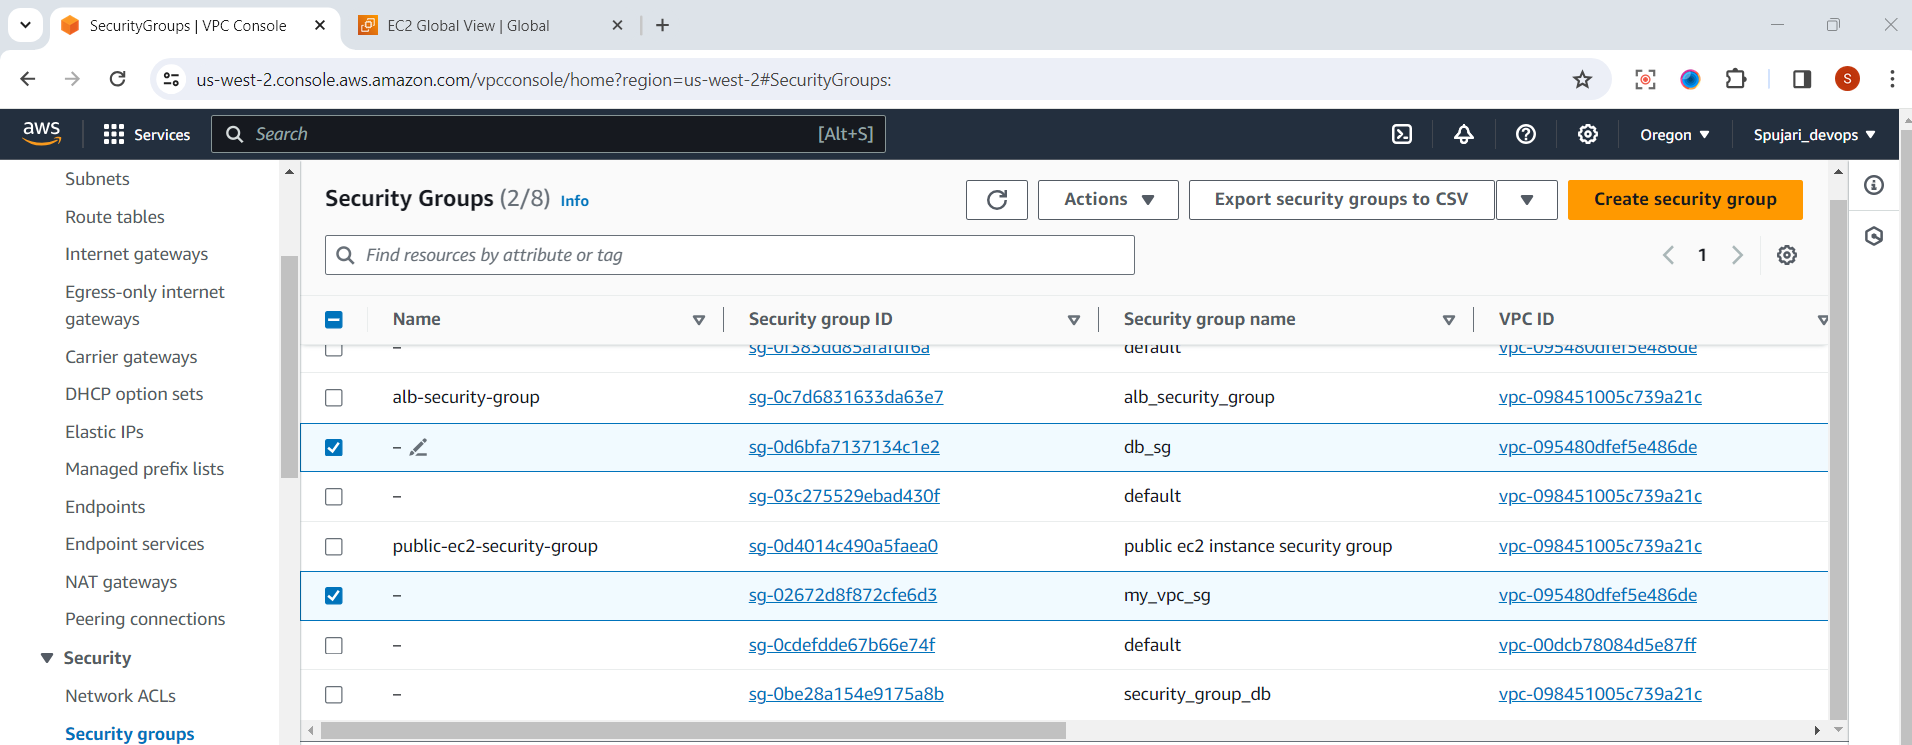
Once your infrastructure is deployed, Go to the AWS console to verify that all resources were spun up successfully. Check for your VPC, subnets, RDS database, and load balancer.
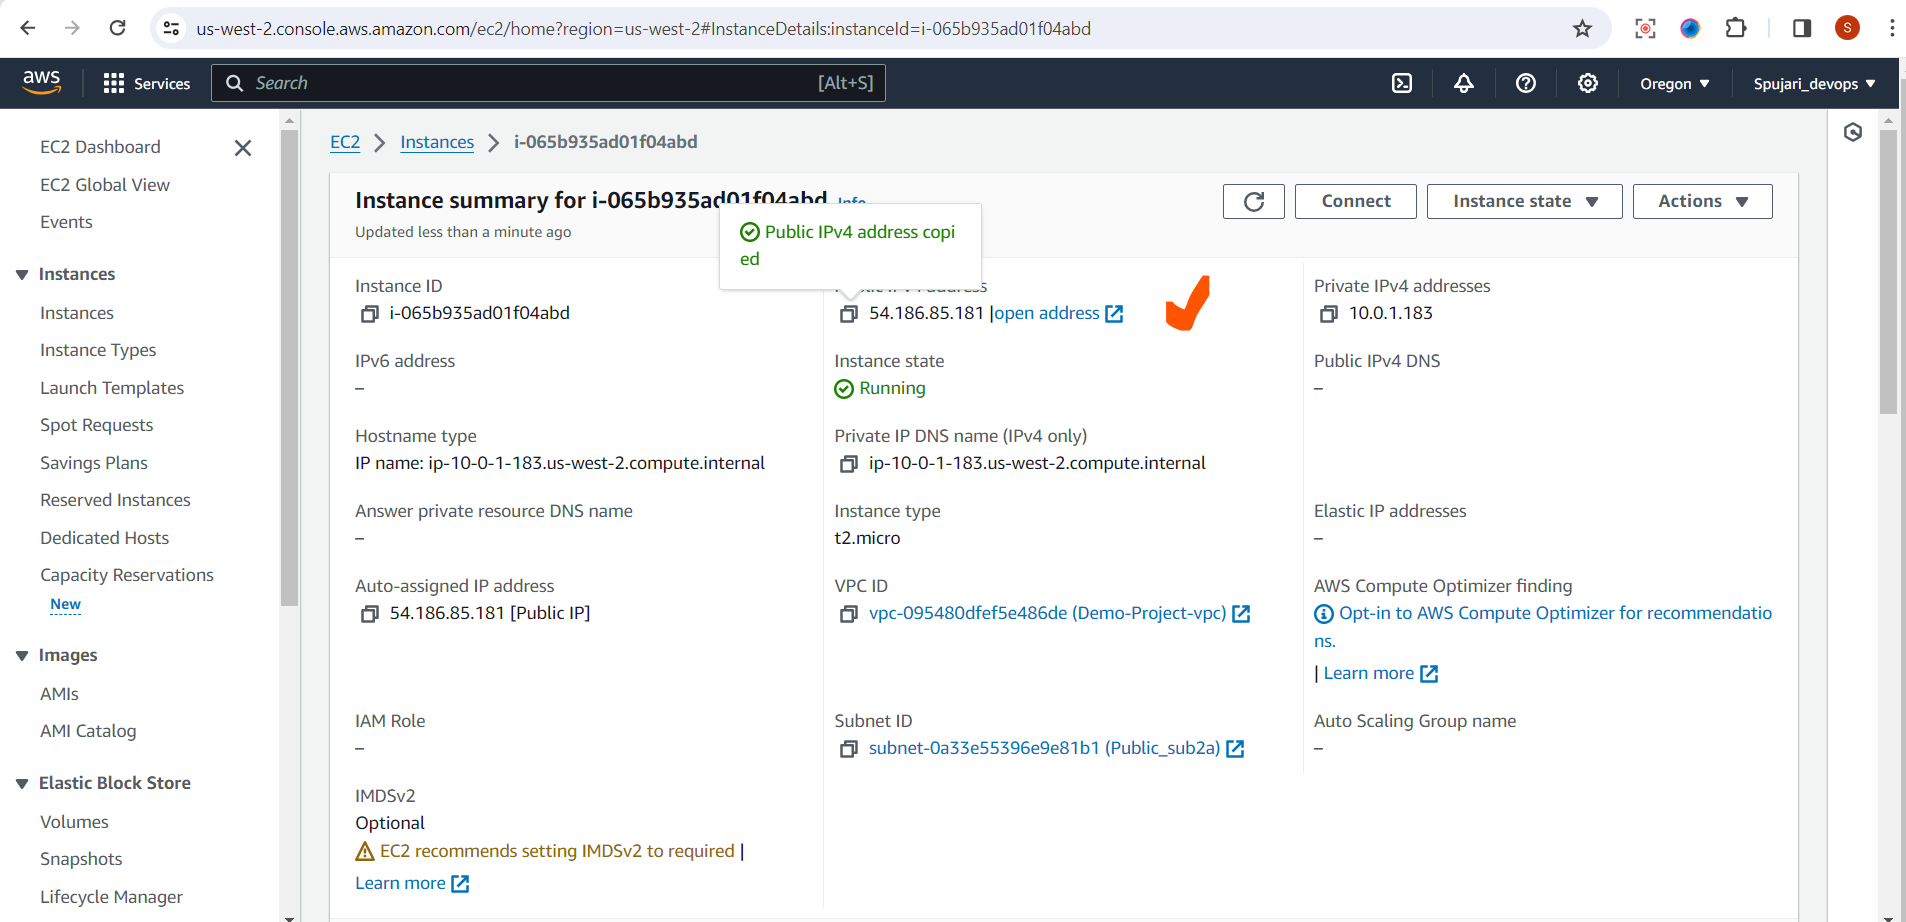
EC2-
VPC
Subnets:
Route Table :
Security Groups
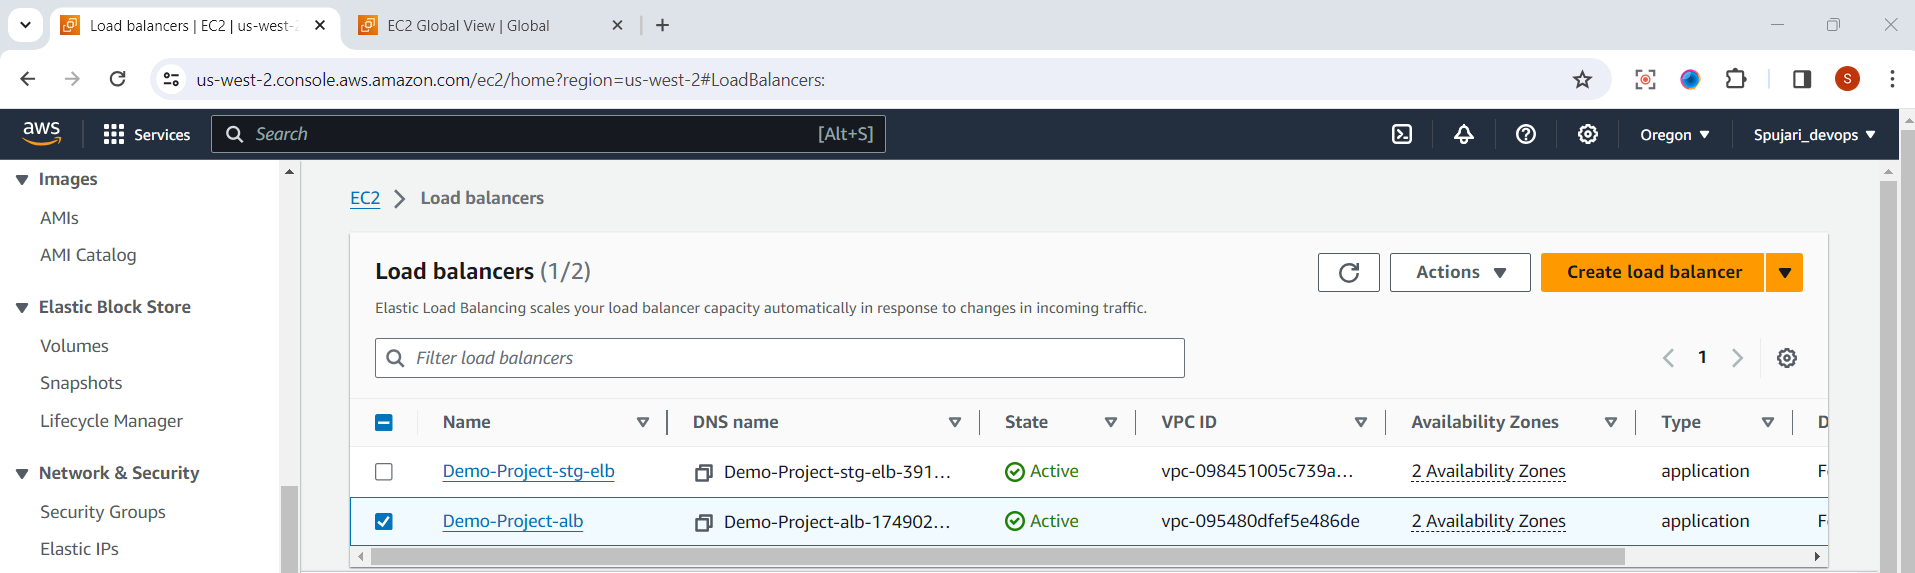
Load Balancer
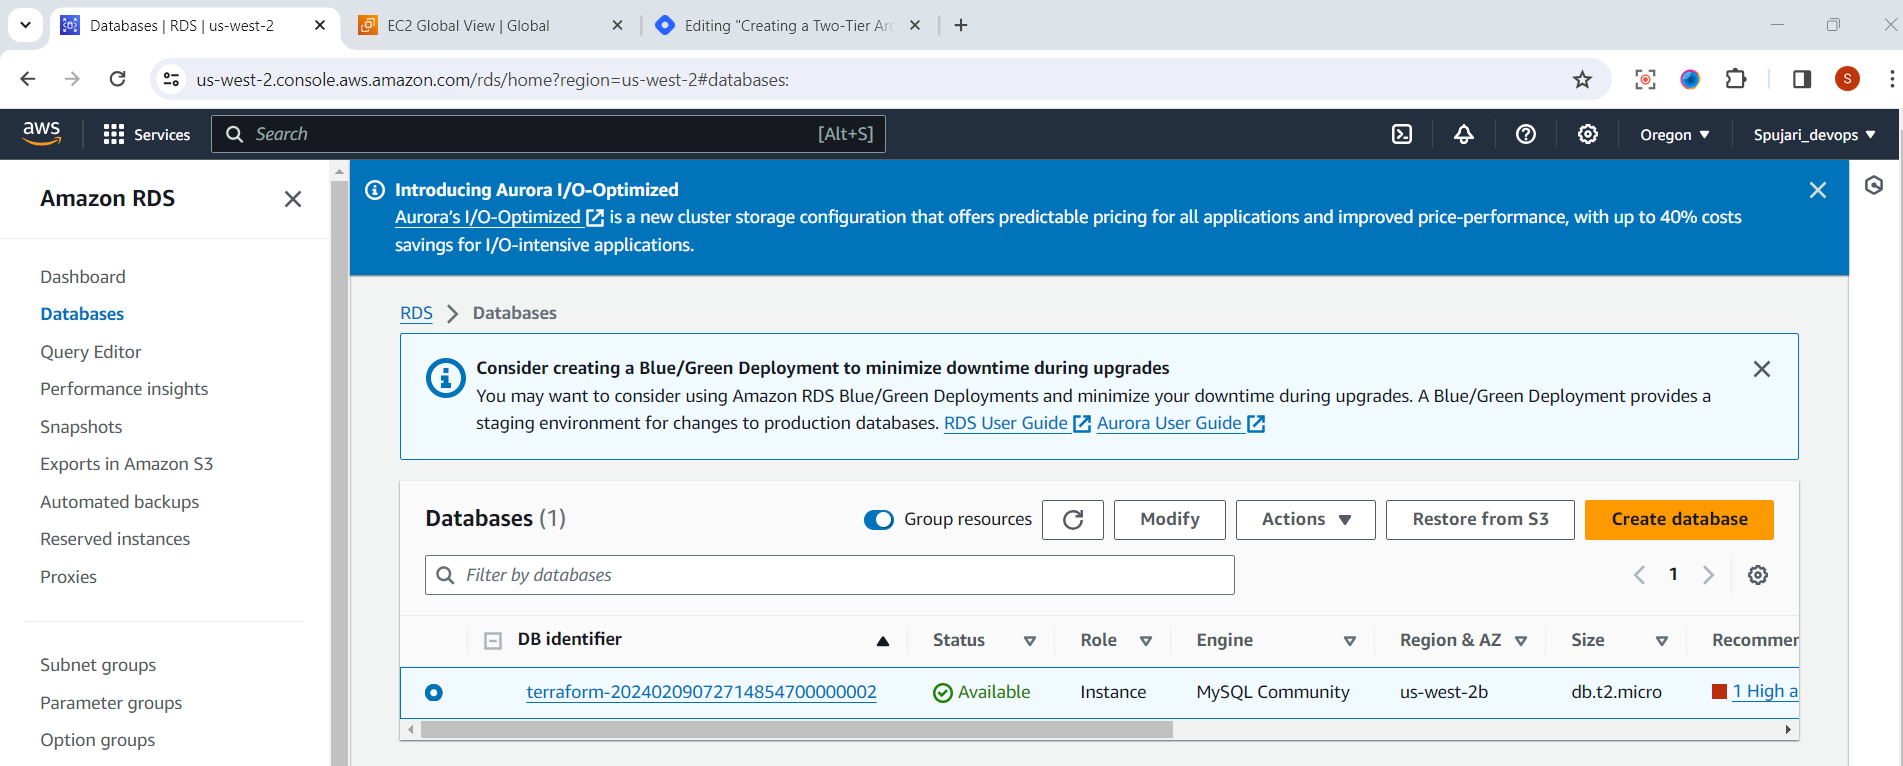
RDS Instance
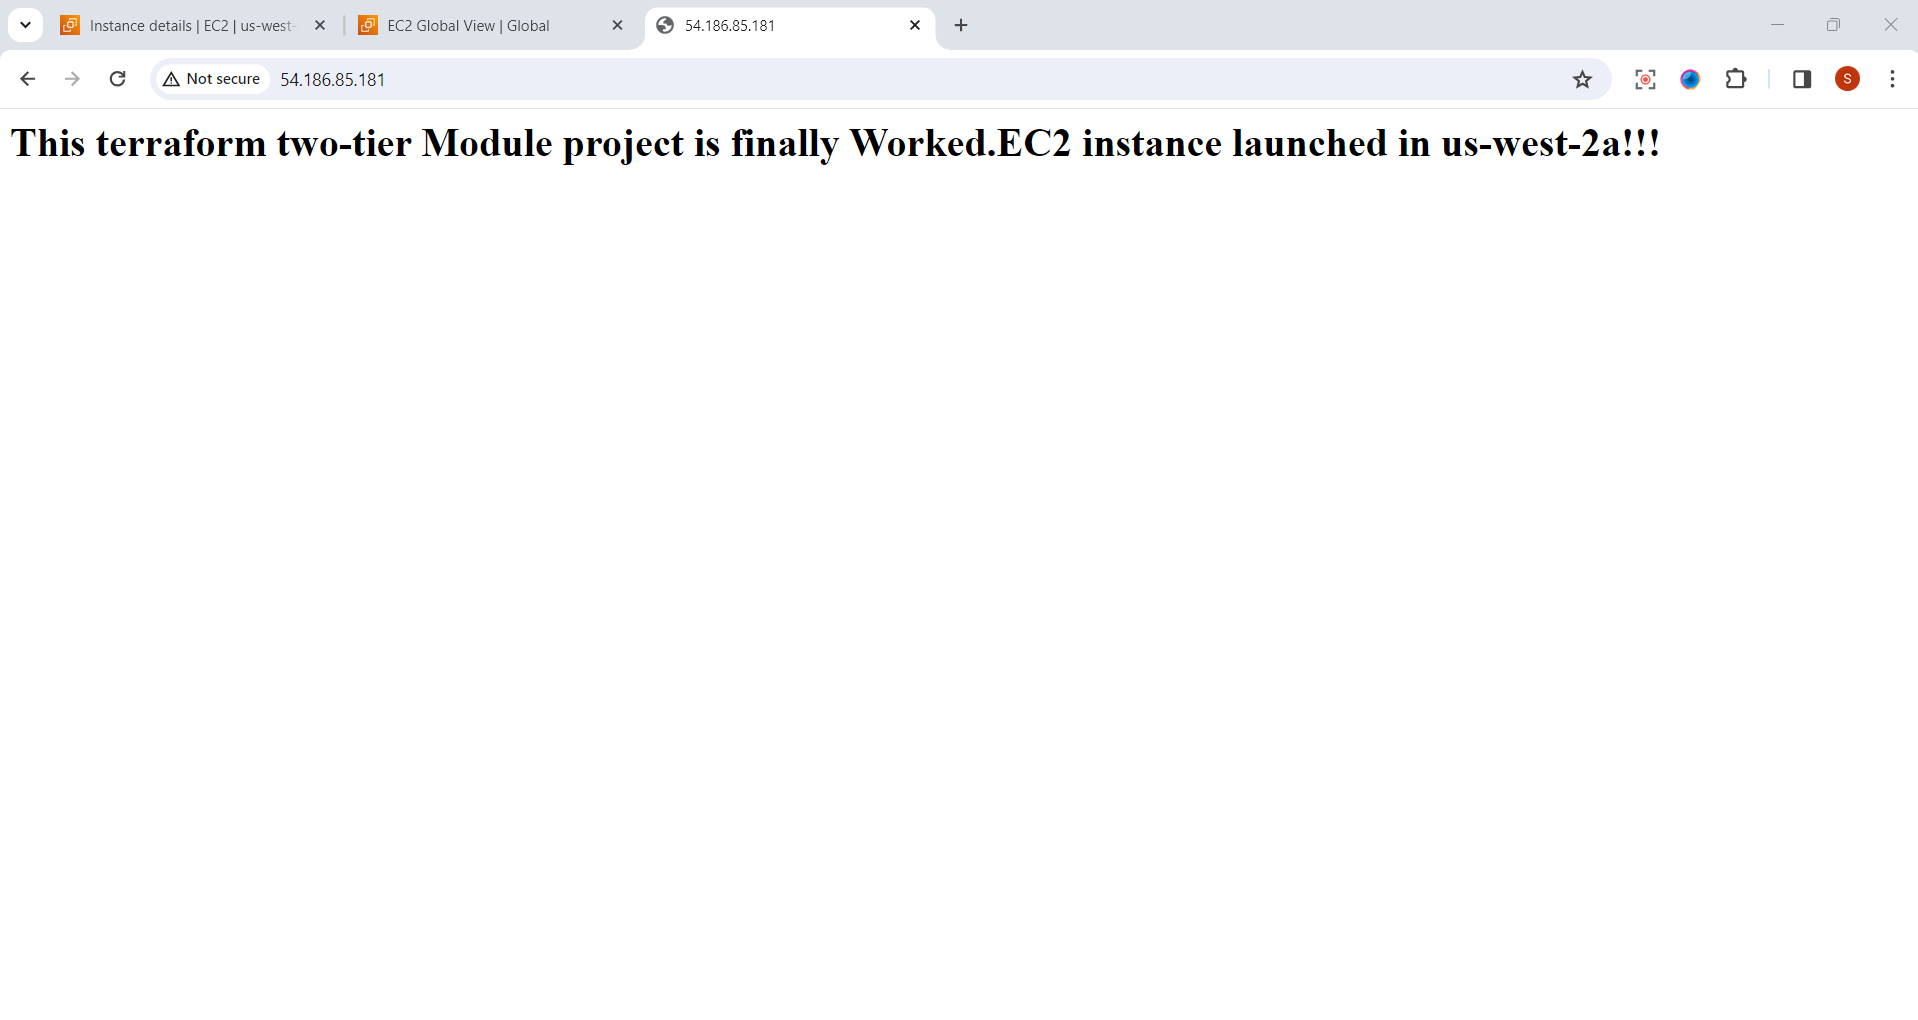
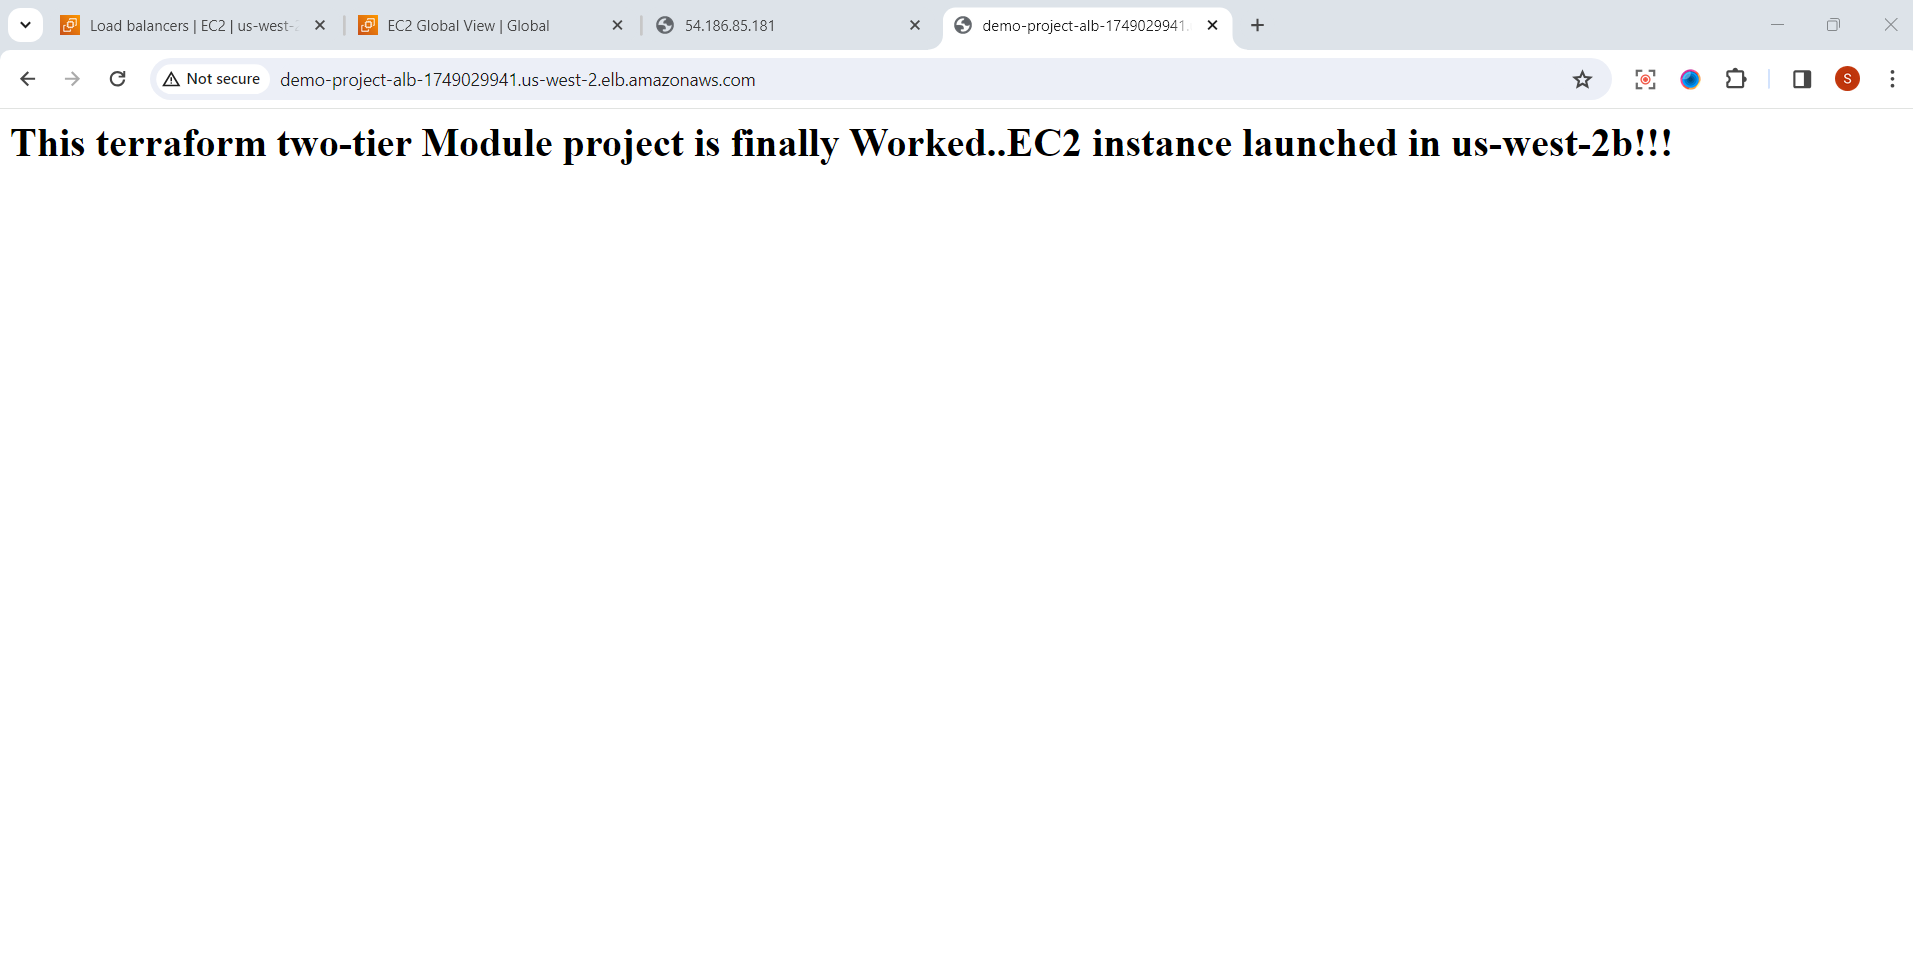
Copy EC2 instance public Ip and paste it into browser ,and see the our Static website is deployed successfully.
Paster it in browser
Copy DNS name from load balancer.
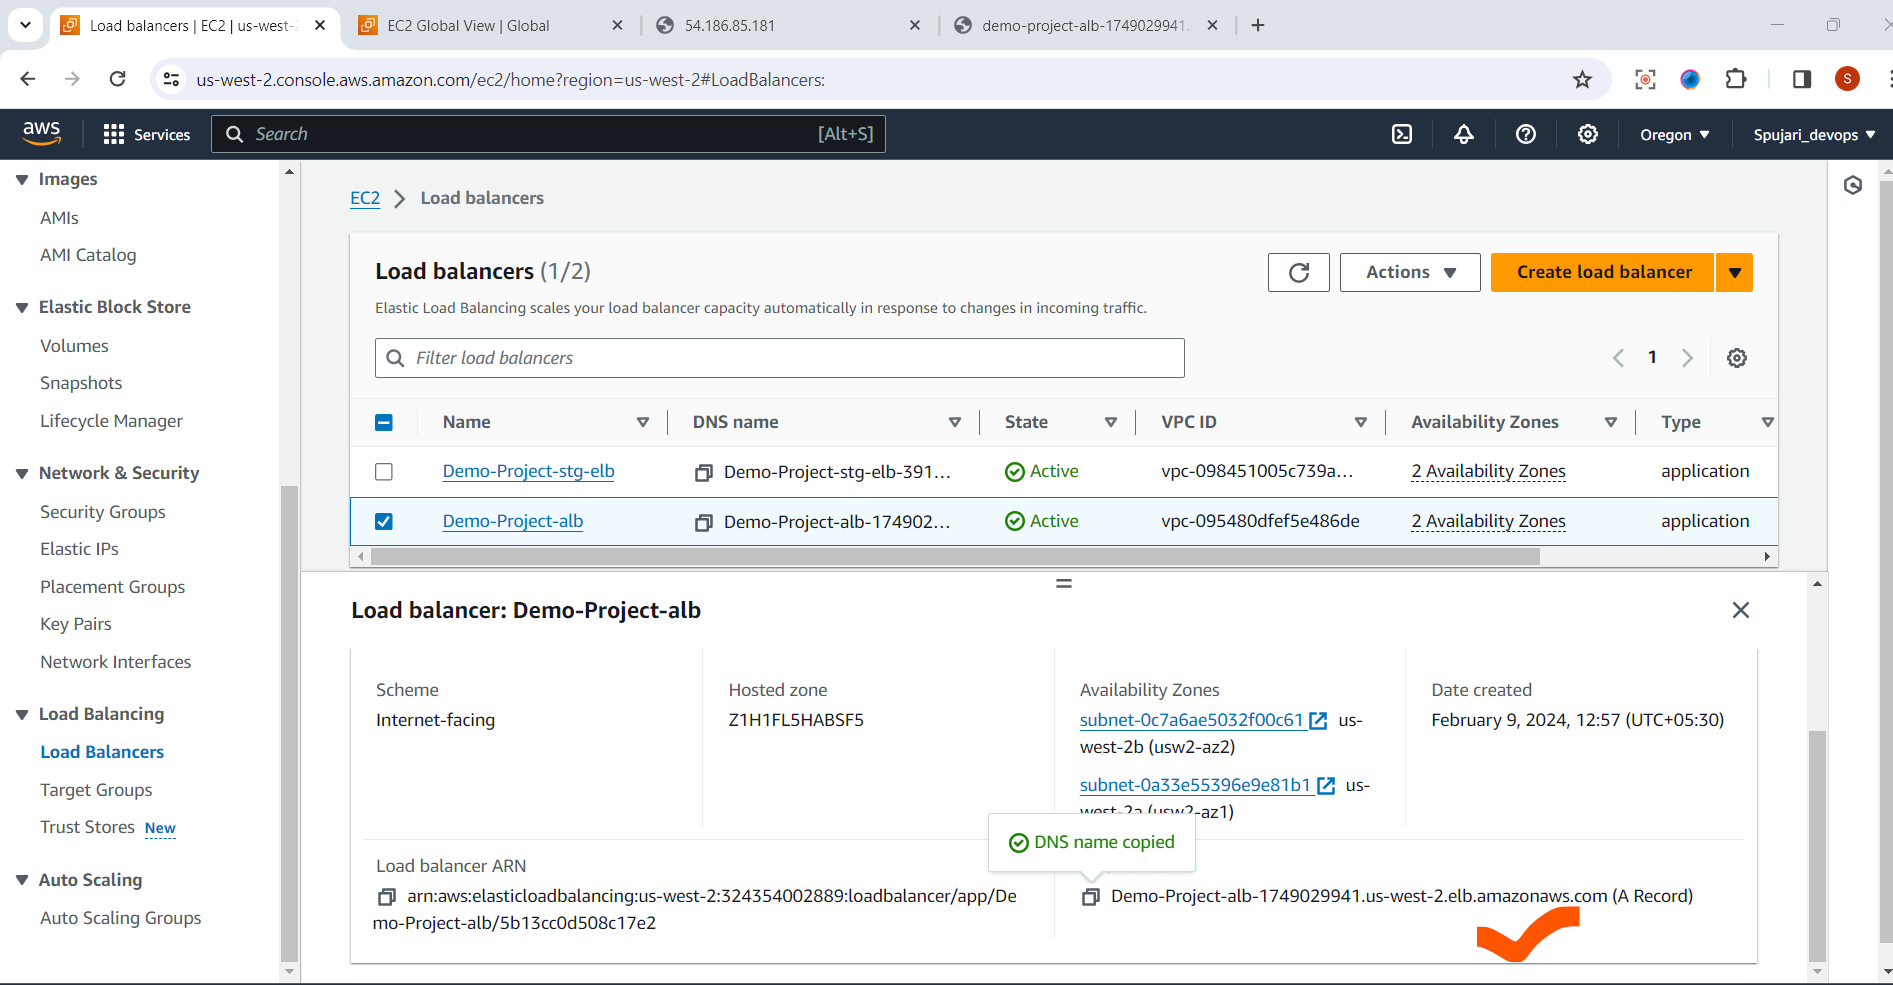
Paste it in browser
Clean Up
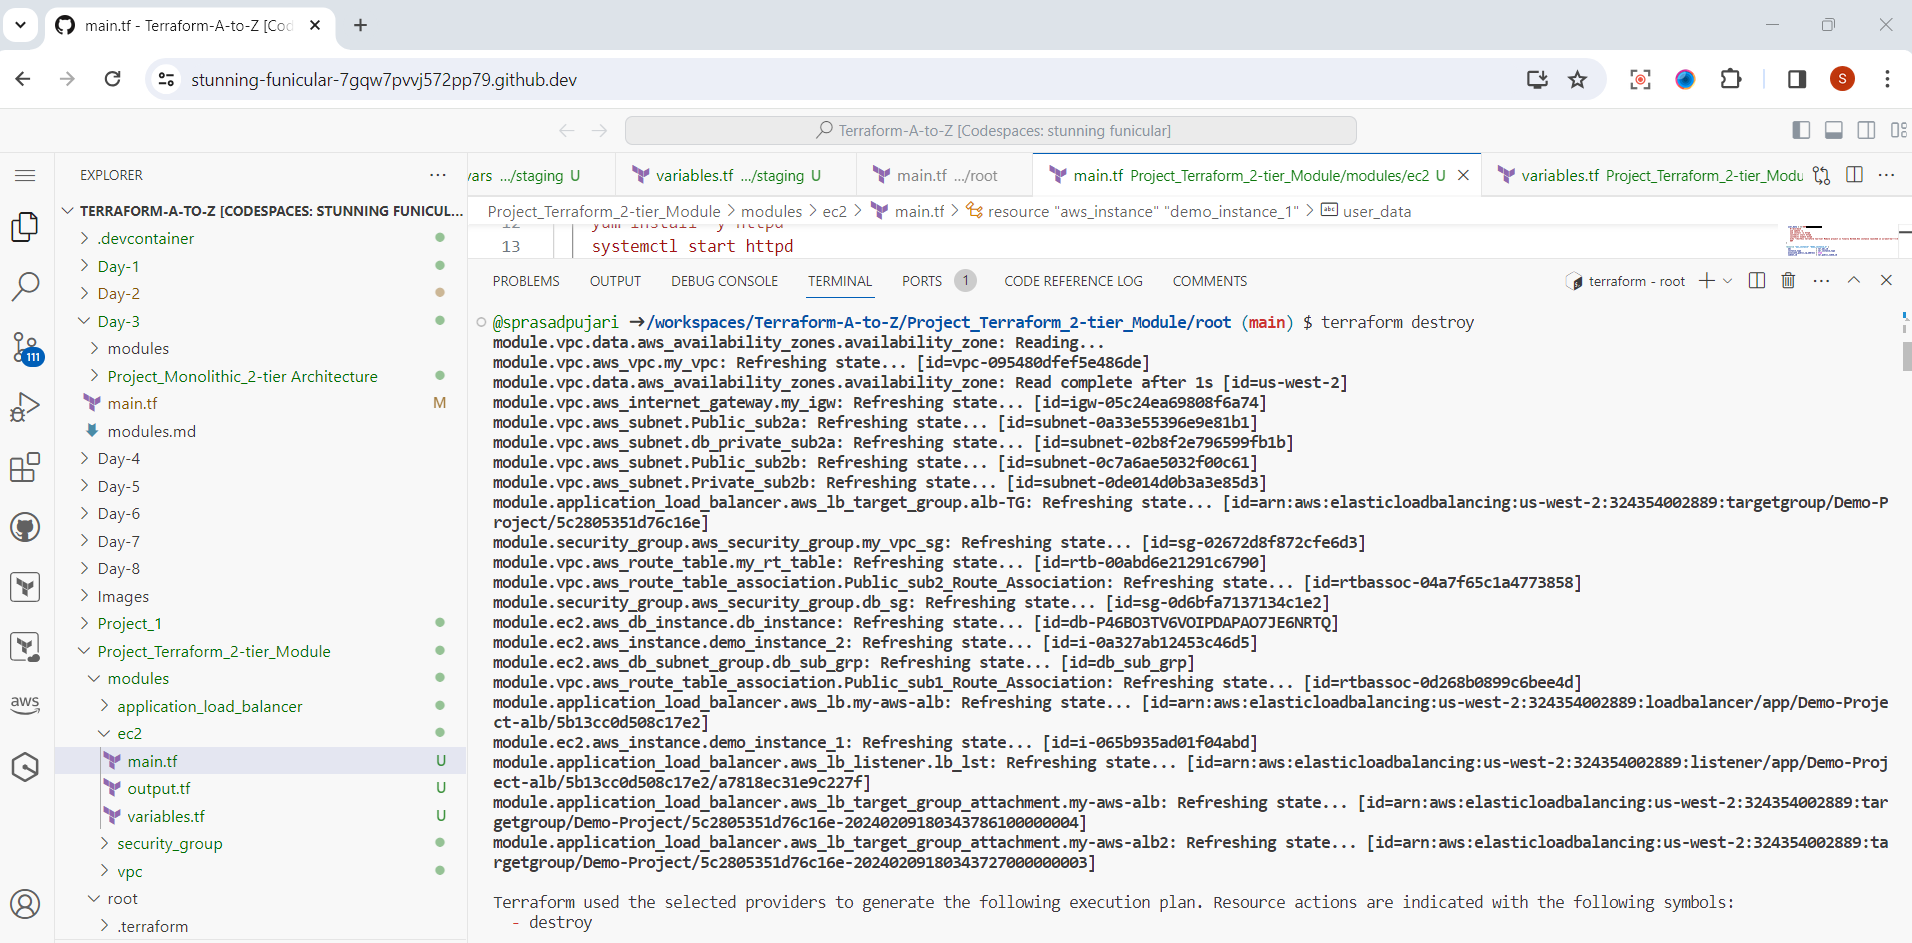
After you've finished experimenting, it's important to clean up your resources to avoid incurring unnecessary charges. Use terraform destroy -var-file="secret.tfvars" to tear down your infrastructure.
$terraform destroy
Thank you for taking the time to review this project write-up! If you have any questions or need further assistance, feel free to reach out. Until next time, take care! 👋🏽
GitHub Repository Link:https://github.com/sprasadpujari
Conclusion
Congratulations! You've successfully created a two-tier architecture in AWS using Terraform. This powerful combination of tools allows you to manage your infrastructure efficiently and scale with ease. Whether you're deploying a simple application or a complex system, Terraform's flexibility and simplicity make it the ideal choice for infrastructure as code. Happy coding!
Thank you for joining me on this journey through the world of cloud computing! Your interest and support mean a lot to me, and I'm excited to continue exploring this fascinating field together. Let's stay connected and keep learning and growing as we navigate the ever-evolving landscape of technology.
LinkedIn Profile: https://www.linkedin.com/in/prasad-g-743239154/
Feel free to reach out to me directly at spujari.devops@gmail.com. I'm always open to hearing your thoughts and suggestions, as they help me improve and better cater to your needs. Let's keep moving forward and upward!
If you found this blog post helpful, please consider showing your support by giving it a round of applause👏👏👏. Your engagement not only boosts the visibility of the content, but it also lets other DevOps and Cloud Engineers know that it might be useful to them too. Thank you for your support! 😀
Thank you for reading💚
Best Regards,
Sprasad 🌐✨


