

🐳 Introduction
Docker Swarm 🐋 is a powerful container orchestration tool designed to manage clusters of Docker nodes, facilitating the deployment and scalability of applications.
- Each Docker container within a Swarm 🐝 can function as a node within the cluster environment, offering flexibility and efficiency.
🔑 Docker Swarm Key Terms Explained
Docker Swarm cluster:
- A cohesive group of Docker nodes collaborating to deliver a robust and scalable platform for deploying and operating Docker-based applications.
Docker Swarm node:
- Refers to individual physical or virtual machines configured to execute Docker applications, categorized as Manager or Worker nodes.
Manager node:
- Oversees the Swarm cluster, coordinating tasks and services across Worker nodes.
Worker node:
- Executes tasks and services under the direction of the Manager node, contributing to the workload distribution.
Docker service:
- Utilized to manage services within a Docker Swarm cluster, facilitating seamless orchestration and operation.
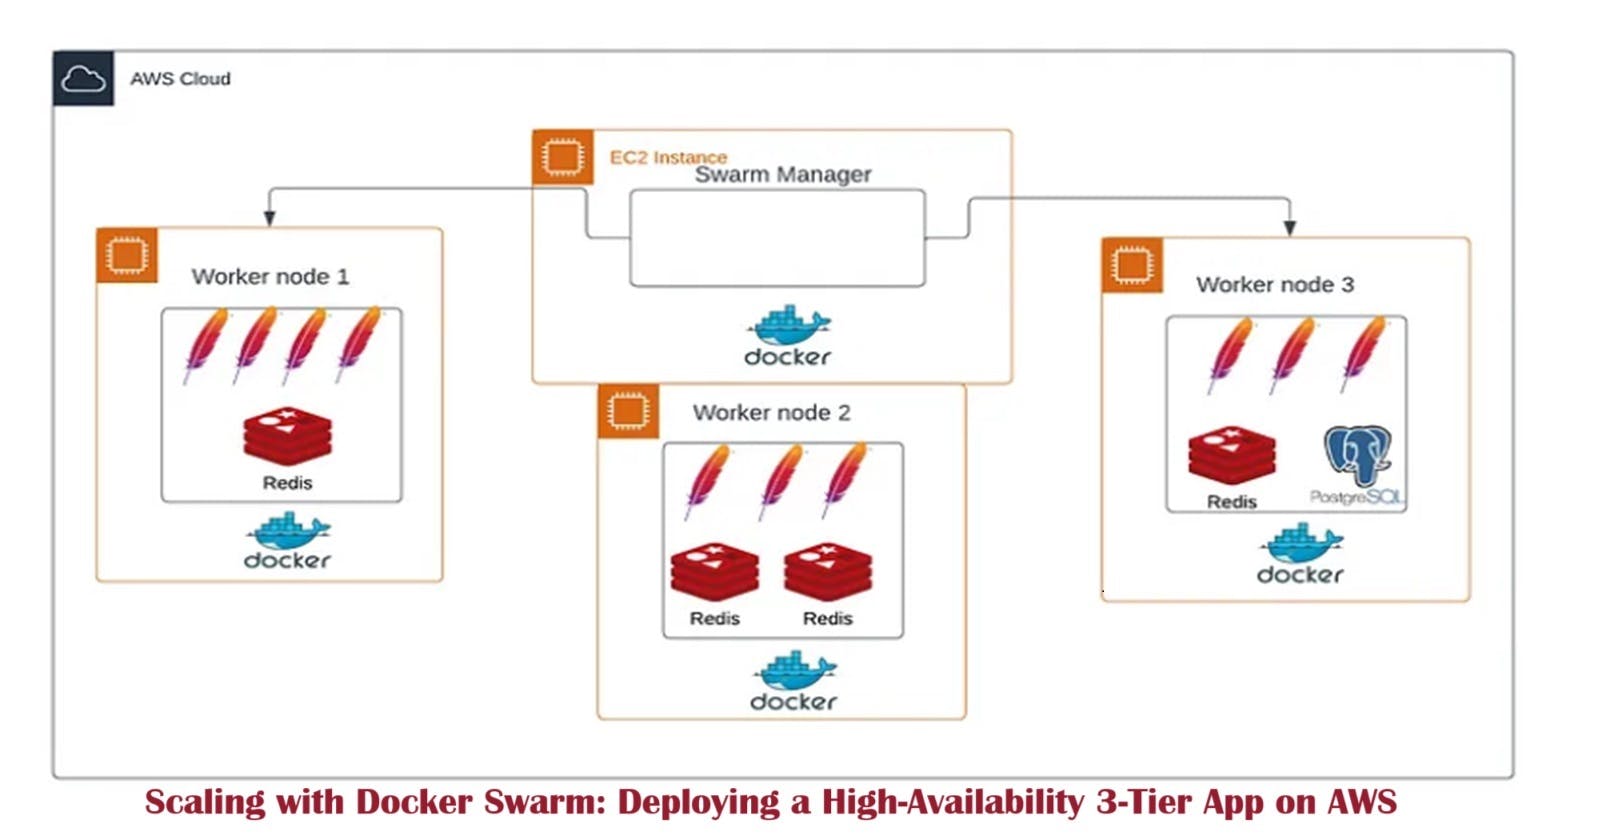
🎯 Project Objectives
Utilize AWS EC2 instances to establish a Docker Swarm comprising one Manager node and three Worker nodes.
Validate the functionality of the Swarm by deploying a 3-tier architecture consisting of:
A Redis service with 4 replicas.
An Apache service with 10 replicas.
A Postgres service with 1 replica.
🛠️ Prerequisites
AWS account 🌐
Fundamental understanding of Docker 🐳
Basic proficiency in Linux command line operations 💻
Docker Hub account 🚢
Step 1: Set Up Amazon EC2 Instance Environment
Create Swarm Security Groups:
Access the Amazon VPC console.

Navigate to security groups and create two distinct groups: Swarm Manager and Swarm Worker.
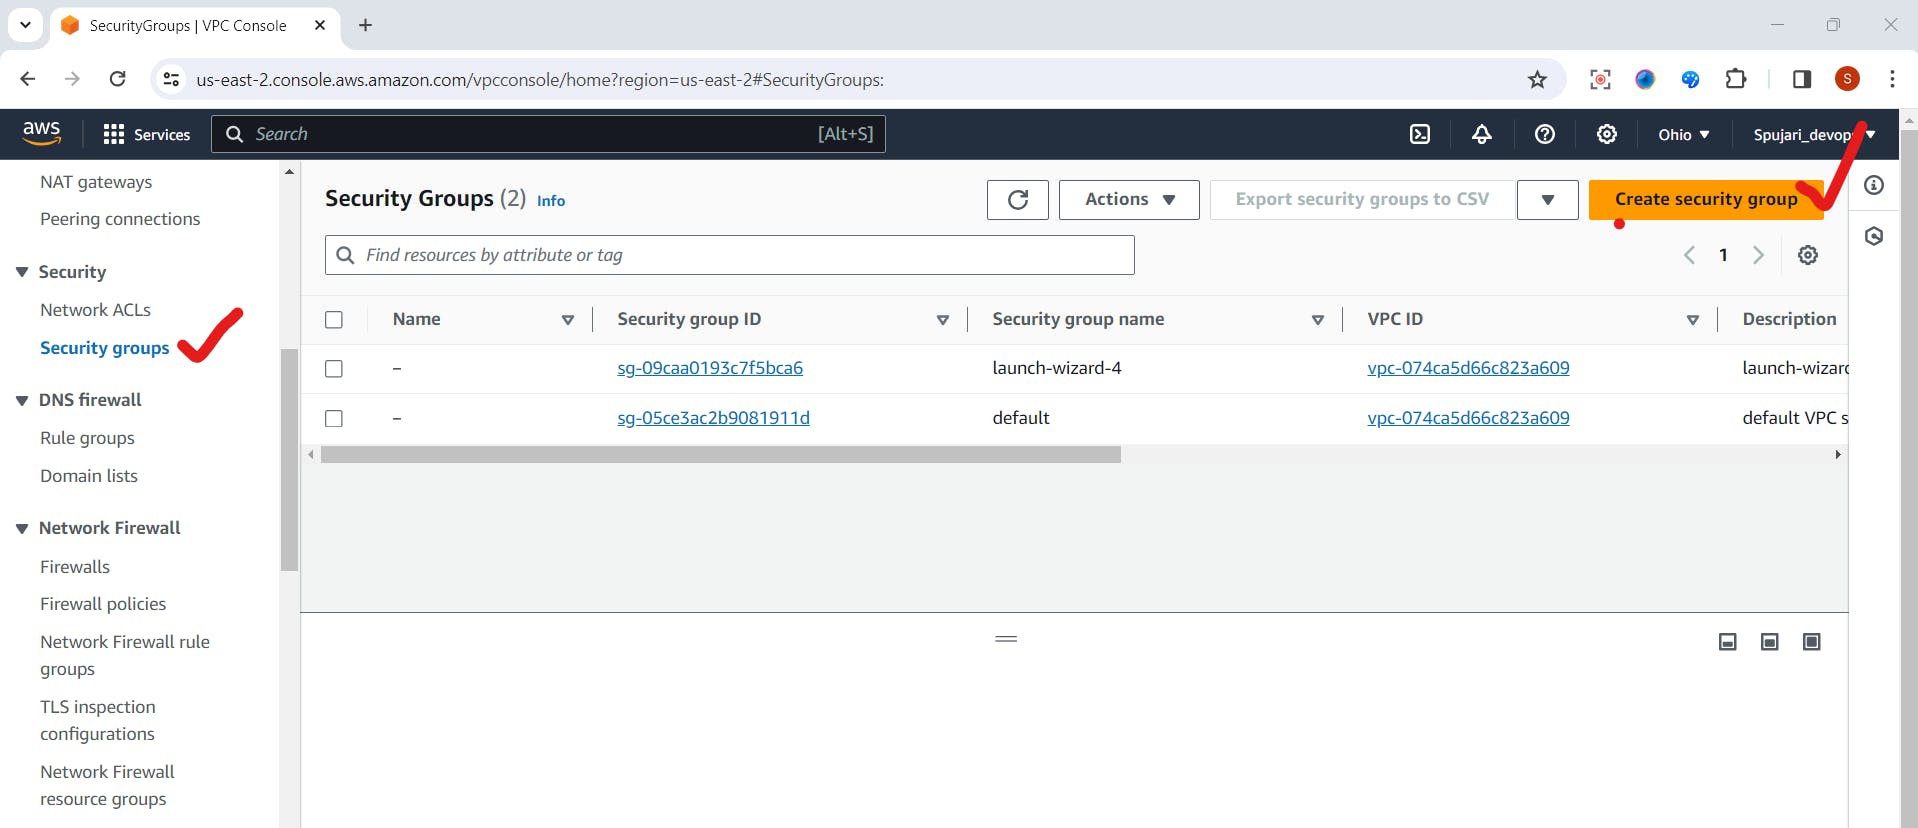
Create Security Group

Configure inbound rules for each group, ensuring ports TCP 2377, TCP 7946, UDP 7946, UDP 4789, and protocol 50 are accessible.


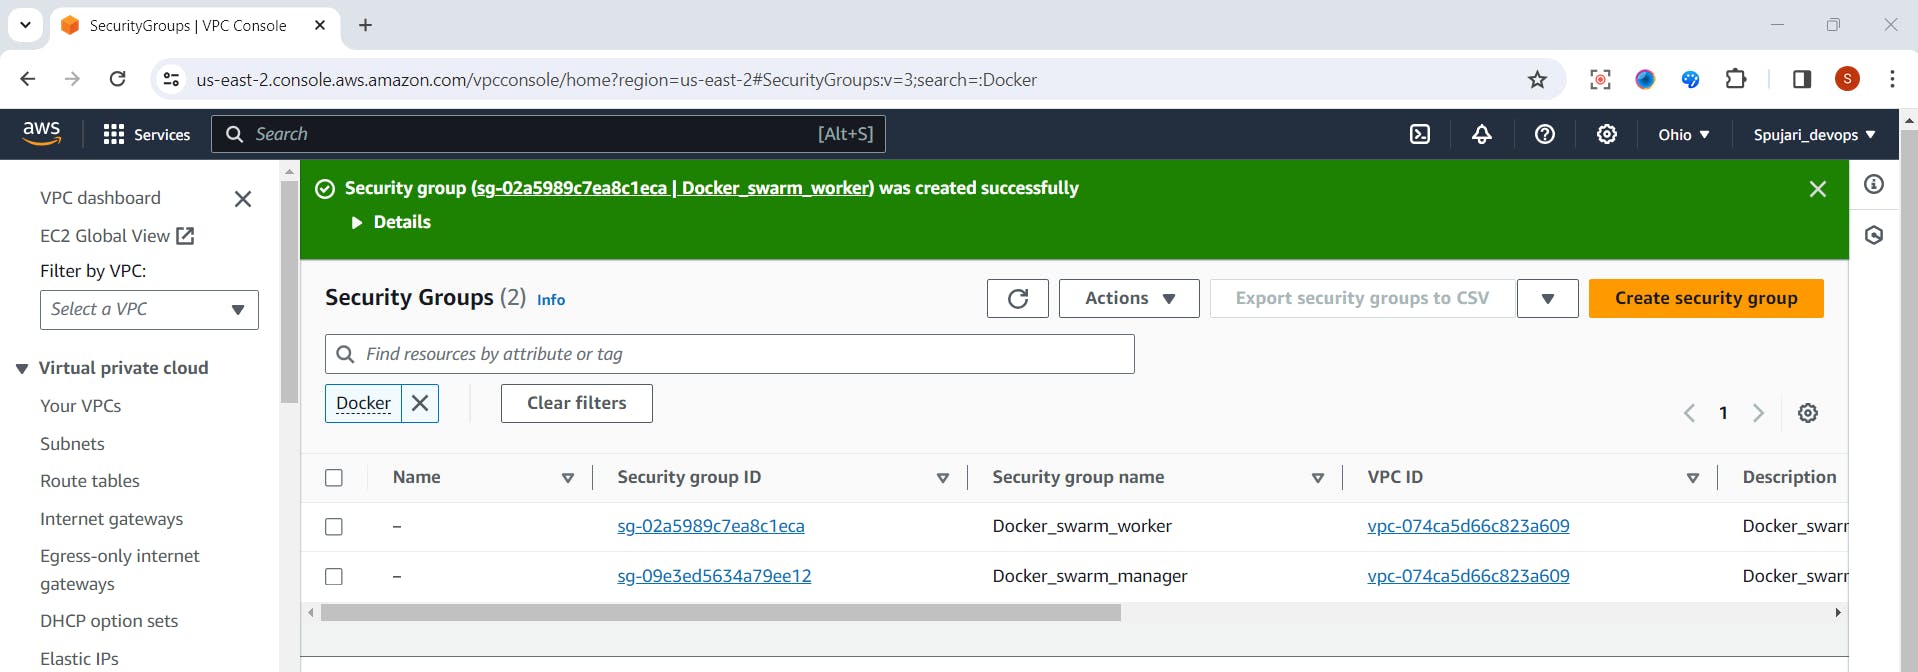
👷 Create Swarm Worker Security Group
To establish the Swarm Worker security group, follow these straightforward steps:
Repeat the same procedures as for creating the manager security group.

Create security group

Adjust the inbound rules to include the following ports:
TCP 7946
UDP 7946
UDP 4789
Allow all IP traffic (protocol 50).
Click on create security group

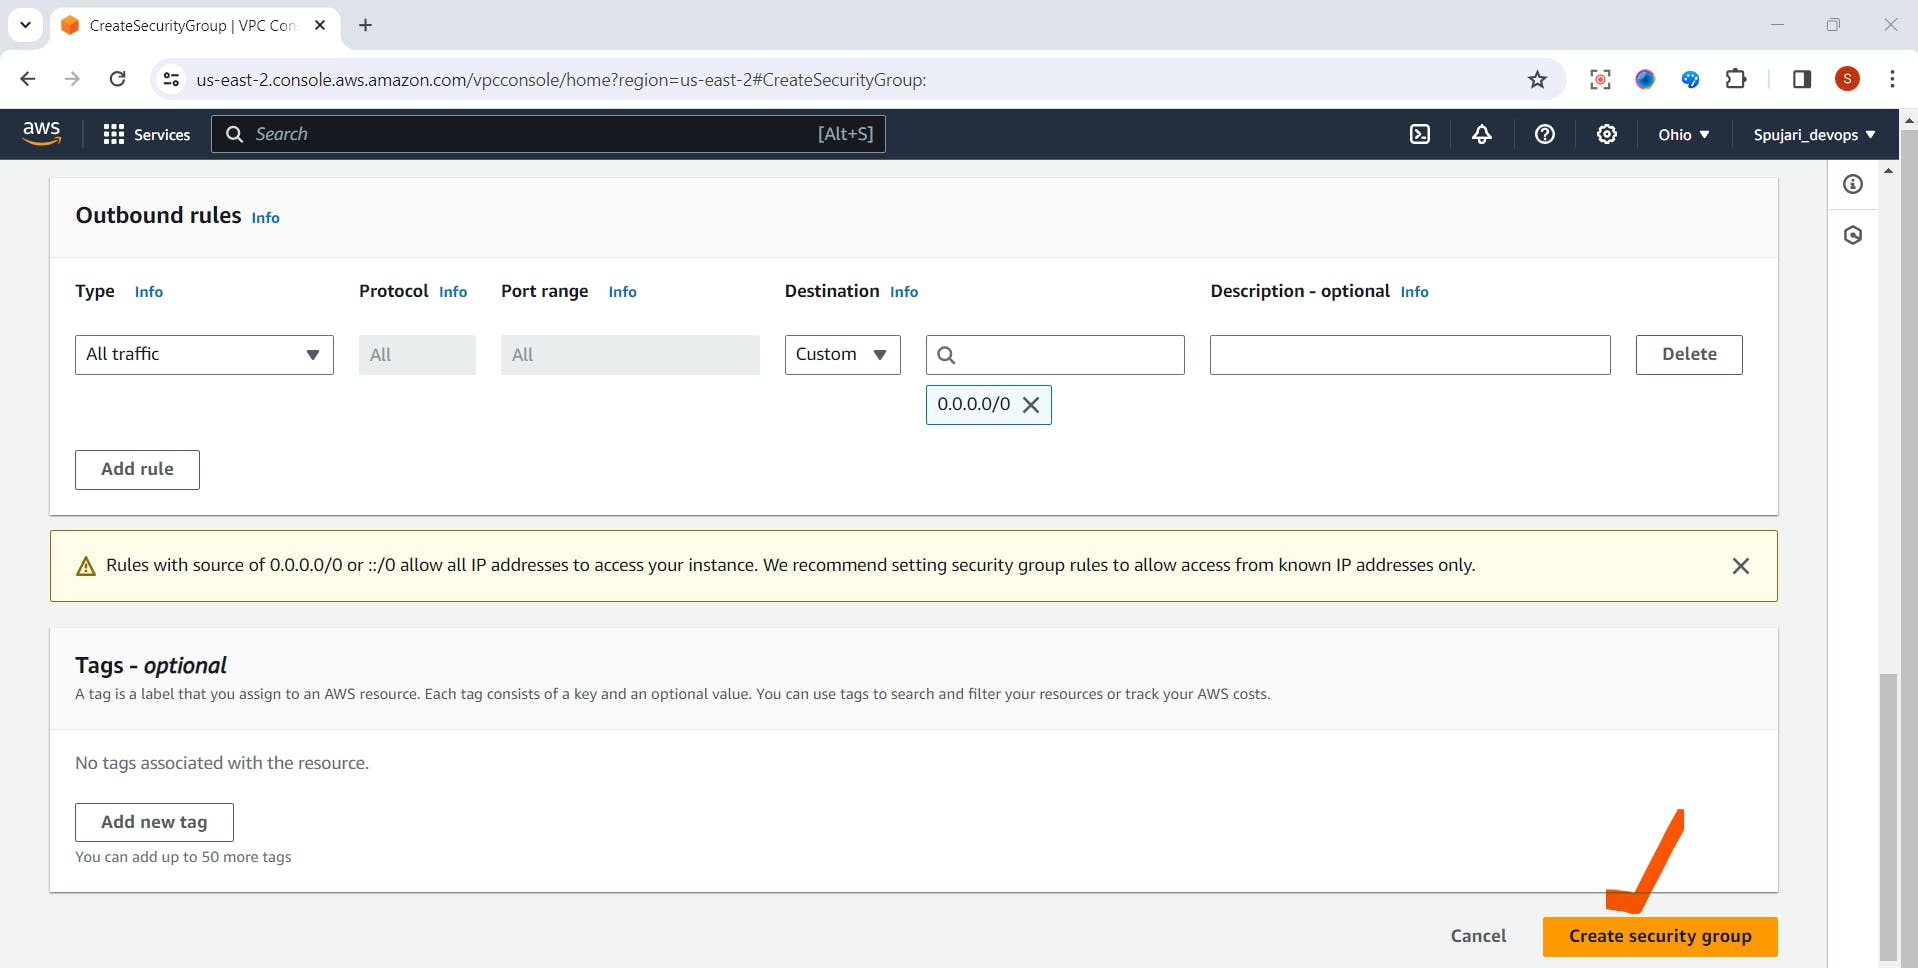
This configuration ensures seamless communication among Worker nodes within the Docker Swarm cluster, enabling efficient orchestration of tasks and services.
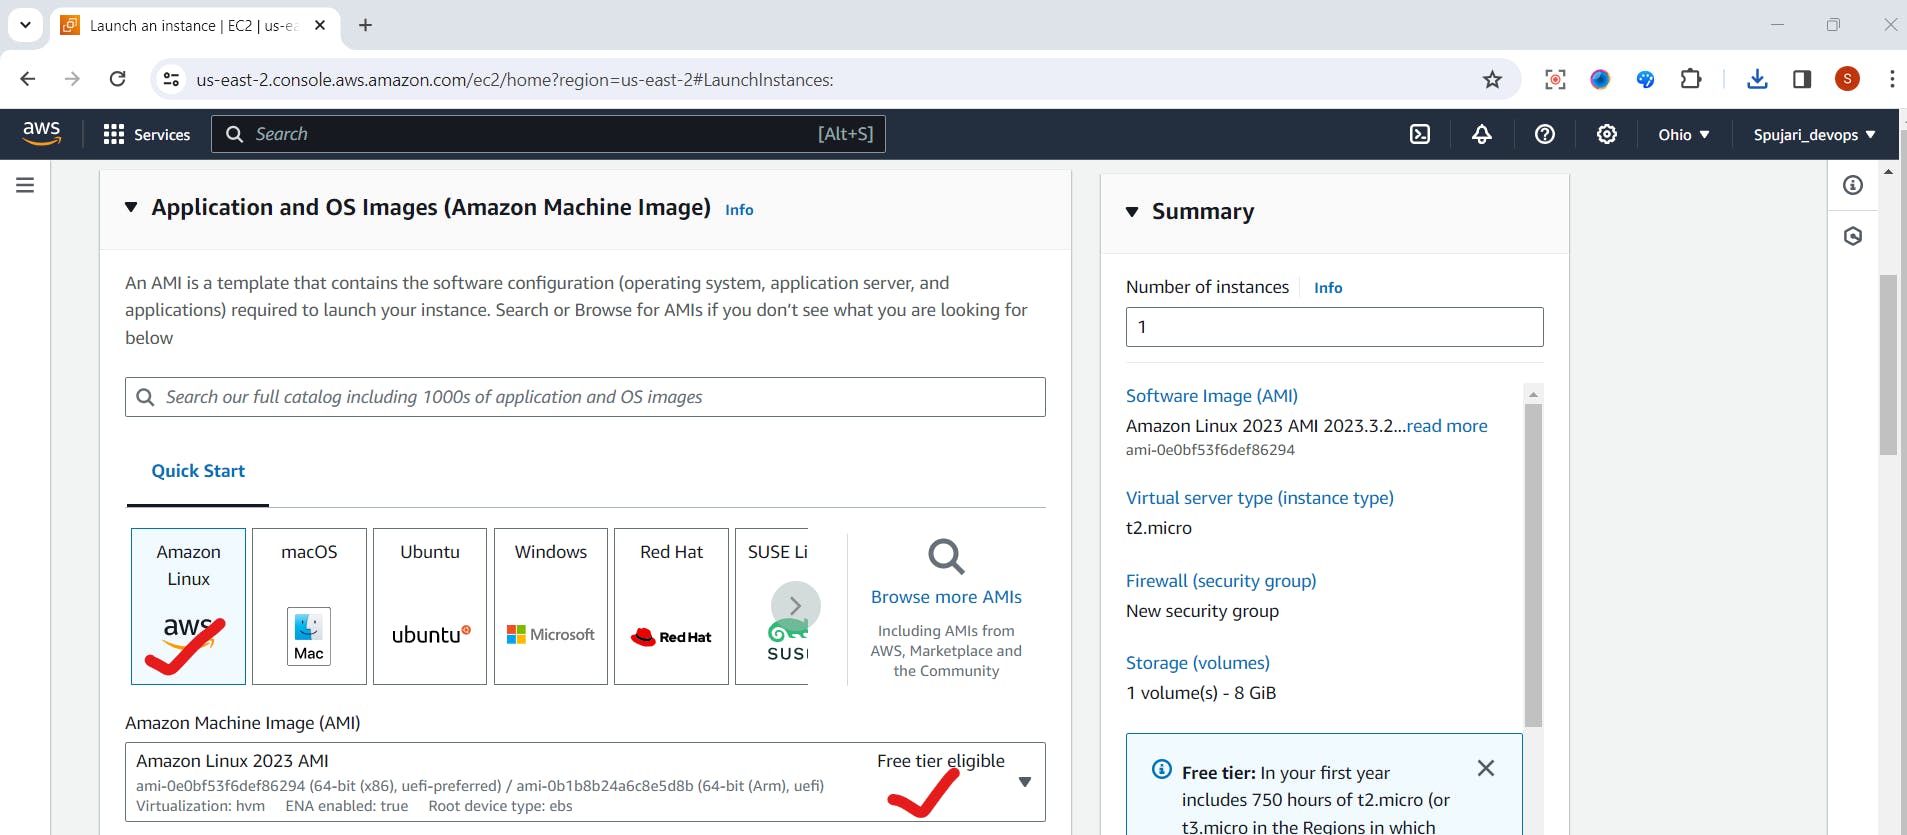
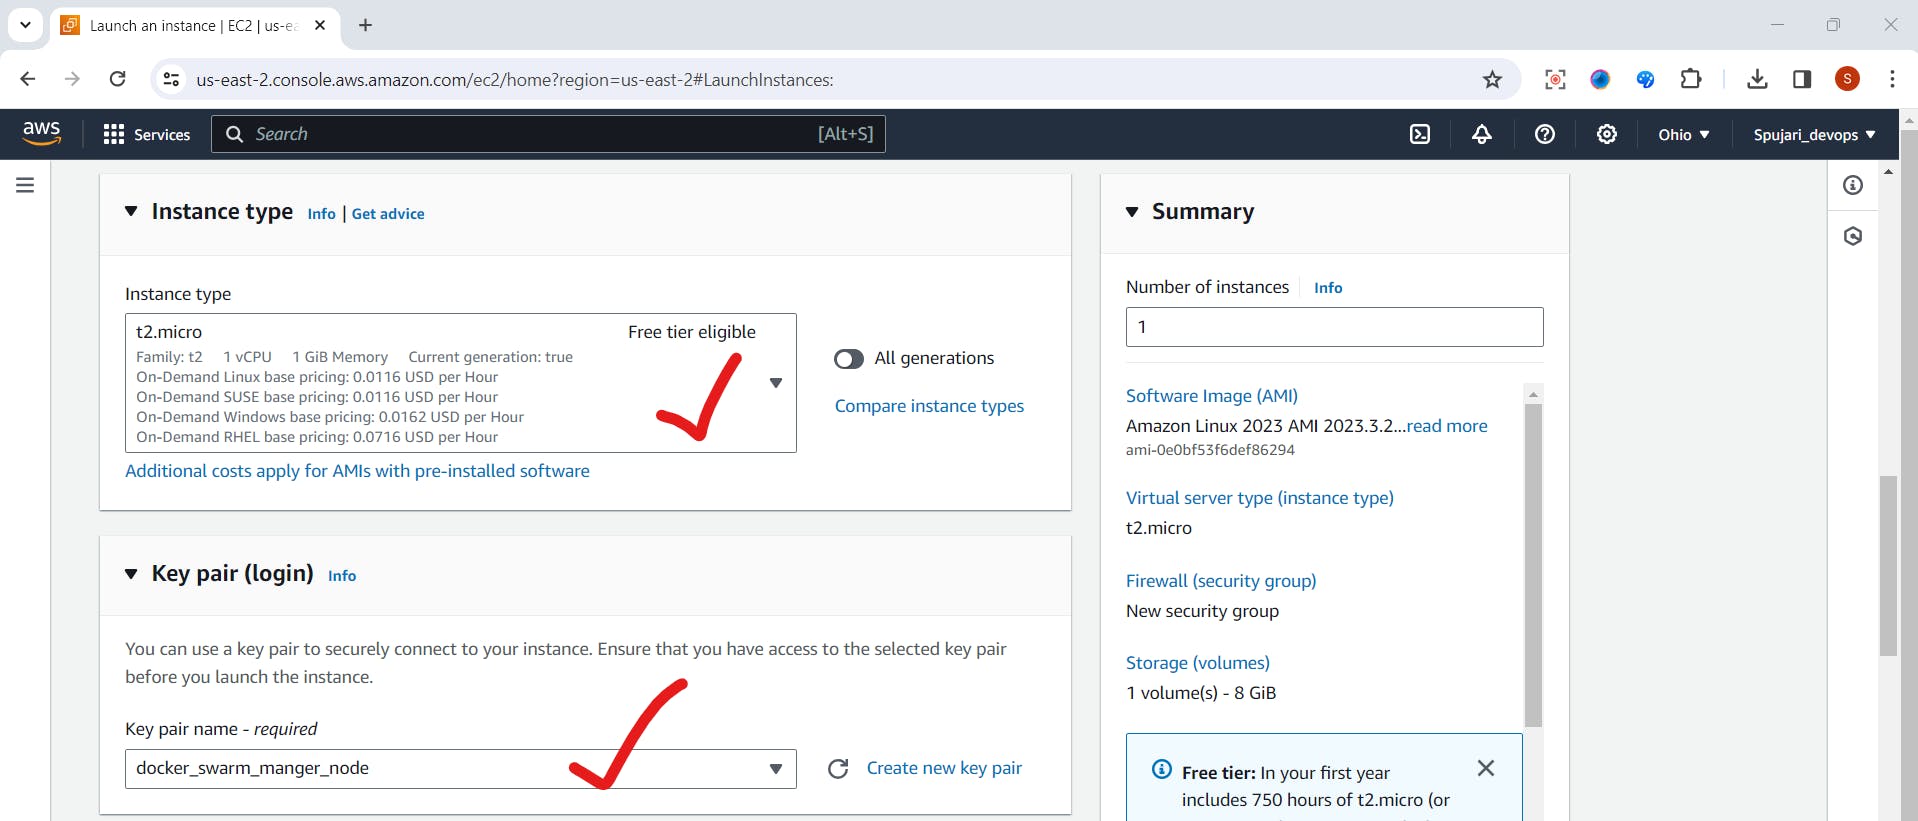
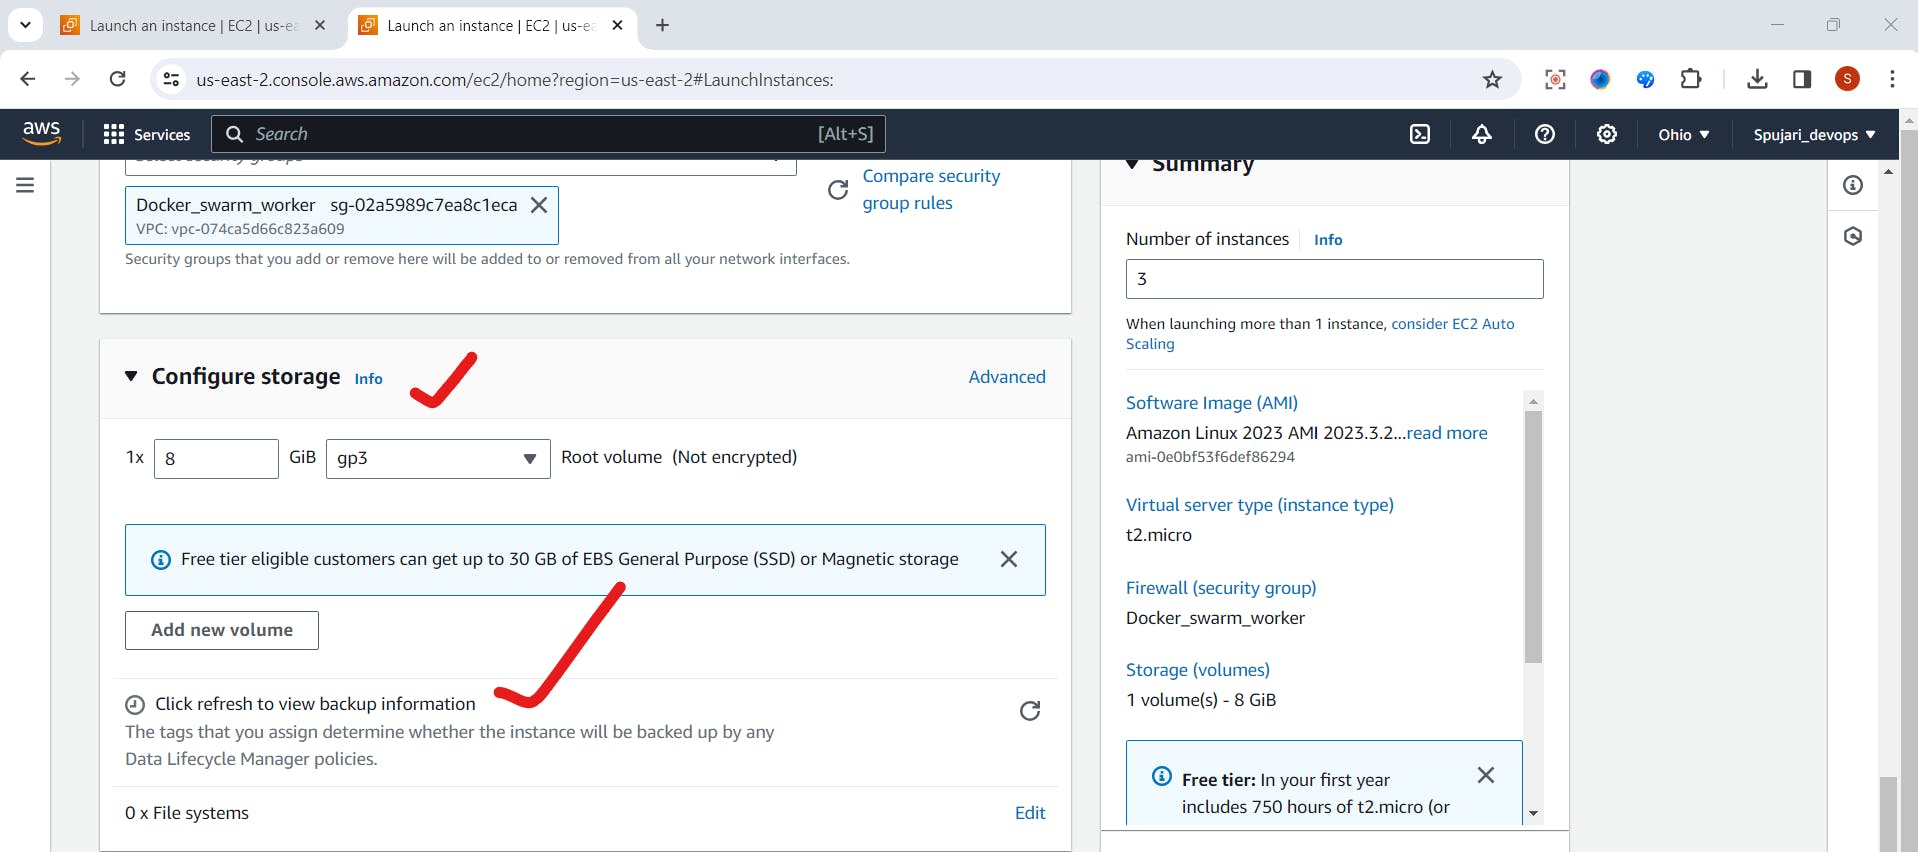
🐳 Create Docker Swarm Manager EC2 Instance
To set up the Docker Swarm Manager EC2 instance, follow these steps:
Go to Ec2 Dashboard -click on Launch Instance
In the Summary section on the right, adjust the Number of instances to 1.

In the Network settings -Edit-select existing security group option -Select Docker swarm manager option .
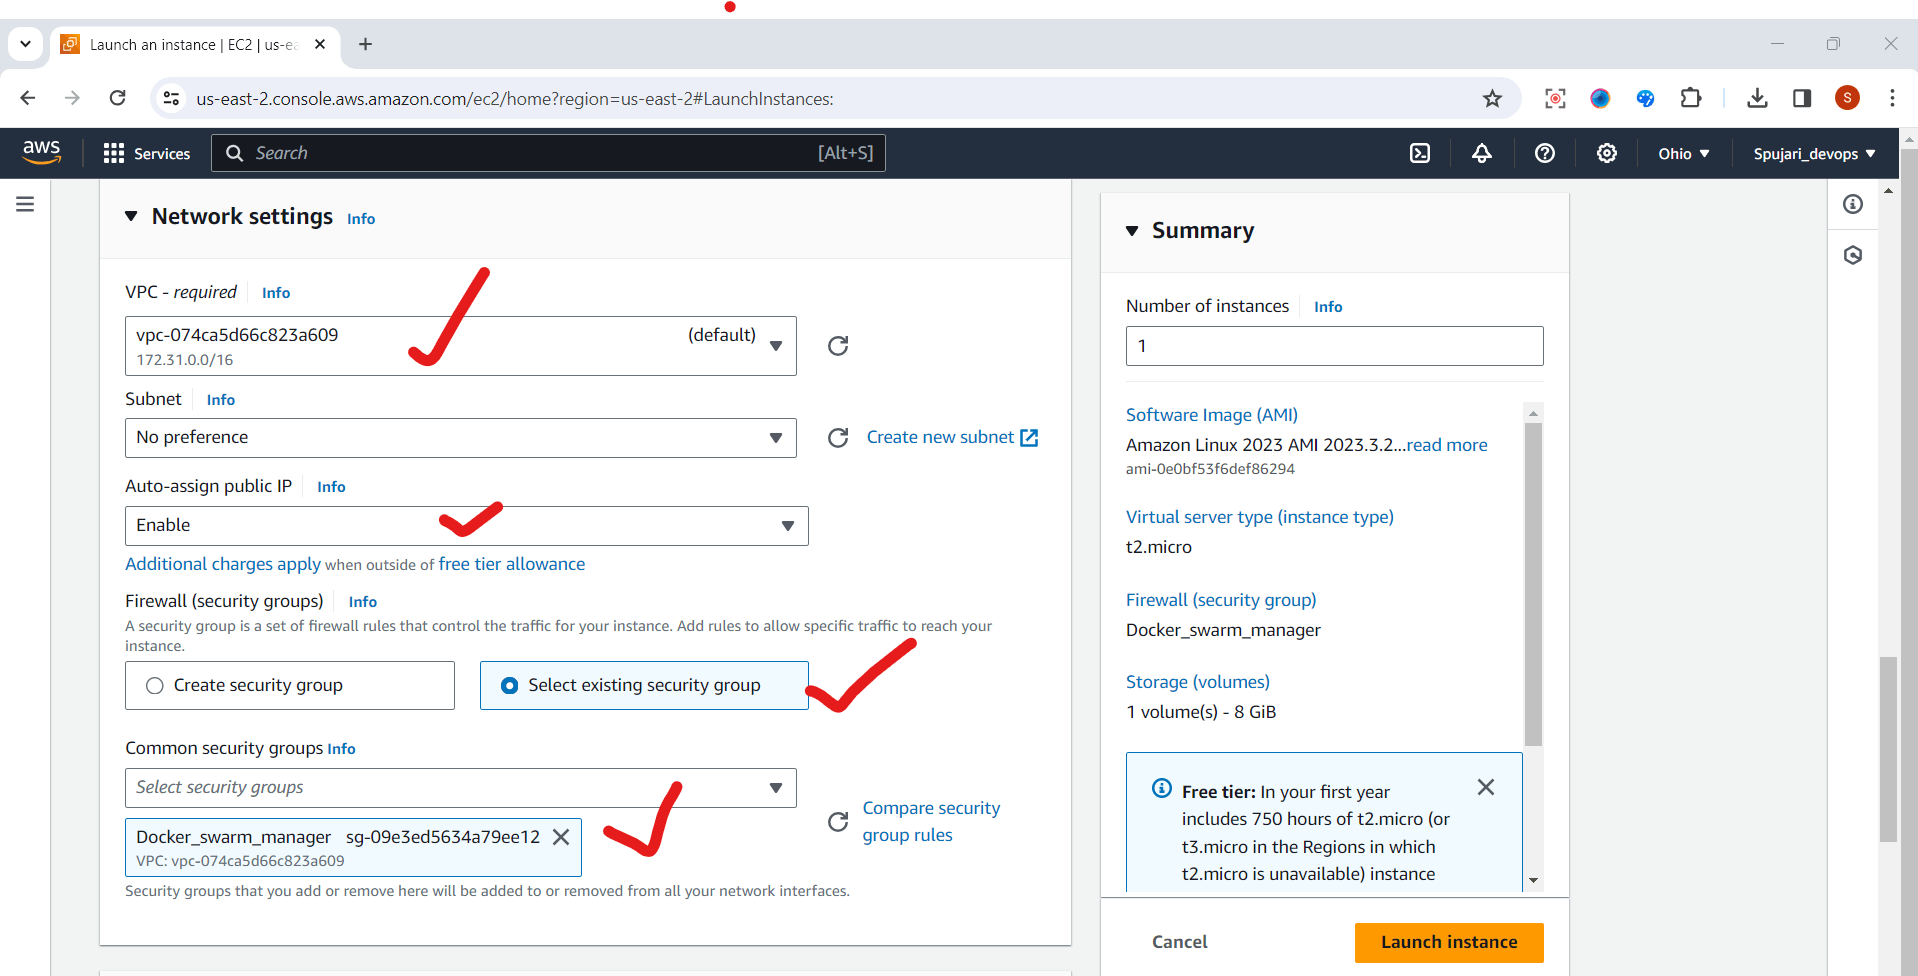
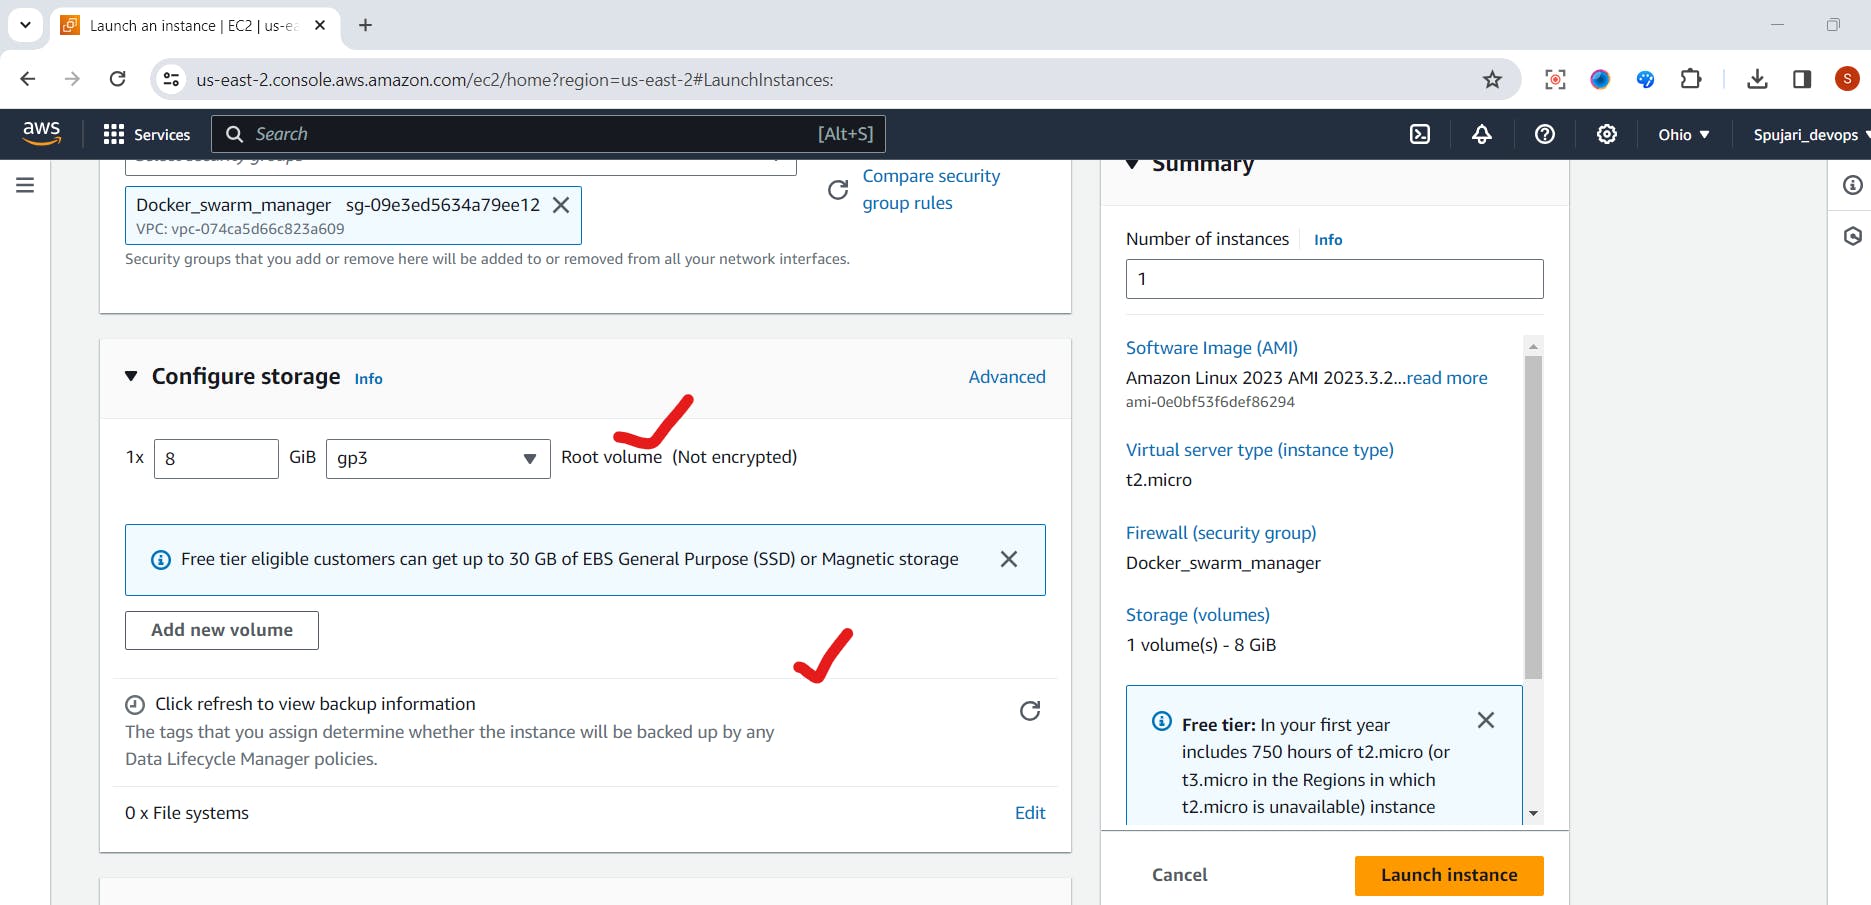
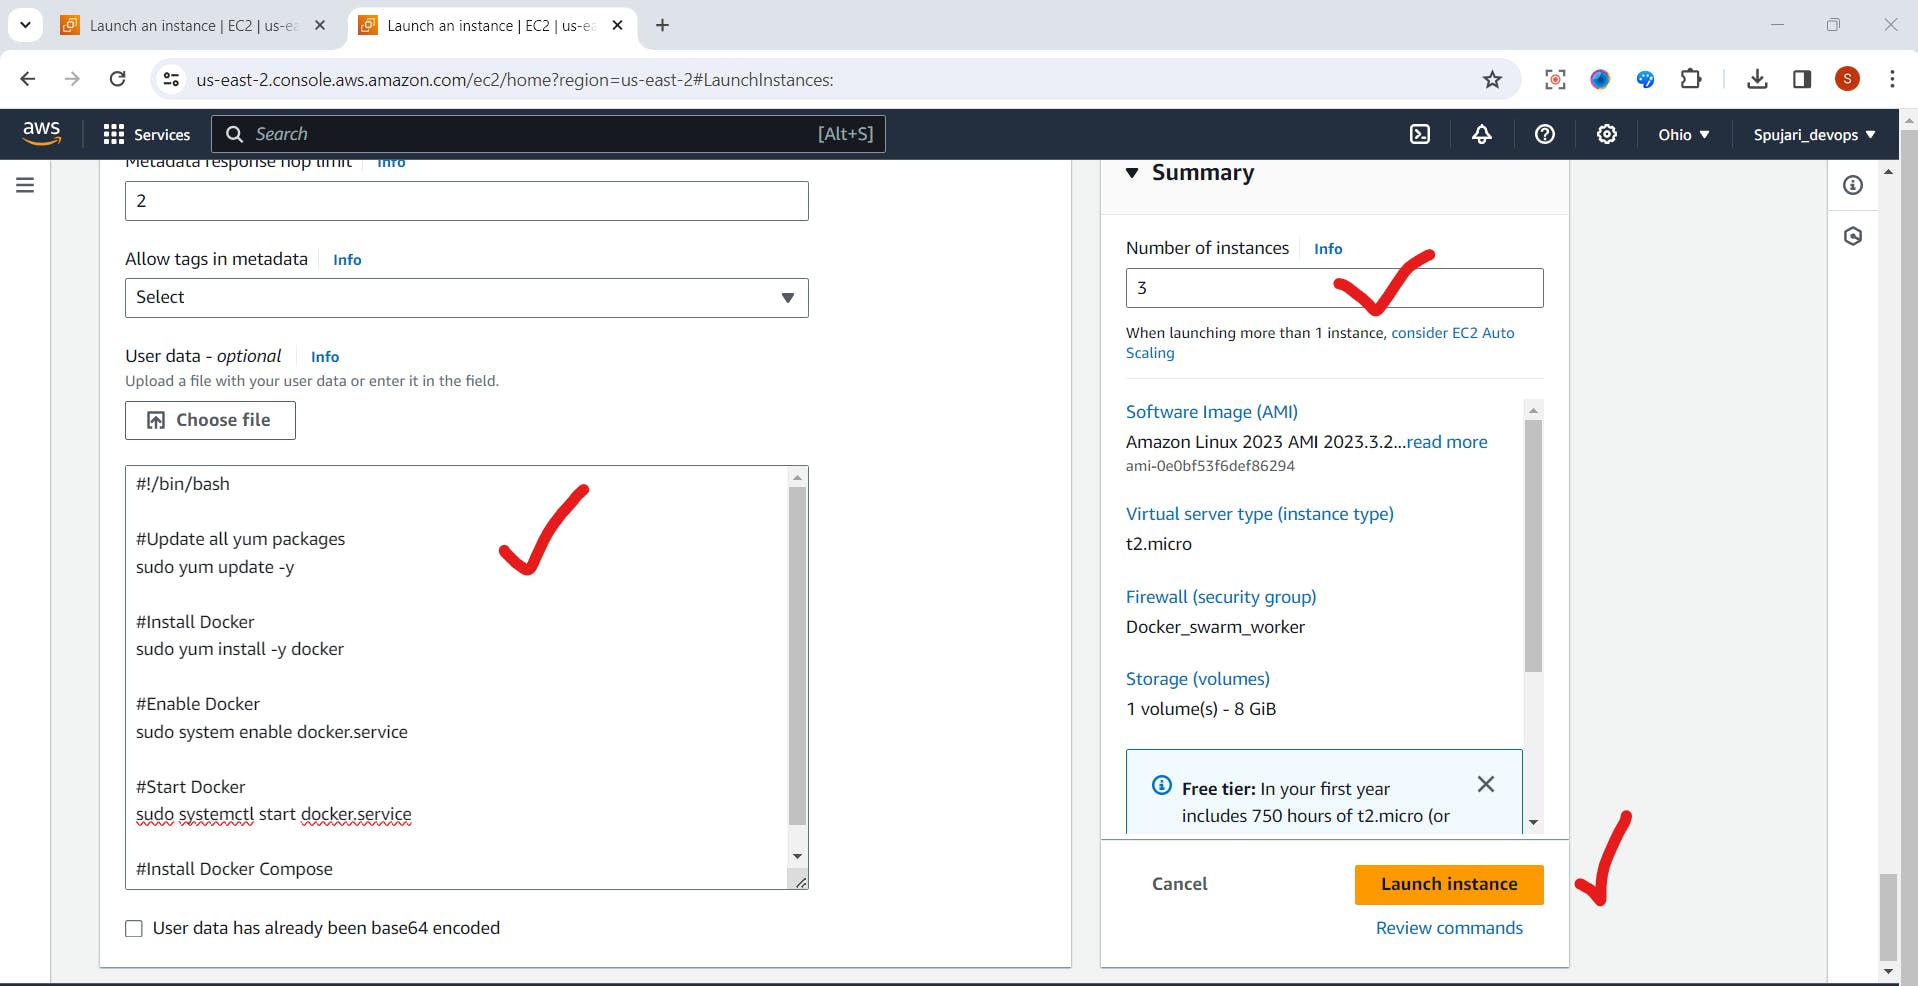
Navigate to the Advanced details section.
Scroll down to User Data and paste the following script into the text box. This script automates the installation, enabling, and starting of Docker upon instance launch, eliminating the need for manual configuration later.
Click launch instance


Note: There are multiple methods to install Docker. For more detailed information, refer to the Docker documentation. 📚
#!/bin/bash

#Update all yum packages
sudo yum update -y

#Install Docker
sudo yum install -y docker

#Enable Docker
sudo system enable docker.service

#Start Docker
sudo systemctl start docker.service

#Install Docker Compose
sudo yum install -y docker-compose
👷 Create Docker Swarm Worker EC2 Instance Worker Instance
To create Worker nodes, follow these steps:
Repeat the Above Process:
Follow the same steps as previously outlined for creating the Manager node.
Go to Ec2 Dashboard -click on Launch Instance
In the Summary section on the right, adjust the Number of instances to 3


In the Network settings -Edit-select existing security group option -Select Docker swarm worker option .

Navigate to the Advanced details section.
Scroll down to User Data and paste the above script into the text box. This script automates the installation, enabling, and starting of Docker upon instance launch, eliminating the need for manual configuration later.
- Click launch instance

🔌 Step Two: Connect To Nodes and Verify
Docker Installation
To connect to your nodes and ensure Docker is properly installed, follow these steps:
SSH into Manager Node Instance:
Select your manager node.
Under actions, click connect.
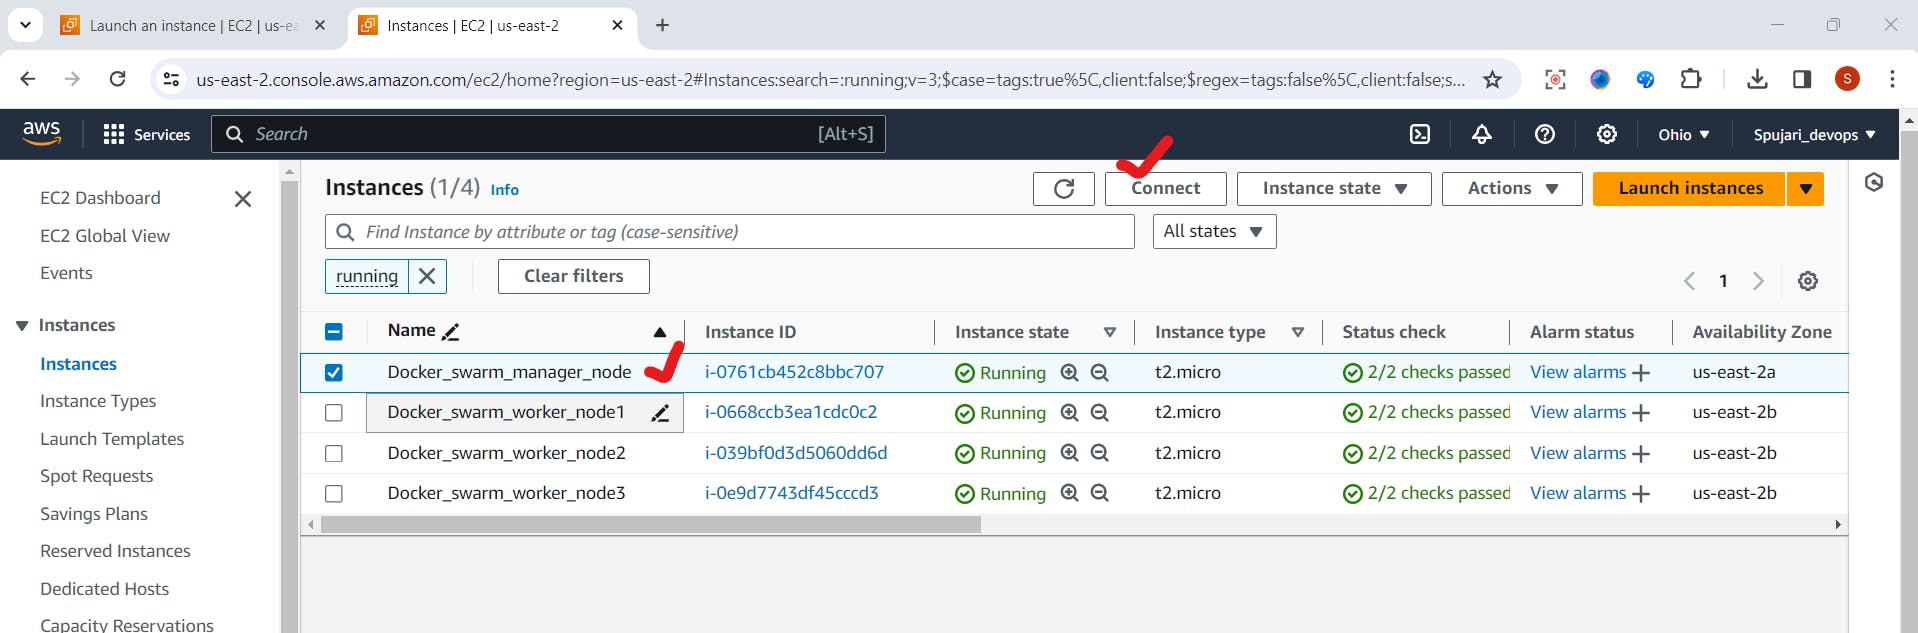
Choose the SSH client tab.
Copy the SSH command provided under the "Example" section.
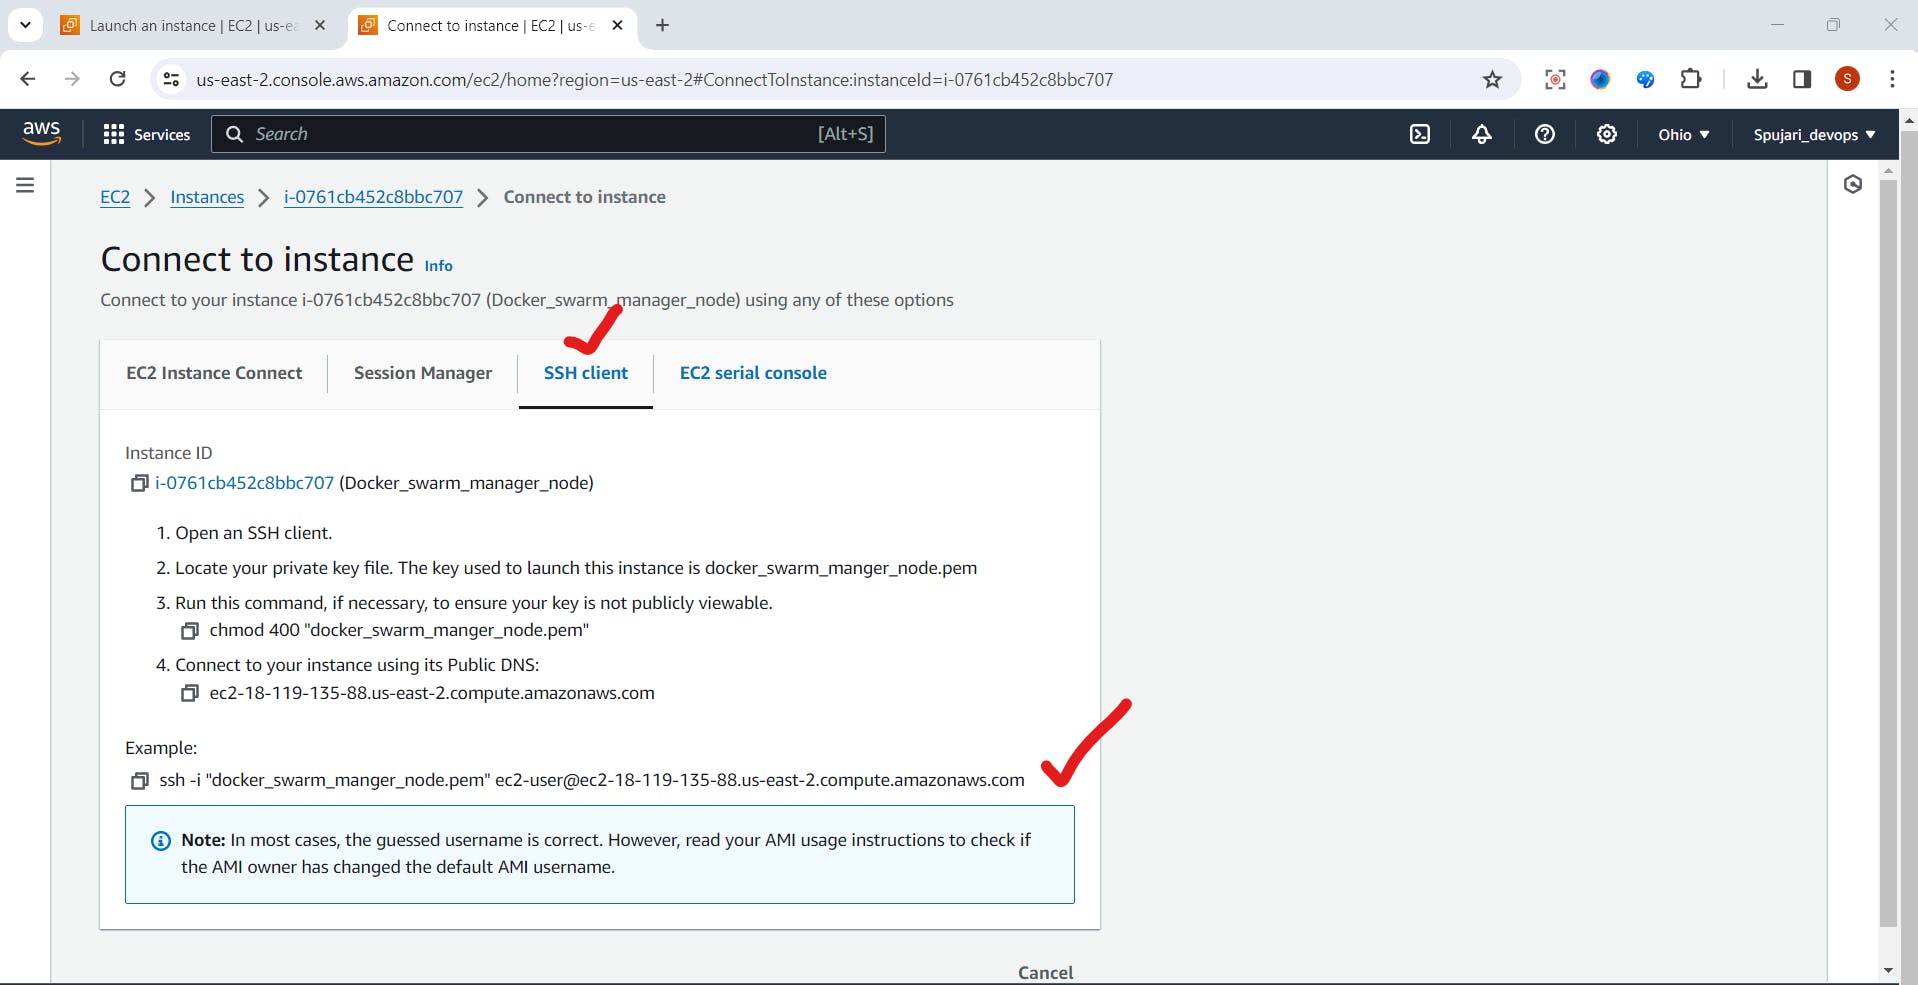
Go to cmd >locate your .pem file path-Here my pem file is located in Download folder -Paste the SSH command here -Enter

Verify docker has been successfully installed on your instance by running the following command:
$docker --version
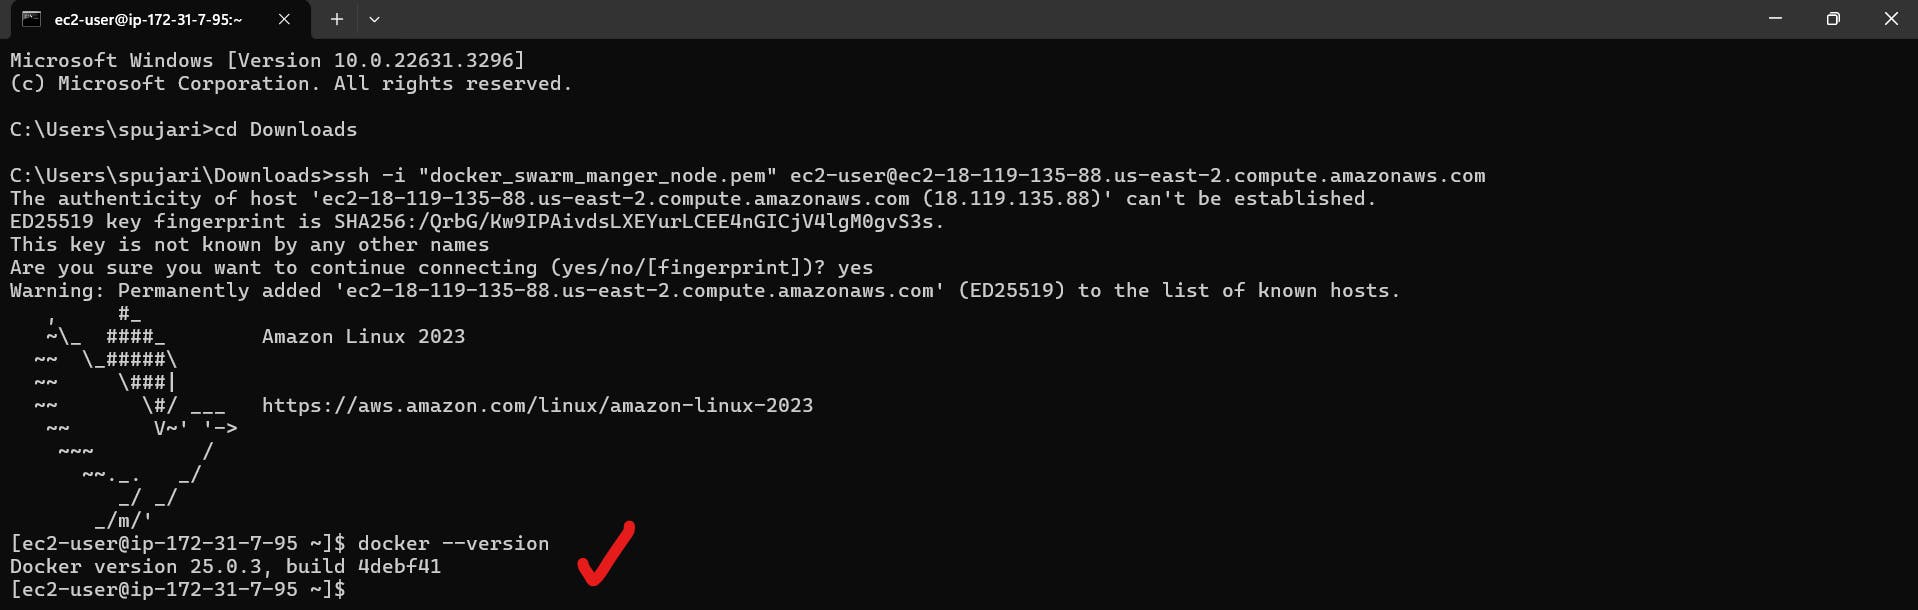
This process allows you to establish a secure connection to the Manager node and verify the successful installation of Docker. 🐋
Run the “exit” command to log out out the manager node instance.

🔁 Repeat the Process for Worker Nodes
To ensure Docker is successfully installed on all three worker nodes, follow these steps:
SSH into Worker Nodes:
Repeat the process outlined earlier for connecting to the manager node.
SSH into each of the three worker nodes.
Worker Node -1
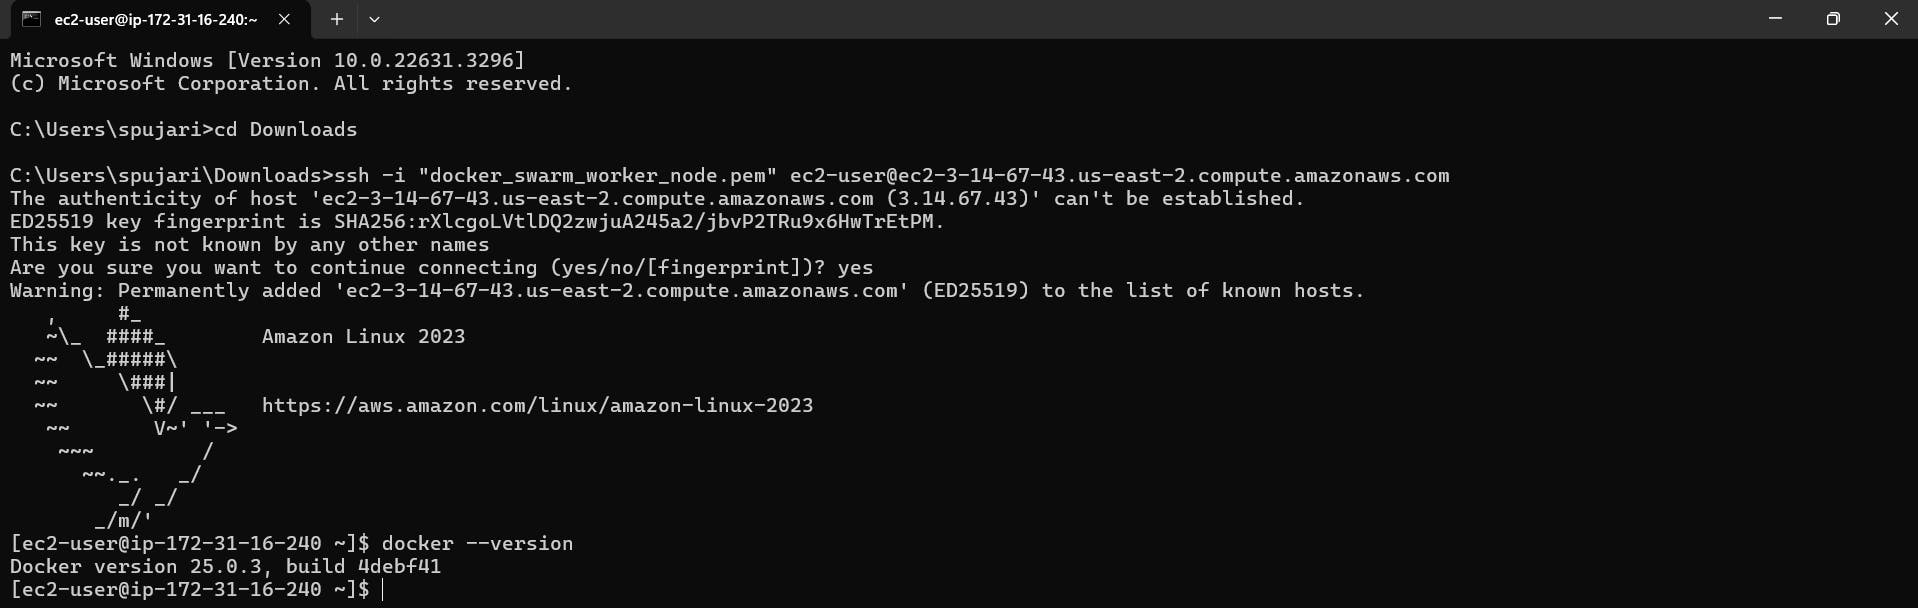
Worker Node -2

Worker Node -3

By repeating this process for each worker node, you can verify that Docker has been installed correctly across the entire cluster. ✅
🚀 Step Three: Create Swarm and Assign
Manager/Worker Roles
To set up the Docker Swarm and designate Manager and Worker roles, follow these steps:
Create Swarm:
SSH back into your manager node.
Run the command:
sudo suto switch to root privileges, eliminating the need forsudobefore each command.
By executing these steps, you prepare the manager node to establish and manage the Docker Swarm effectively. 🐝
🐝 Set Up Docker Swarm
To initialize our Swarm, execute the following command:
Run:
docker swarm init
The output confirms that our node is now a manager. 🎉
- Copy the generated "docker swarm join" command provided. 📋
This command will be used to join other nodes to the Swarm cluster. 🚀
🔧 Join Worker Nodes to Swarm
To add worker nodes to the Swarm cluster, follow these steps:
Open Terminals:
- Use the shortcut "command + t" to open three additional terminals.
SSH into Worker Nodes:
- SSH into each of your three worker nodes.
Escalate to Root Privileges:
- Before running the join command, ensure you've executed:
sudo suto escalate to root privileges.
- Before running the join command, ensure you've executed:
Paste and Run Command:
Paste the copied "docker swarm join" command into each terminal.
Execute the command to join the respective worker nodes to the Swarm cluster.
Worker Node-1

Worker Node-2

Worker Node-3
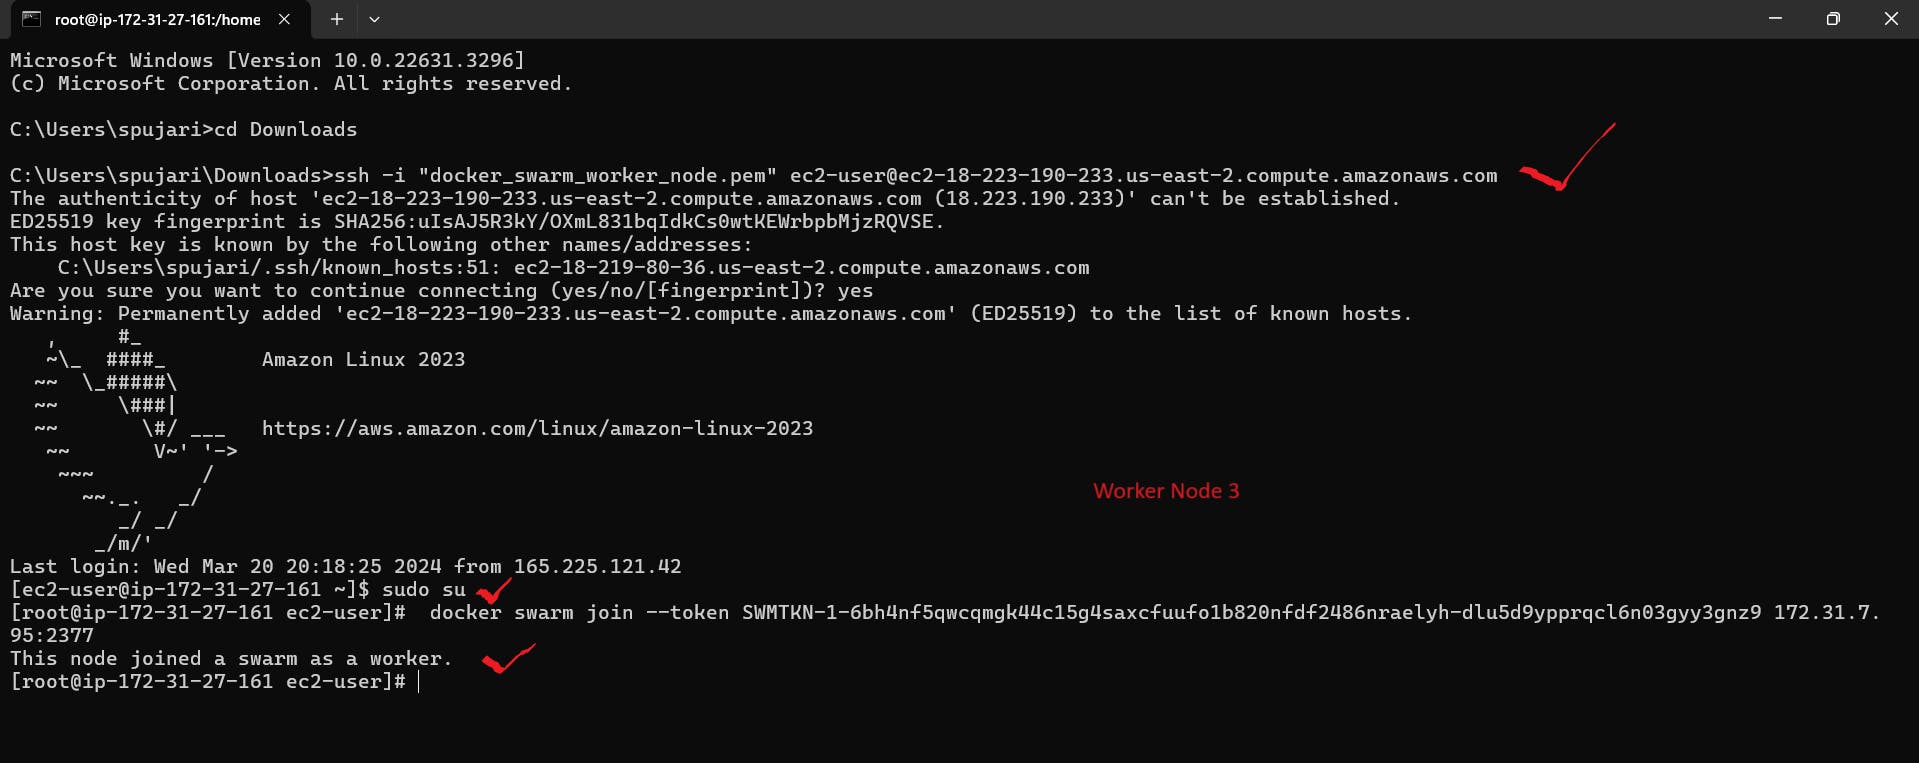
By following these steps, you successfully integrate the worker nodes into the Docker Swarm cluster. 🚛
🔍 Verify Swarm Setup
After adding worker nodes, confirm the Swarm setup:
Check Worker Node Confirmation:
Ensure the output on each worker node reads: "This node joined a swarm as a worker". ✅

Verify Swarm on Manager Node:
Return to your manager node.
Run the command:
docker node lsto verify that the Swarm has been successfully set up. 🐝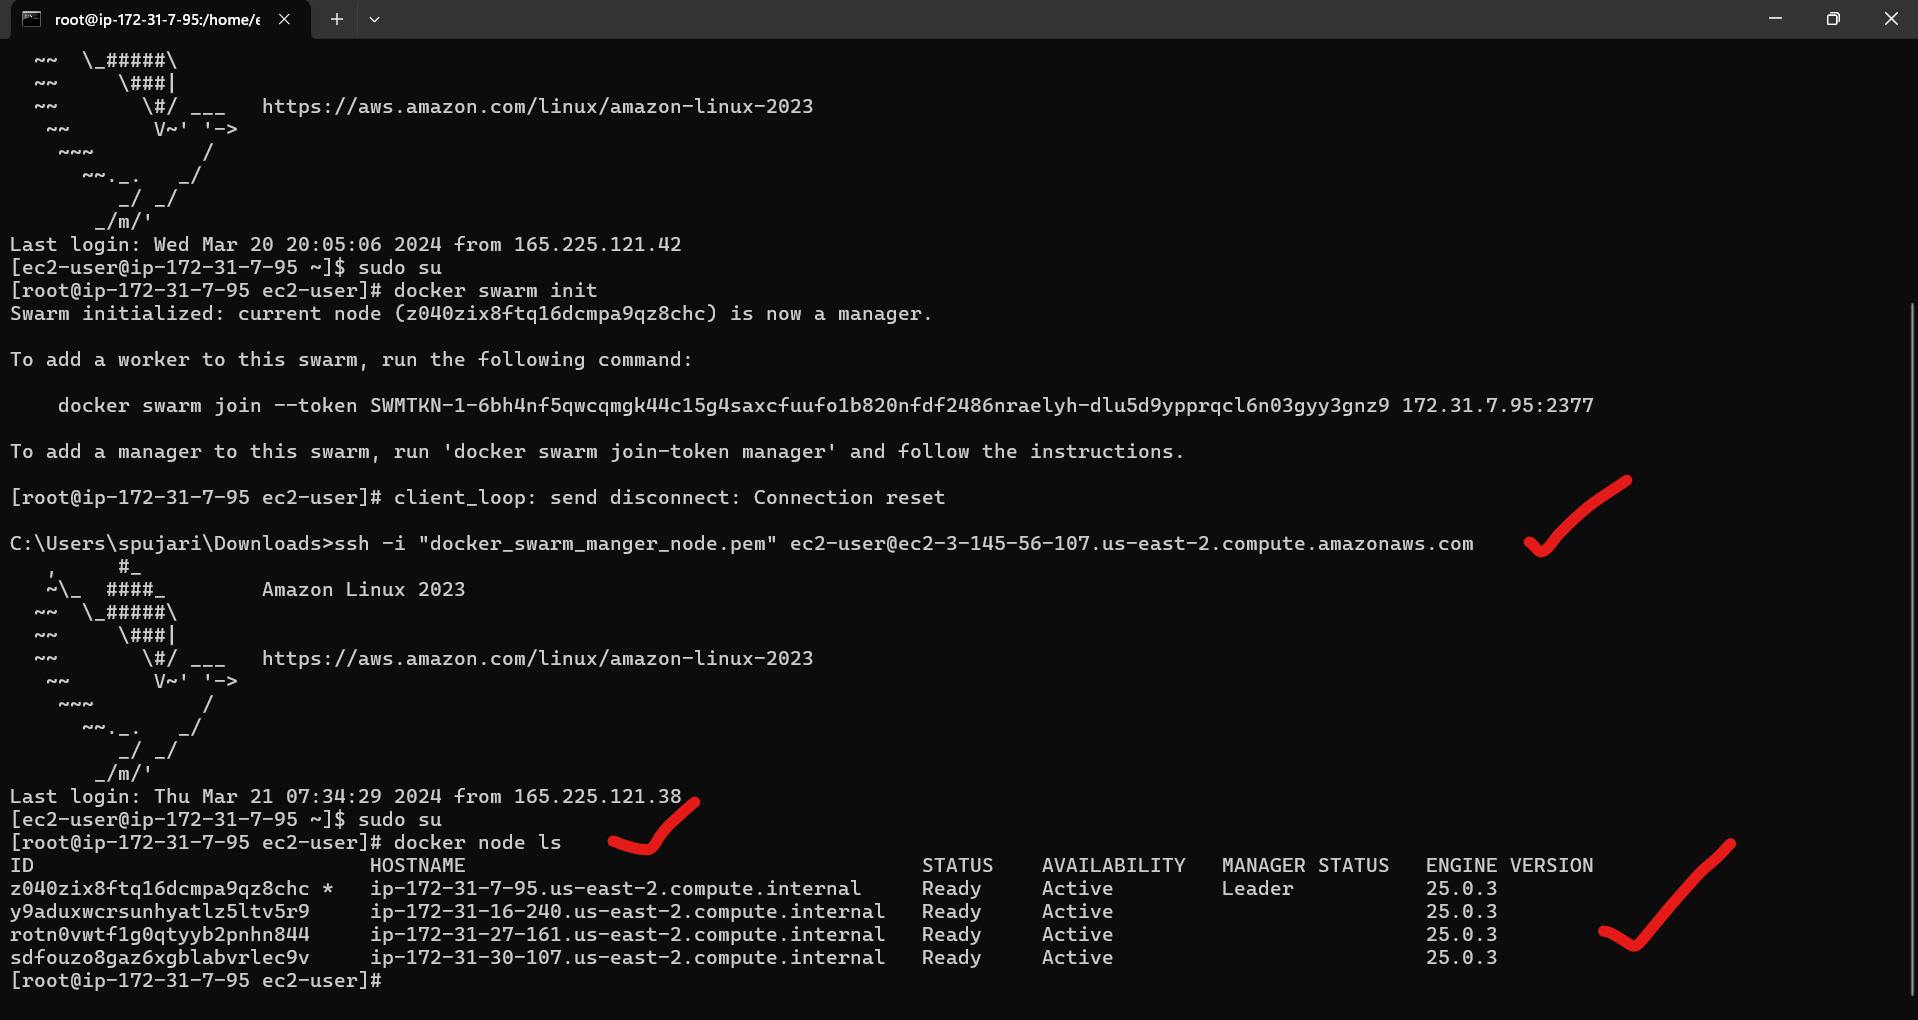
**Note-**The node with the asterix * next to it indicates the manager node.
This ensures that the Swarm cluster is properly configured and ready for deployment. 🚀
🛠️ Step Four: Create Services
To deploy services within the Docker Swarm, follow these steps:
Create Redis Service with 4 Replicas:
Navigate to your manager swarm, as we'll be working from the manager node.
Ensure the official Redis image is available on DockerHub. 🐳
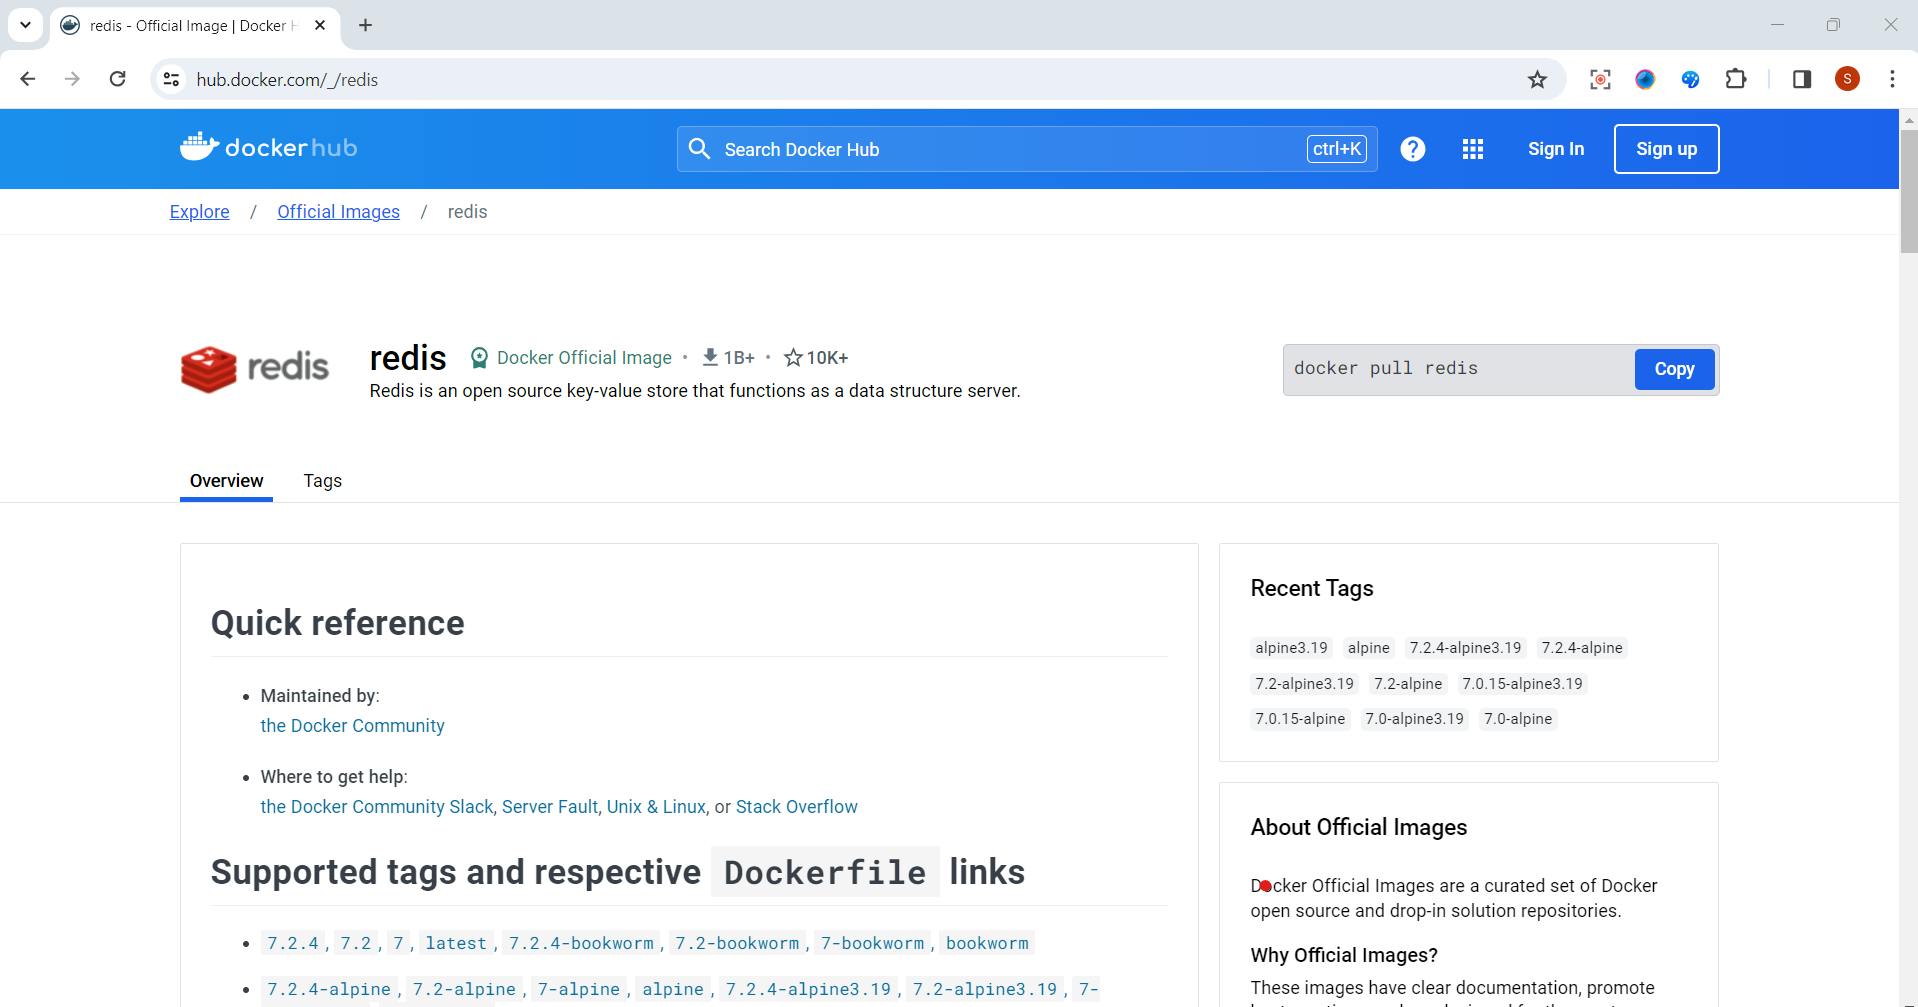
Next steps to follow To create our redis service, run the following command:: 📝
Continue with Redis Service Creation:
Utilize Docker commands to create the Redis service with the desired number of replicas.
docker service create --name redis --replicas 4 redis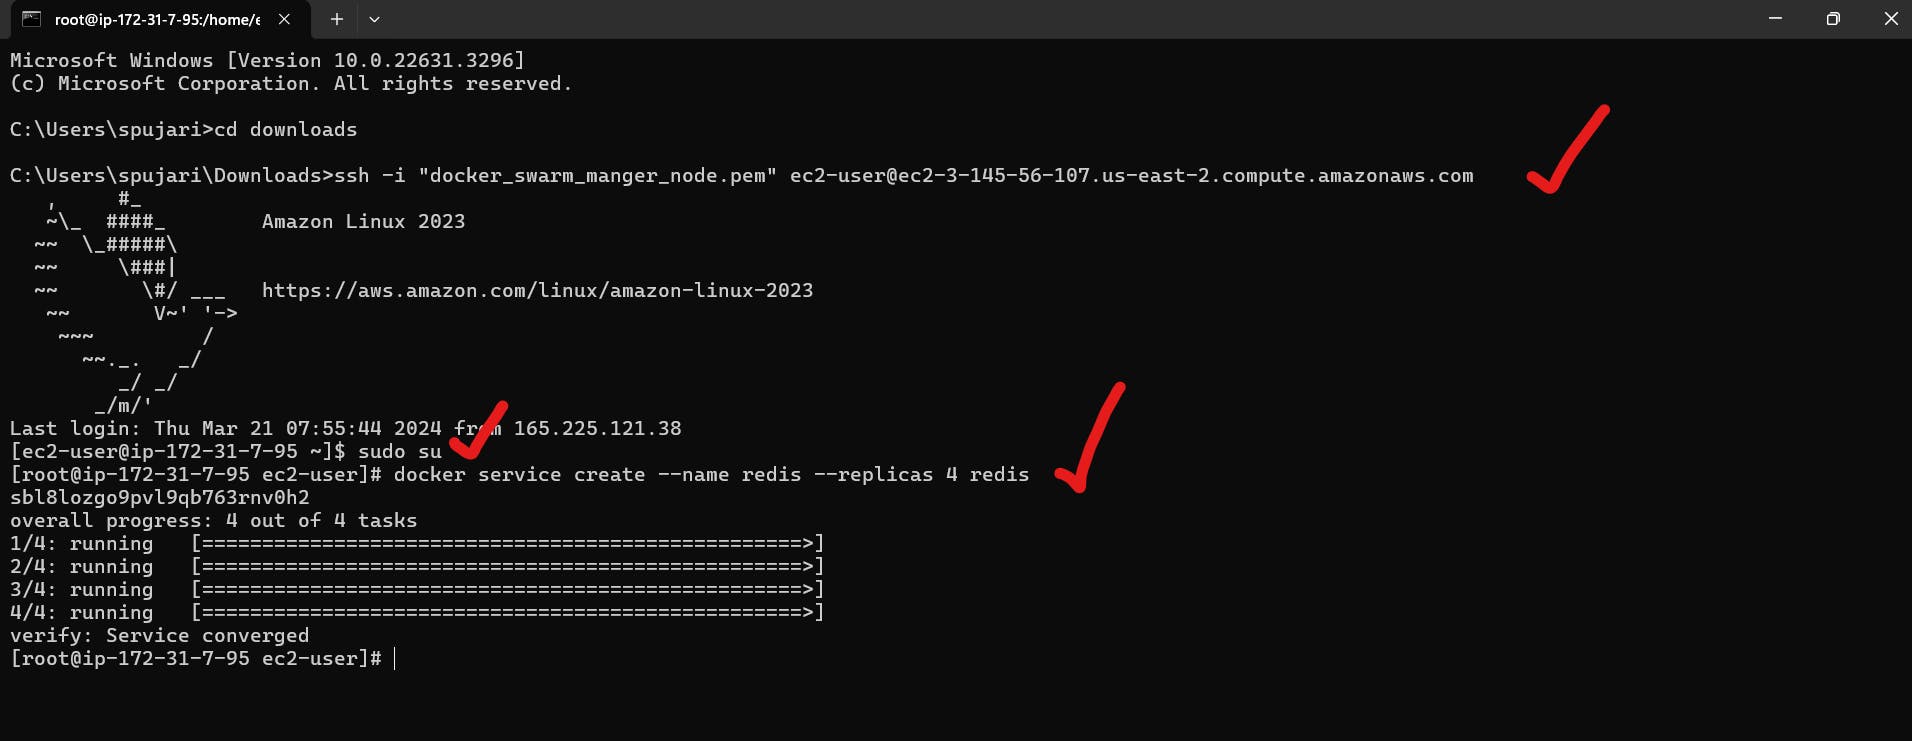
Stay tuned for the detailed instructions on deploying the Redis service. 🚀
🛠️ Create Apache Service with 10 Replicas
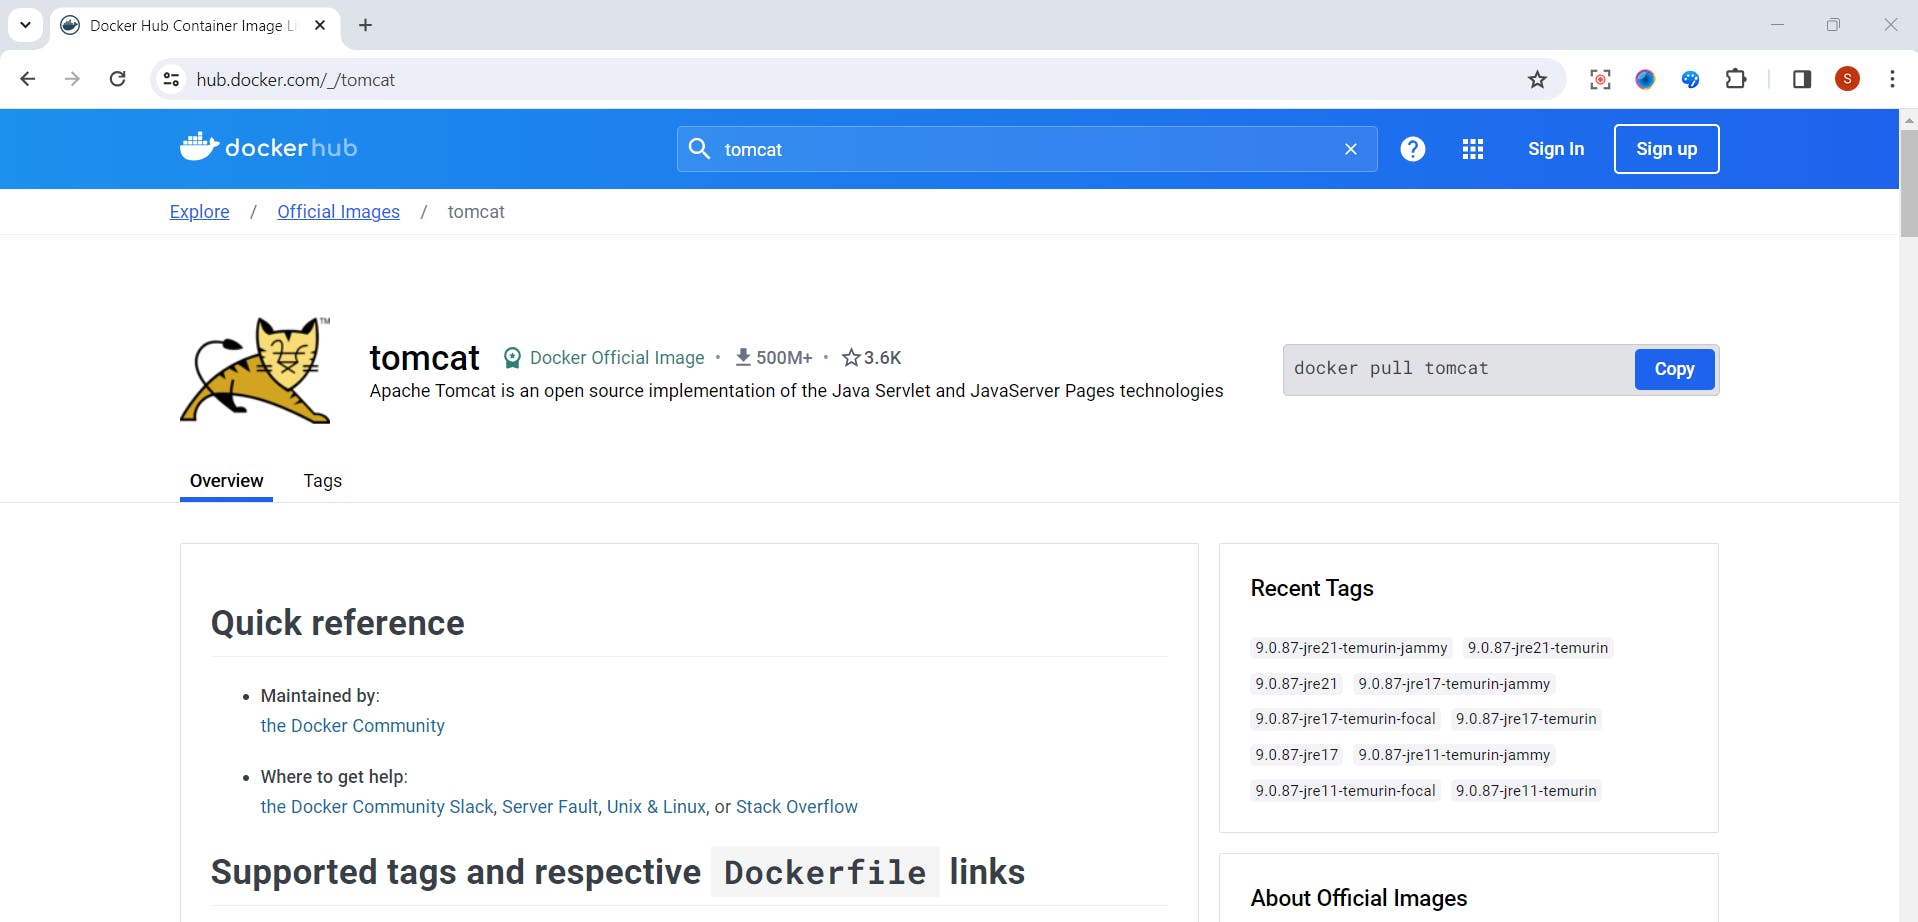
To deploy the Apache service with 10 replicas, execute the following command:
Run the command:
docker service create --name apache --replicas 10 httpd:latest
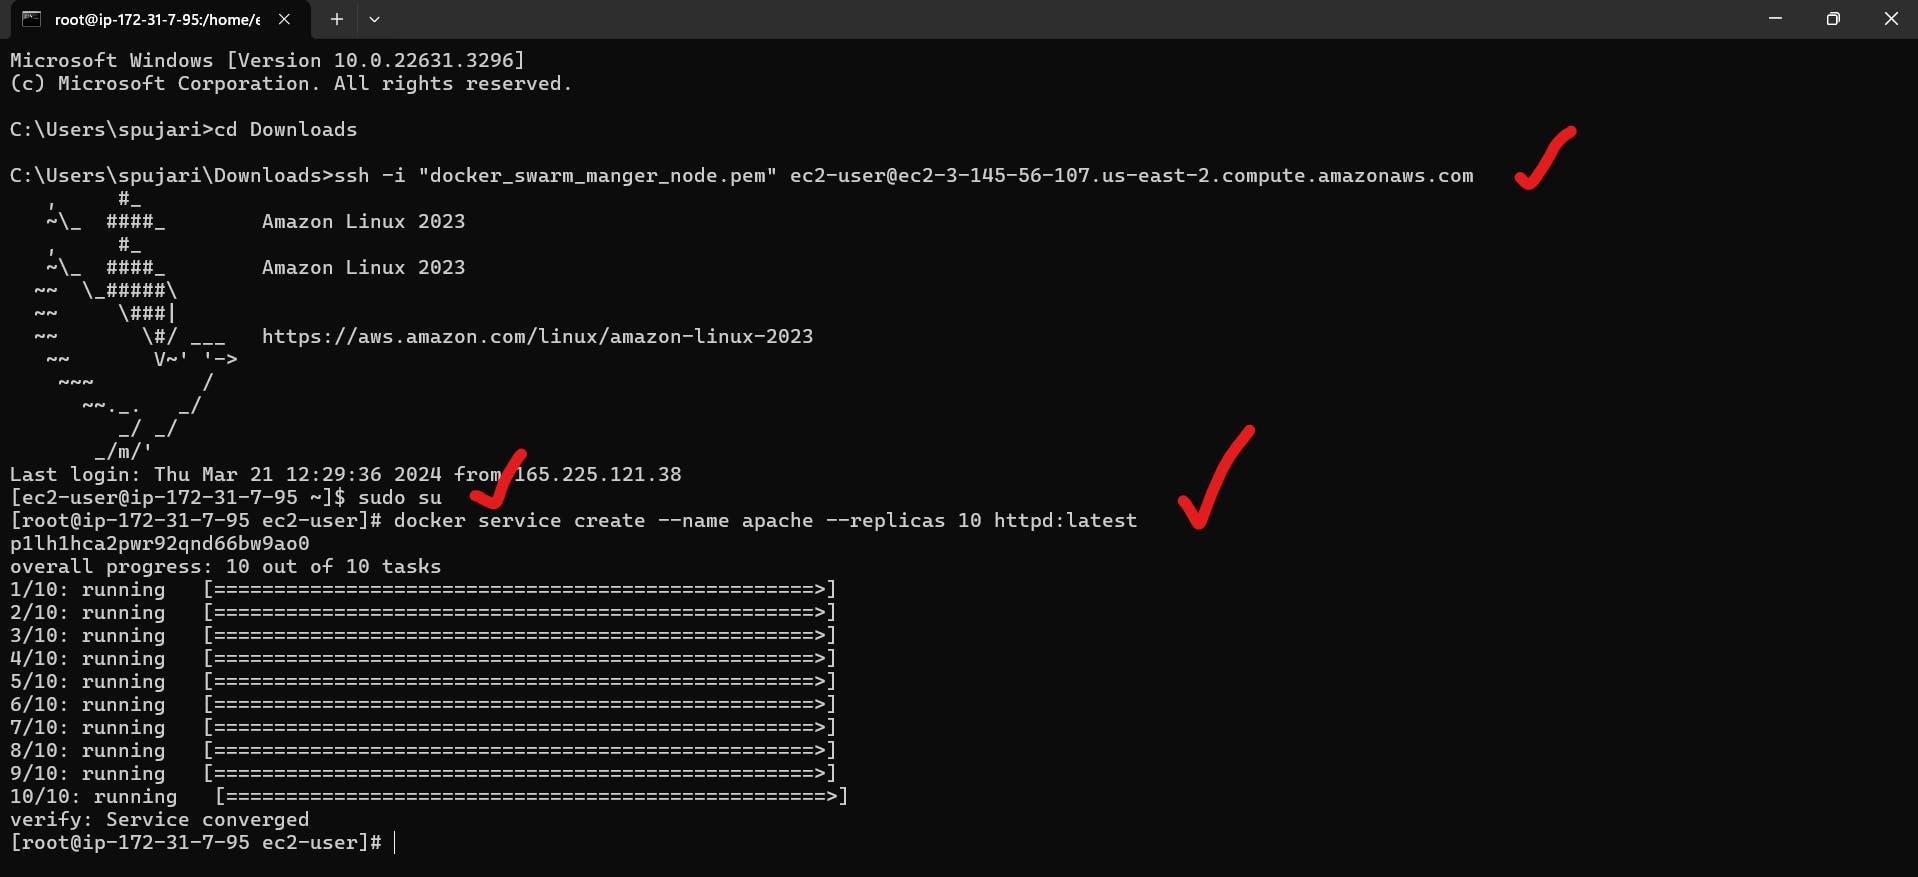
This command instructs Docker to create a service named "apache" with 10 replicas, utilizing the latest version of the HTTPD image available. 🚀
🛠️ Create Postgres Service with 1 Replica

To deploy the Postgres service with a single replica, follow these steps:
Create Docker Compose File:
From your swarm manager node, create a new directory using the
mkdircommand.Change into that directory using the
cdcommand.
Use Vim Text Editor:
Run the command:
vim docker-compose.ymlPress "i" to enter insert mode.
Paste the following code:
      version: '3.8'

      services:
        db:
          image: postgres
          restart: always
          environment:
            - POSTGRES_USER=postgres
            - POSTGRES_PASSWORD=postgres
Press "esc" to exit insert mode.
Type ":wq!" and press enter to save your file and exit the text editor.
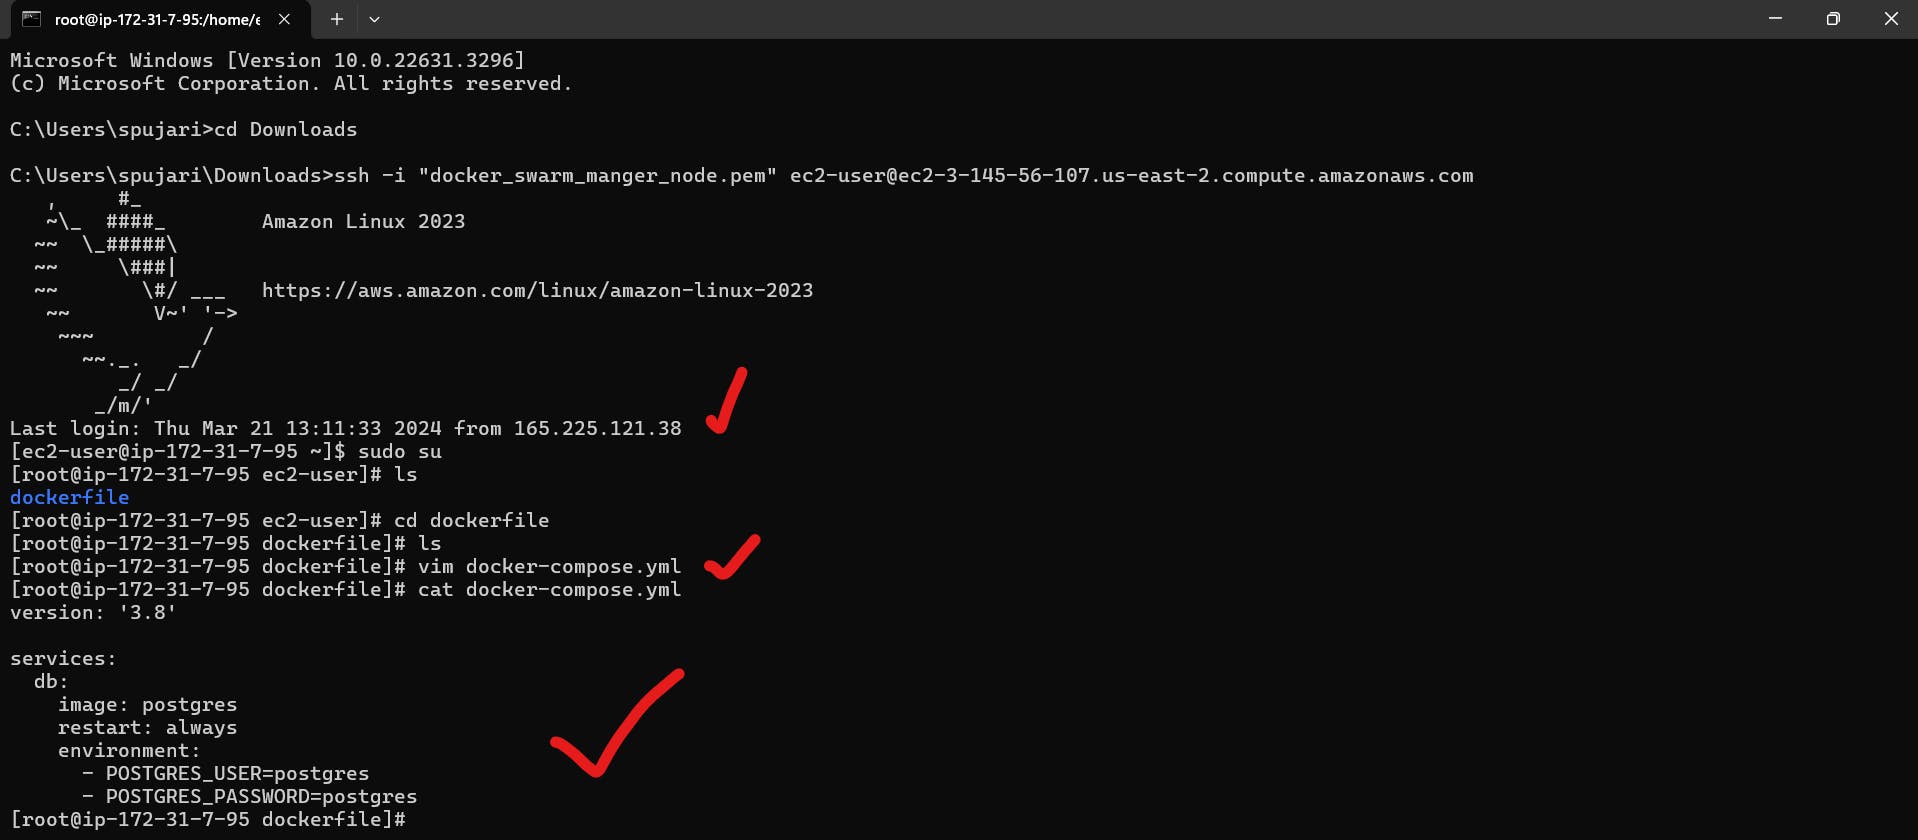
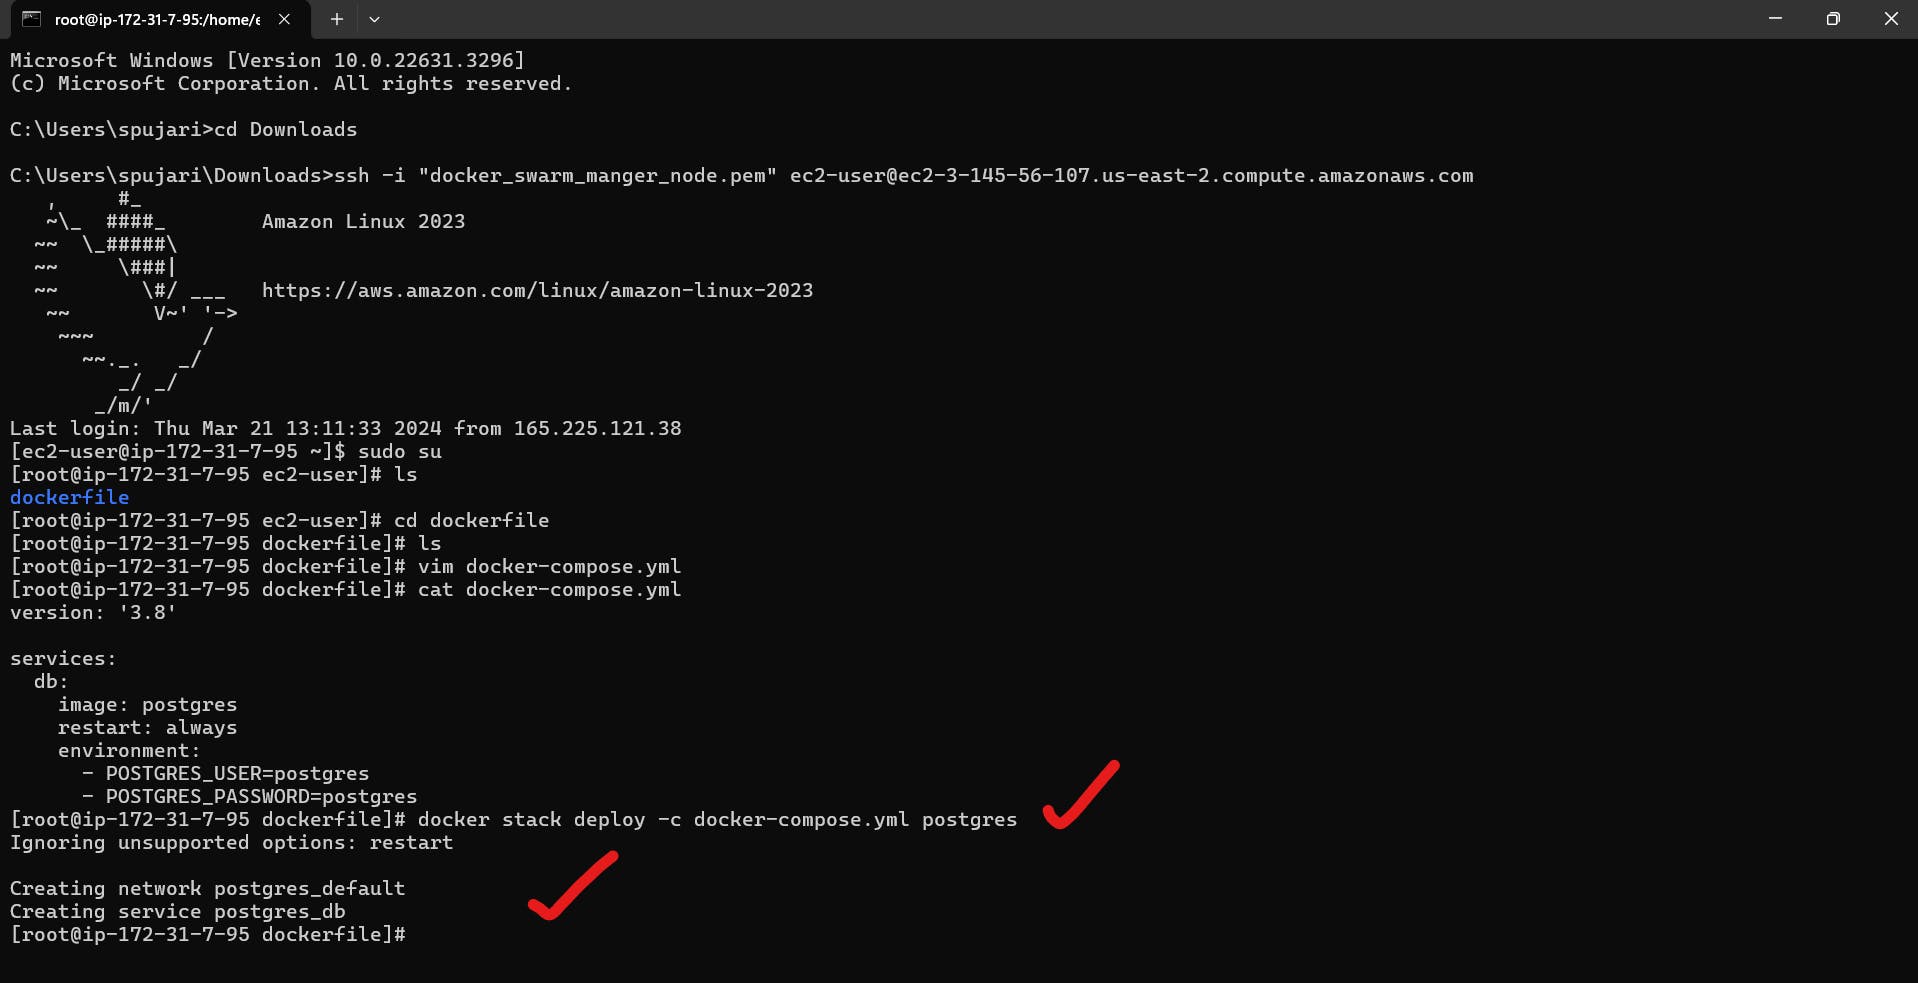
This Docker Compose file defines a Postgres service with the specified environment variables, ensuring seamless deployment with the desired configuration. 🐘
Run the following command to run our docker compose file:
docker stack deploy -c docker-compose.yml postgres
🔍 Verify Services Status
To ensure all services are up and running within your Docker Swarm, execute the following command:
Run Command:
docker service ls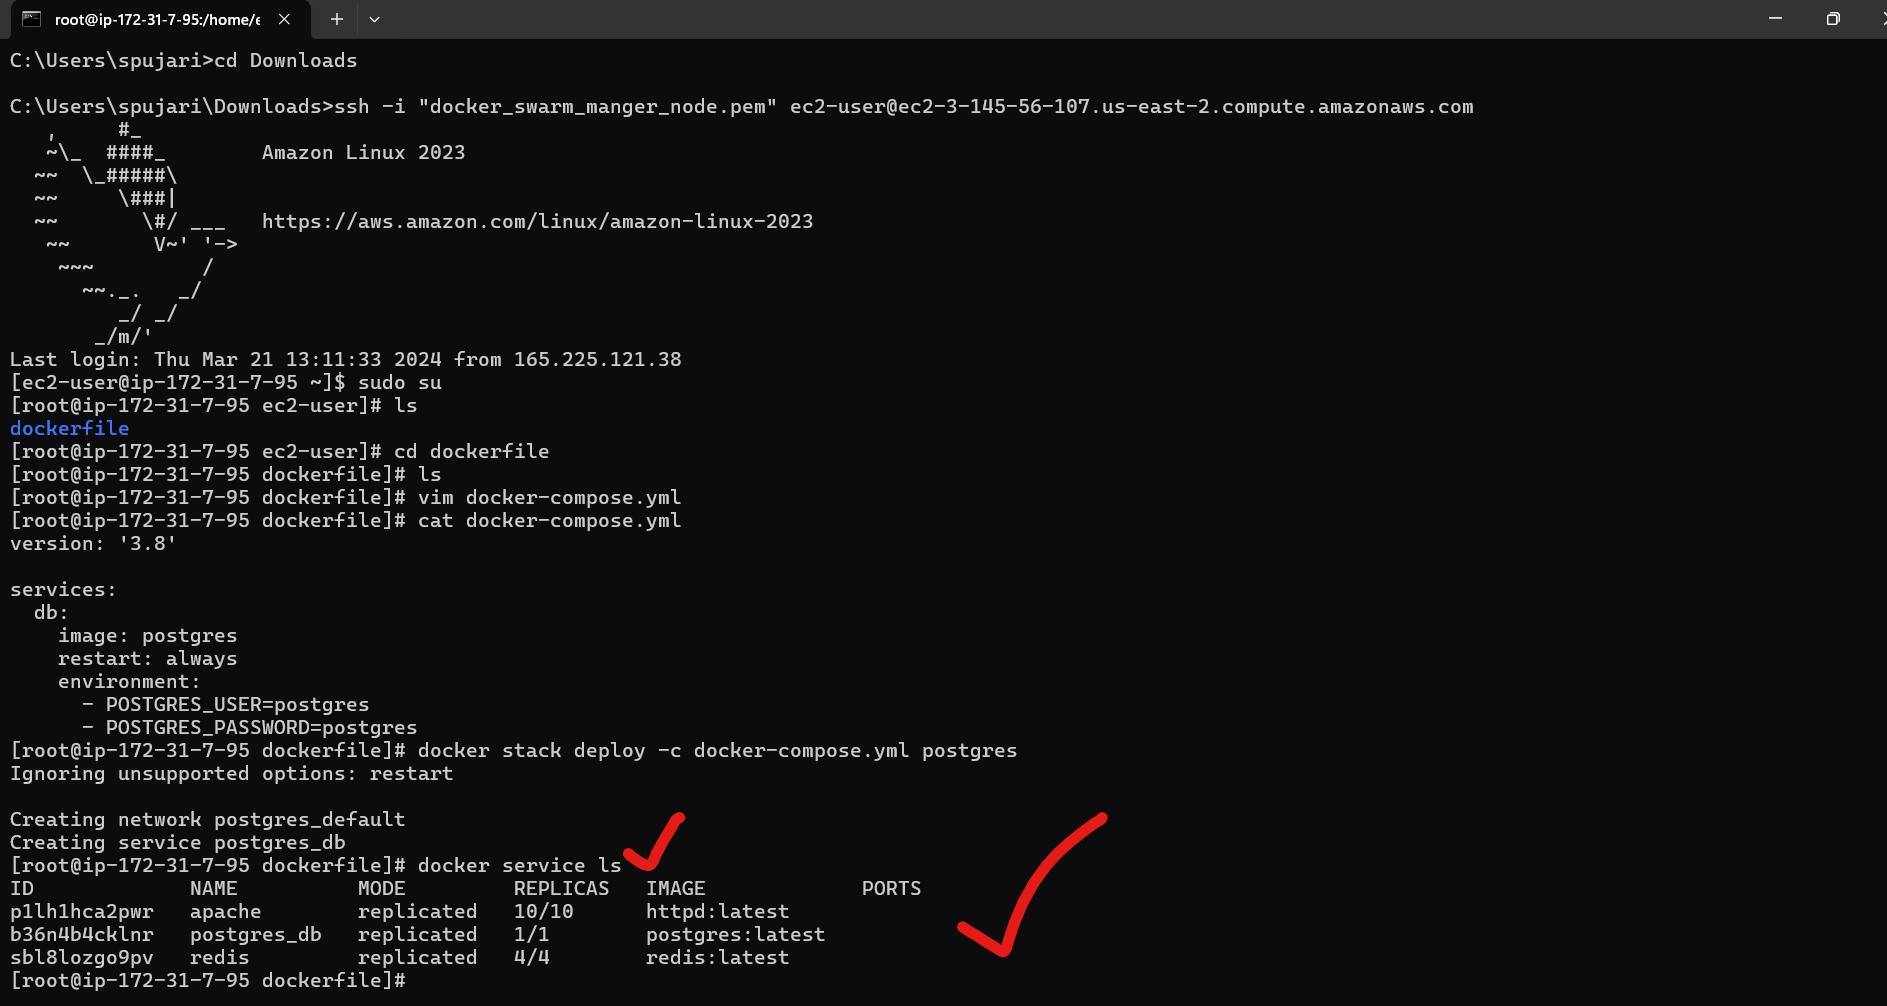
Now you will have your three desired services and the replicas listed.
This command provides a list of all services in your Swarm along with their status, enabling you to verify the successful deployment of your services. ✅
🔧 Manage Cluster Tasks
To manage the Docker Swarm cluster and view tasks associated with specific services, utilize the following command:
Run Command:
docker service ps <service_name>Here we have checked all the three services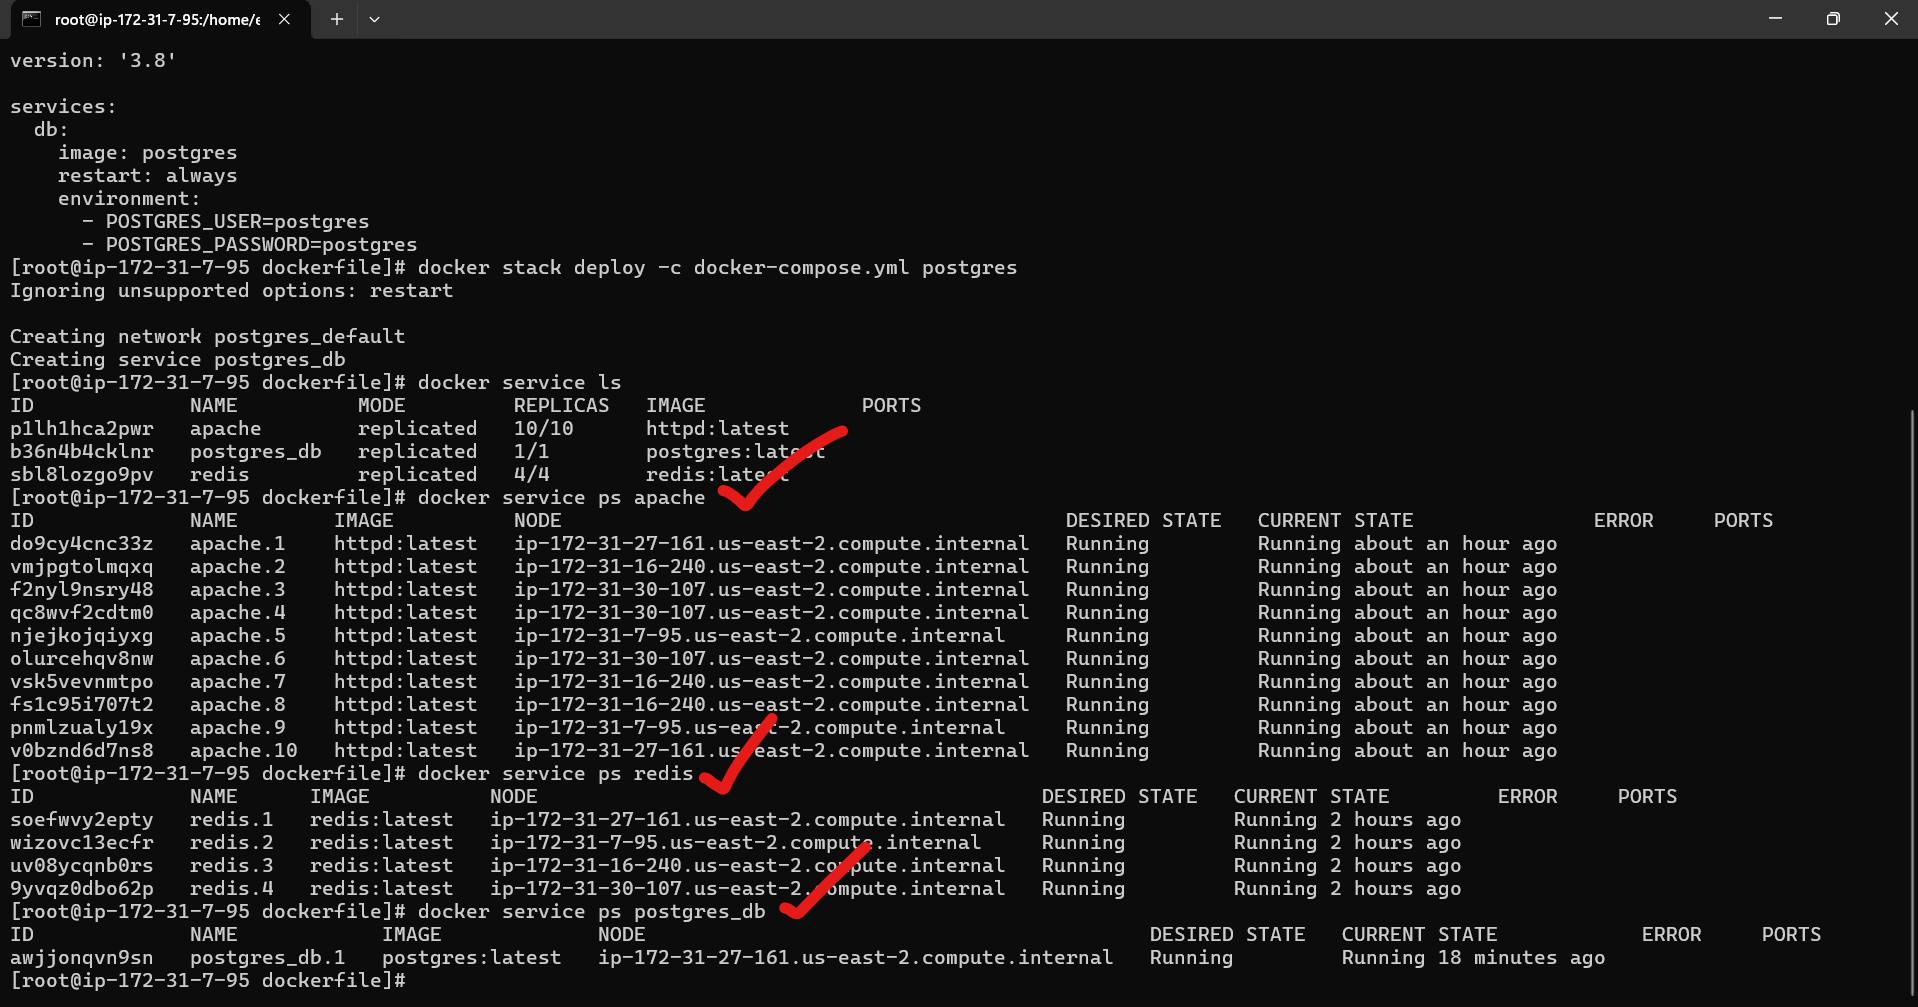
This command allows you to monitor the tasks of a particular service within the cluster, facilitating efficient management and troubleshooting. 🐳
🧹 Step 5: Clean Up Environment
💻 On each node, run
docker swarm leave --forceto release them from the swarm.
🛑 Stop and terminate all EC2 instances.
🎉 By following this guide, you'll master the art of deploying and managing containerized applications on AWS using Docker Swarm. Get ready to elevate your DevOps game to new heights! 🚀
Reactions and comments are welcome! Let's discuss the exciting world of container orchestration together. 🤝
Thank you for joining me on this journey through the world of cloud computing! Your interest and support mean a lot to me, and I'm excited to continue exploring this lfascinating field together. Let's stay connected and keep learning and growing as we navigate the ever-evolving landscape of technology.
LinkedIn Profile: https://www.linkedin.com/in/prasad-g-743239154/
Feel free to reach out to me directly at spujari.devops@gmail.com. I'm always open to hearing your thoughts and suggestions, as they help me improve and better cater to your needs. Let's keep moving forward and upward!
If you found this blog post helpful, please consider showing your support by giving it a round of applause👏👏👏. Your engagement not only boosts the visibility of the content, but it also lets other DevOps and Cloud Engineers know that it might be useful to them too. Thank you for your support! 😀
Thank you for reading and happy deploying! 🚀
Best Regards,
Sprasad