Dockerizing Healthcare Node.js Apps: with Docker-Compose

Greetings! I'm Sprasad P, a DevOps Engineer with a passion for optimizing development pipelines, automating processes, and enabling teams to deliver software faster and more reliably.
In the fast-paced realm of modern software development, containerization has emerged as a revolutionary approach. Docker, a leading containerization platform, empowers developers to package applications and their dependencies into standardized units known as containers. This ensures consistent performance across various environments, from development to production.
Node.js developers stand to benefit greatly from Docker, streamlining development, fostering collaboration, and simplifying deployment processes. In this article, we'll walk you through containerizing your Node.js app using Docker. By the end, you'll grasp how to leverage Docker effectively in your Node.js projects, boosting efficiency in development workflows and ensuring consistent deployments.
Let's dive in and explore how Docker can enhance your Node.js development journey!
Prerequisites 🛠️
Before delving into Dockerizing your Node.js application, ensure you have the following prerequisites:
Docker: Install Docker on your system to enable containerization.
Node.js and npm: Have Node.js and npm installed for Node.js application development.
1. Setting Up Your Node.js Application 📁
1.1 Initialize a New Node.js Project
Open your terminal.
Navigate to the directory where you want to create your project.
Run the command:
mkdir Deploy-Node-Js-With-Docker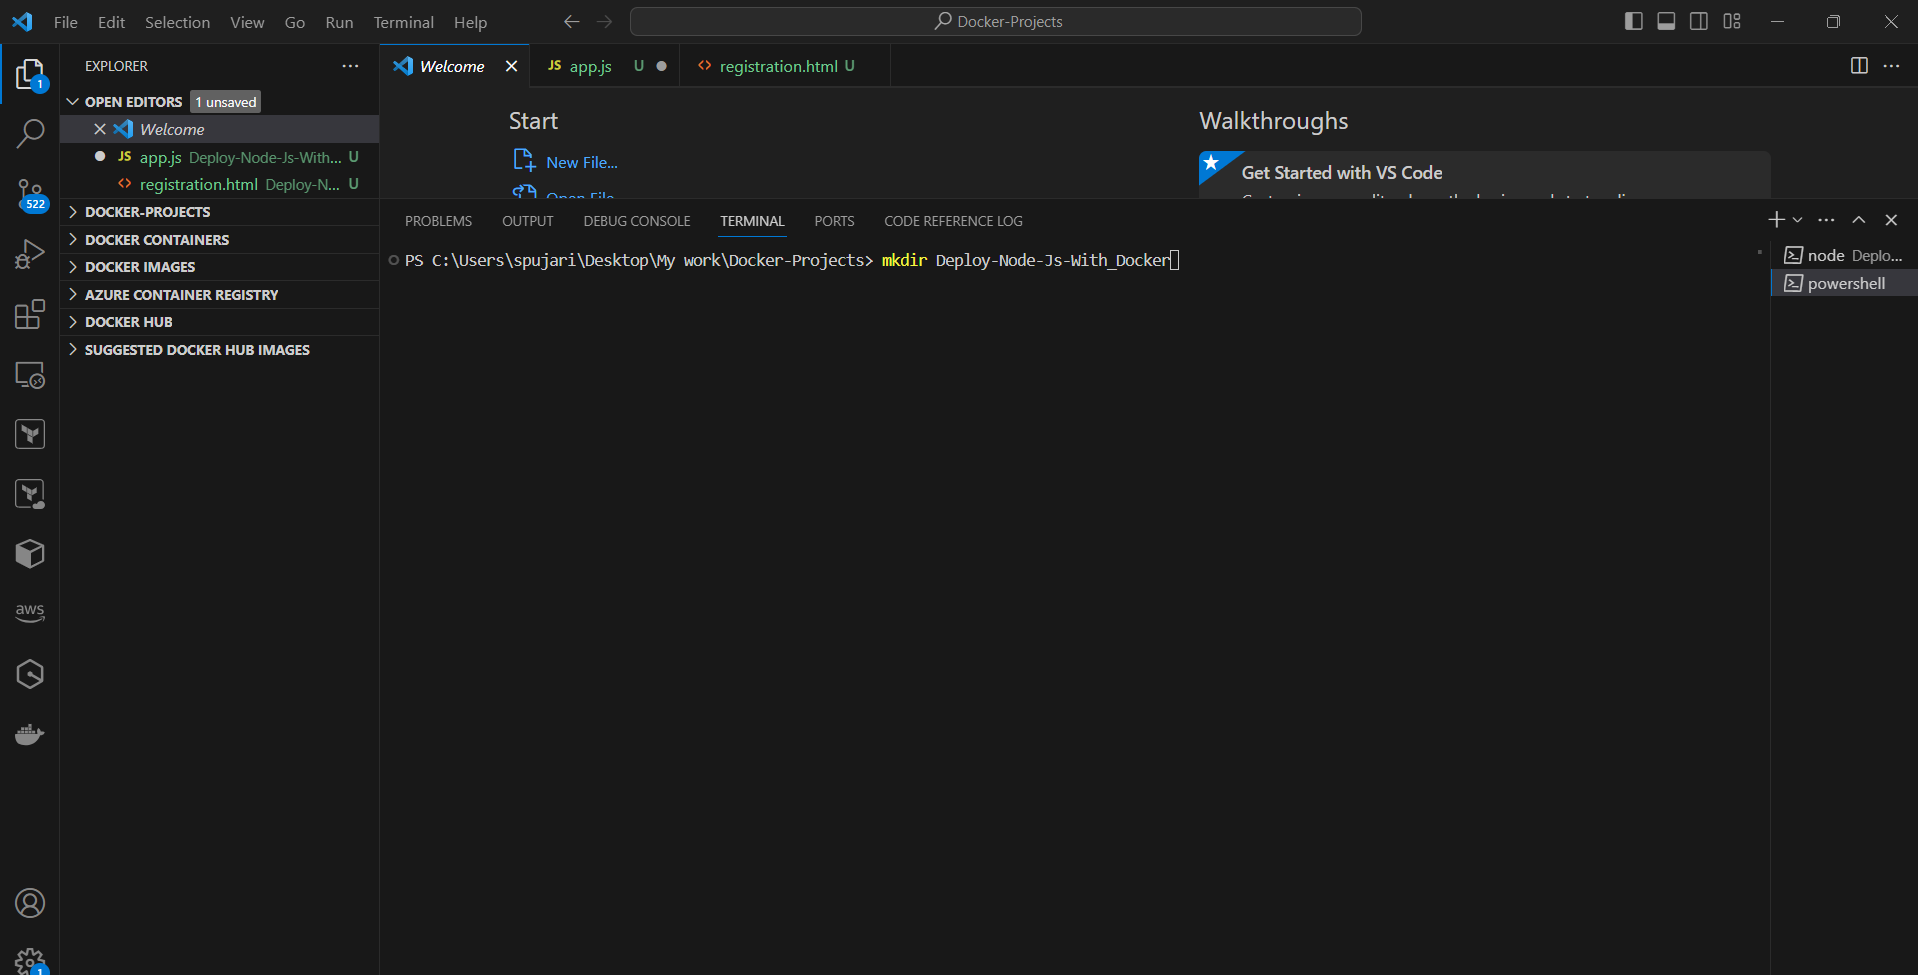
Move into the newly created directory:
cd docker-node-app.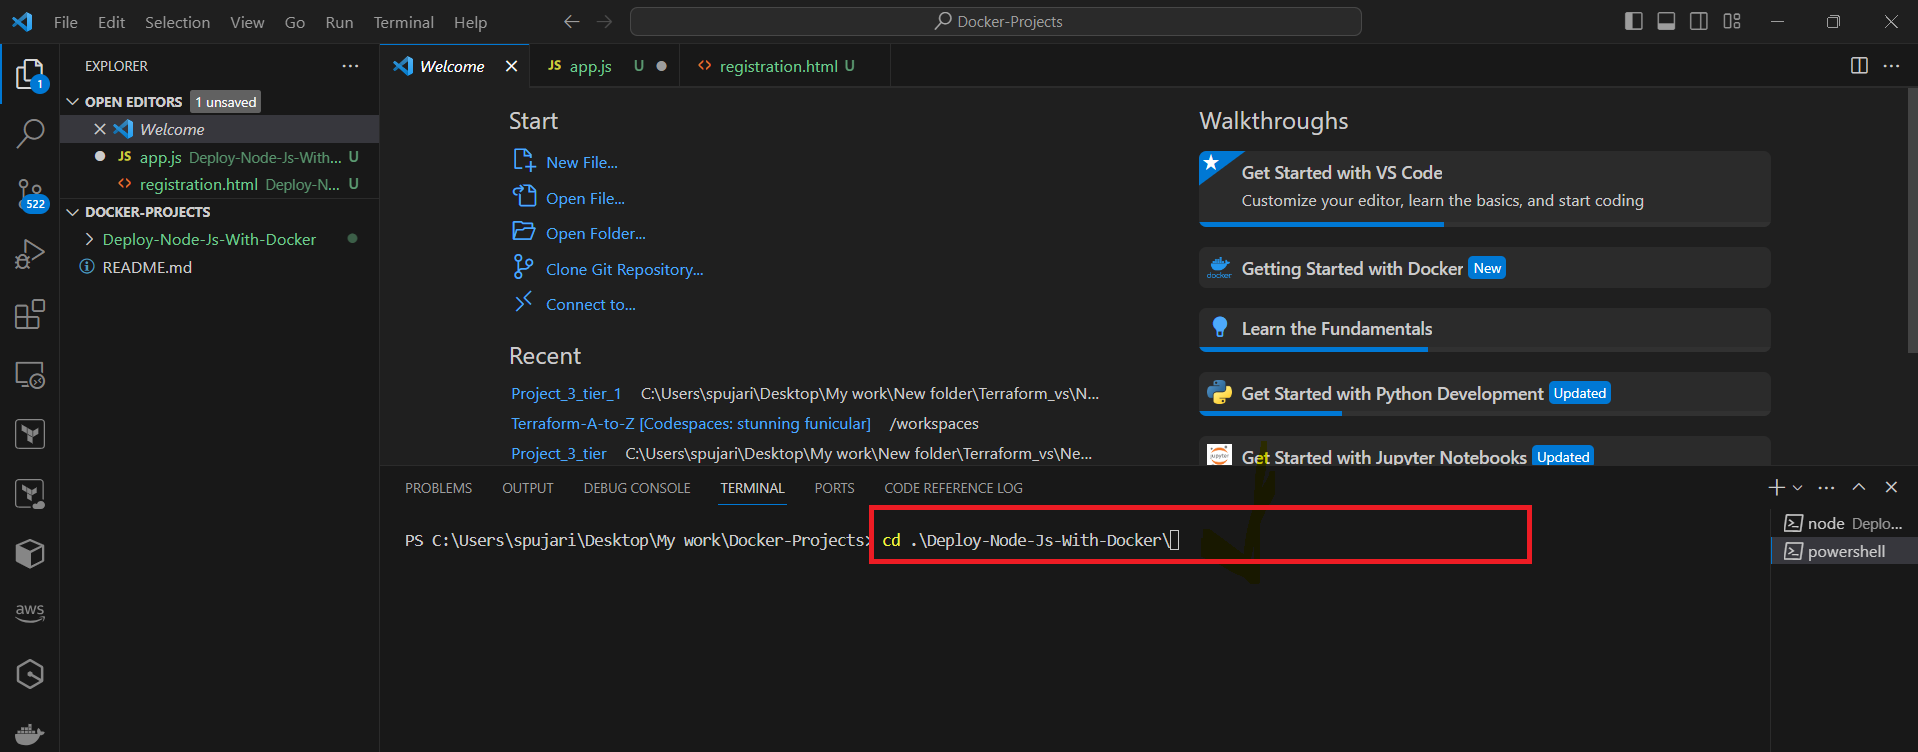
Initialize a new Node.js project with default settings by running:
npm init -y.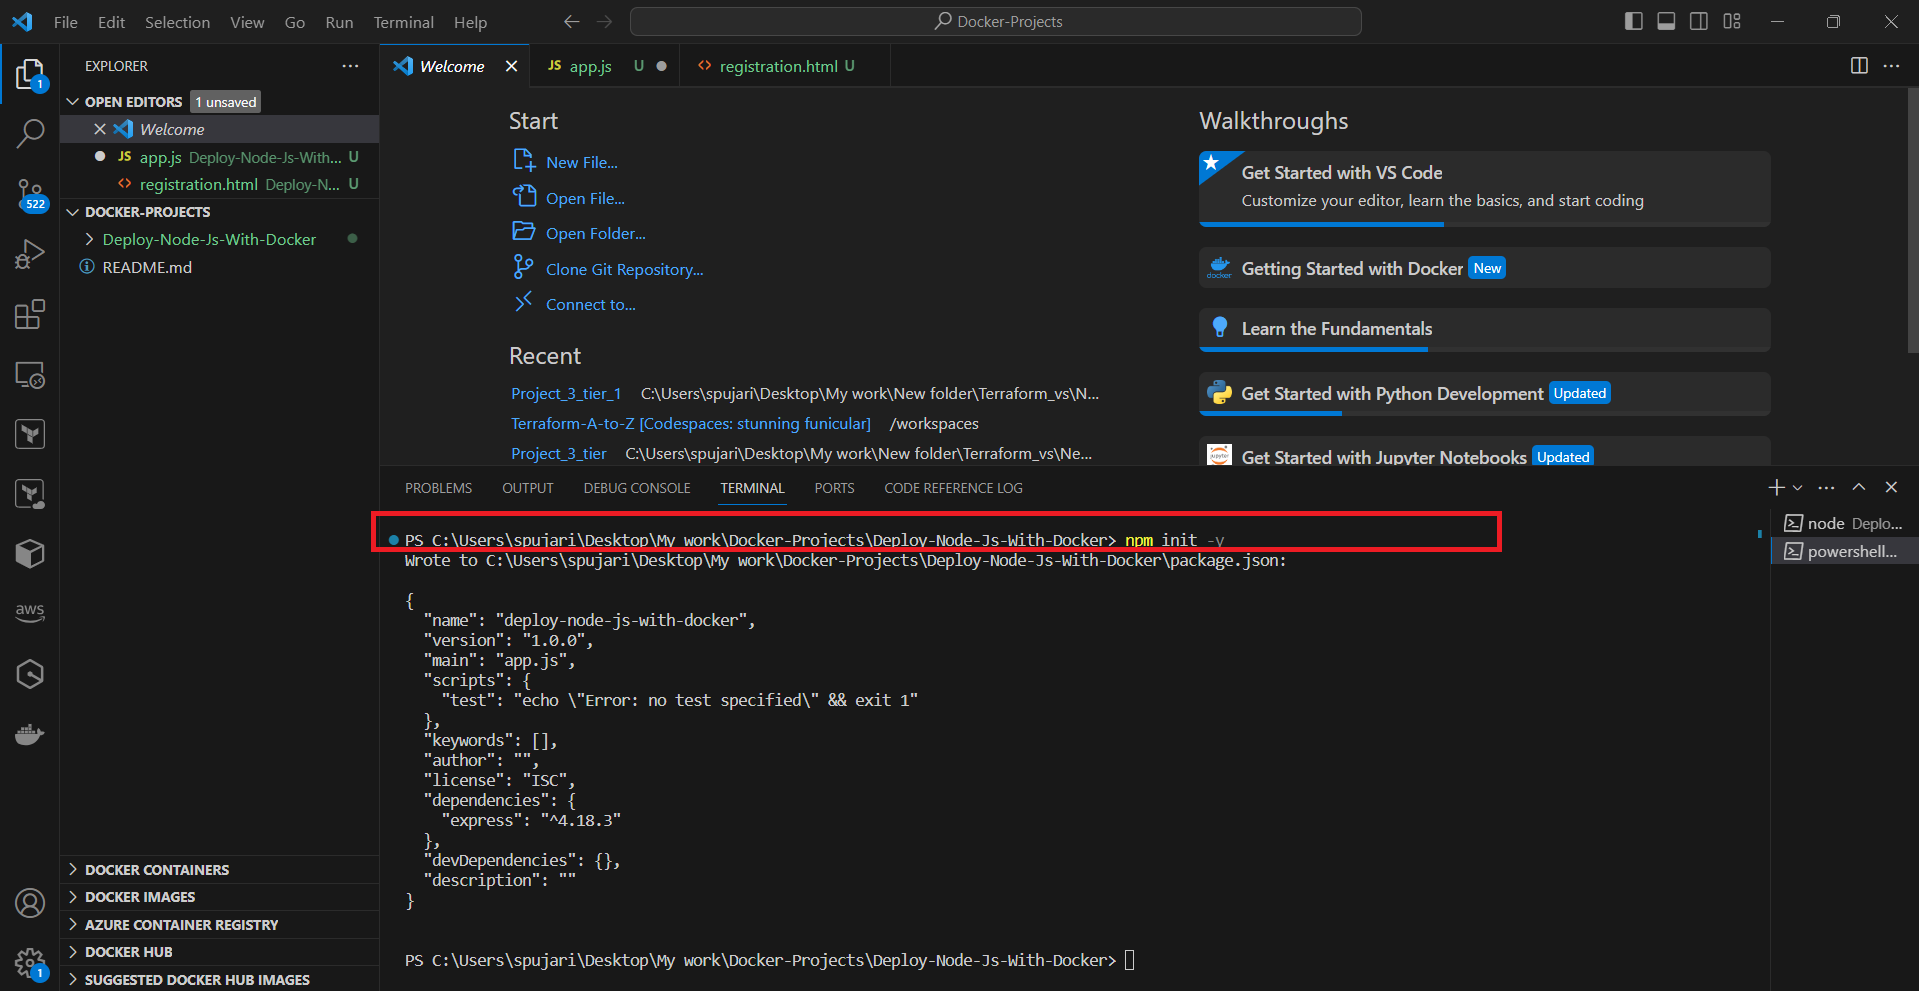
1.2 Install Dependencies
Install Express.js for handling HTTP requests:
npm install express
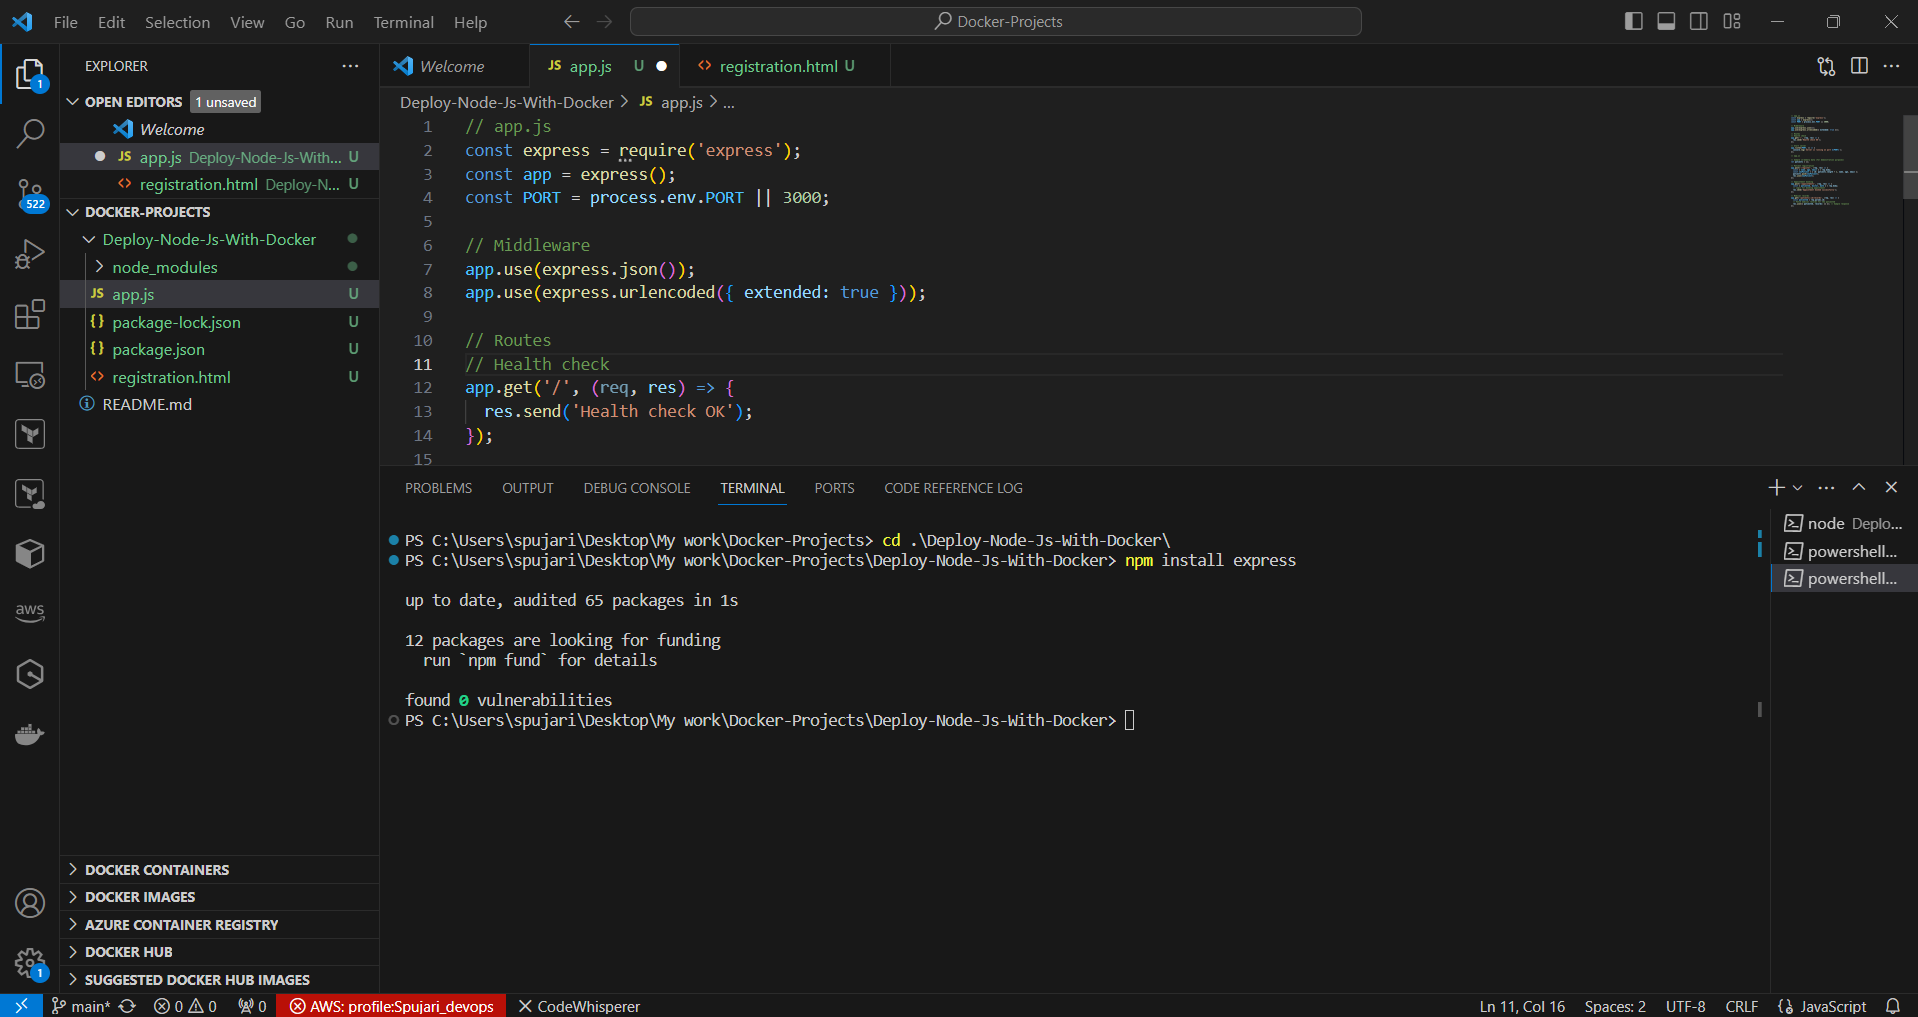
1.3 Create a Healthcare Application Node.js Application
Open your favorite code editor-Here I'm using Visual Code
Create a file named
app.jsinside theDeploy-Node-Js-Dockerdirectory.Add the following code to
app.js:Create a file named
app.jsfor the server: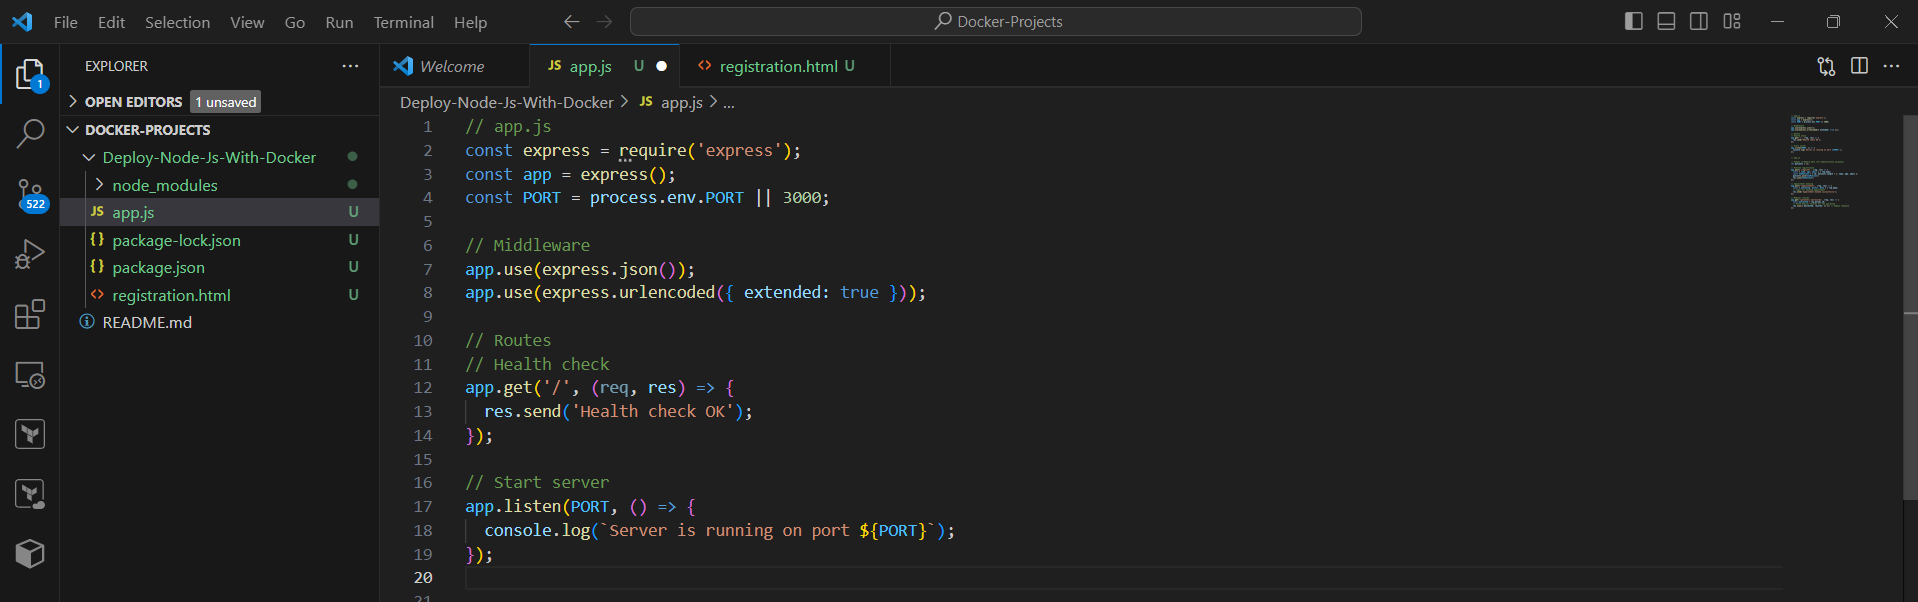
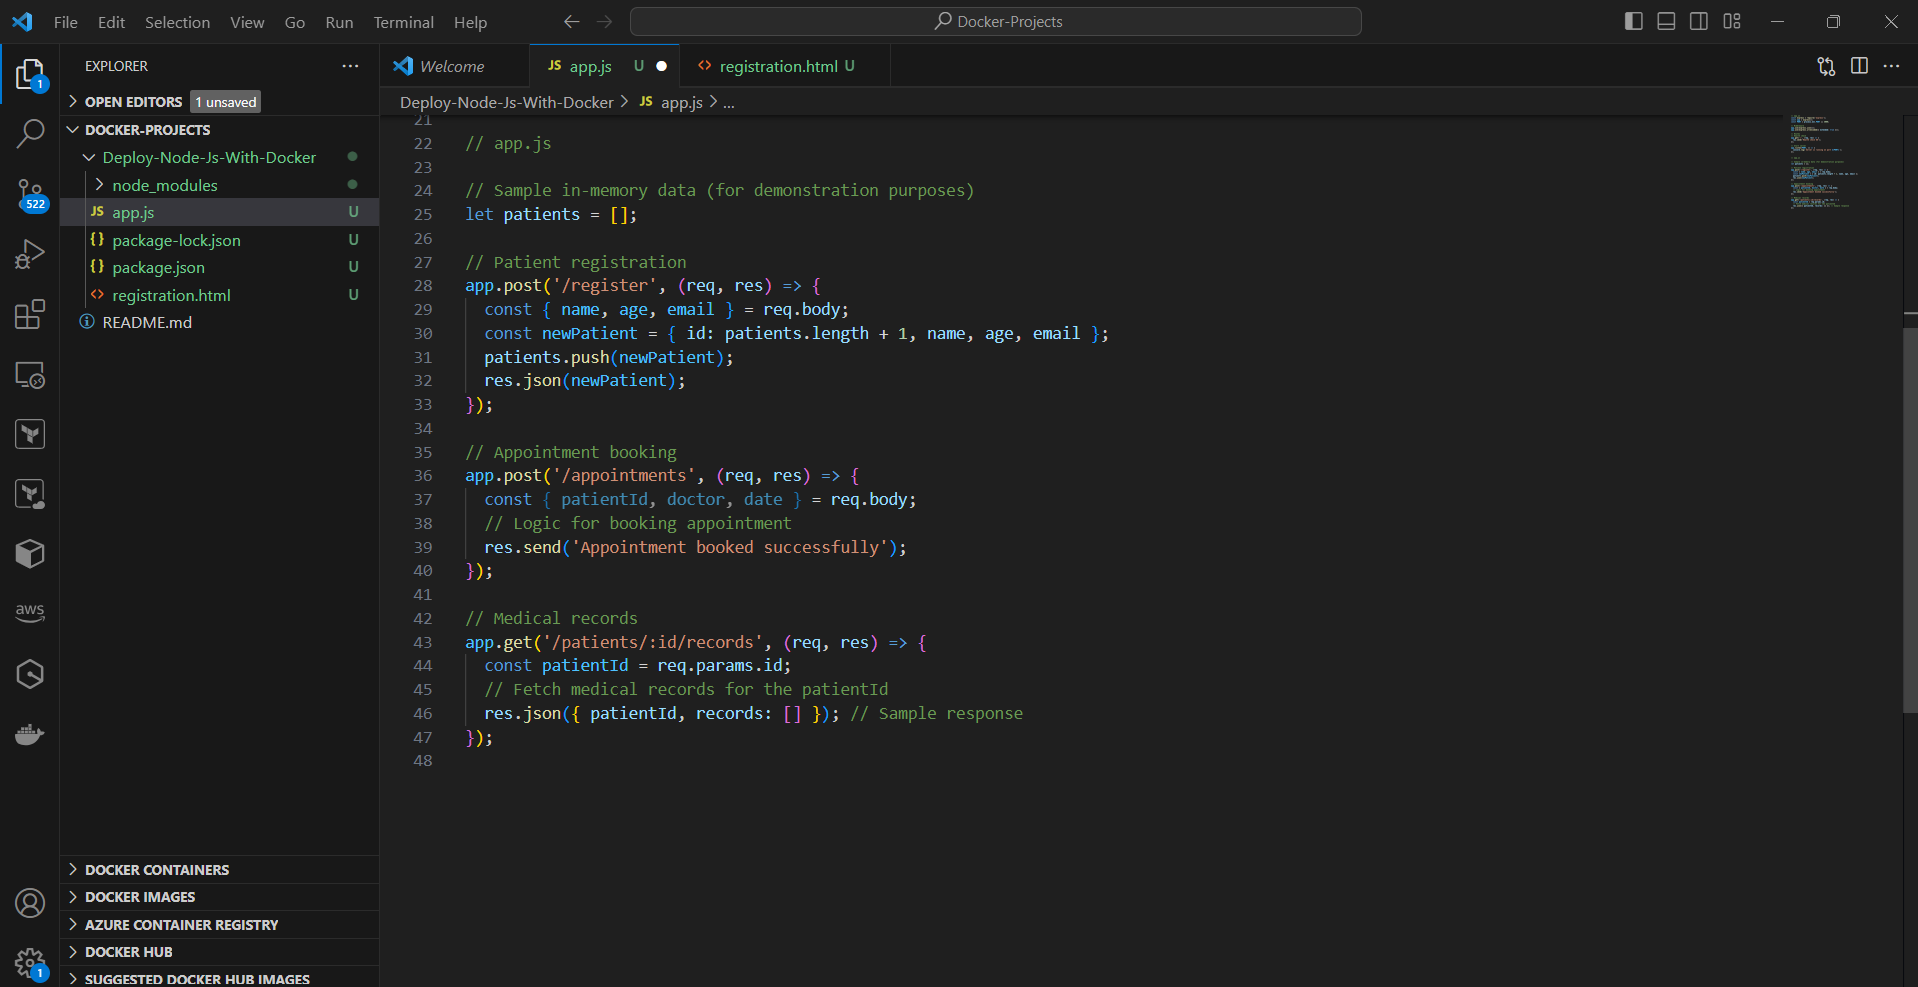
Define Routes for Healthcare Features
Add routes for patient registration, appointment booking, and medical records:
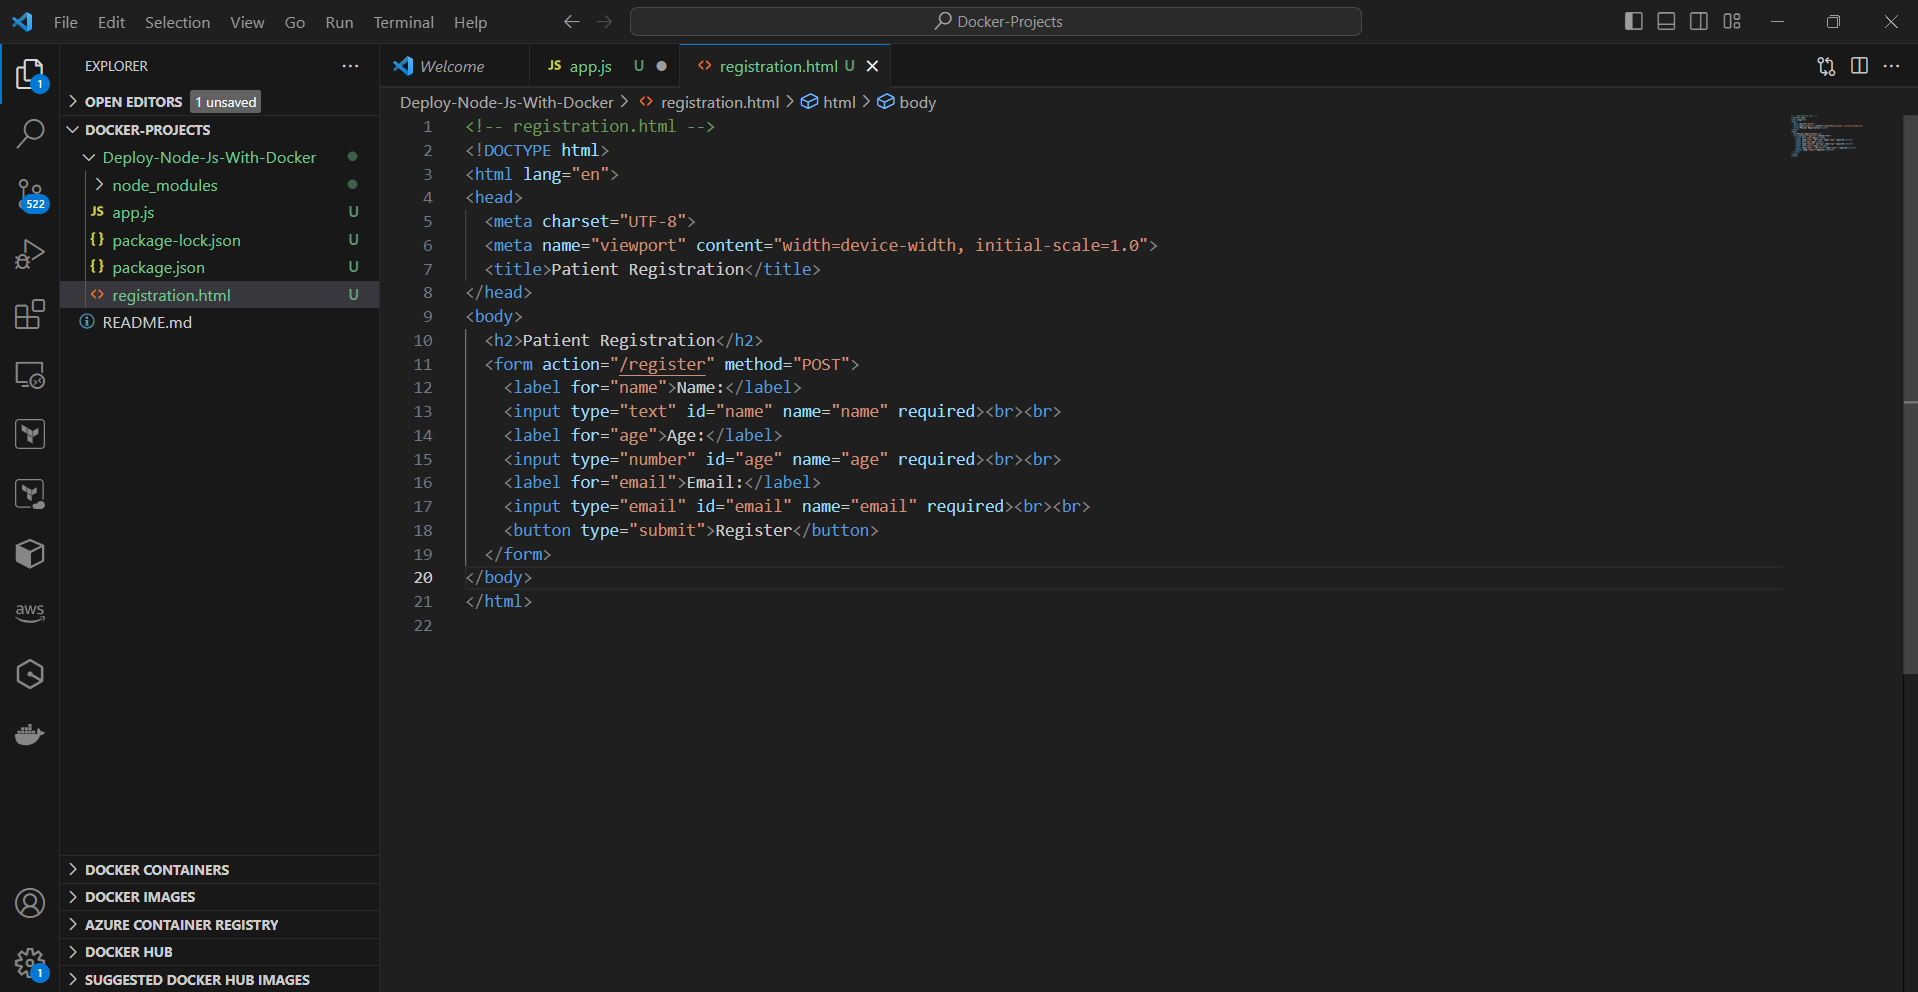
1.4 Creating a simple HTML form for registration and appointment booking.
Here's a simple HTML form for patient registration:
1.5 Test Your Node.js Application
In your terminal, run the command:
node app.js
To access the HTML file in your browser, you need to serve it using a web server. One simple way to do this is by using a local development server. You can achieve this by installing a package called
http-serverusing npm. Here's how you can do it:Step 1: Install
http-serverRun the following command in your terminal to install
npm install -g http-serverglobally: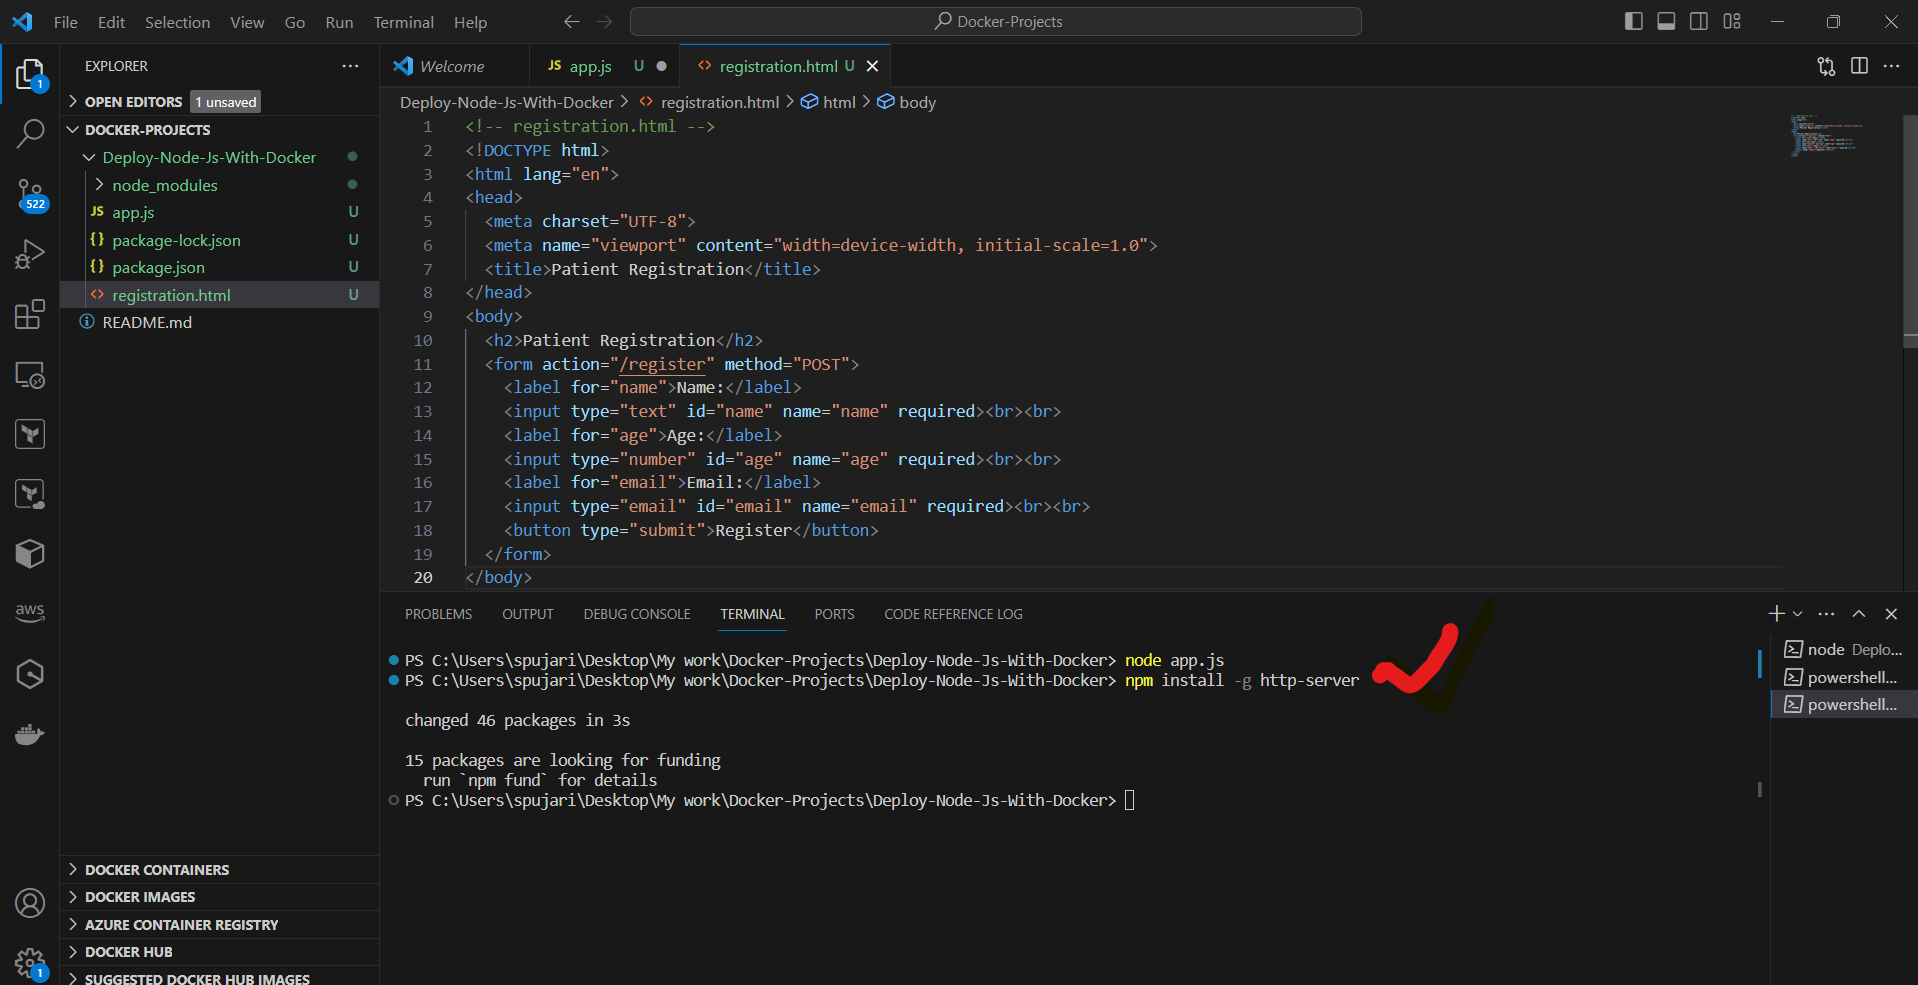
Step 2: Serve the HTML File
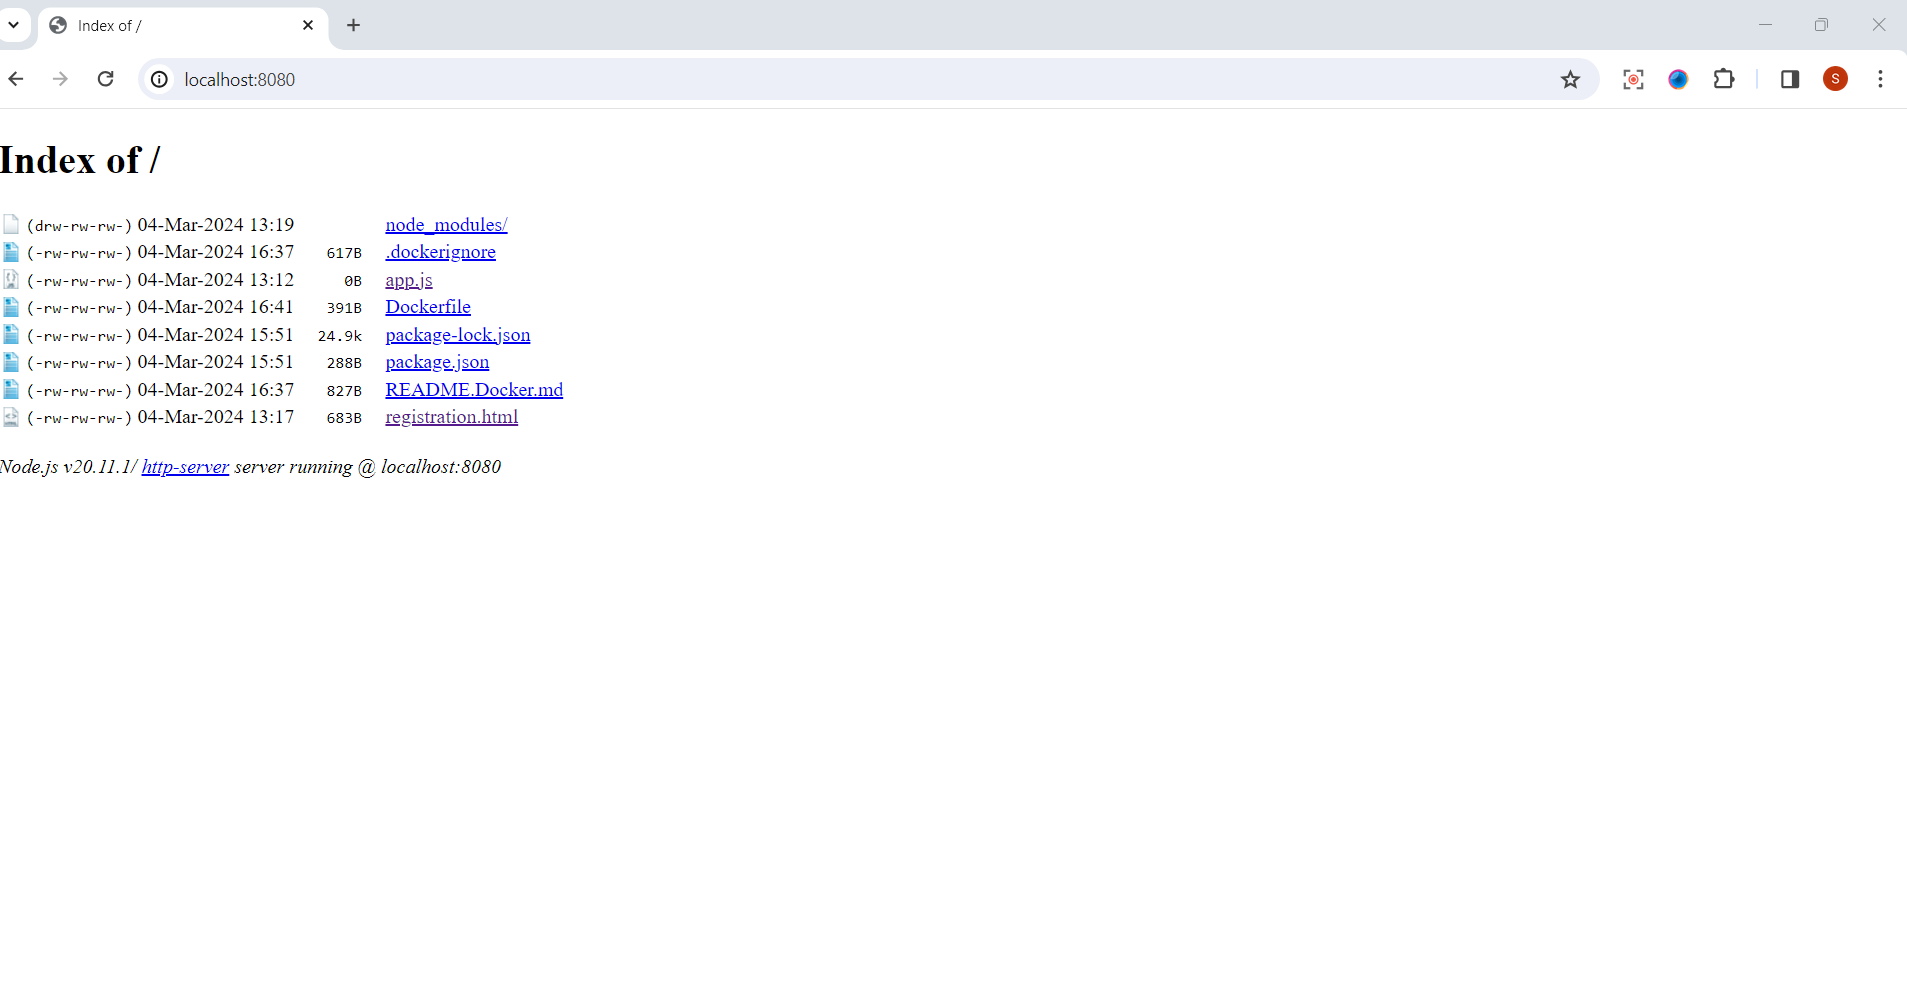
Navigate to the directory where your HTML file (registration.html) is located. Then, run the following command to start the server:http-server
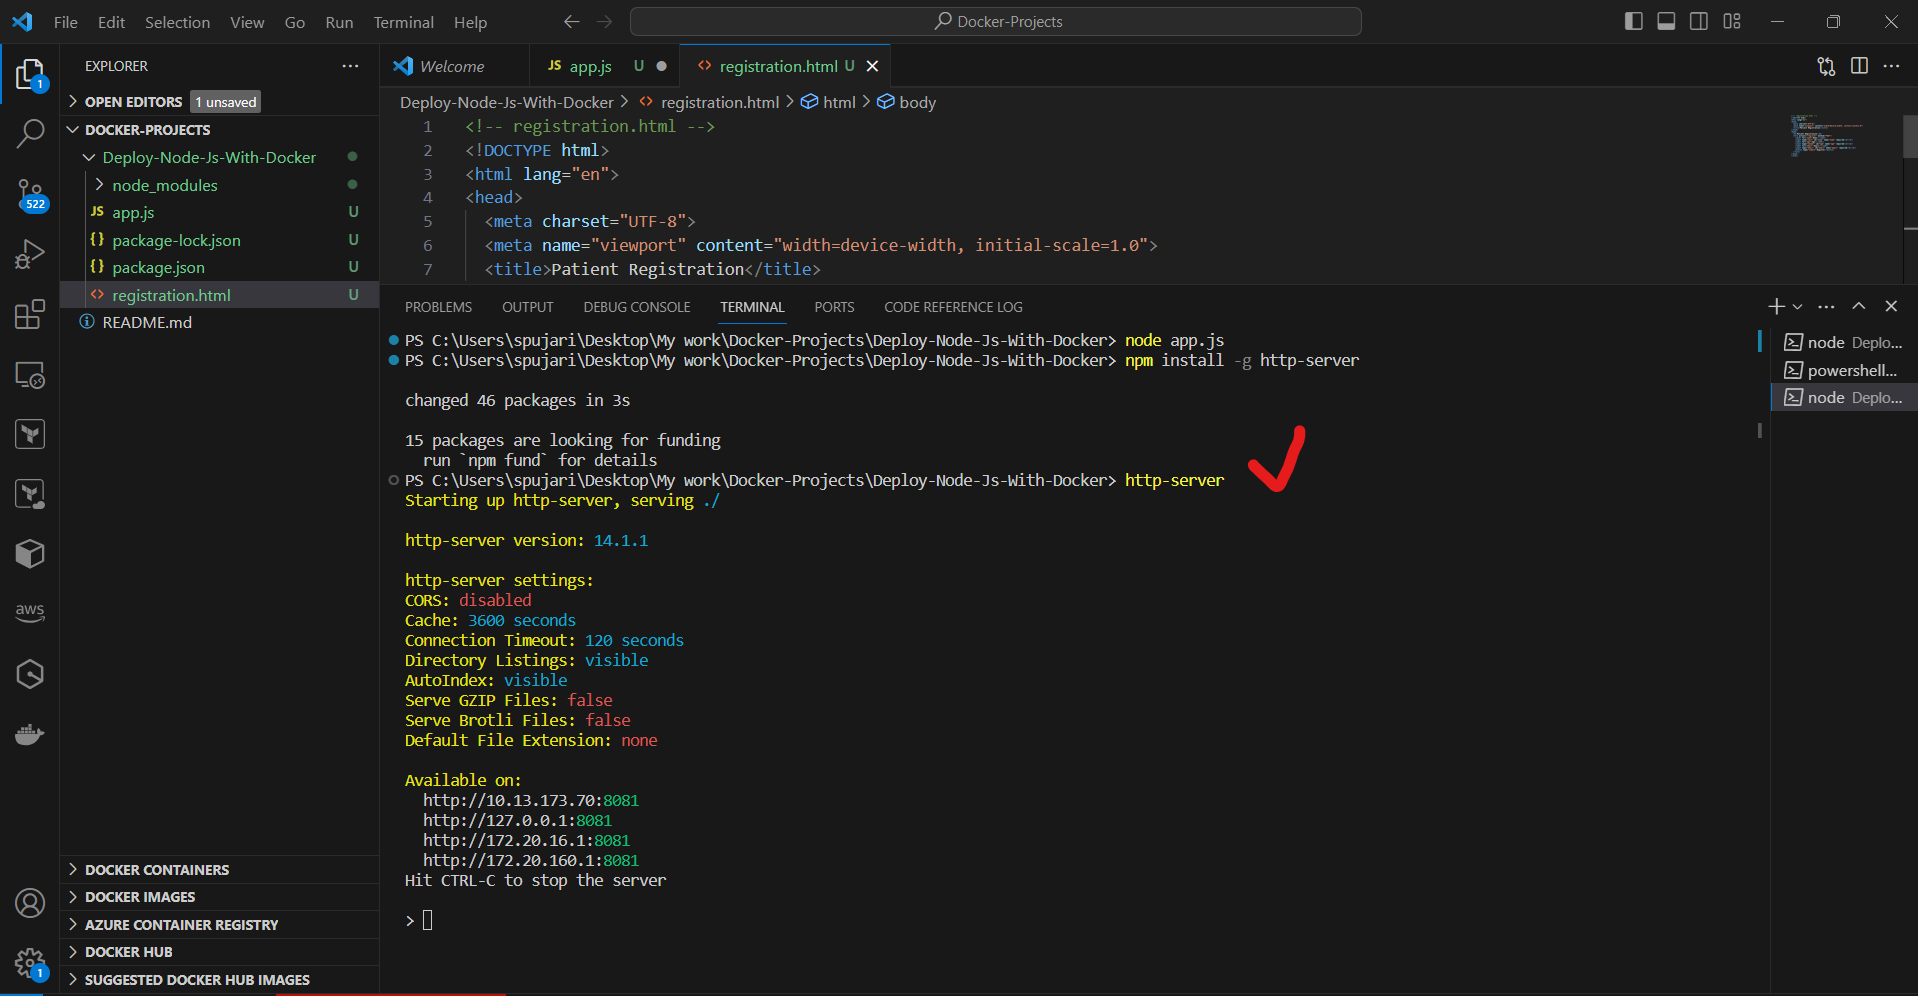
By default, http-server will serve files from the current directory on port 8080.
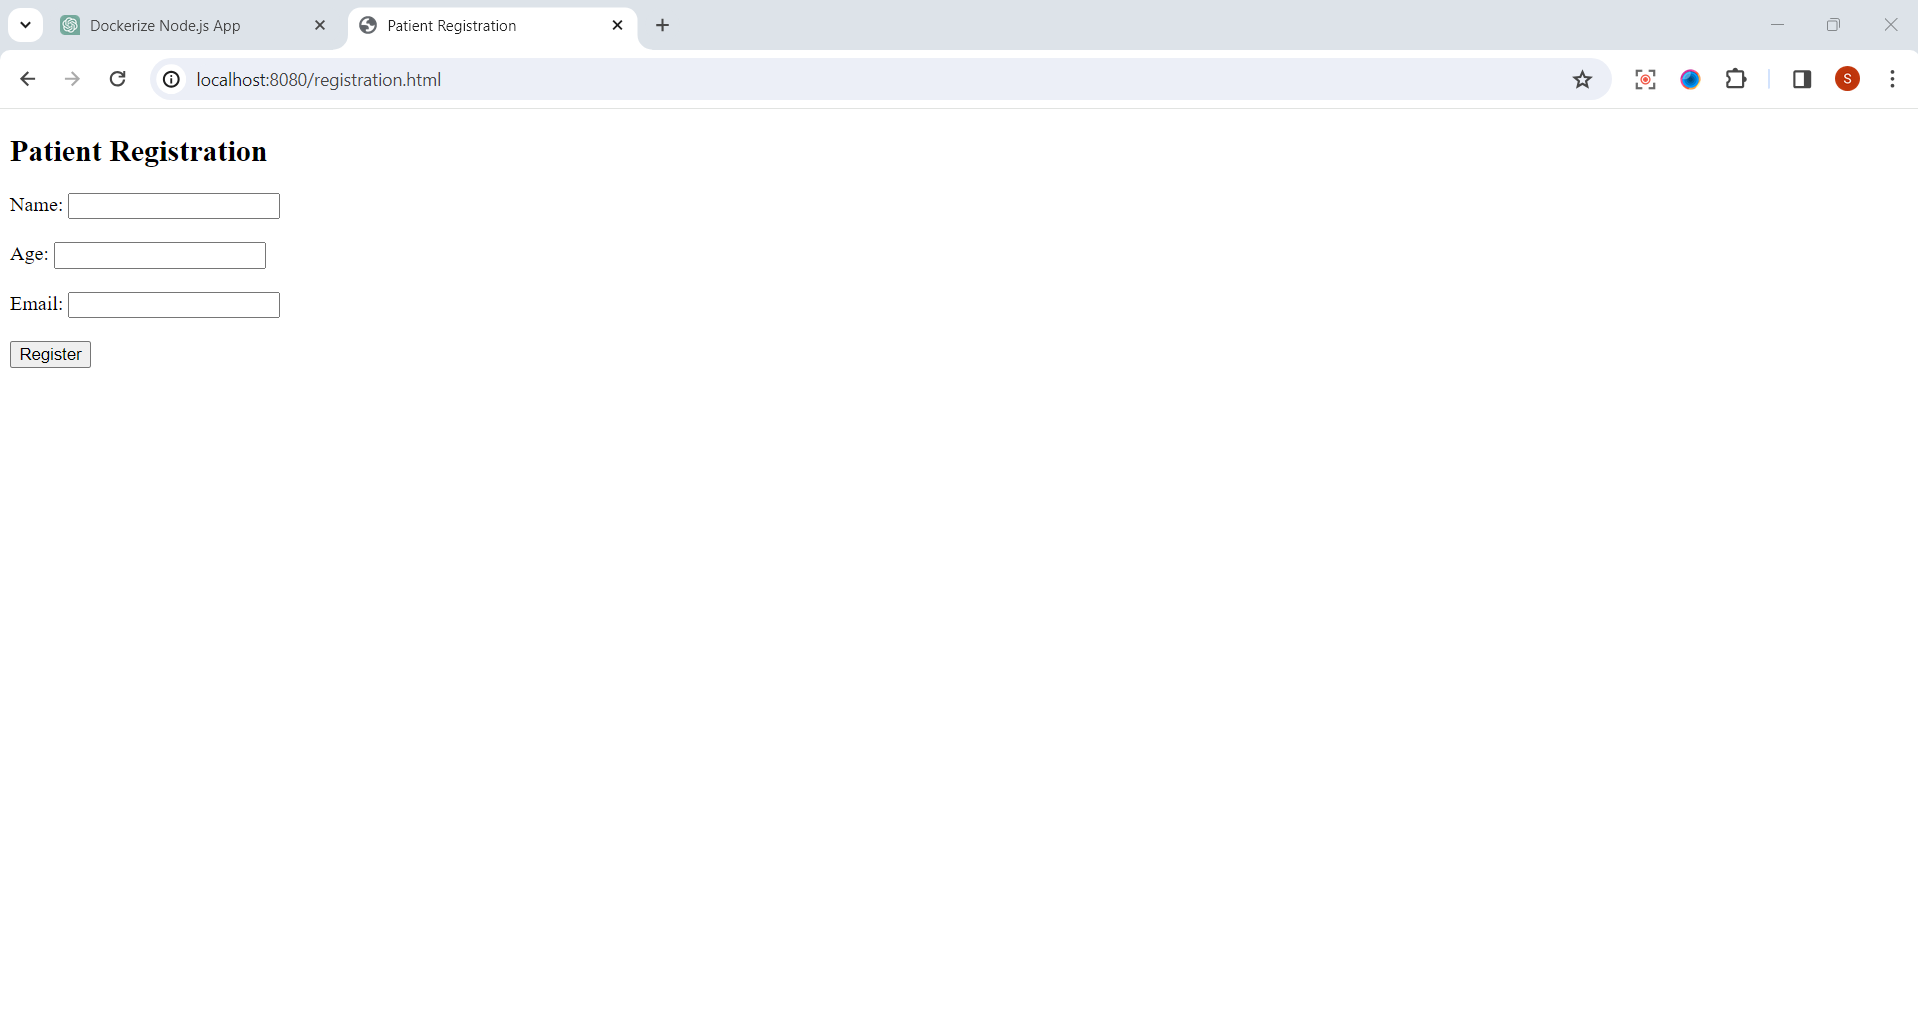
Step 3: Access the HTML File in Browser
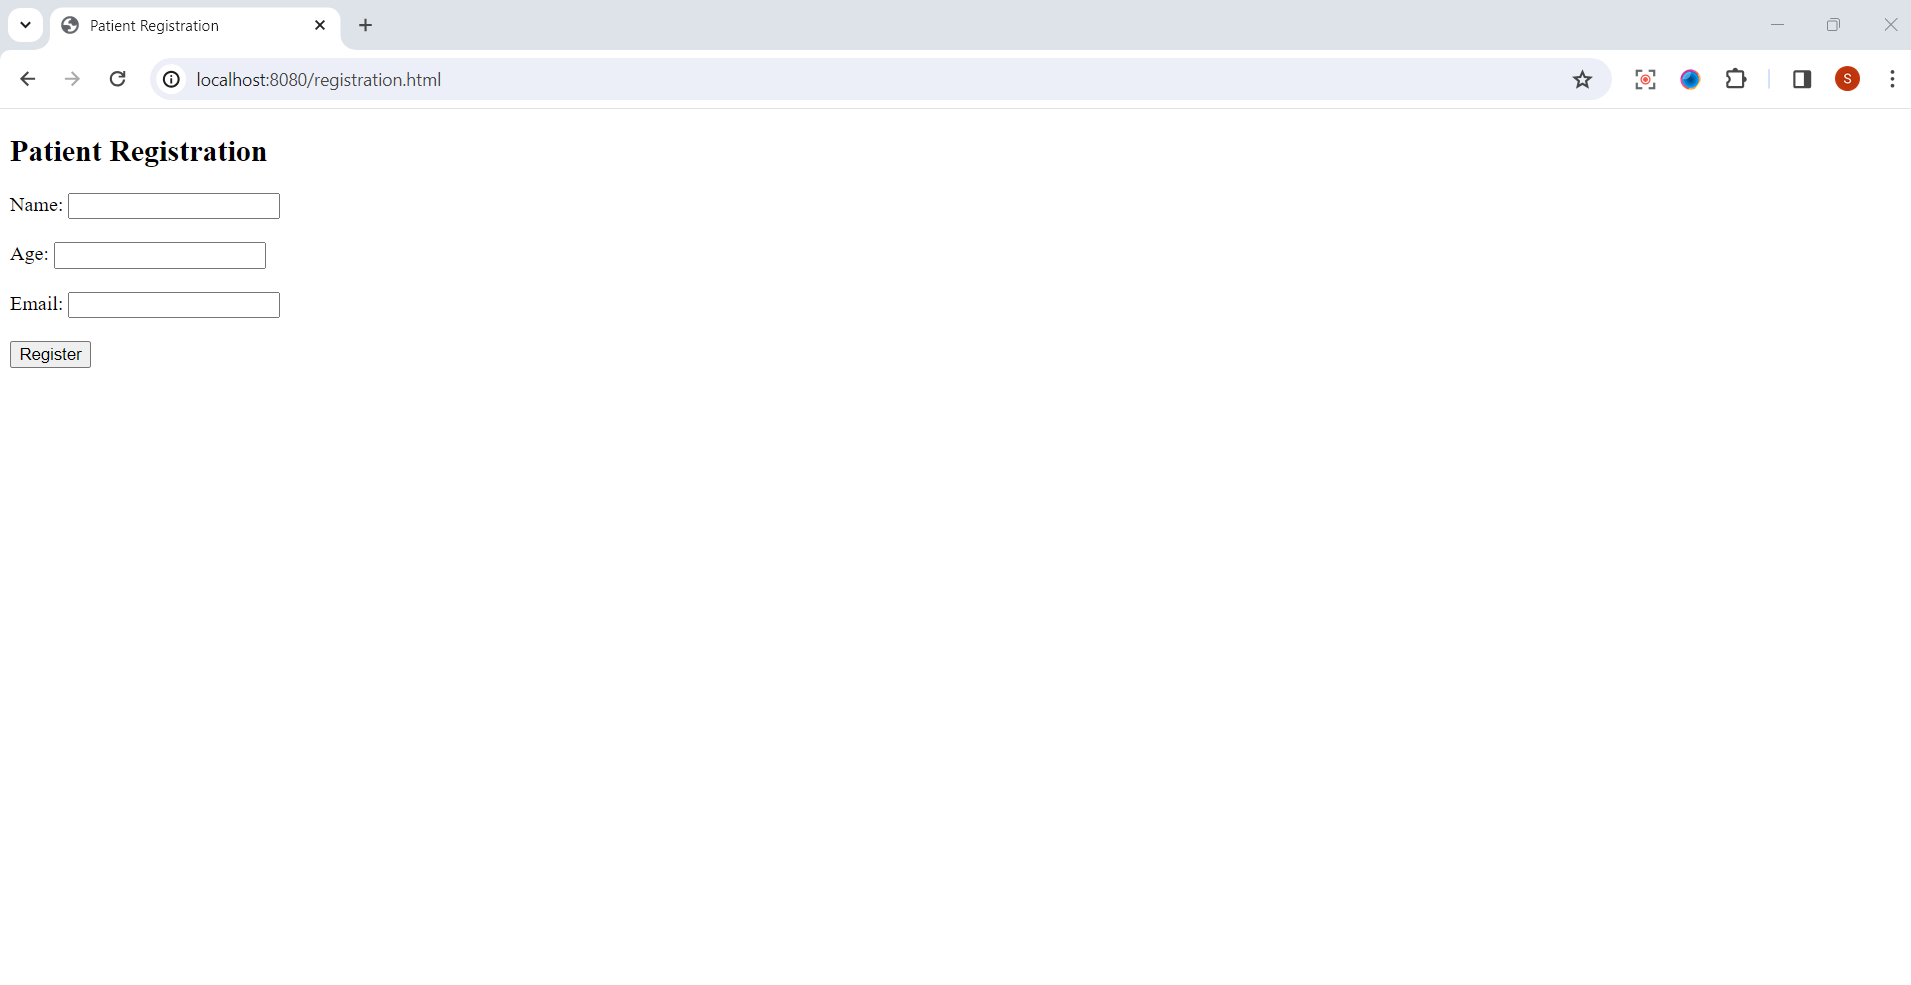
Once the server is running, open your web browser and navigate to the following URL:http://localhost:8080/registration.html
You should see the "Patient Registration" form displayed in the browser.
2. Creating a Dockerfile 🐳
2.1 Choose a Base Image
Open a text editor.
Create a file named
Dockerfileinside theDeploy-Node-Js-App-With-Dockerdirectory.Add the following content to the
Dockerfile:DockerfileCopy code# Use an official Node.js runtime as the base image FROM node:18 # Set the working directory in the container WORKDIR /usr/src/app # Copy package.json and package-lock.json to the container COPY package*.json ./ # Install application dependencies RUN npm install # Copy the rest of the application code COPY . . # Specify the command to run your application CMD ["node", "app.js"]
🔍 Understanding Dockerfile Instructions:
FROM node:18: 📦 This instruction selects the official Node.js 18 image as the base image.WORKDIR /usr/src/app: 📁 Sets the working directory inside the container to/usr/src/app.COPY package*.json ./: 📝 Copies thepackage.jsonandpackage-lock.jsonfiles to the container’s working directory.RUN npm install: 🛠️ Installs the Node.js application dependencies defined in thepackage.jsonfile.COPY . .: 📂 Copies the remaining application files to the container.CMD ["node", "app.js"]: 🚀 Specifies the command to run when the container starts. In this case, it runs theapp.jsfile using Node.js.
By following these instructions, you can effectively build a Docker image for your Node.js application, ensuring that all dependencies are included and the application is ready to run within a container environment.
2.2 Build the Docker Image
Open your terminal.
Navigate to the
docker-node-appdirectory.Run the command:
docker build -t node-app-docker .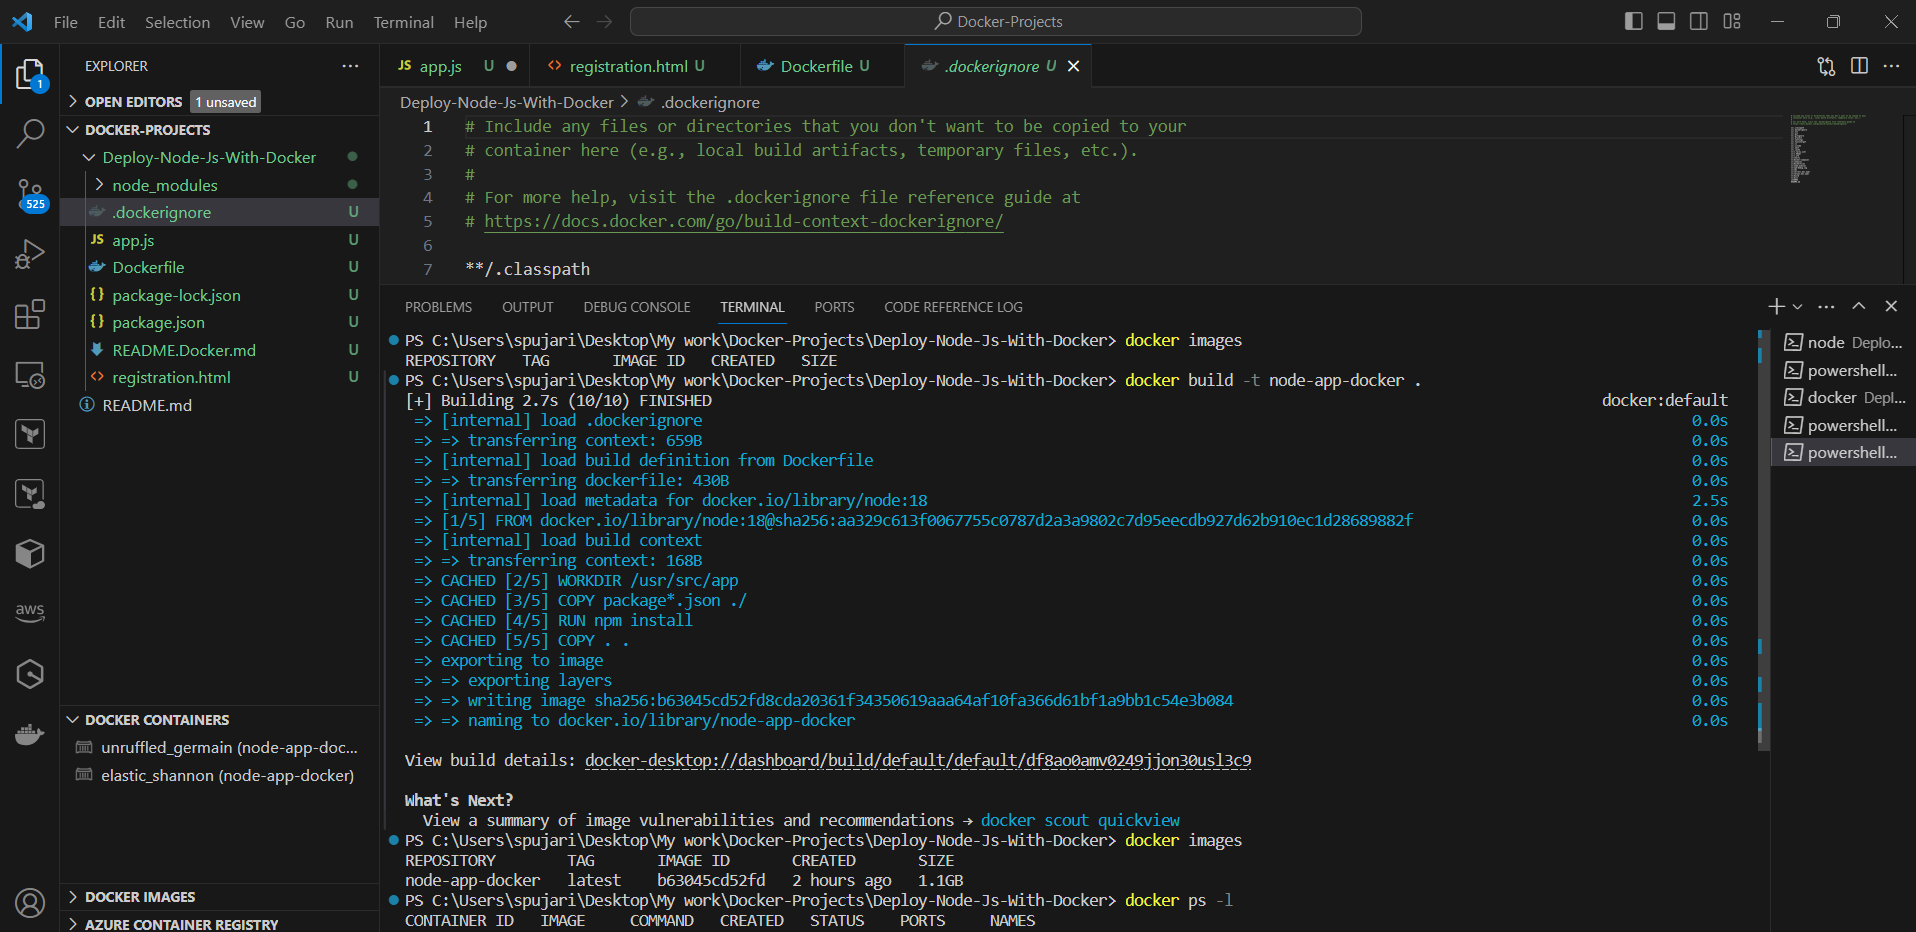
🏷️ Tagging the Docker Image:
-tFlag: 🏷️ This flag specifies a tag for the image.Image Name: 🖥️
docker-node-appis the name of the tag.
📁 Build Context:
.(Dot) at the End: 📂 This indicates the build context, which is the current directory.
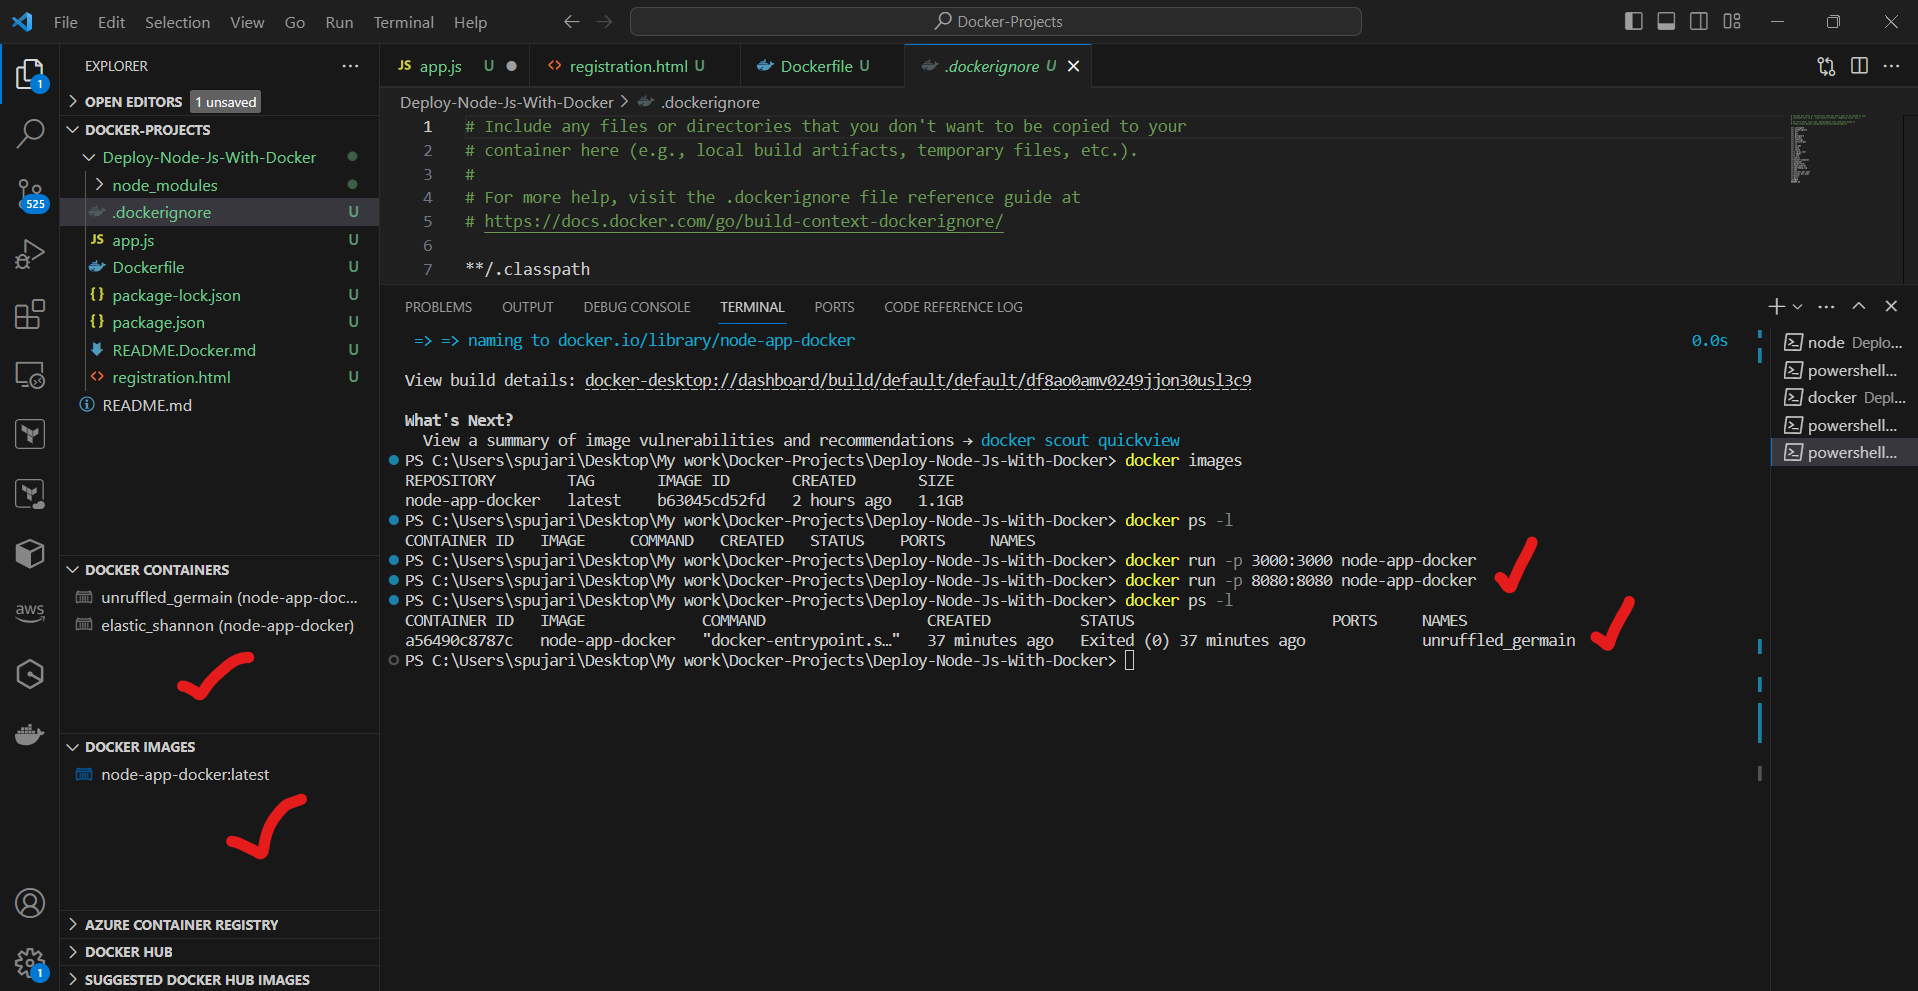
3. Running Your Dockerized Node.js App 🏃♂️
3.1 Run the Docker Container
- In your terminal, run the command:
docker run -p 8080:8080 node-app-docker
🏃♂️ Running the Docker Container:
docker run: 🚀 This command is used to create and start a new container from an image.
🌐 Port Mapping:
-p 8080:8080: 🔄 This option maps port 8080 from the host machine to port 8080 in the container. This enables access to your application via a web browser.
🖥️ Image Name:
docker-node-app: 🖼️ This is the name of the image you built earlier.
Executing this command will launch a Docker container based on the specified image, allowing you to access your application on port 8080 of your host machine.
3.2 Access Your Application
Open a web browser and navigate to
http://localhost:8080.You should see the "Patient Registration" form displayed in the browser.
3.3 Stopping the Container
To stop the running Docker container, return to your terminal and press
docker stop "container_id here".How to check container id -
docker ps -l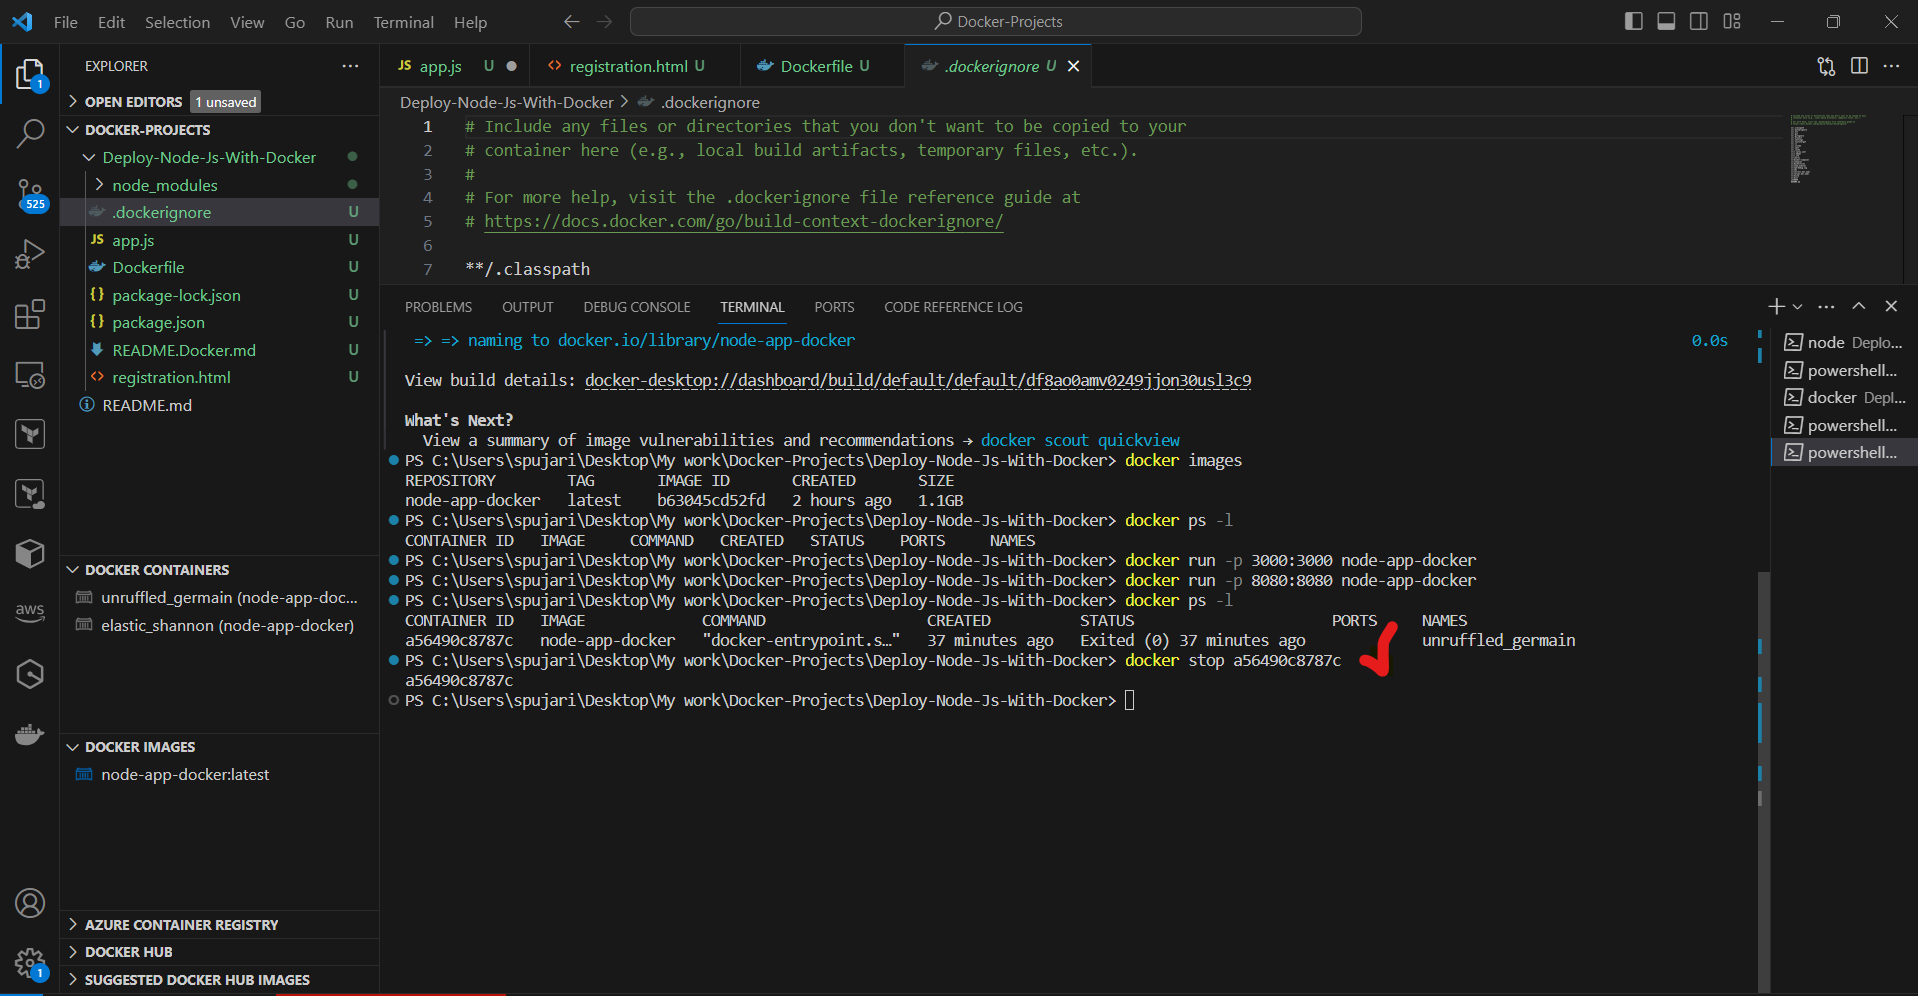
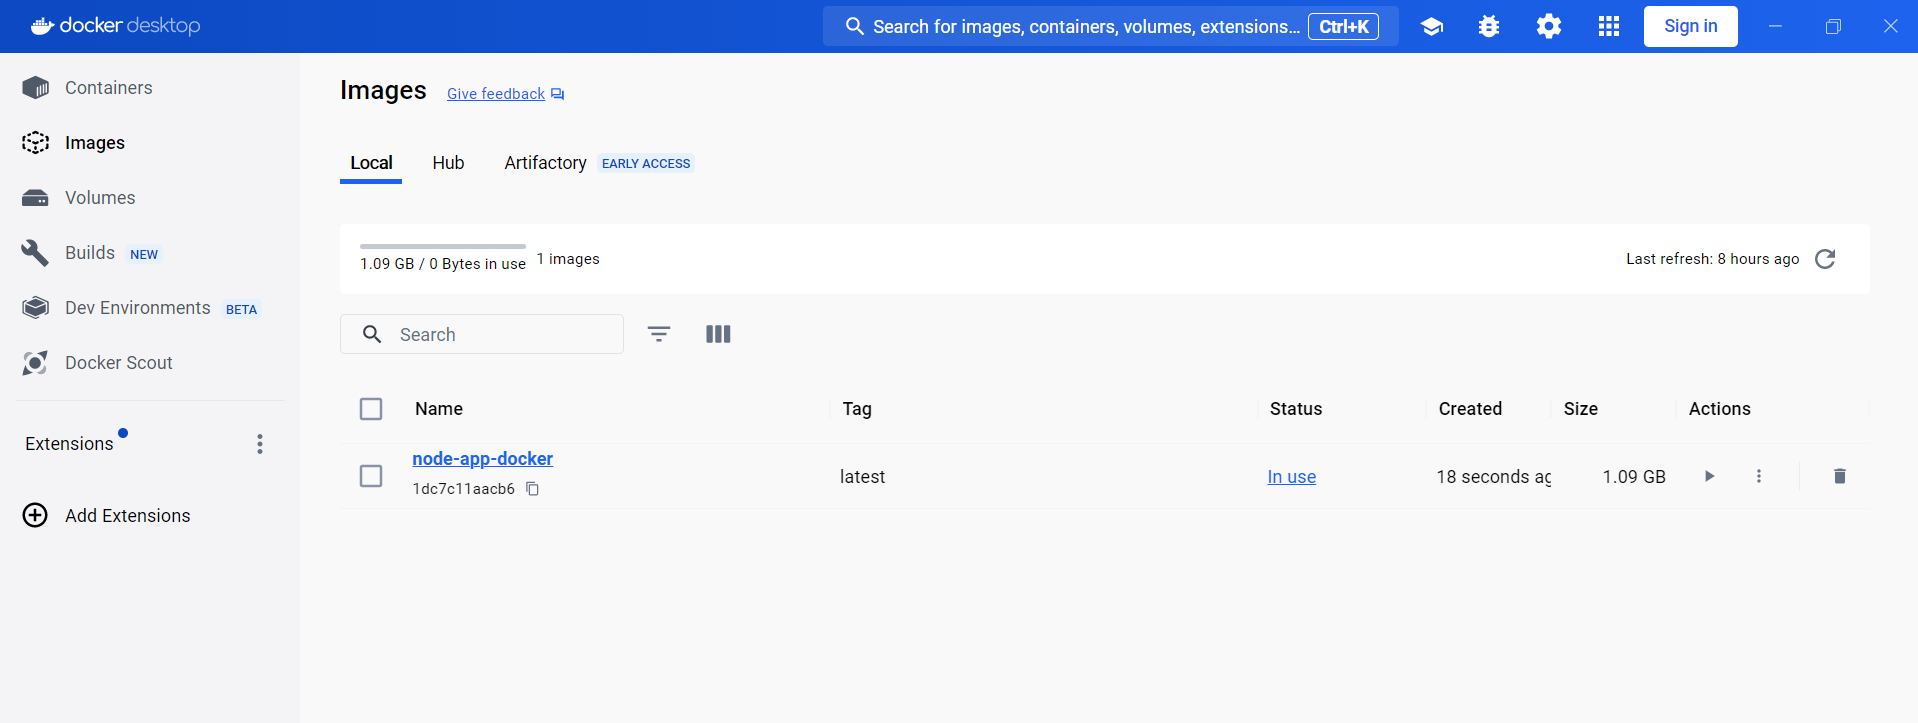
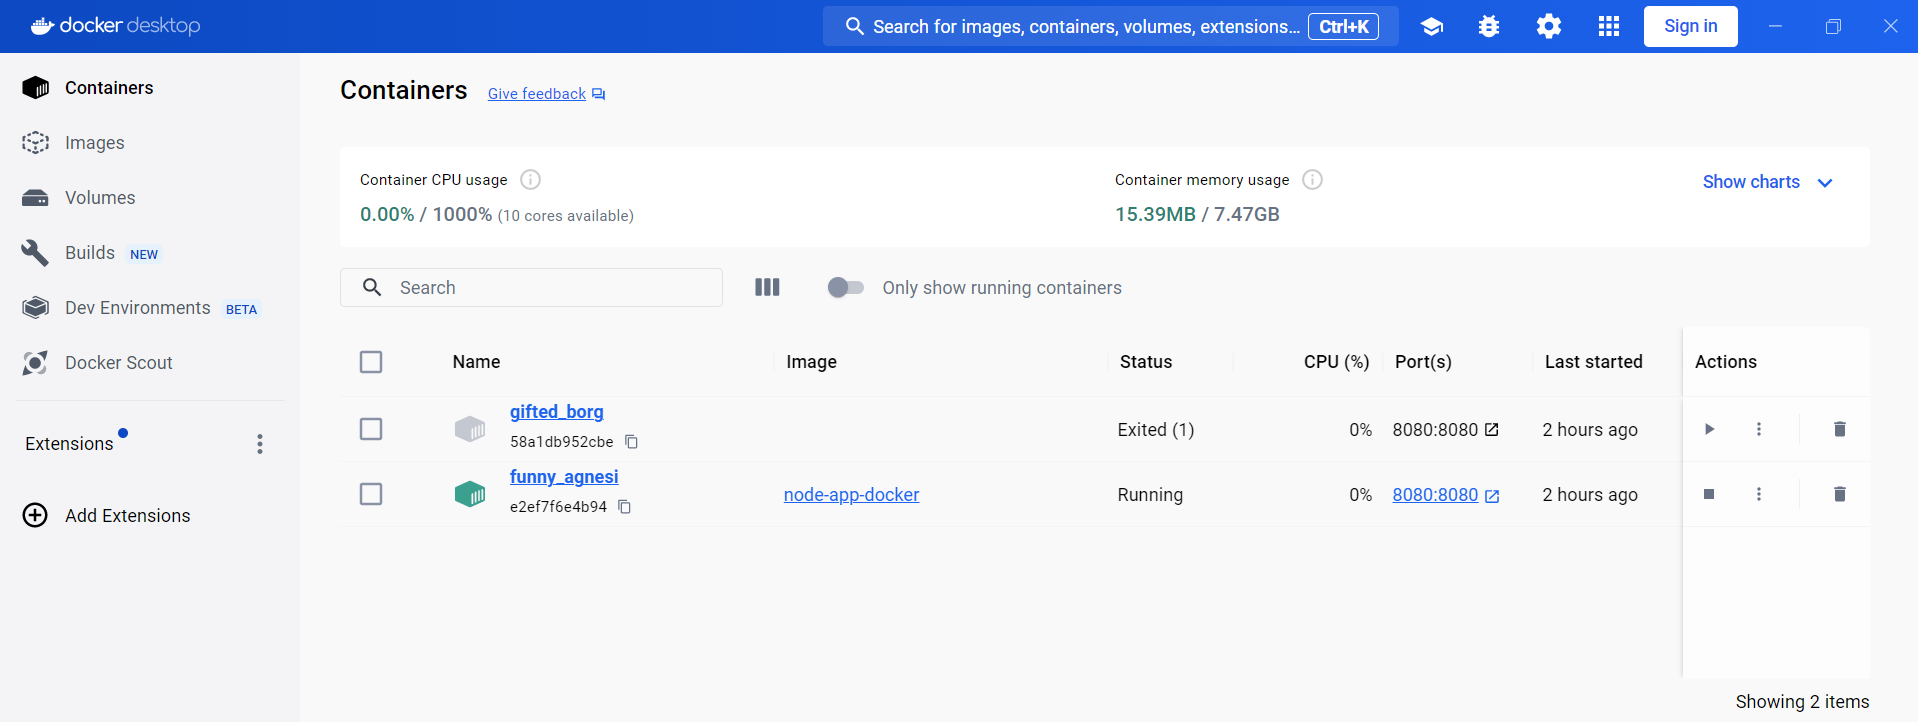
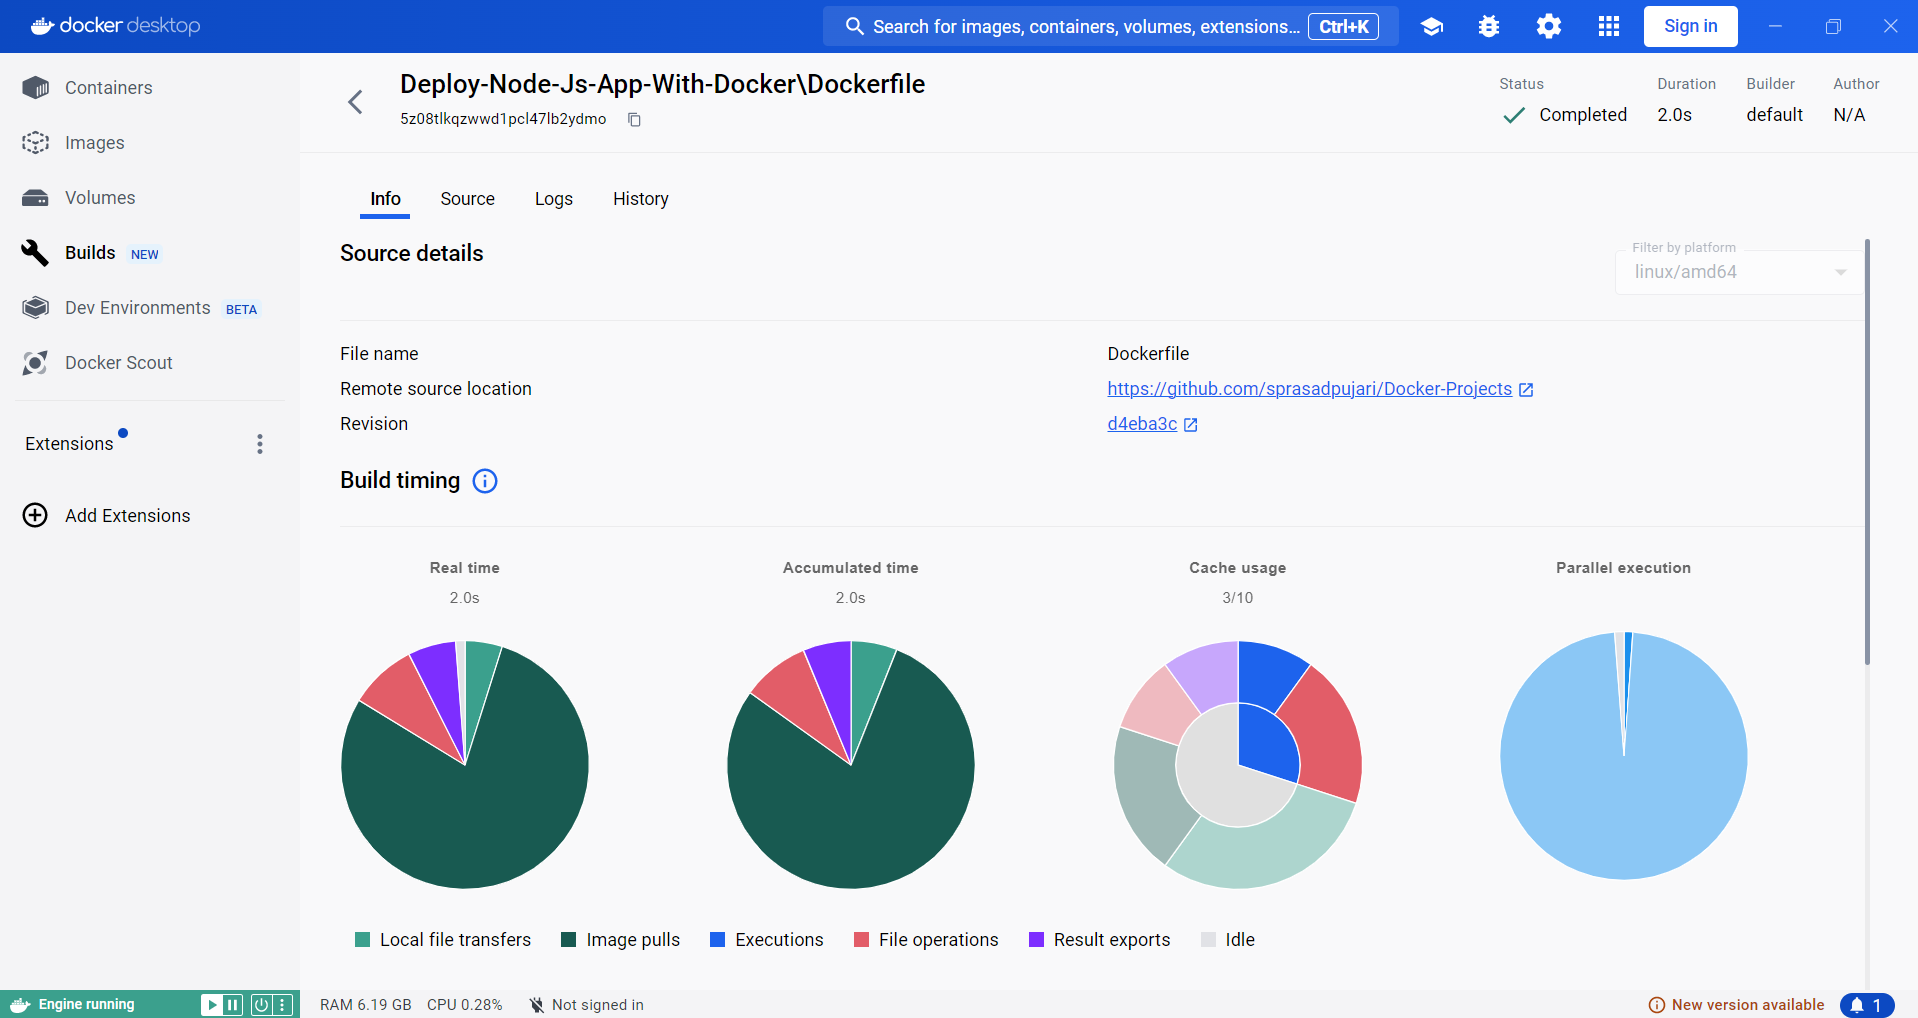
3.4 Check in Docker Deskstop App
Go to your Docker Deskstop ,and see Images ,and Container ..etc.
Image-
Container-
Great job! You've effectively executed your Node.js application within a Docker container. This showcases Docker's containerization capabilities, which enable straightforward deployment and management of applications within isolated environments.
Moving forward, we'll delve into a more efficient method for managing multi-container applications using Docker Compose.
Stay tuned for the next segment of Docker-Compose !
4.Streamlining Above Development with Docker Compose: Simplify Your Workflow🔄
4.1 Install Docker Compose
Follow the official installation guide to install Docker Compose if you haven't already.-https://docs.docker.com/compose/install/.

4.2 Create a Docker Compose Configuration
Create a new file named
docker-compose.ymlin thedocker-node-appdirectory.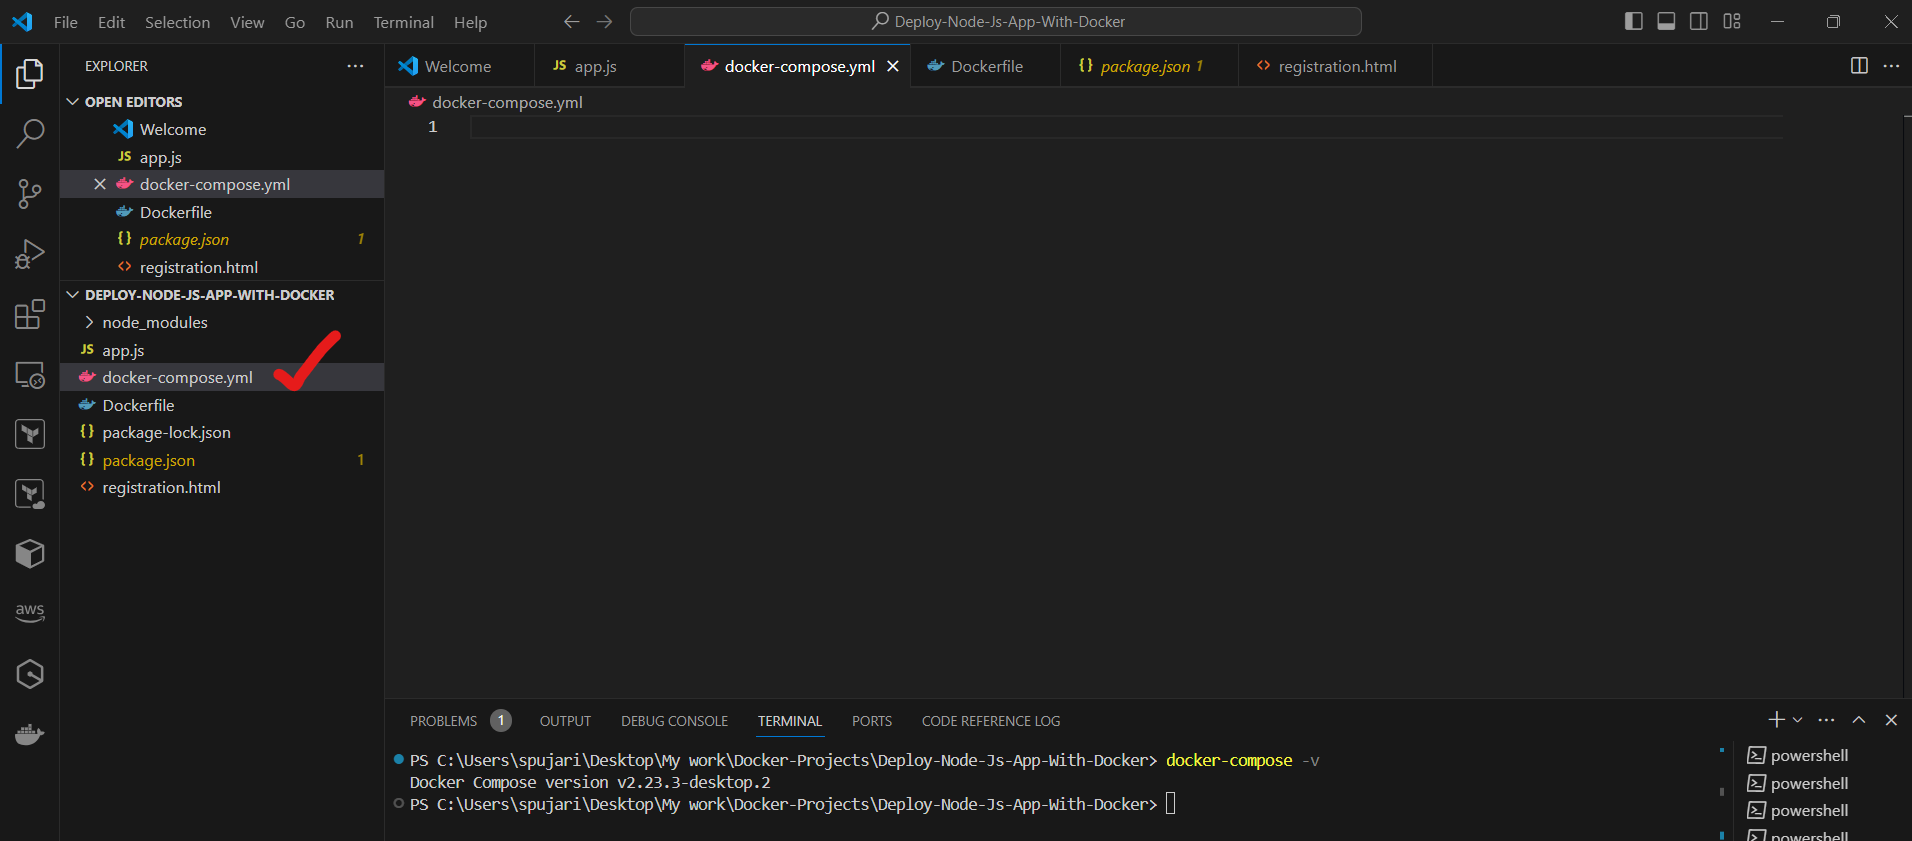
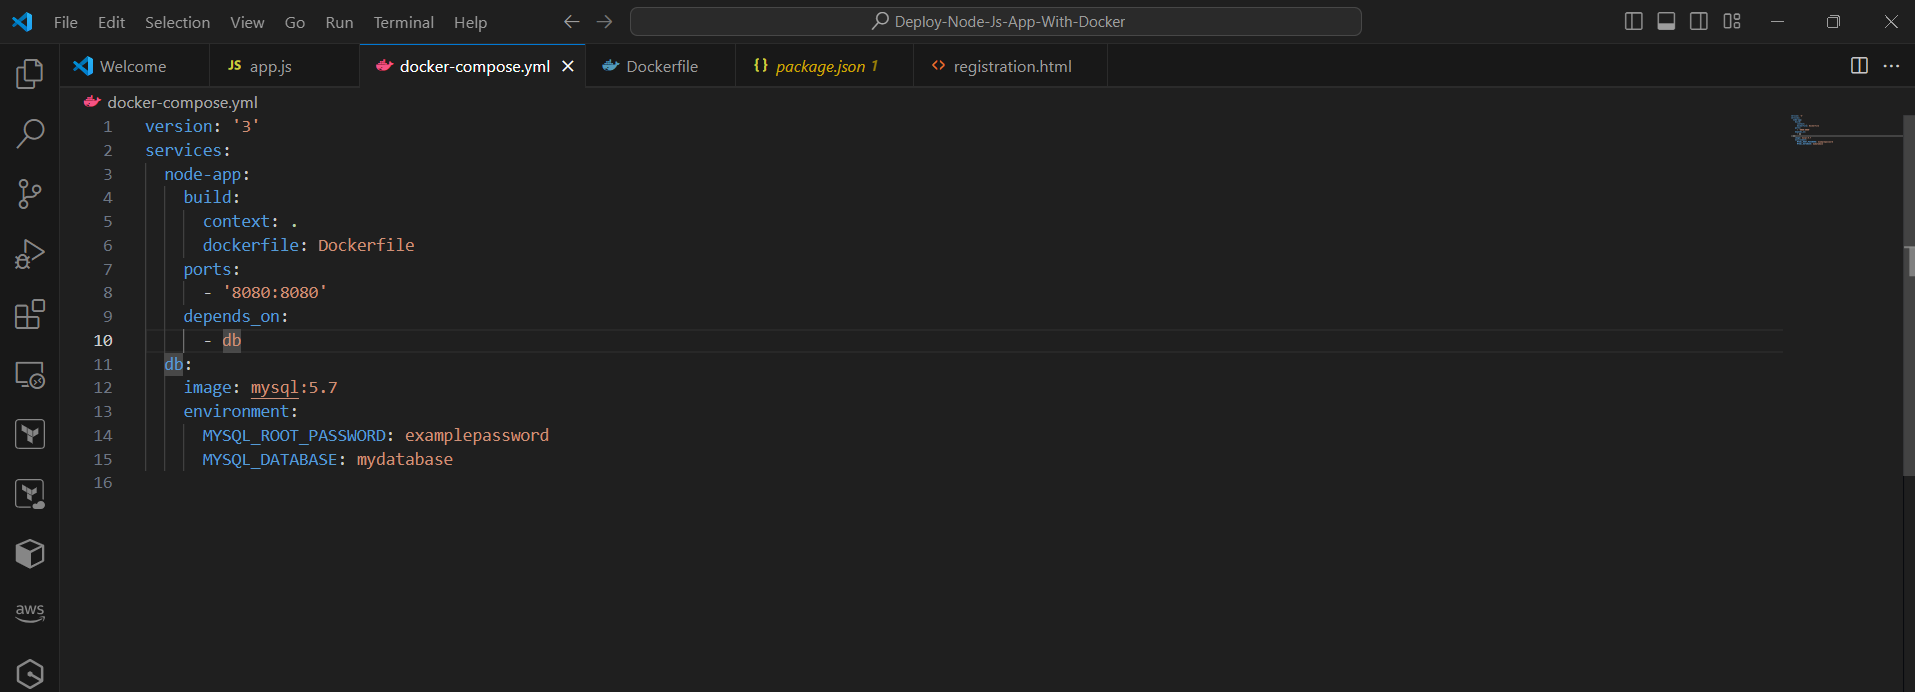
Add the following content to define your Node.js application and a simple database service
Sure! Here's the breakdown of the docker-compose.yml file in a more readable format with emojis and bullet points:
🐳 Understanding docker-compose.yml:
version: '3': 📋 Specifies the Docker Compose version.services: 🛠️ Defines the services that make up your application.node-app: 🚀 Defines the Node.js application service.build: 🛠️ Specifies the build context and Dockerfile for the Node.js application.ports: 🌐 Maps port 3000 from the host to port 3000 in the container.depends_on: 🔄 Specifies that thenode-appservice depends on thedbservice.
db: 🗃️ Defines the MySQL database service.image: 🖼️ Specifies the MySQL image and version.environment: ⚙️ Sets environment variables for configuring the MySQL instance.
This docker-compose.yml file defines two services: node-app for the Node.js application and db for the MySQL database. It sets up port mapping for the Node.js application and defines environment variables for the MySQL database configuration. Additionally, it specifies that the node-app service depends on the db service, ensuring proper initialization order during container startup.
4.3 Start the Multi-Container Application
In the terminal, navigate to the
Deploy-Node-Js-App-With-Dockerdirectory.Run the command:
docker-compose builddocker-compose up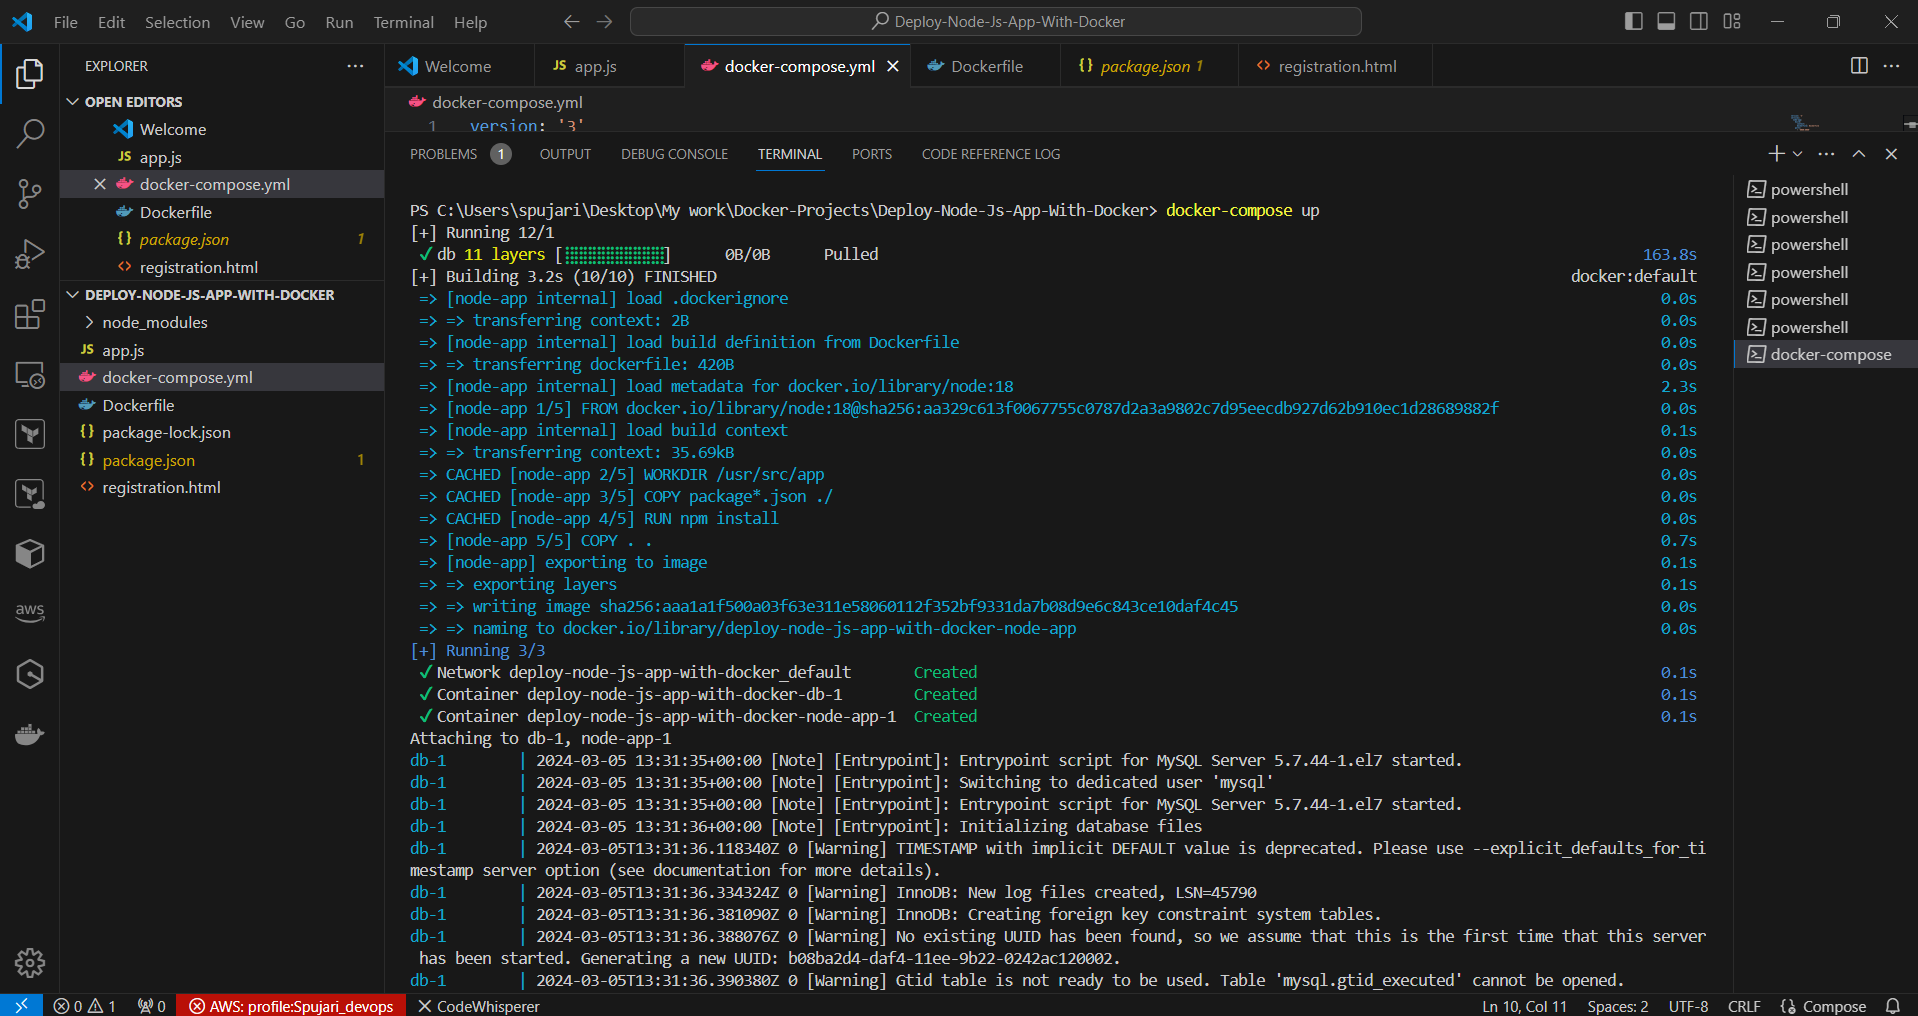
4.4 Access Your Application
Health check is passed
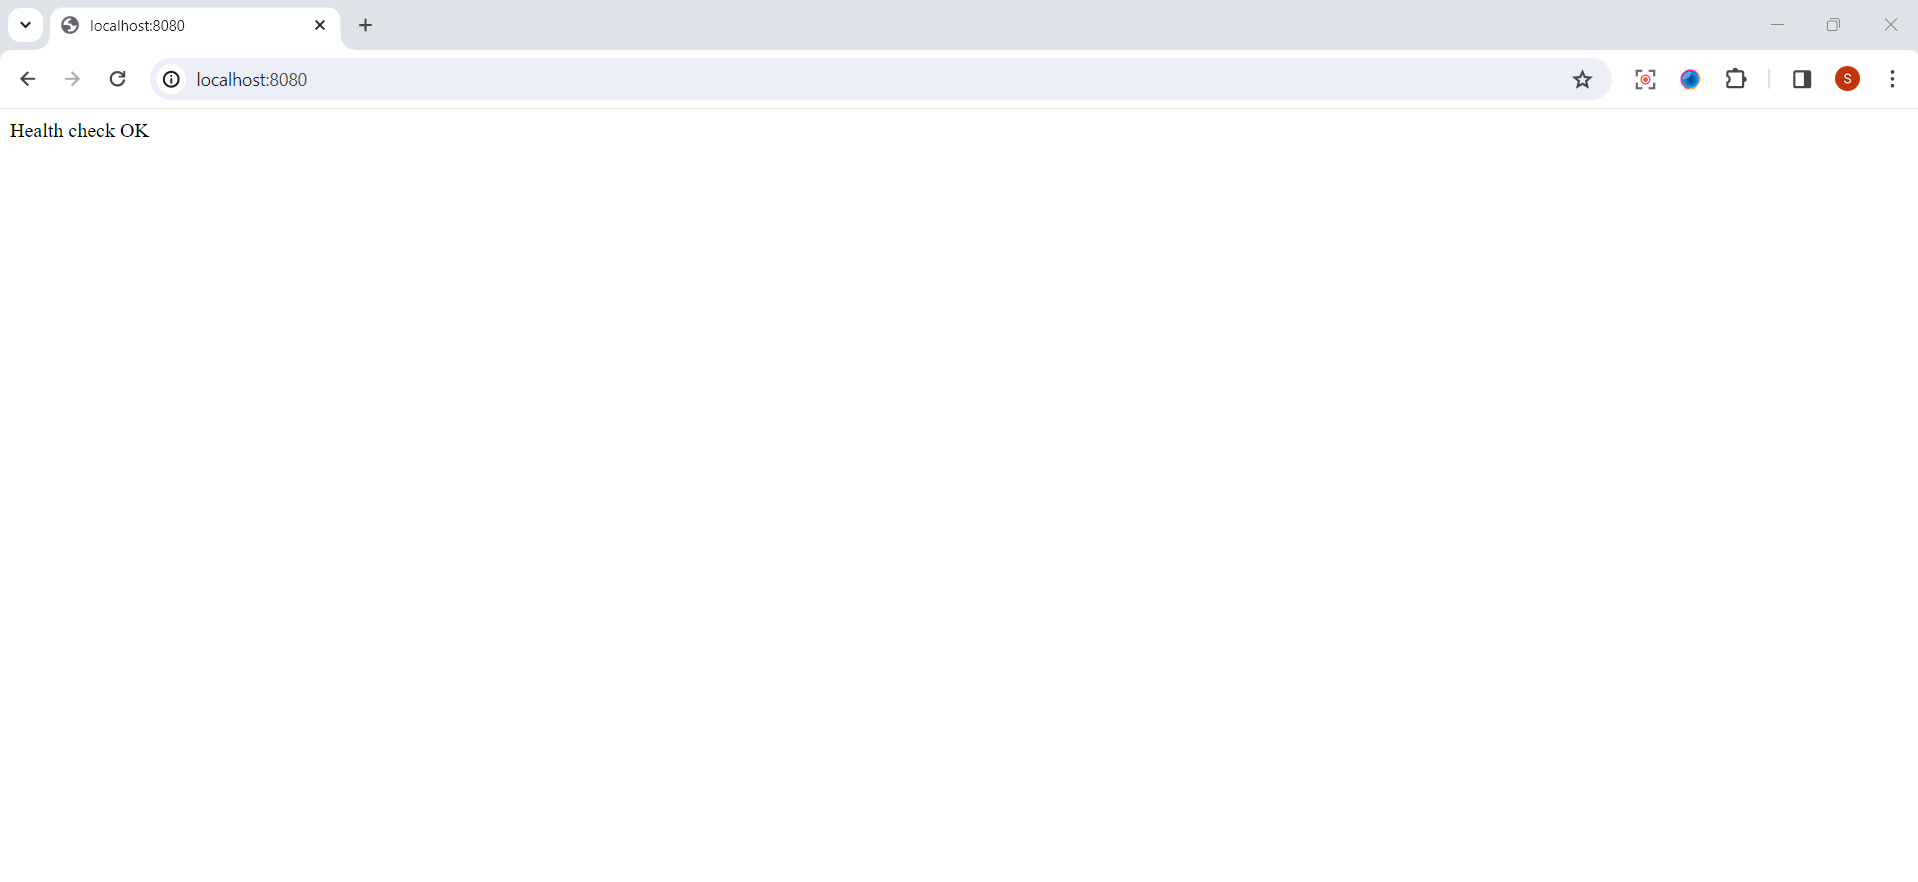
Open a web browser and navigate to
http://localhost:8080.
4.5 Stop the Containers
To stop the running containers, return to your terminal and press
Ctrl + C. Then, run the command:docker-compose down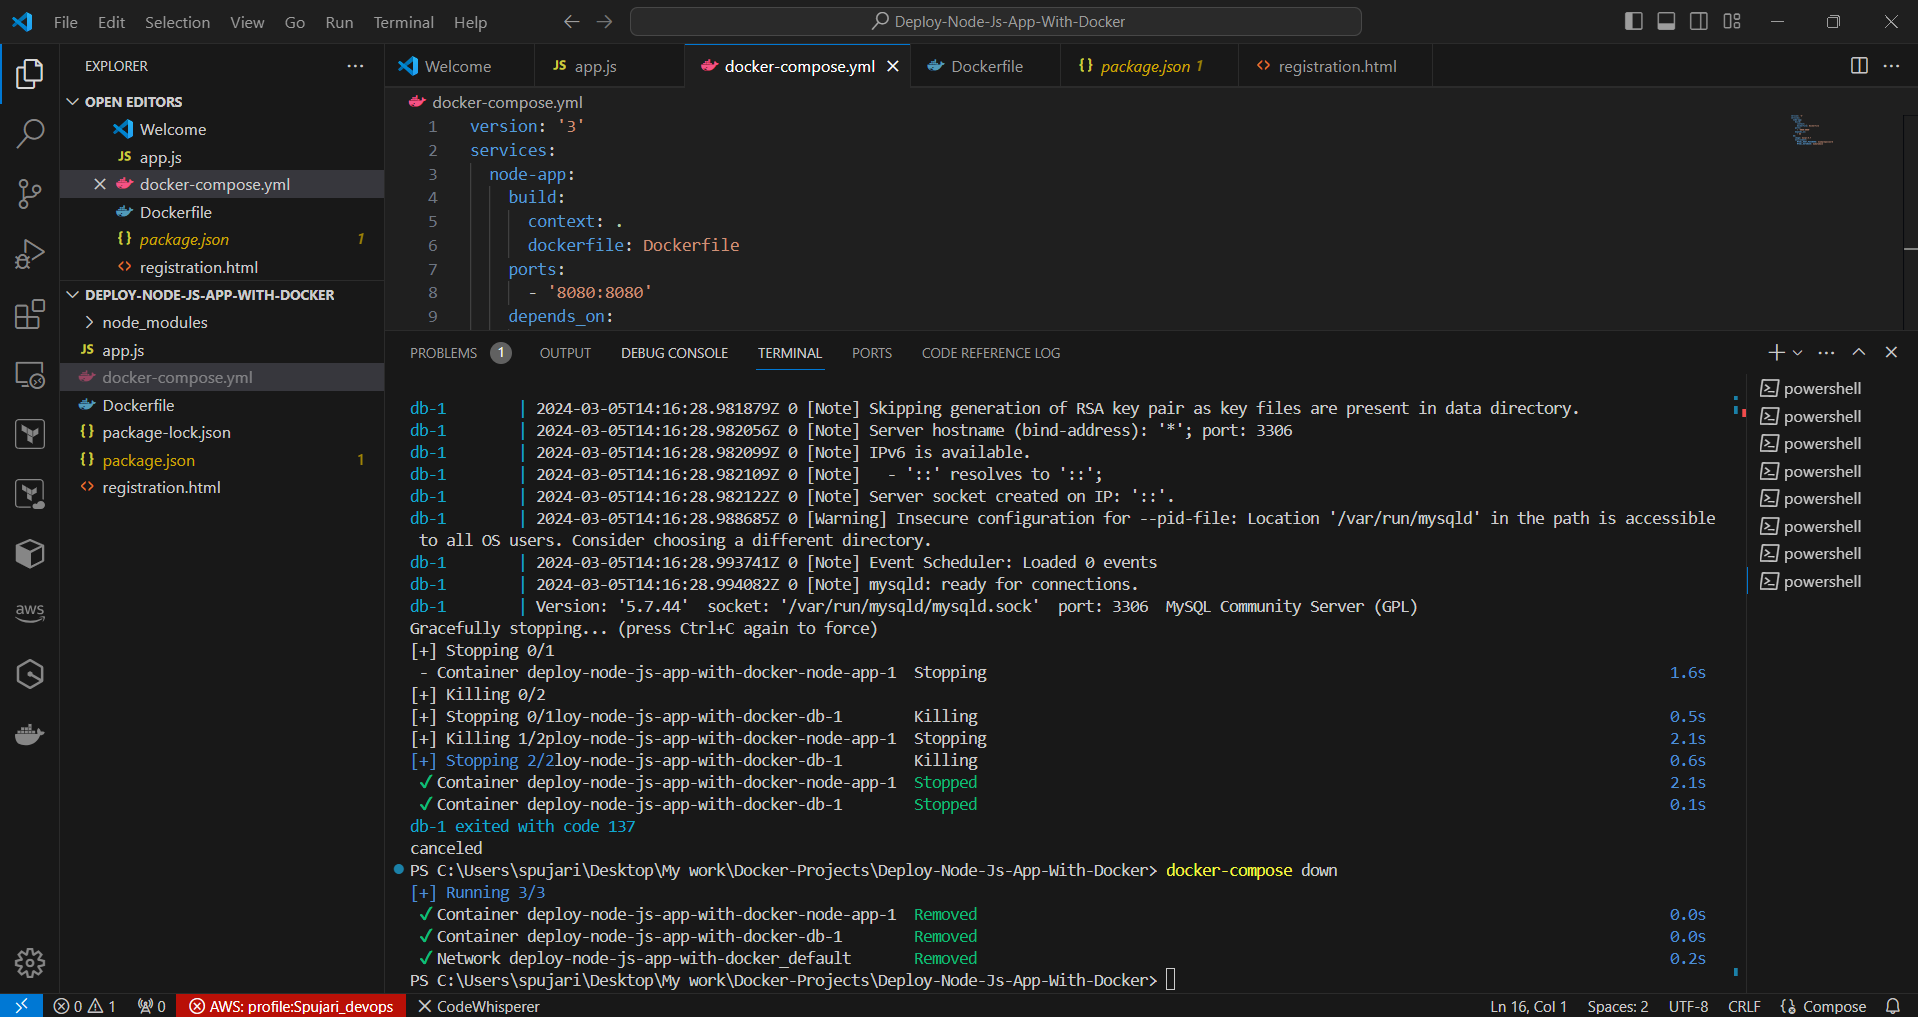
4.6 Monitoring and Maintenance:
Note:
You can find all of the Docker code used in this tutorial on the following GitHub repository:
https://github.com/sprasadpujari/Docker-Projects/tree/main/Deploy-Node-Js-With-Docker
Conclusion 🎉
Dockerizing your Node.js applications unlocks a myriad of benefits, from enhanced development workflows to streamlined deployments. Armed with the knowledge and skills gained in this guide, you're ready to embark on your Dockerized development journey.
Explore further into the Docker ecosystem and delve into advanced containerization techniques to elevate your Node.js projects to new heights. Happy coding and containerizing! 🚢
Thank you for joining me on this journey through the world of cloud computing! Your interest and support mean a lot to me, and I'm excited to continue exploring this fascinating field together. Let's stay connected and keep learning and growing as we navigate the ever-evolving landscape of technology.
LinkedIn Profile: https://www.linkedin.com/in/prasad-g-743239154/
Feel free to reach out to me directly at spujari.devops@gmail.com. I'm always open to hearing your thoughts and suggestions, as they help me improve and better cater to your needs. Let's keep moving forward and upward!
If you found this blog post helpful, please consider showing your support by giving it a round of applause👏👏👏. Your engagement not only boosts the visibility of the content, but it also lets other DevOps and Cloud Engineers know that it might be useful to them too. Thank you for your support! 😀
Thank you for reading and happy deploying! 🚀
Best Regards,
Sprasad


